How to make a Rose Quartz Tee of Life Pendant: How To: Weekly contest by @starjewel
This is my entry in the contest How To: Weekly - created, sponsored and judged by @aoart and @roscoeh.
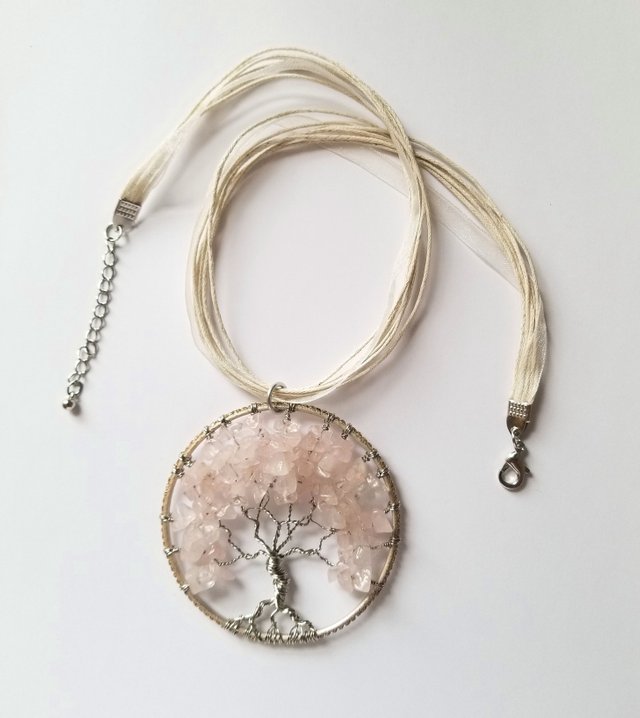
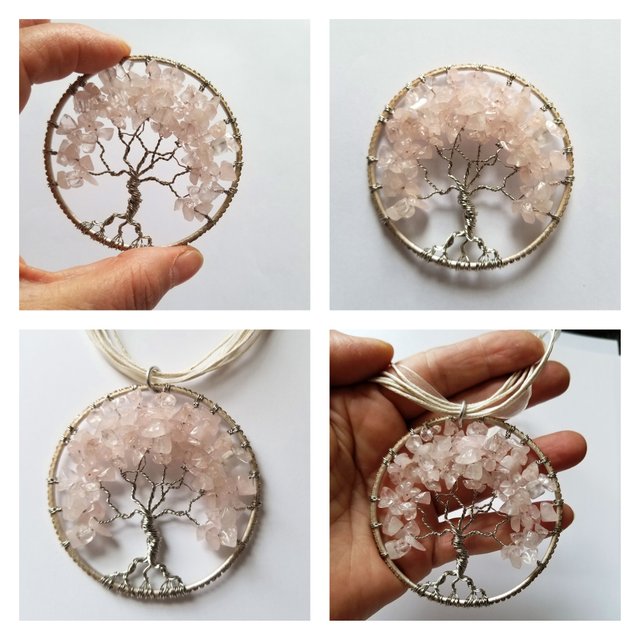
I will show you how to make a Rose Quartz Tree of Life pendant in 10 steps. This is our finished piece of jewelry. Lovely!
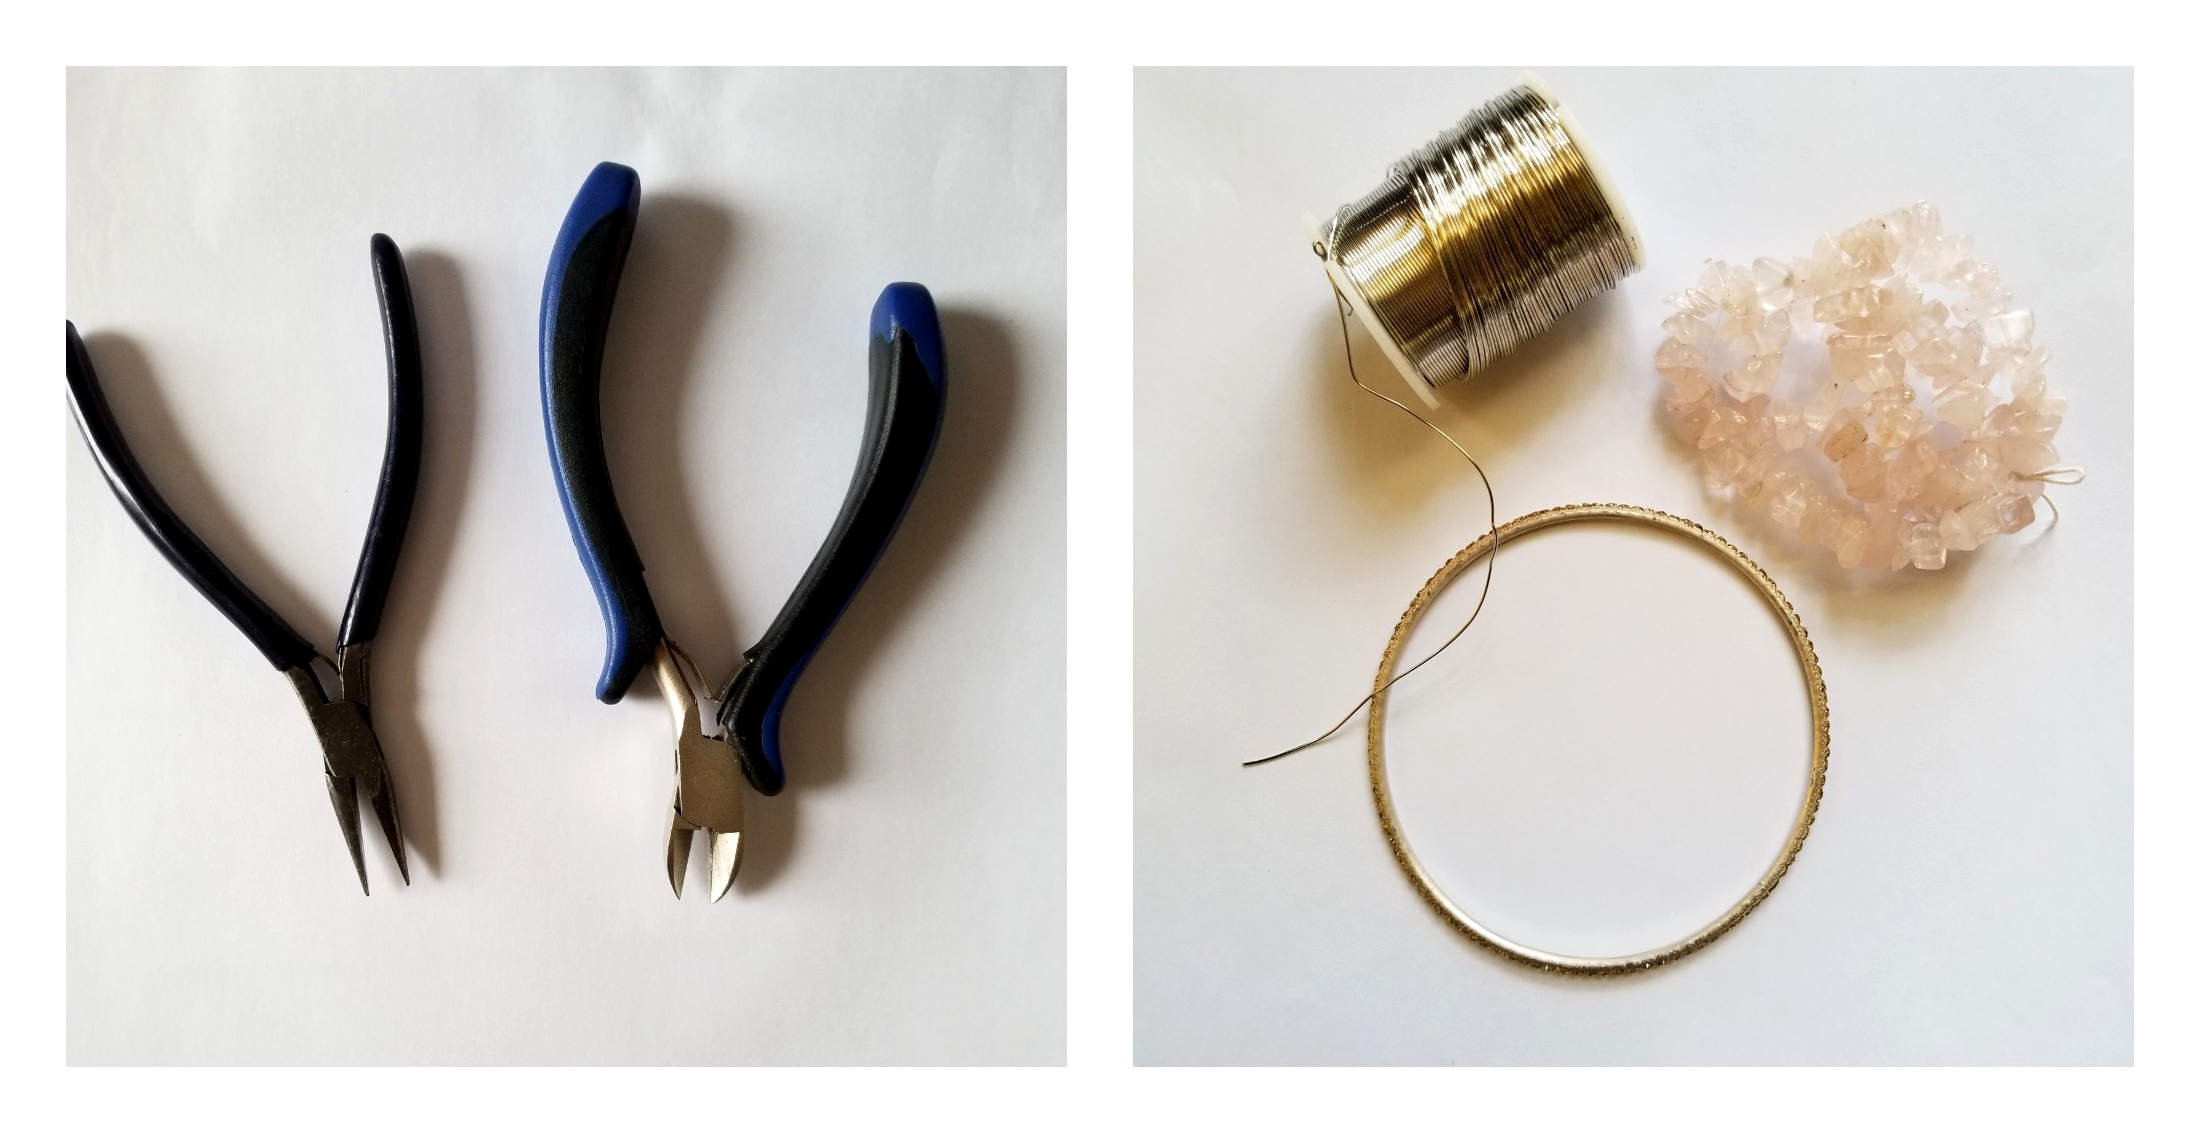
The materials that you need: rose quartz chips (sold in strings), artistic wire 24 gauge (silver colored copper), a fashion bangle 2.5" diameter (sold in dollar stores), a cutter and a pair of pliers.
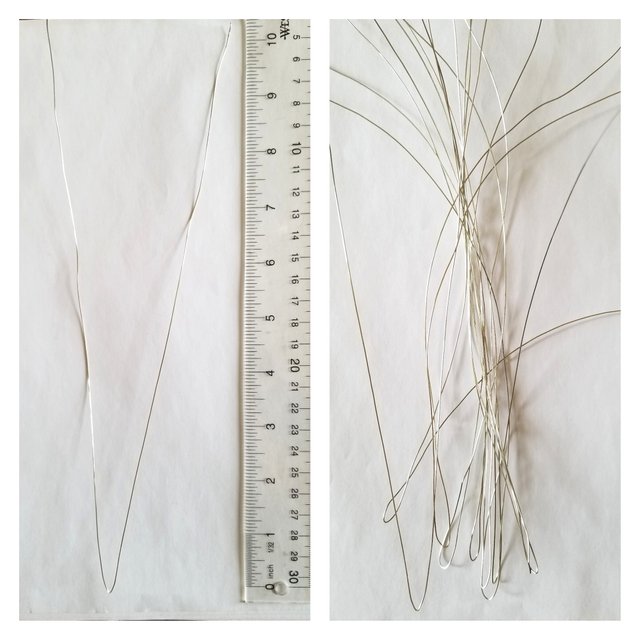
Step 1 - Cut the wire. You need 10 pieces, each piece must be 20 inches long. Fold the wire in half, as below.
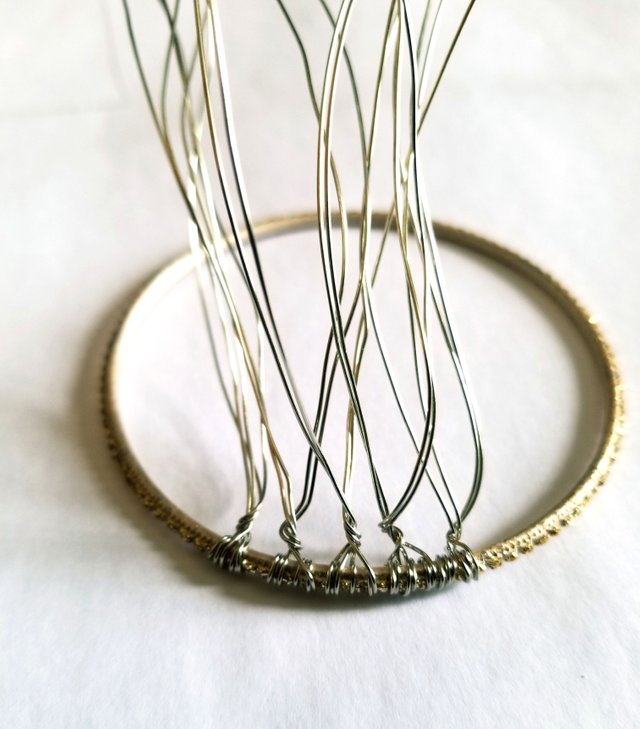
Step 2 - Wrap the wires. One by one, wrap each wire twice on the bangle (2 loops), at the middle point. Make it neat, be nice with the wire and the wire will be nice with you. When you finish, you will have 20 strings to work with.
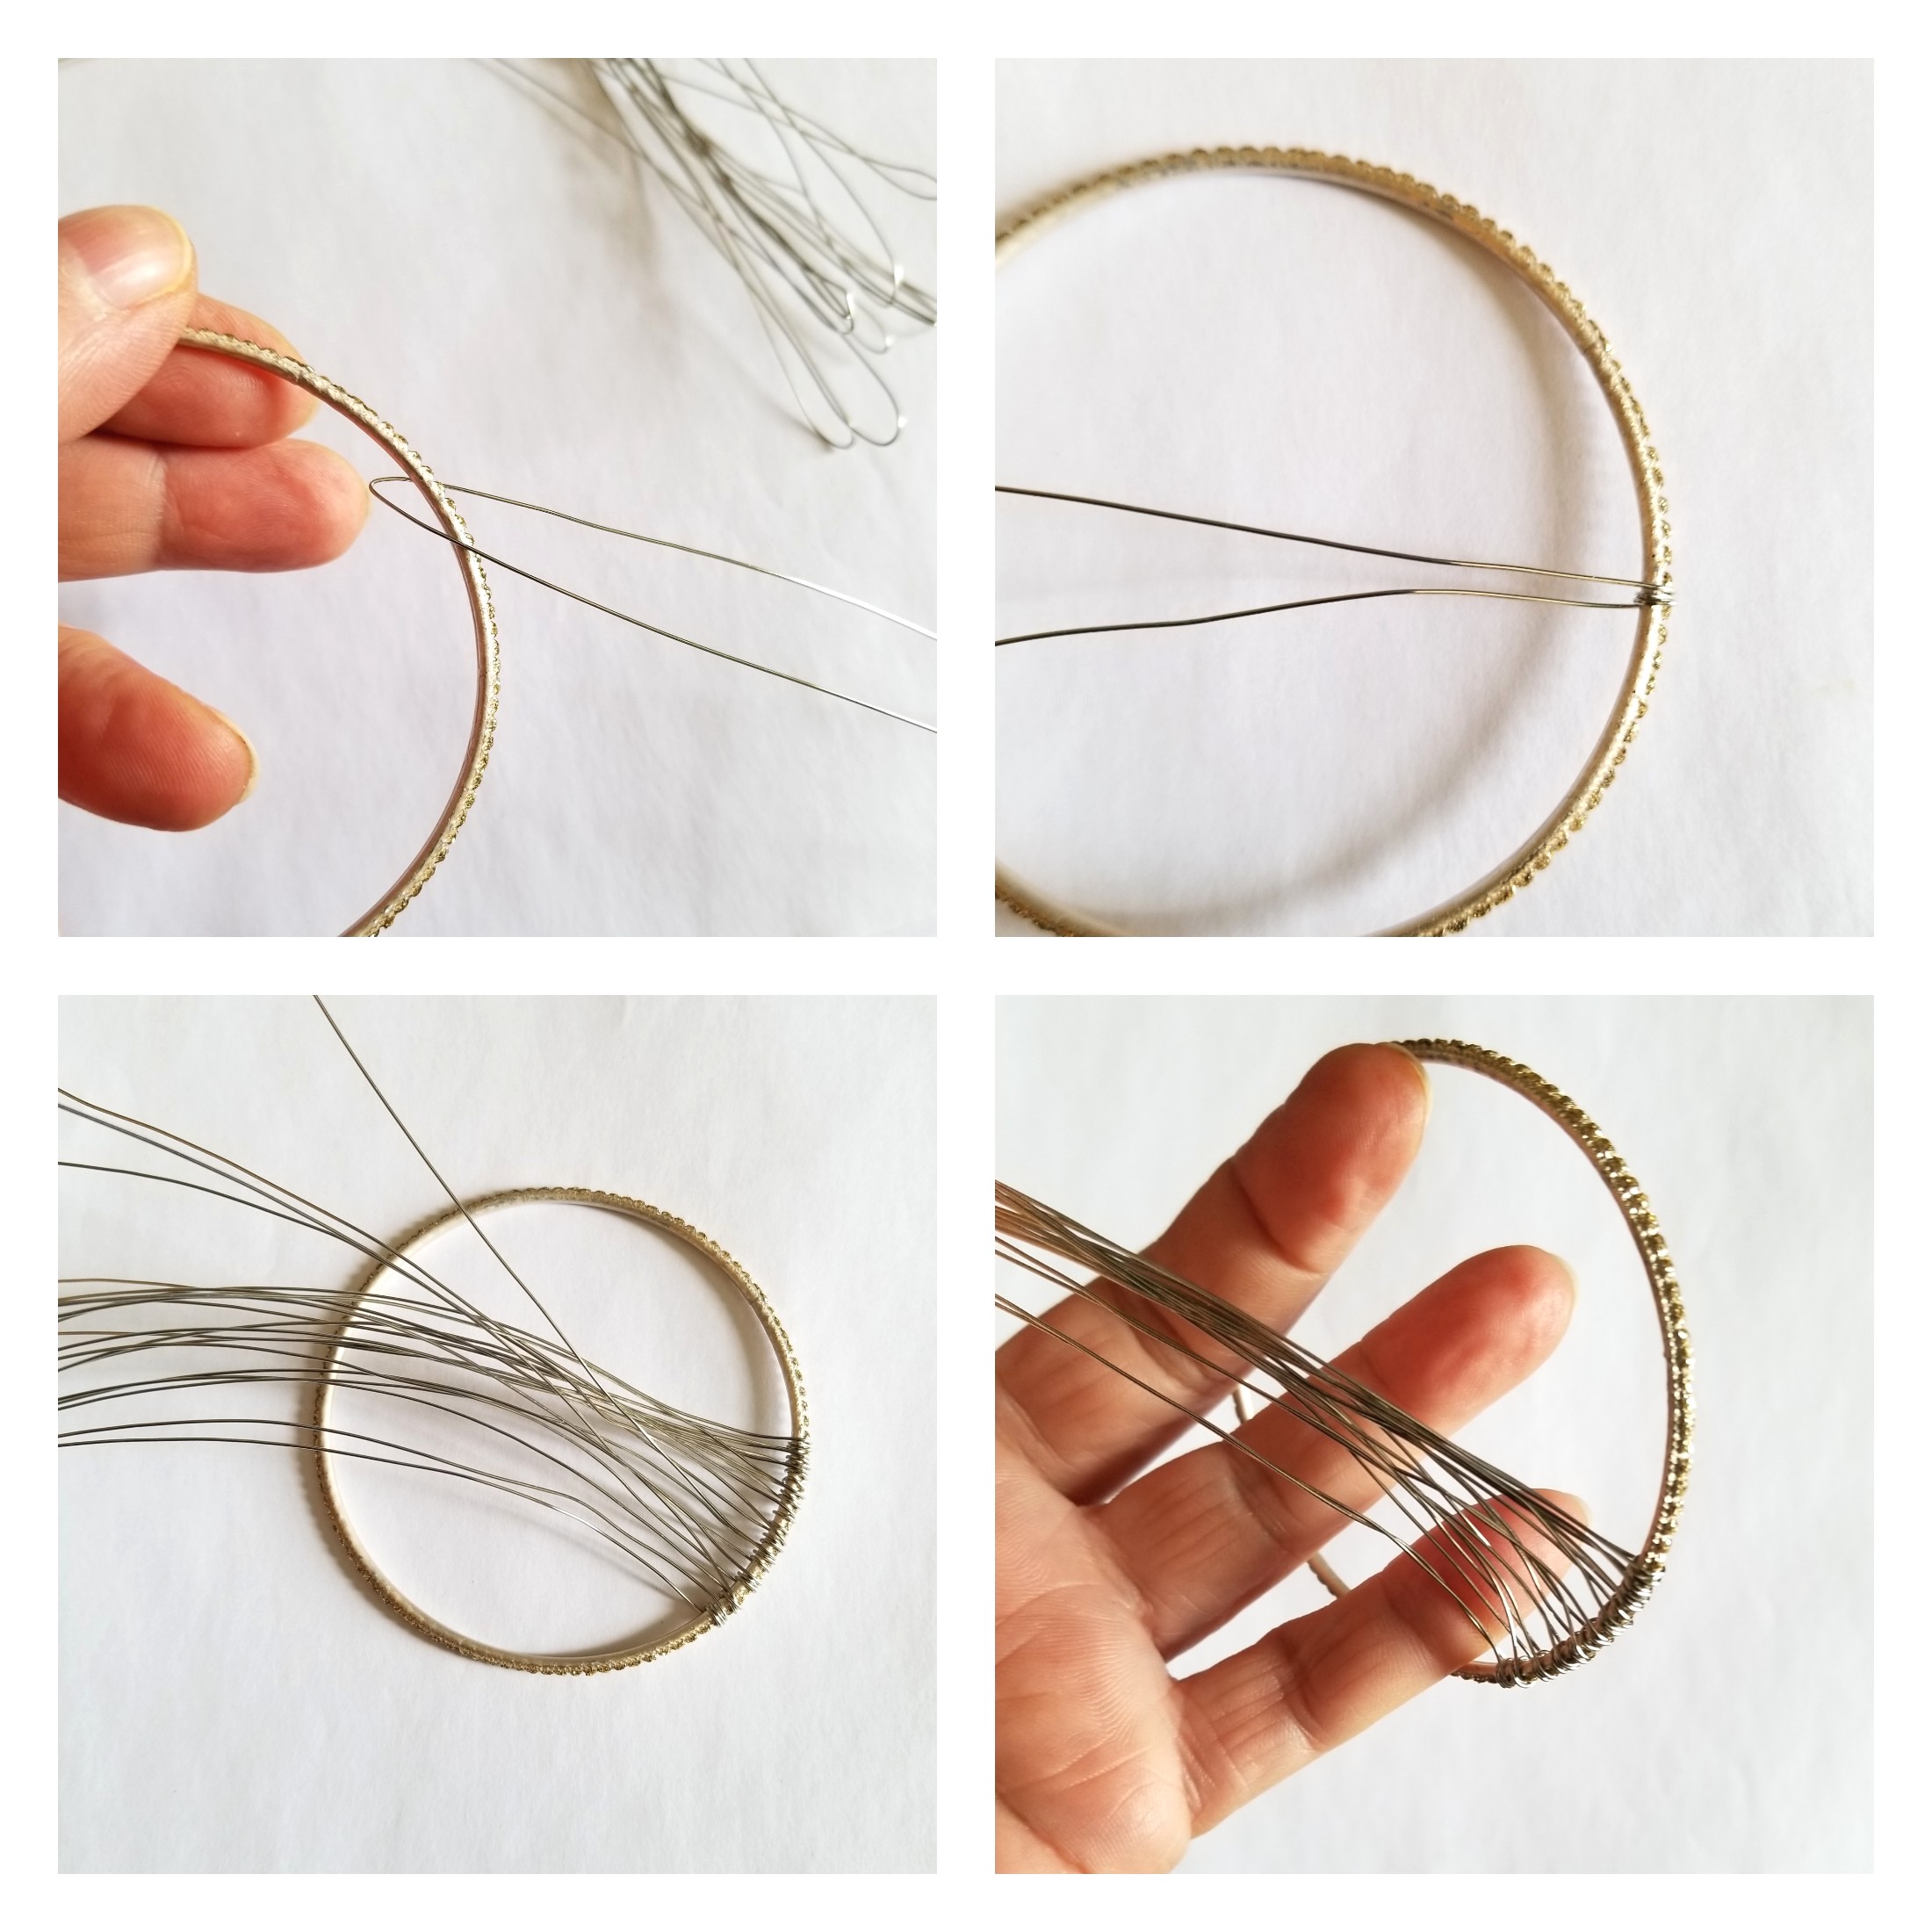
Step 3 - Twist wires. Start by twisting 2 groups of consecutive wires, as shown. You will get 5 twisted bunches.
Step 4 - Now twist 2 on the left and 2 on the right, as shown. You will get 3 bunches.

Step 5 - Keep twisting to make the trunk. Be neat! Take your time and don't pull hard. The wire is soft and friendly.
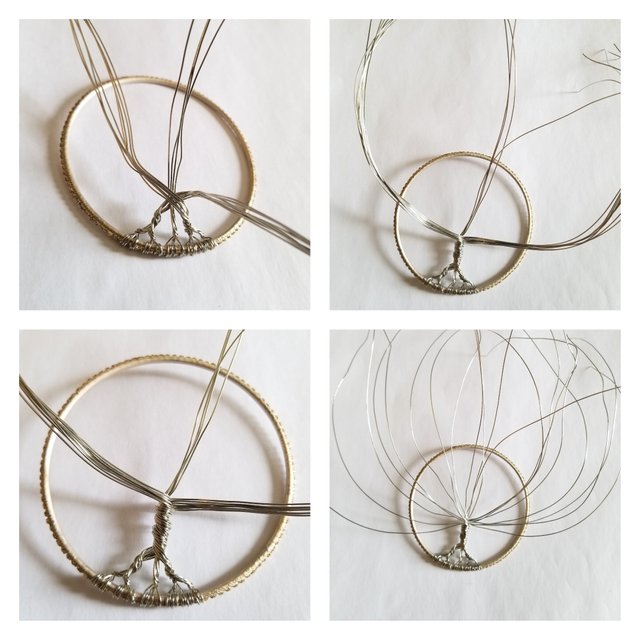
Step 6 - Now the trunk is ready and you already had spread all the 20 wires. 2 by 2, twist them in 5 bunches, as shown.
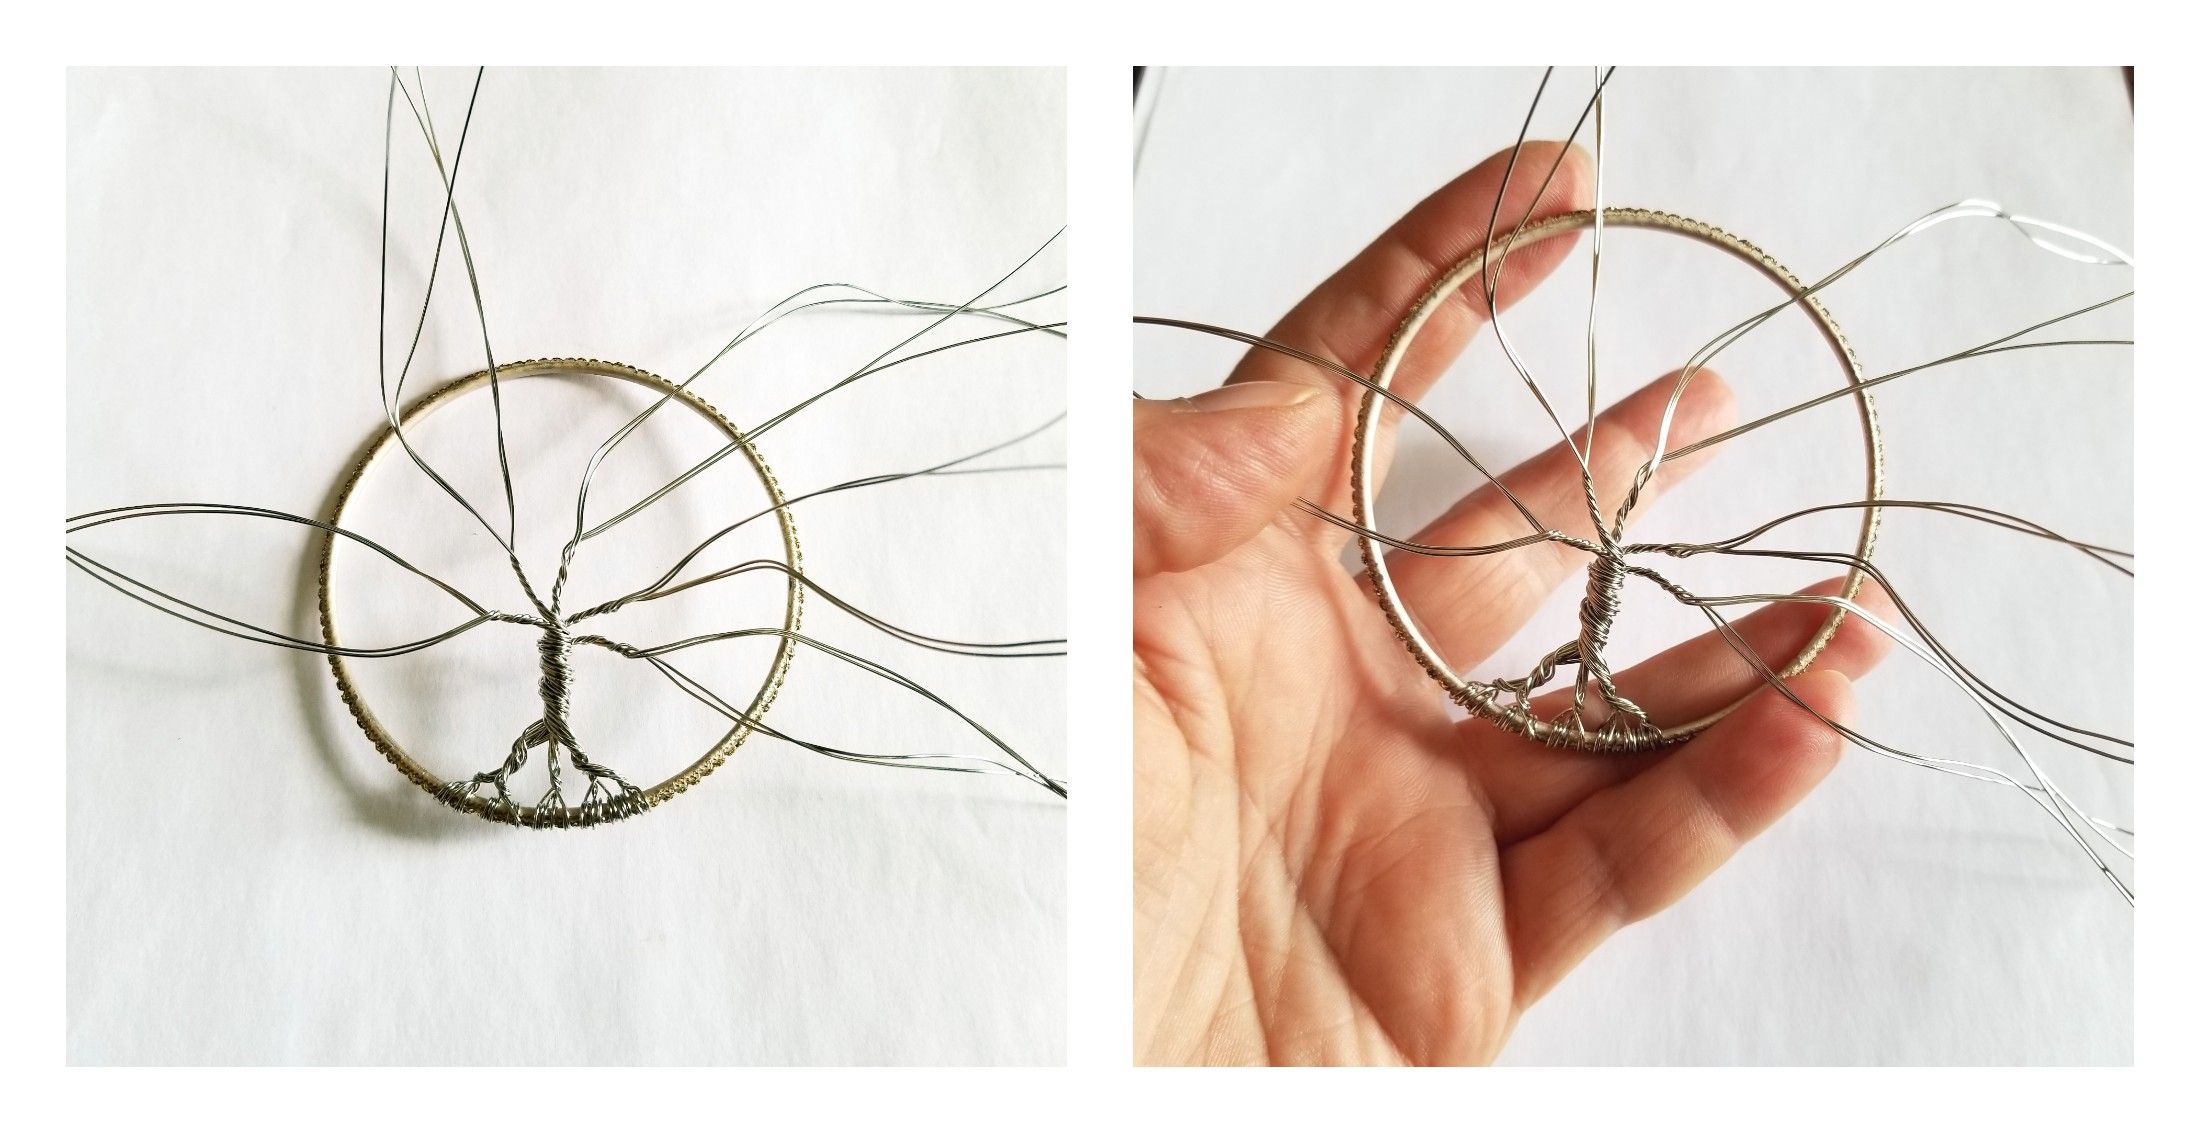
Step 7 - We have 5 branches, each has 4 wires. Now we separate each branch in 2, and we twist each group of 2 separately. Please make sure you twist just a few times, you need some wire left for the beads. The result will be 20 lose wires.
Step 8 - Start beading! This is fun! Start sliding rose quartz chips on the wires. Use your judgement regarding the number of the beads, in my case 3-4 per string. Start from right bottom, then go to left bottom and work yourself up. Depending on the size of your beads, you might not need to string on all 20 wires. In my case, the wire in the middle was left loose, no space for beads!
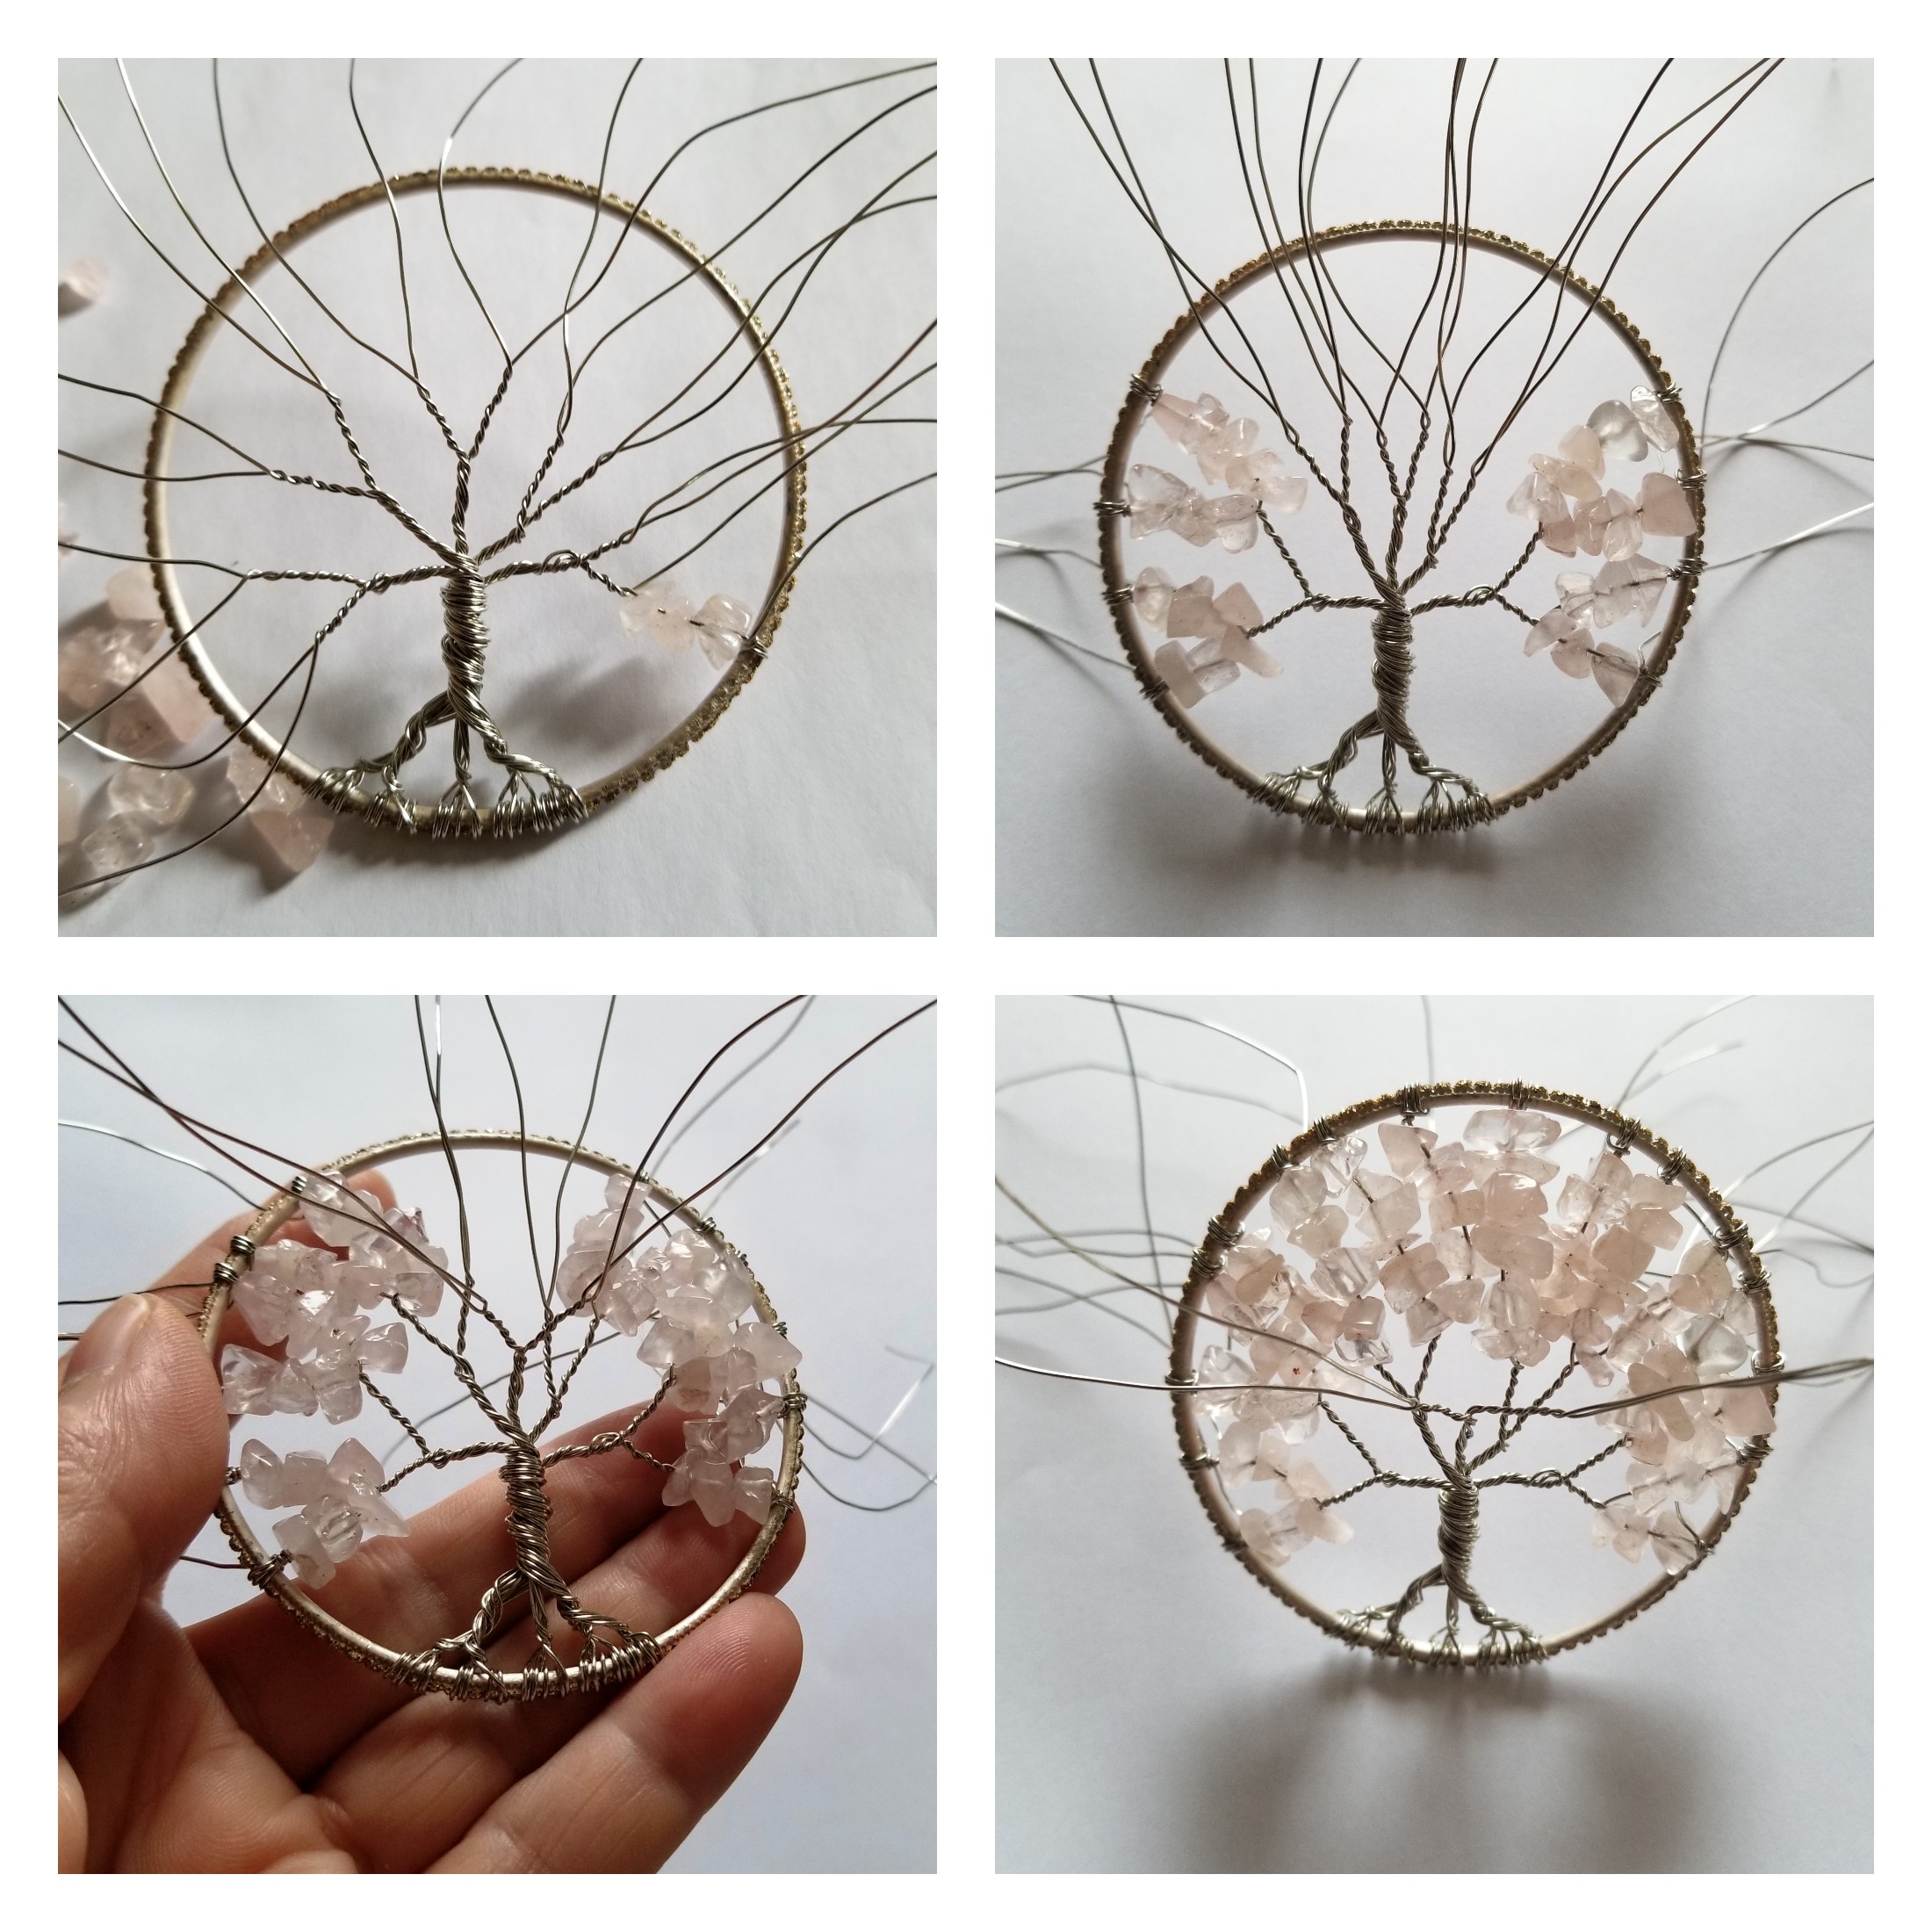
Step 9 - Tuck in the last wire, if you have one left, like me. I connected it with other brunches, used 2 loops to secure it in place, and then cut it.
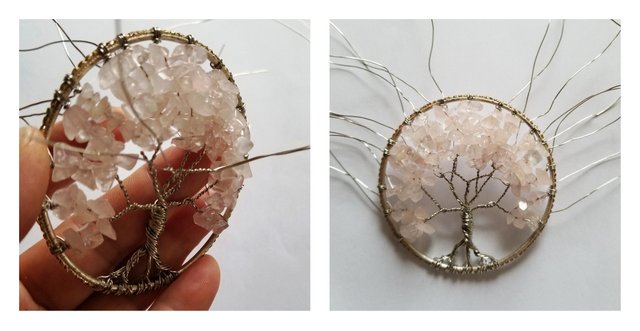
Step 10 - Tuck in all wires and cut the ends. I suggest to take your time when you do this step. The finishing is very important. You want to secure the loops and make them look neat. Cut close to the other wires and tuck the ends in, so they don't catch fabric or scratch the skin.
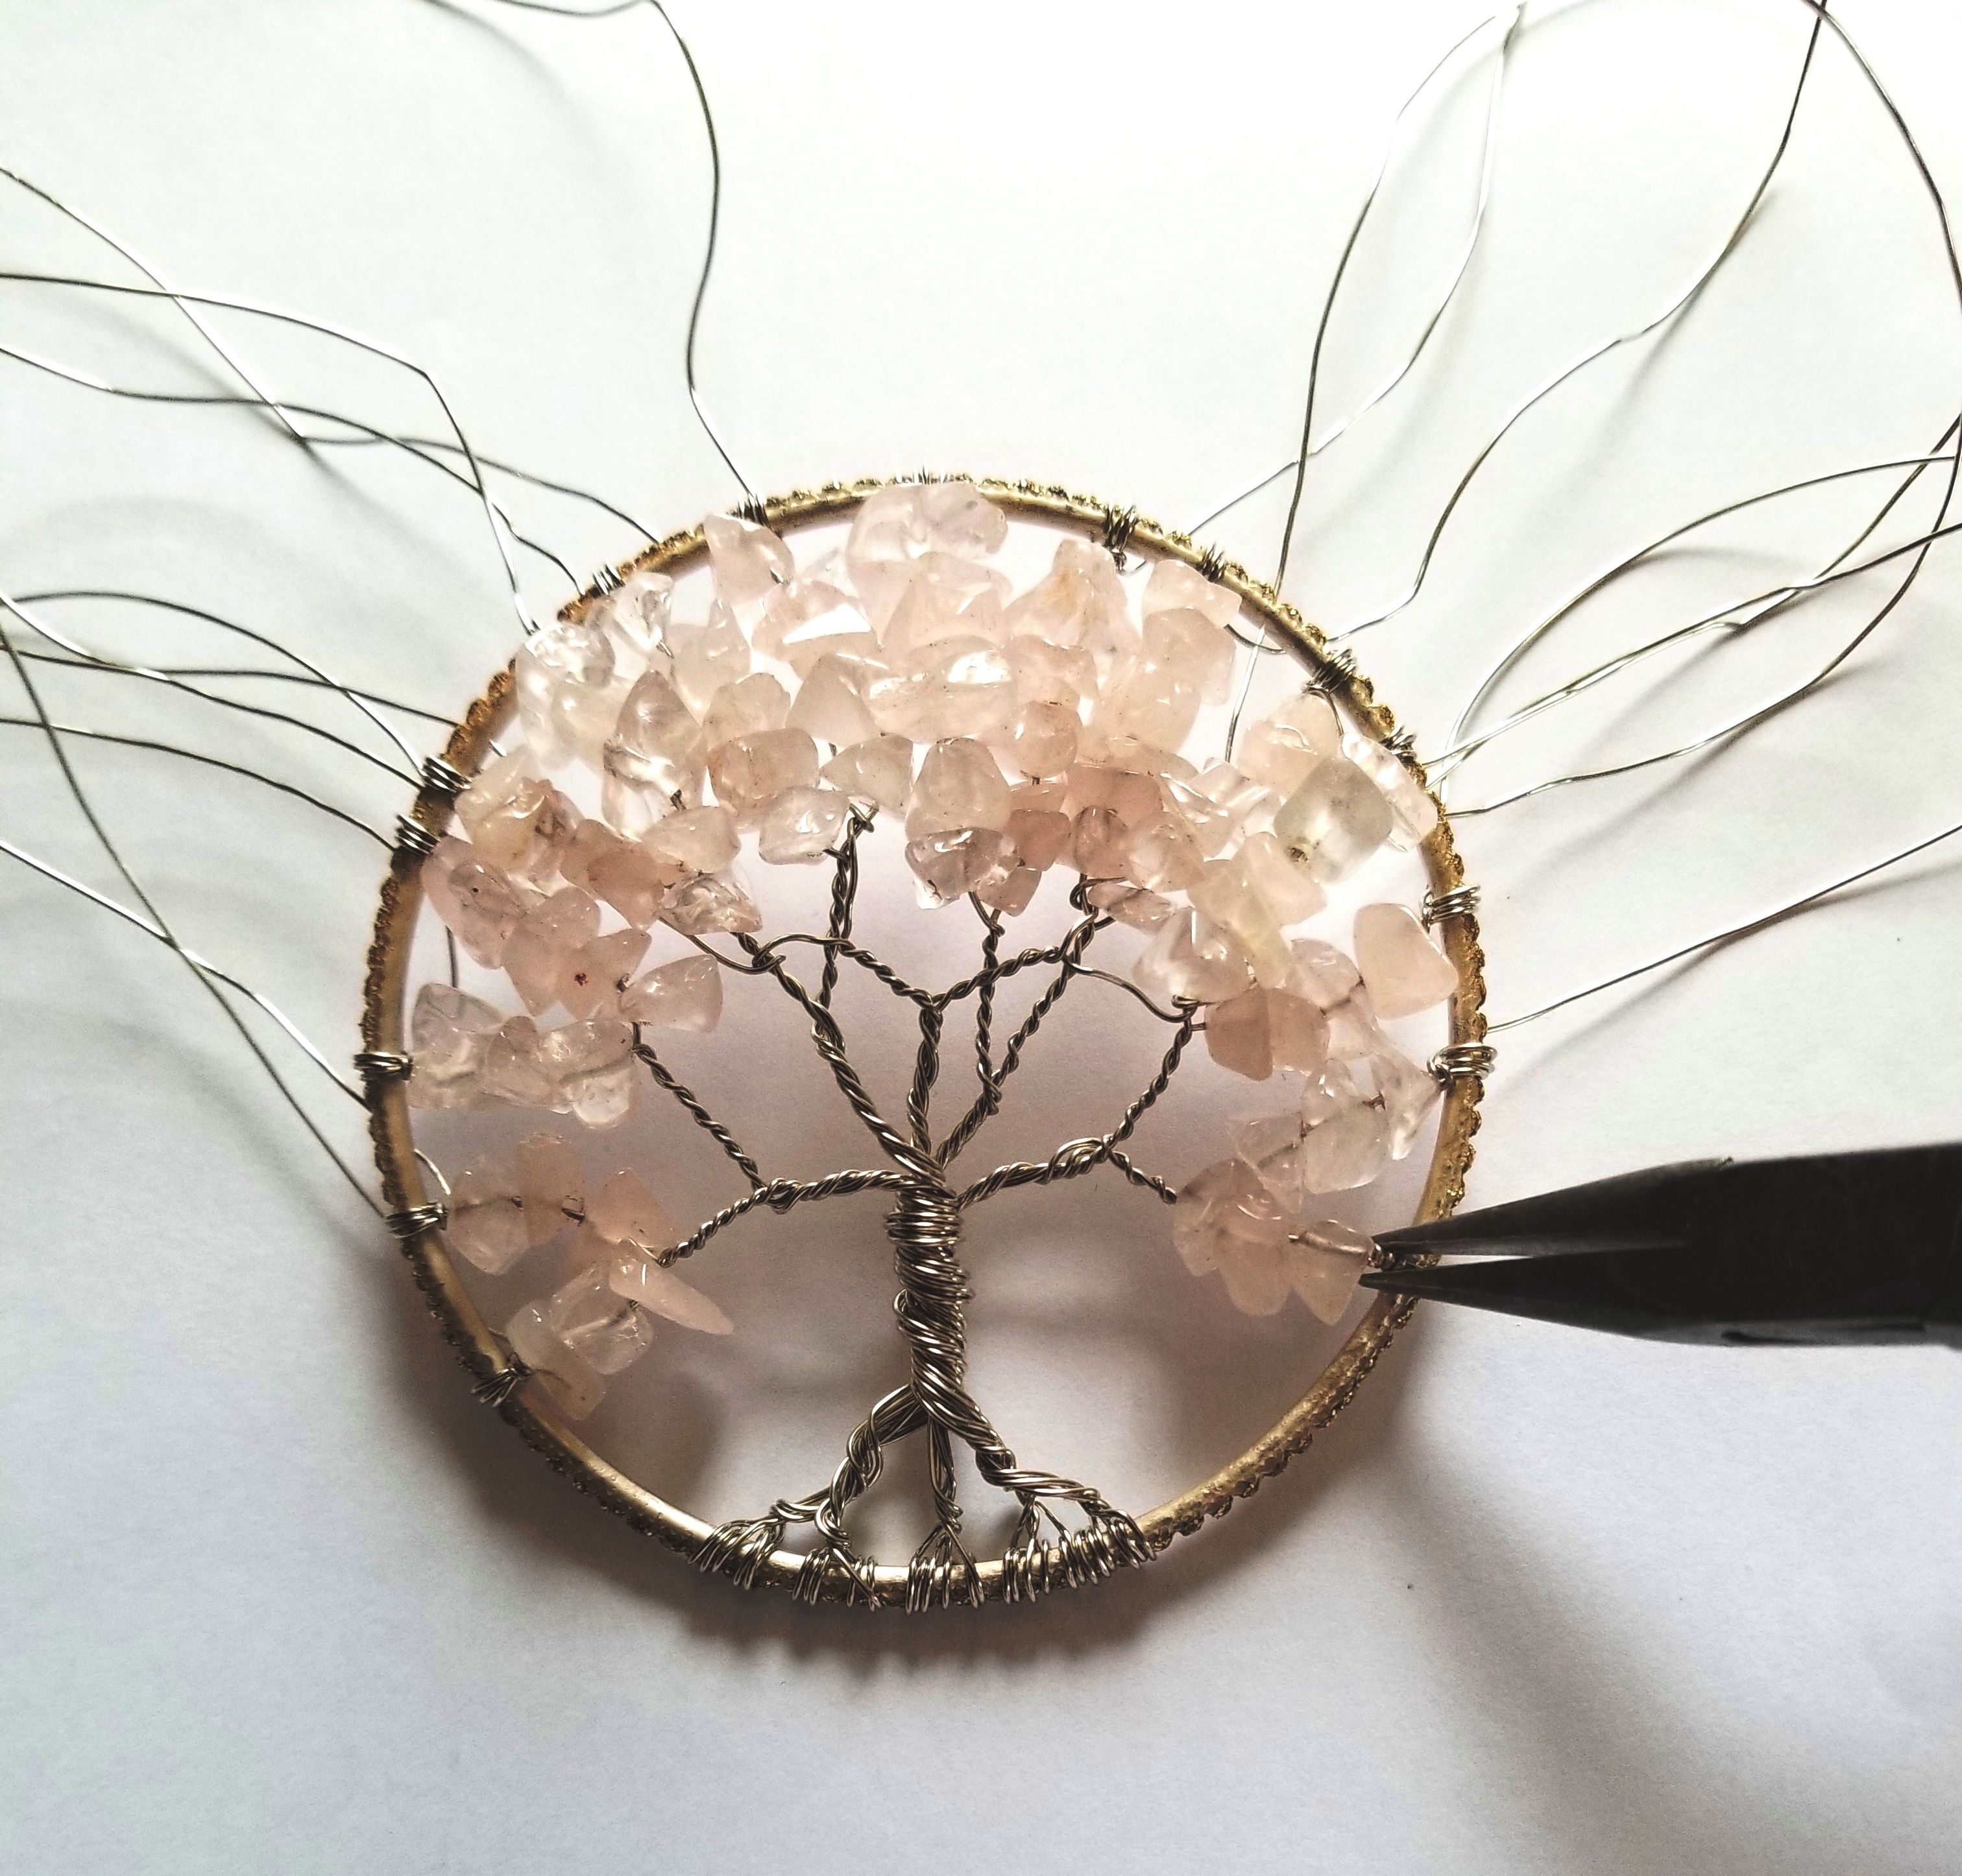
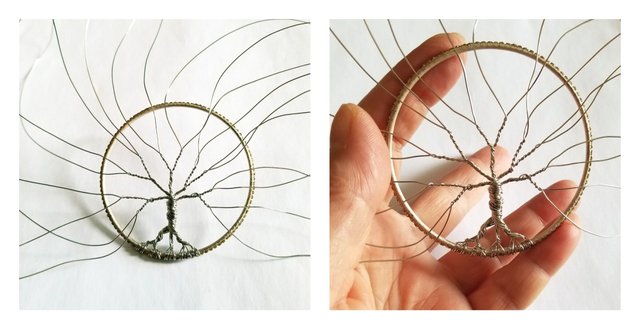
When you finish and you are satisfied with the look, use pliers and gently twist the branches, for a more esthetic and natural look. You can slide your Rose Quarts Tree of Life Pendant on any cord, right through the top part, or you can attach a bail or a spring ring, like I did. So here is your pendant! Beautiful!
I hope you enjoyed my tutorial. You can use this method with any beads, any frames, any wires. Use your imagination and CREATE!

Lovely!!
Thank you @luanne. It is my first tutorial, it took me forever 😊 but now I know how to write a tutorial. We always learn.
I've done one or two on wire wraps. They are tricky! You did well!
Brilliant
You’re very kind, @sherylneil. I tried my best. Breaking down the whole process in steps was not very easy, but I actually learned some tricks and I can’t wait to share them in a future post.
this is absolutely stunning !!!
@drawmeaship Thank you so much, I love making "tree of life" jewelry and other ornaments. I love the theme :)
The best how to I have seen so far!
Nice work!
Thank you @four20, big compliment! Are you going to try it? It’s not difficult, trust me. The most difficult part is to START. 😊
If I get some time. I had a ton of sterling wire. I also have a lot of raw gem stones (I used to make jewelry)
I make and sell miniatures on eBay and etsy. Keeping up with that takes the little spare time I have! I will resteem it so its on my blog, so I can find it easily when I have time. Thanks for sharing!!
@four20 You're welcome. If you make one, please send me a picture :)
Join our Discord Channel to connect with us and nominate your own or somebody else's posts in our review channel.
Help us to reward you for making it ! Join our voting trail or delegate steem power to the community account.
Your post is also presented on the community website www.steemmakers.com where you can find other selected content.
If you like our work, please consider upvoting this comment to support the growth of our community. Thank you.
@steammakers Thank you so much, I really appreciate it!
Oh wow! So that's how it's done. I did a bit of beading before but I got impatient. Lol.
@artgirl Yes, it needs some patience. Jewelry making relaxes me, but I couldn't do it on a daily basis. :)
I will upvote and resteem your last blog post free to my 35,000+ followers if you reply with the word, "free".
Beep bop, this is @pushbot.
I just received a signal from the Mother Ship that you may require a push.
You just got a 10.45% upvote courtesy of @howtoweekly!
Message from the Mother Ship:
You can earn daily profit by delegating SP to make @pushbot stronger. Delegators receive a share in 95% of the earnings.
10 SP • 20 SP • 50 SP
100 SP • 200 SP • 500 SP
1000 SP • 2000 SP • 5000 SP
Any Other Amount