How to Crochet a Headband in Less than 1 Hour?!!! (Crochet Tutorial By Alodia's Crochet Corner)
Hey everyone!!!! Alodia's Crochet Corner is back!!! Today I'm gonna show you how to make this very easy fashion headband. This is so simple that can be done for about 1 hour only and can be made in any sizes you would like.
Headband is already part of the fashion nowadays. There are different design and styles that had been sold in the market. But crochet headband are somehow not that really known. I saw some crochet headband especially in malls only. And I am happy if I saw crochet products selling in the mall.
That is why I come up to make my own headband, because I saw a lady wearing a ready made headband and I find it so cute. And I told to myself I can make the same design as the lady used. And this is it!!!
This crochet tutorial is a very good practice especially for beginners since this tutorial only uses simple stitches like double crochet!

Sorry if I make myself a model! Lol! Just let me do this because I like wearing every piece I made. Hehe!
So let's start this quick and easy tutorial!! Super excited. Come and Join me doing this tutorial, surely you will like this too.
Materials that we are going to used are:
- Indophil Acrylic Yarn in Cinnamon Color
- 4.5mm crochet hook
- Tapestry Needle
- Scissors
NOTE: You can use any yarn you want. Yarns in bookstore would do.
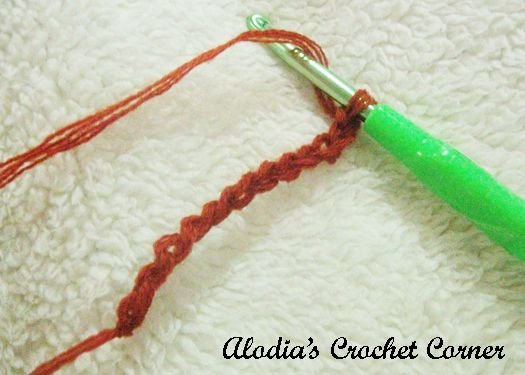
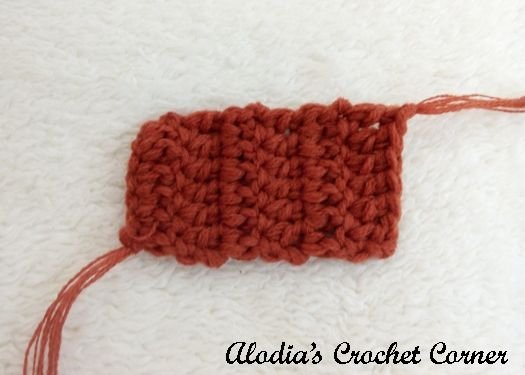
The first thing to do is to make the band.
Round 1:
Chain 12, double crochet in the 3rd chain from the hook.
Then double crochet up to the last chain (10 double crochet made)
Round 2:
Chain 2, then turn.
Double crochet in the next 10 stitches.
 | 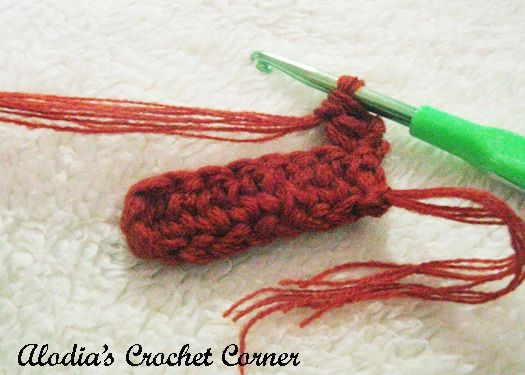 |
Round 3- 38:
Repeat Round 2.
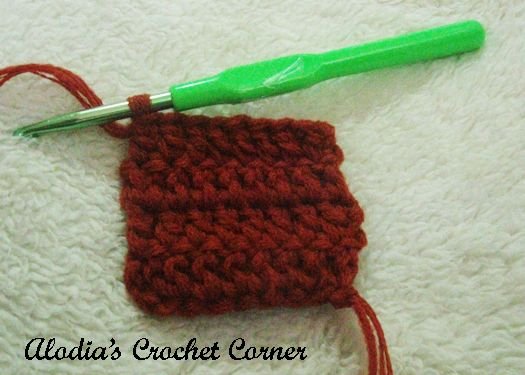
Cut the yarn and weave ends. Then connect each ends as you can see in the photo.
 | 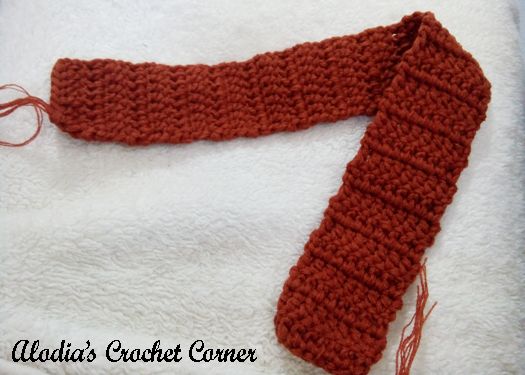 |
The next thing to do is to make a smaller band.
Round 1:
Chain 8, then double crochet in the 3rd chain from the hook.
Round 2:
Chain 2, double crochet in the next 6 stitches
Round 3- 5:
Repeat Round 2.
 | 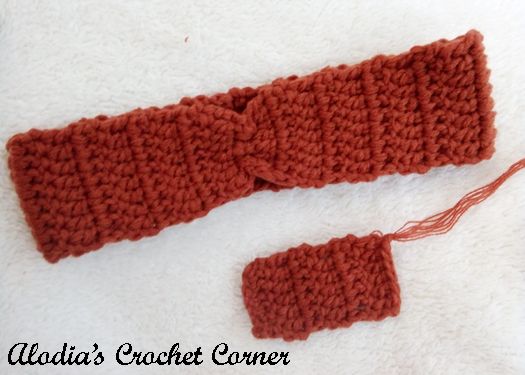 |
Cut yarn then weave ends.
Then wrap this small band on the middle part of the bigger band we made a while a go. Then sew both ends of the smaller band.
And you are done!!! Yipieeee!!! I love the color of my new headband! You can make yours too.!!

I love doing this to myself. Haha! I just felt like a model, whahaha! Just let me do this.
I can now go to malls using this headband. Another idea to add in your fashion OOTD (Outfit of the day).
Girls, you can do this promise! This is so easy! If you want to make a smaller headband for kids you can decrease the rows as long as it will fit to someone who will wear it..
That's the end of our tutorial. I hope you will like it #steemians! Thank you so much ;)


@surpassinggoogle has been a wonderful person and please support him as a witness by voting him at https://steemit.com/~witnesses and type in "steemgigs" at the first search box.
If you want to give him witness voting decisions on your behalf, visit https://steemit.com/~witnesses again and type in "surpassinggoogle" in the second box as a proxy.

very nice
thank you ;)