How to install Particl and DigiByte on Linux LIKE A BOSS!!!!

Particl (PART) is a decentralized version of Amazon and was designed specifically for users with lots of cryptocurrency to spend! No fait allowed sorry! DigiByte (DGB) on the other hand, is a decentralized cryptocurrency that was influenced by Bitcoin. Great thing about DigiByte is the ability to move currency across the internet at minimal or no fees and instantly for that matter, but that doesn't stop there because they are trying to be some sort of gaming currency where users can earn tokens from playing video games!
Why I can't make a tutorial for windows users
Today's article will simply discuss how to install the Particl and DigiByte wallet on the Linux operating system. I would make a tutorial for the windows operating system, but I'm in a rather complicated situation because if I did, it could only be for a 32 bit wallet installation and I read some article claiming a vitualbox installation of windows with 64 bit host requires a CPU with VT-x enabled in BIOS and that option is not even present for me because my computer is ancient! Sorry Windows users.
Who is this tutorial aimed for?

First, let's get the basic commands out the way...
Use the cp command to copy a file, the syntax goes cp sourcefile destinationfile. Use the mv command to move the file, basically cut and paste it somewhere else.
The exact syntax you would use for your example is:
sudo cp /usr/bin/octave/3.2.4/m/miscellaneous/mkoctfile.m /usr/bin/mkoctfile-3.2.4
For more information on the cp or mv commands you can run:
man cp
or
man mv
To view the manual pages
Downloads for Particl and DigiByte:
Particle:
https://github.com/particl/particl-core/releases/tag/v0.14.2.1
DigiByte:
https://digibyte.co/digibyte-wallets
Extract and delete the tarball file with the following commands
sudo tar xvzf name_of_tarball_file.tar.gz (This will extract the tarball file)
sudo rm -rf name_of_tarball_file.tar.gz – (This will remove the tarball file)
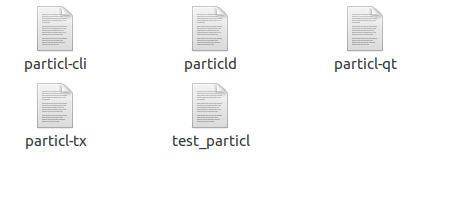
If the directory looks like the following: (if not scroll down to PART 2)
Notice the bin, include, lib, and share directories

Right click on the directory path and click “open in terminal” or press “CTRL + ALT+ T” then change directory to the bin folder. You will see a file with the qt.
Note:
If you decided to use CTRL+ALT+T bear in mind that you will have to navigate to the directory instead.
Type in ./name_of_package-qt but for this tutorial it will be specifically ./particl-qt OR ./digibyte-qt
Depends on which wallet you decided to install first but the concept is the same for each. Trying to knock out two birds with one stone here! :D

Congratulations, you are now ready to setup up the package!

NOTE: The installation of DigiByte looks just the same way.
Wallet preview for Particl and DigiByte:


Decided to install from source on my dinosaur computer (epic fail):
So, I downloaded the source file on a very old pentium 4 computer with the Linux Lite 3.2 version to see what would happen lol and I will save you time. I wasn't successful at installing it because it was just going in an endless loop of dependencies and I got tired and gave up, but I'm sure if you installed all the required dependencies, it will work for you! For those that are curious on how the installation went south please continue reading on; maybe it will help some folks out in the future...

(PART 2) If your directory looks like the following (and it should if you downloaded the source file):
Notice the autogen.sh bash file
WARNING:
I was not able to successfully install the package from source because of too many dependencies on an old desktop computer (read paragraph above for details) but hopefully you can learn something from my troubleshooting experience. I'm sure you will succeed!

Right click on the directory path and click “open in terminal” or press “CTRL + ALT+ T”
Use the following command:
./autogen.sh
This will copy files to the package directory and you’ll be able to see another bash file labeled configure

Use the following command:
./configure.sh
The configure bash file will check for any required dependencies. If you see anything with a "no," that means you have to use google to find the required package. WARNING: the package will not work unless you install all required dependencies!

I decided to google the following:
checking for Berekeley DB C++ headers...no
Which lead me to a github page that suggested the following command as the solution:
sudo apt-get install libdb++-dev
But since my distribution of linux doesn’t have libdb++-dev in the repository, I needed to install sources of BerkeleyDb 4.8 from scratch. At this point, I would suggest opening a new terminal (CTRL+ALT+T) as this will be a side task.
Perform the following commands and make sure you are in the db-4.8.30 directory:
cd build_unix
../dist/configure
It should check for dependencies. Once again if you see anything with a “no” you must install those necessary packages.

Okay so go back to the other terminal that was dealing with the particl installation and run the following command:
./configure
Run the following commands to complete installation:
make
make install
See stackoverflow for more details on why you need to run those commands.
Conclusion (correct me if I'm wrong):
Because my desktop computer is so out of date, It requires too much dependencies that would probably require upgrading my Linux Lite to a newer version. It’s important to have a computer that’s not older than 3 years old because often times, when you are installing from source, you are installing brand new software that is intended for a modern or new hardware. Just bare that in mind. Hope, you had a good laugh at my noob experience. And remember, the trouble-shooting process of compiling packages on Linux is what separates the pros from the hoes! Therefore, never give up! One day, you will get it if you keep trying and I know I will!
Thank you for your time and have a great day.

Sources:
https://www.reddit.com/r/Digibyte/comments/6ehwwx/if_digibyte_wants_to_be_a_gaming_currency_they/
https://help.ubuntu.com/community/CompilingEasyHowTo
https://www.reddit.com/r/Particl/comments/6sva63/wallet_installation_on_ubuntu/
https://github.com/CellProfiler/CellProfiler/wiki/Source-installation-(Ubuntu-16.04-LTS)