✎ Tutorial: How to use the Stackedit Editor, for publishing Steemit articles easily? (English/German)
Hello, in this article I want to show you, how to use the StackEdit Markdown editor. With this great tool it is very easy to write articles, including links and photos, without any HTML-knowledge. In addition you can pre-write articles, save and publish them when you want. With the StackEdit Editor you don´t have to learn any HTML-tricks anymore to publish articles in the HTML-mode with pictures for example and it is very easy to use it.
[German] Hallo, in diesem Artikel möchte ich euch zeigen, wie man den StackEdit Editor Markdown Editor benutzt. Mit diesem tollen Tool ist es sehr einfach Artikel mit Links und Fotos, ohne HTML-Wissen, zu veröffentlichen. Zusätzlich kann man so Artikel vor-schreiben, speichern und veröffentlichen wann man möchte. Mit dem StackEdit Editor brauchst du keine HTML-Tricks mehr lernen um Artikel im HTML-Modus zu veröffentlichen, wo z.B. Bilder und Links drin vorkommen und er ist einfach zu benutzen.
This is how it works:
[German] So funktioniert es:
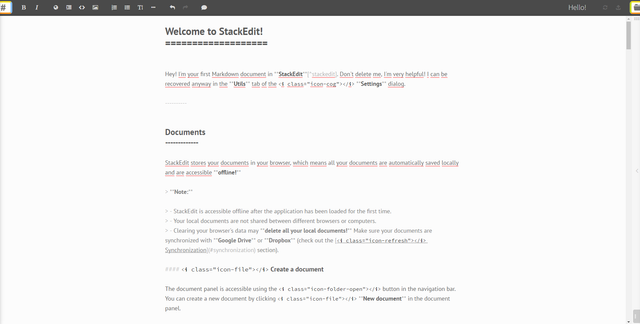
This is the start page and your first document, with a detailed tutorial. Don´t delete it, create a new document!
[German] Das ist die Start-Seite und dein erstes Dokument, mit einer detaillierten Anleitung. Lösche sie nicht, erstelle ein neues Dokument!
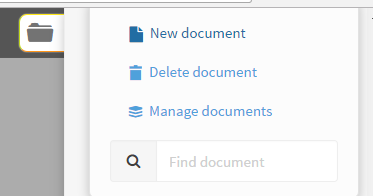
To create a new document, click on the folder button in the top right corner.
[German] Um ein neues Dokument zu erstellen, klicke auf den Ordner-Button oben rechts.
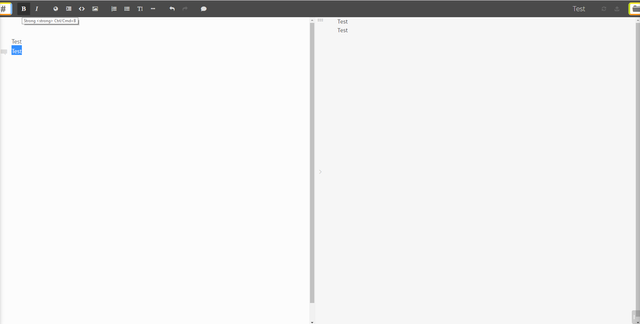
Now you can add a document title in the top right corner (I used Test in this example) and you can begin to write your article. To write in bold letters, just mark the text part you want and click on the "B" in the function bar.
[German] Nun kannst du dem Dokument am rechten oberen Rand einen Titel geben (ich habe Test in diesem Beispiel benutzt) und du kannst damit beginnen deinen Artikel zu schreiben. Um in fetten Buchstaben zu schreiben, markiere einfach den Text-Teil den du möchtest und klicke auf das "B" in der Funktions-Leiste.
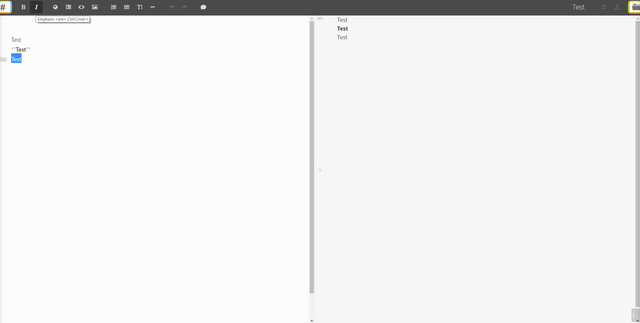
To write in italic letters, mark the text part you want and click on the "I" in the function bar.
[German] Um kursiv zu schreiben, markiere den gewünschten Text-Teil und klicke auf das "I" in der Funktions-Leiste.
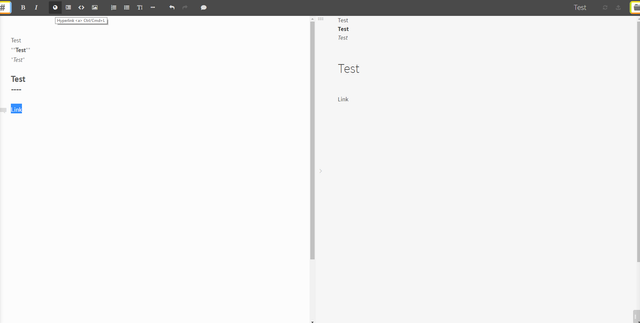
To add a link, just mark a text part you want to be clickable and click on the World-Button.
[German] Um einen Link einzufügen, markiere einfach den Text-Teil den du klickbar machen möchtest und klicke auf den Welt-Button.
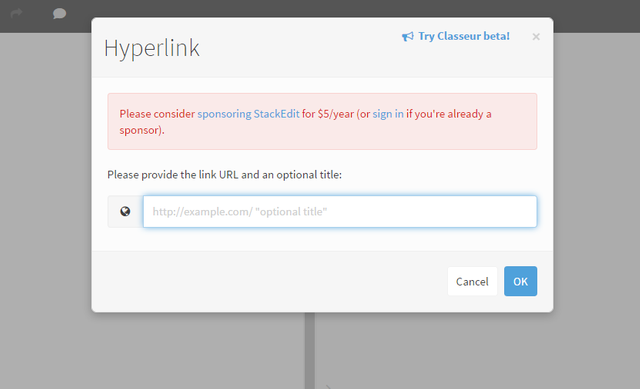
Now a window is opening and here just add the Hyperlink with http:// or https://.
[German] Jetzt öffnet sich ein Fenster und hier einfach den gewünschten Link mit http:// oder https:// einfügen.
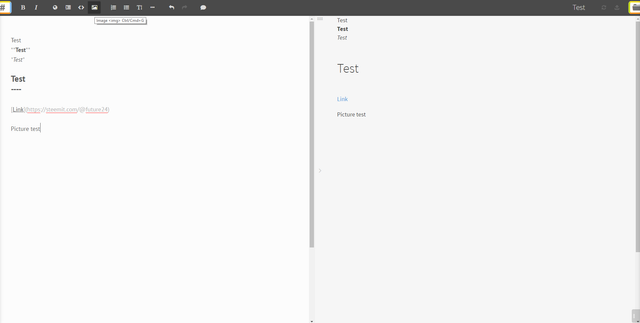
To use pictures, you have to upload them at picload.org for example and then you have the direct link, which you just have to copy in the field in your editor. To do this, just write a text as picture name, like I used "Picture test" in this example, mark it and click on the Picture Button in the function bar. Now just add the picture URL in the field. (It´s the same like adding links)
[German] Um Bilder zu nutzen, musst du sie einfach zum Beispiel bei picload.org hochladen und dann hast du den direkten Link, den du nur in das Feld im Editor einfügen musst. Um das zu tun, schreibe einfach Namen für das Bild, so wie ich in diesem Beispiel "Picture test" genommen habe, markiere es und klicke auf den Bild Button in der Funktionsleiste. Jetzt einfach die Bild-URL in das Feld einfügen. (Es ist das Gleiche wie links einfügen)
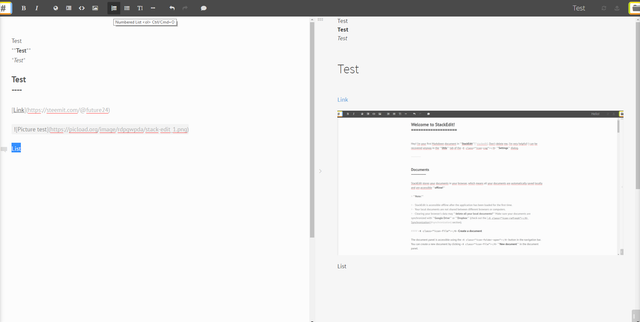
If you want to add a numbered list, just mark the wished text part and klick on the numbered list button in the function bar.
[German] Wenn du eine nummerierte Liste einfügen möchtest, markiere einfach den gewünschten Text-Teil und klicke auch den nummerierte Liste Button.
All other funtions are working similiar and you can find them in the tutorial article of StackEdit too. I just wanted to show you the main features to keep it simple and that you know the Stackedit Editor.
If you are ready, you can copy the text in your StackEdit Editor and just copy it into the Steemit editor in HTML-mode (Markdown Editor).
[German] Alle anderen Funktionen funktionieren gleich und du kannst sie auch alle in dem Tutorial-Artikel von StackEdit finden. Ich wollte euch hier nur mal die Grundfunktionen zeigen um es einfach zu halten und damit ihr jetzt von dem Stackedit Editor wisst.
Sobald du fertig bist, kannst du den Text aus dem StackEdit Editor kopieren und in den Steemit Editor einfügen im HTML-Modus (Markdown Editor).
PS: Here you can watch a tutorial from Youtube, with a tutorial how to use the Stackedit editor together with GoogleDrive too!
Best regards and hear you in my next article!
[German] Beste Grüße und wir hören uns in meinem nächsten Artikel!
Jonas Ahrens




How about this tool https://www.steempower.org/editor?
Really great too, thanks for sharing!
I'm almost writing everything in Stackedit now.
Really good and helpful tutorial, thank you! :)
Excellent information thank you very much, great post congratulations
Thank you very much for your feedback @jlufer!
Looks like a nice tool to write better looking articles with, I should take a look at that too, haha.
Yes it´s really a great tool and especially for pre-writing articles it is very nice! 👍
This post has been ranked within the top 80 most undervalued posts in the second half of Nov 08. We estimate that this post is undervalued by $5.90 as compared to a scenario in which every voter had an equal say.
See the full rankings and details in The Daily Tribune: Nov 08 - Part II. You can also read about some of our methodology, data analysis and technical details in our initial post.
If you are the author and would prefer not to receive these comments, simply reply "Stop" to this comment.
Toller Artikel. danke für Deine Mühe.
Ich suche immer noch eine Möglichkeit komplett offline einen Text nebst Bildern zu verfassen und diesen dann einfach hochzuladen.
In Wordpress geht das bereits.....
This is so very much interesting, @future24! I saved this article so I can study this better. I love creating long articles, like journals, and this can help me a lot. Thank you! 🤗