Simulated Wood Plank Flooring Tutorial
We had a lot of feedback and interest on the post we wrote about the paper bag flooring in our house. During the course of a few discussions I mentioned that my mother had also done a different version of paper bag flooring that ended up looking like hard wood flooring. I asked my mom for pictures just so I could share them in the comments and, to my surprise, she had progress pictures of her entire process. Since people were interested, I figured another tutorial was in order.
My mom did two rooms with vastly different colors of simulated wood. In the first room, she did a medium brown and in the second room she did a "white wood" floor which actually looks pretty neat.
 The finished simulated brown planks. You can see some of the old tile seams showing though.
Materials
- Brown Craft Paper
- Wood Stain or Latex Paint (mom used brown and white latex paint thinned out)
- Paint Brushes
- White Glue (Elmers)
- Wood Grain Tool
- Oil Modified Polyurethane
- Bowl or Bucket (to dunk your strips in the glue)
- Small Squeegee
Step by Step
Start by prepping your floor; it needs to be smooth and free of debris. Ensure the floor you're working on is covered with a material that the white craft glue will stick to. My mom did one room where she removed the old tile and another where she left the tiles intact. Where the tiles were intact you can still see the lines between tiles in some places so having a smooth surface is important.
 Left:The old tile flooring in one of the rooms. Right: The flooring scraped off in the other room.
Next, cut your strips of brown craft paper into plank sized pieces. You will want a few different plank lengths so you can stagger the rows. The widths of the planks are up to you. In one room, my mom did a narrow plank and in the other they were eight inches wide so they would be the same width as the tile she was covering. Some people will use an actual board as a guide to draw lines on the paper but a ruler would work just as well.
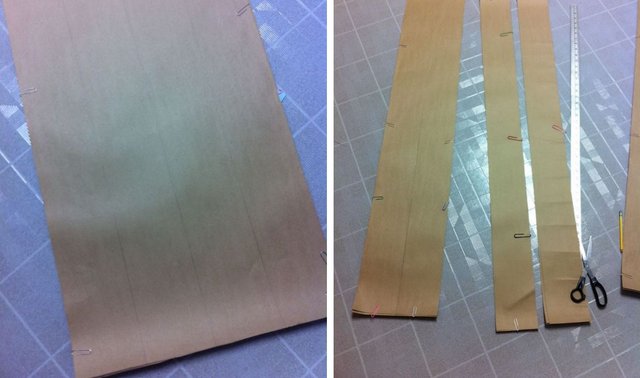 The plank strips at different stages of the cutting process
After you have the pieces cut, apply the wood grain to one side. Some people use wood stain on their planks to simulate a wood grain. However, mom used watered down latex paint in the colors she wanted, and it turned out pretty good, which goes to show there is more than one way to accomplish this look. You may want to make some samples, like I recommended in the other tutorial, to figure out what you like best.
Once you have the stain, or paint, the shade you want paint it on the planks using the wood grain tool. There are different types of tools available for this treatment. The tool mom used has a curved section that you need to rock and drag at the same time to simulate the wood grain as well as an edge with teeth you can use to make straight grain. You will probably need to experiment beforehand until you get the hang of the process.
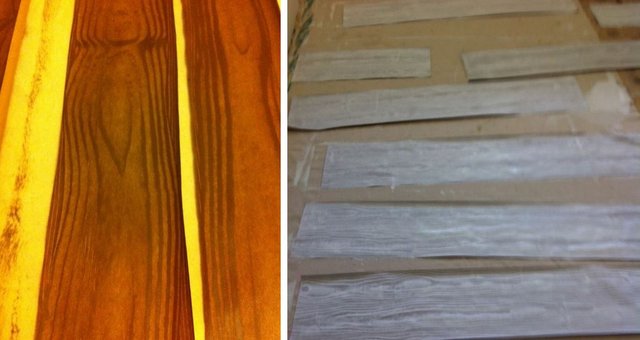 Left: Wood grain freshly applied. Right: Paper planks drying.
Stain as many planks as you think you'll need for the floor you are covering. Having a few extra planks ready may also be a good idea. Once you've finished painting your planks set them aside to let the paint dry. You can put a drop sheet down on the floor if you need a place to put them without worrying about paint transfer to your current flooring.
Application
For this method, the water glue mixture was a lot weaker: 3 parts water to 1 part glue. Dunk the planks in the mixture one at a time then apply them to the floor. Using the squeegee makes more sense for this method since you'll need to help flatten the planks down against the floor.
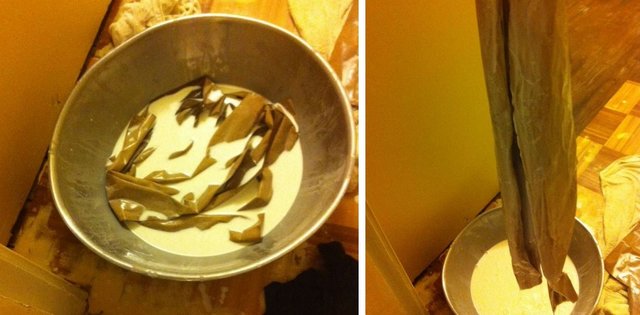 Dipping the planks in the glue mixture one at a time. Make sure your planks are painted and dried before this step.
Some people overlap the planks but, in my moms experience, this creates unwanted ridges. Instead, lay them as close together as possible. After the first row, start the next row with a different sized plank so the seams are staggered. Any small gaps left between the planks can be filled with paint after.
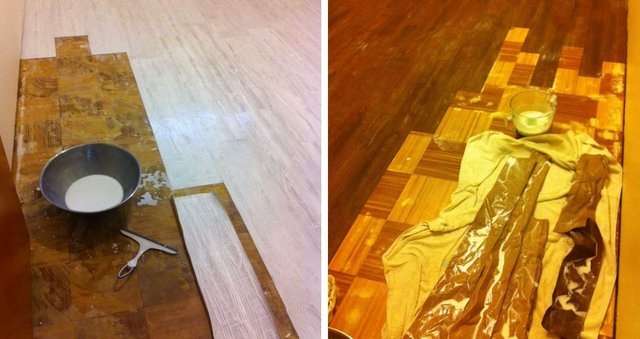 The two different rooms during the application process.
Once all the pieces are on, let the floor dry. Drying may take a few days before you are able to walk on it so I recommend you don't rush this part.
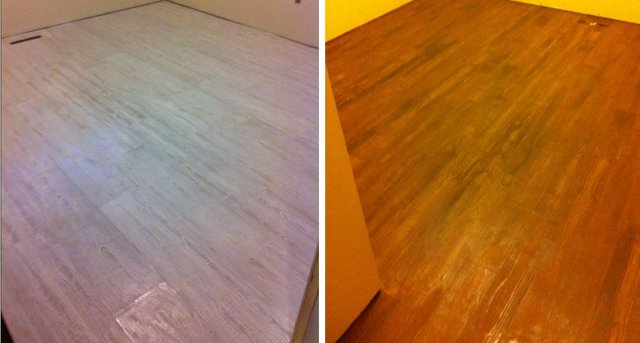 The floors drying before getting the coats of polyurethane.
One optional step is to use a sponge with a bit of paint or stain on it to create darker and lighter areas on the floor to give the planks a more natural wood look.
Once the floor is dry make sure that it is clean and free of dust and debris then apply 5-7 coats of polyurethane. Wide paint brushes work well for this; you should be able to find 5" brushes or larger at your local hardware store. The regular oil modified polyurethane has a bit of an amber tone when it dries but, for a slightly higher cost, there is one that also dries crystal clear. Just be aware that the type of polyurethane you choose may change the color of your floor.
Best practice would be to do one coat of polyurethane a day to allow for ample dry time. You may be able to do two coats but you'll want to make sure the floor is completely dry so you don't ruin the finish.
Well, that's a wrap. Hopefully you got some value from this post. The great thing about this floor is that because it's so thin you could probably just go overtop of it with something else later if you grow tired of it.
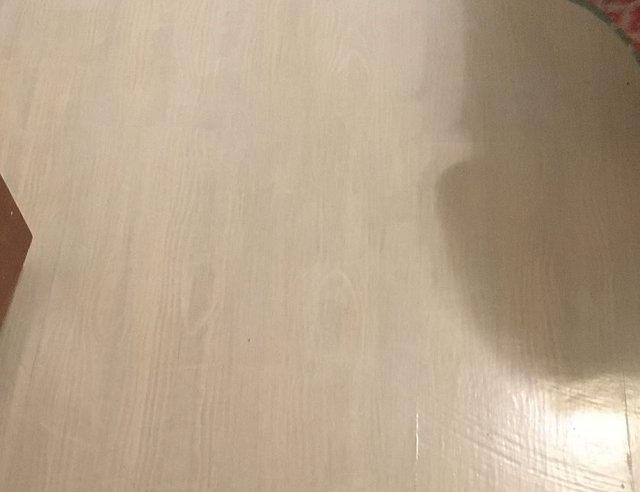 The white plank floor finished!
What is polyurethane used for?
It is a clear protective finish normally used on wood. Like furniture or hard wood flooring.
I’ve seen some brown paper floors, but this is like “brown paper floor 2.0”. Good work, and excellent tutorial. Thumbs up.
Thanks, my mom does good work!
Thanks for sharing your mom's craft.
How about adding a bit of ceramics to the floor, let's say replacing one of the planks with to give a new outlook?
No problem! Thanks for reading!
I'm not sure what you mean by replacing one plank?
I mean combing simulated wood and ceramics on same floor
It never crossed my mind but I guess it could work. Have you seen any examples of something like you are talking about?
No, it's just an idea I conceived. It should work though
Excellent working
Thanks!
genial...