How to Extract Images on your PC for your Steemit Posts Using Snipping Tool for WINDOWS Users

As we prepare our post, sometimes we find it difficult to have the right image or images to go along with our write up. Often times we get images from the internet, originator (designed by you), from cameras, our phones e.t.c, but sometimes there are images we need right there in our that we can use but don’t know how to get them e.g. a picture from the theme of your pc, an image in a pdf material, images for your how to do tutorials (like this one) and others. So I will be showing you how to create image from your PCs] for how to do tutorials, and how to extract images from pdf materials.
There are two methods that can be used to achieve this, they are as follows
Using the inbuilt WINDOWS APP called SNIPPING TOOL
Using the print screen key on the keyboard
METHOD ONE: Using the inbuilt WINDOWS APP (Snipping Tool)
Snipping tool is an in built application for WINDOWS users that can be used to extract images.
First, you identify the image you want to extract (for this tutorial it will be my desktop, I will be creating an image of my desktop)
After identifying the image you want to extract, you stay on that particular page where the image is, (for example if the image is on your desktop, you stay on the desktop).
Then you press the WINDOWS button on your keyboard
On the search tab, you type the word “SNIPPING TOOL”

The application will pop up, then you SELECT it to open
When the application is opened you click on NEW

A select tool will pop up on the particular page where the image is (for this tutorial it will be my desktop) then you can now select your desired image or section by dragging the select tool across the page.

After selecting the image, it automatically takes you to another page with your image, where you can save your image in Png or Jpeg formats and also copy your image as well.

METHOD TWO: Using the print screen key on the keyboard.
On the keyboard for almost every WINDOWS users, there’s a particular key named the “Prt SC” (meaning print screen)
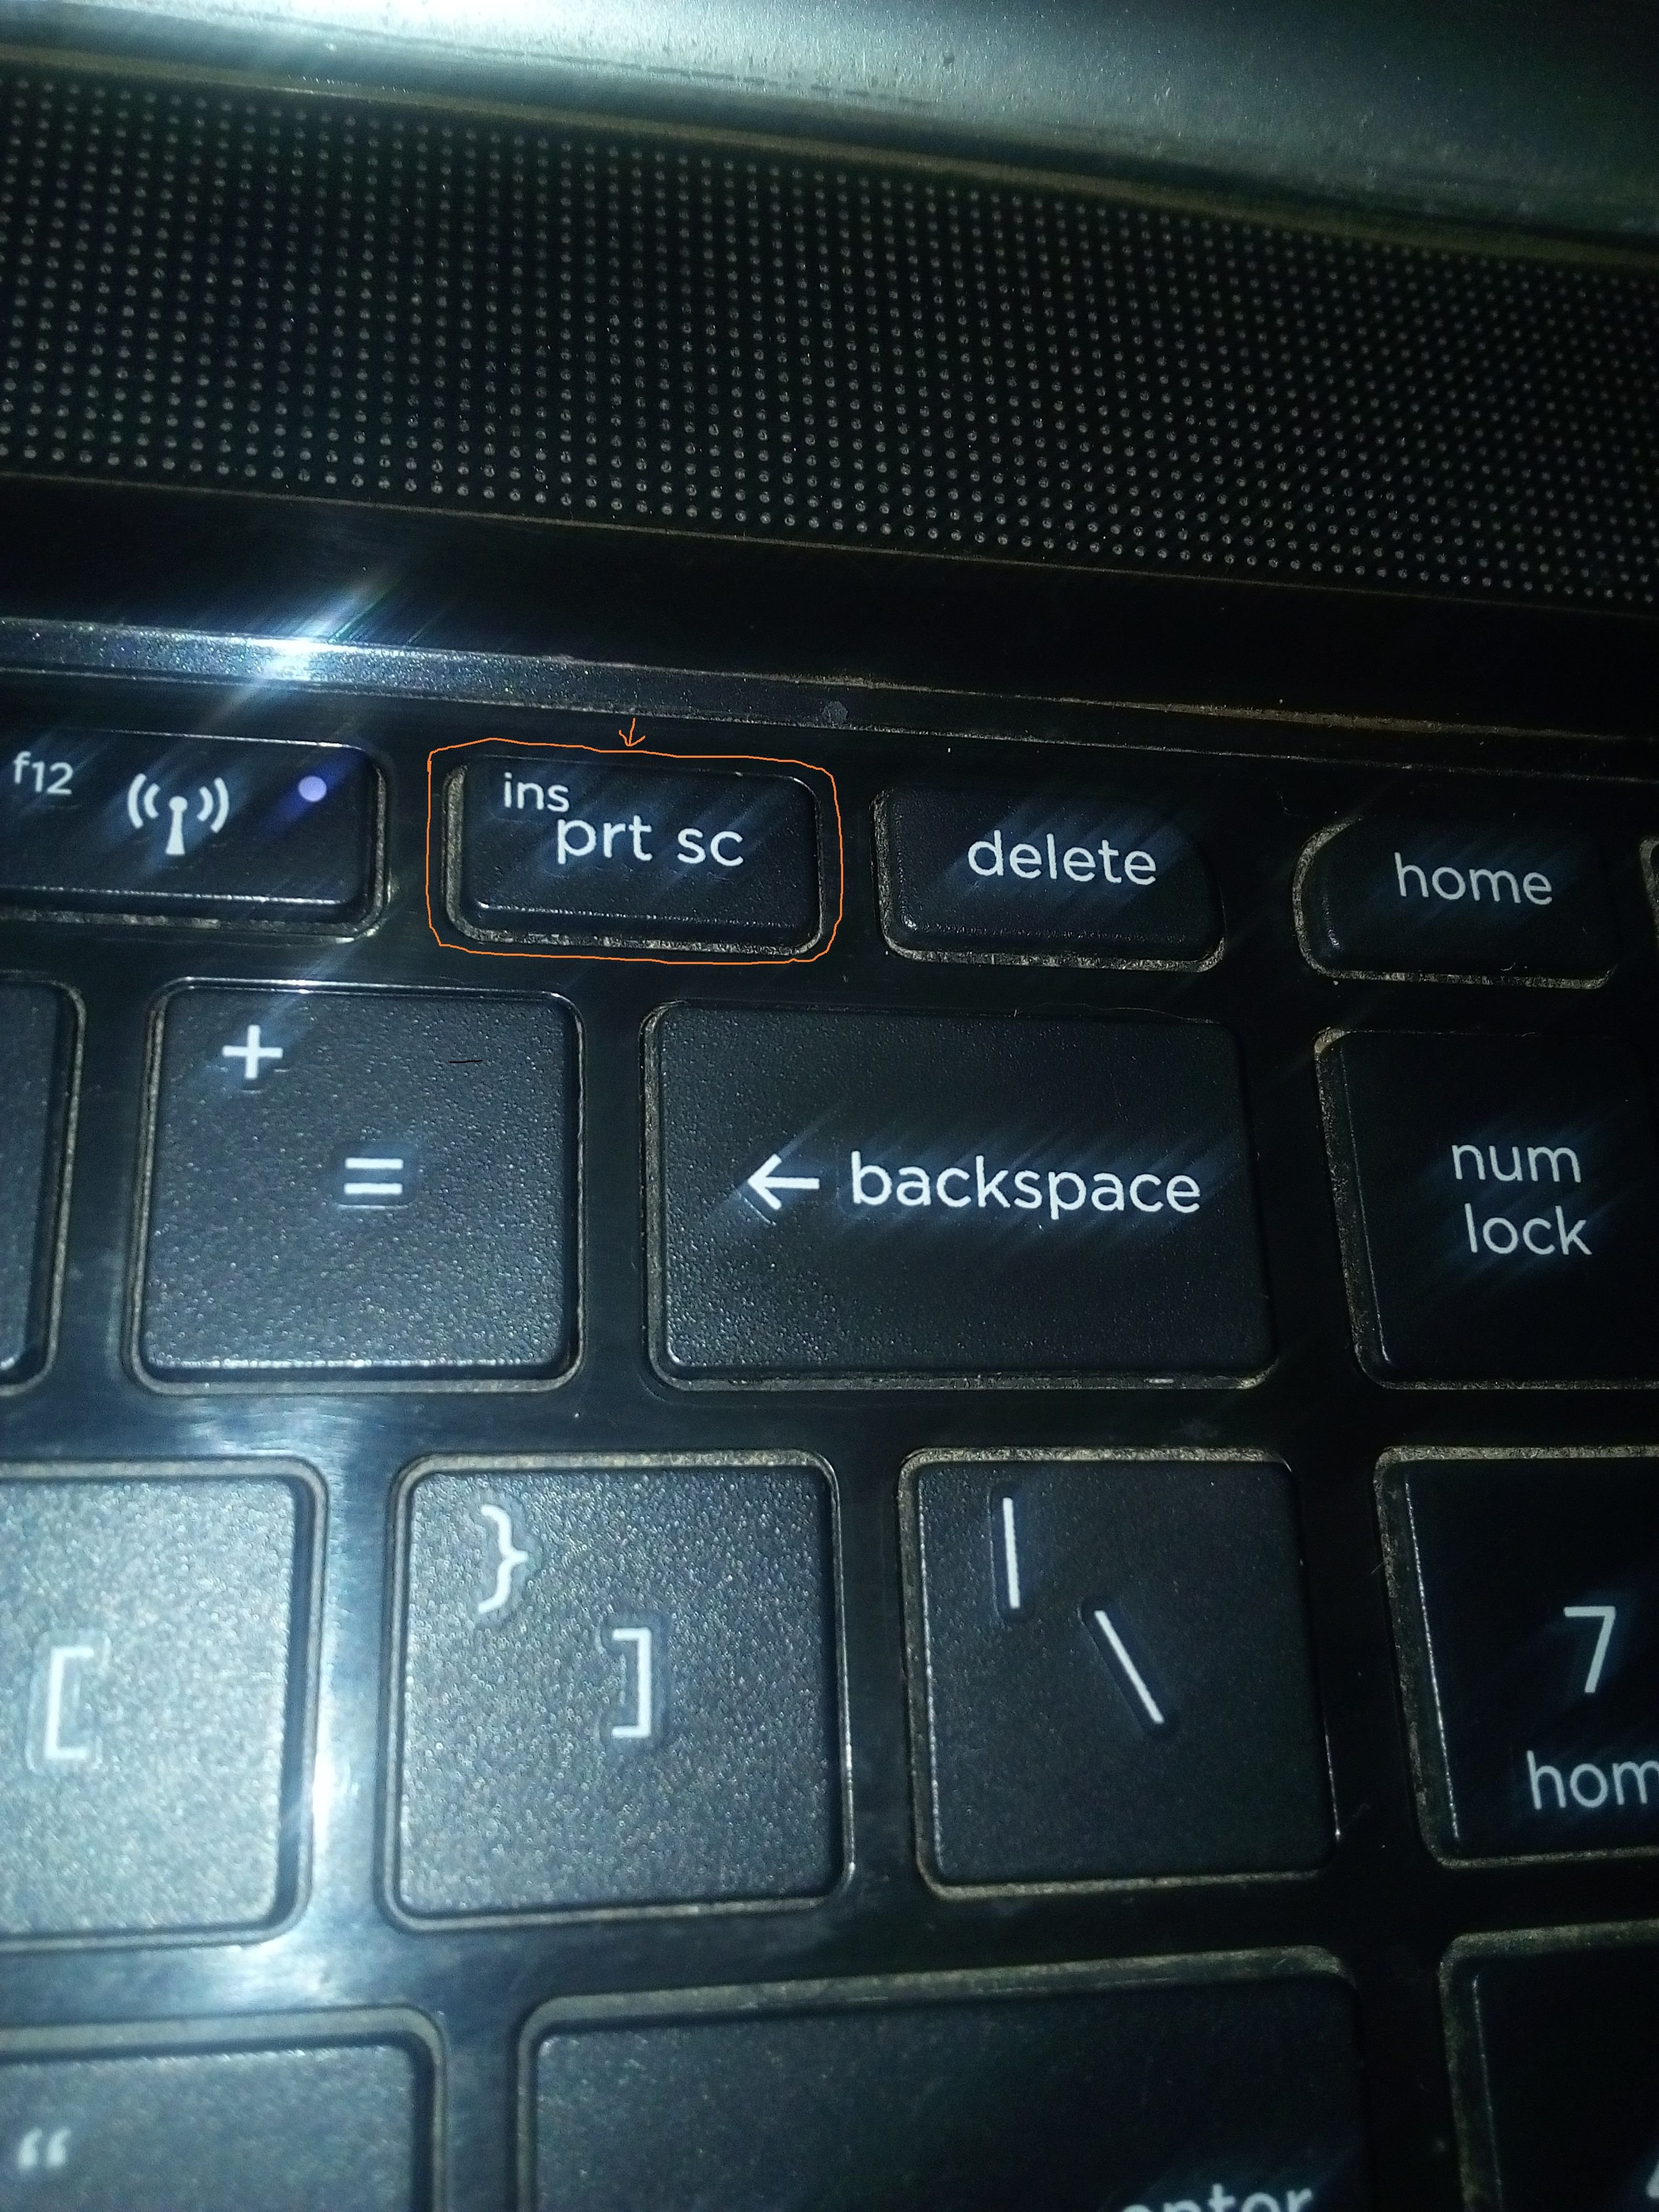
All you need do is open the particular page where the image is, (for this tutorial it will be my desktop) then you click on the key, after which you open the section or page where you want to saved or use the image (for this tutorial I will be using PAINT), you just hit PASTE (CTRL+V) your image will be pasted there.
This is a useful tutorial that we can used. Thanks for sharing.
Thanks for reading
just amazing thank you for the tutorial
You are welcome.
Wonderful!! nice job
Thanks for reading.
Useful tutorial. Amazing trick.
Yea really amazing. The combination of both is where the Real Magic lies
that's quite informative.
i prefer the snipping tool; it lets you select exactly what you want to keep
with printscreen, it captures the whole screen, you then have to crop, etc.
Yea. But both have there different importance. For pc tutorials most times you need print screen
Great Tutorial Man. Very Useful for new users. Keep up the good work. God Bless. Peace.
Thanks for reading. And for the love