HOW TO DESIGN STEEMIT LOGO IN 5 MINUTES

Hello steemians, I will be giving a few lessons on logo designs using CorelDraw.
Here is a tutorial on how to design Steemit logo.
Before we begin let me a give a brief intro to some CorelDraw tools we make use of in this tutorial.
PICK TOOL

SHAPE TOOL

FREE HAND TOOL

ELLIPSE TOOL

TRANSPARENCY TOOL
COLOUR EYEDROPPER TOOL

INTERACTIVE FILL TOOL

BEZEIR TOOL

Lets begin
These are the shapes you'll need to design

STEP 1
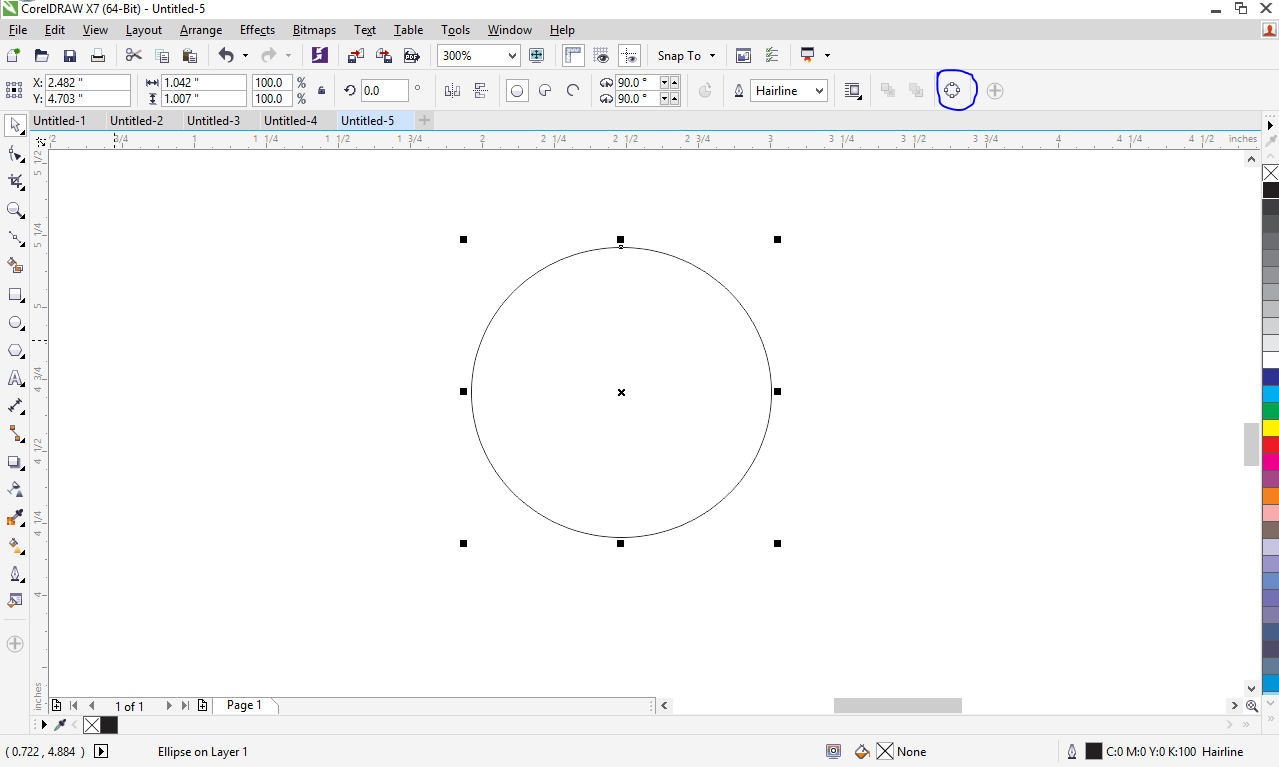
Create a circle using the ellipse tool then select the circle with the Pick tool then tap the icon circled below to convert the shape to curve which enables you to manipulate the shape of the ellipse to your satisfaction.
STEP 2
After converting to curve, double click the bottom left part of the circumference to add a node. Then add two more nodes while leaving the first node at the center of the two new nodes, thus, creating three nodes in total.

STEP 3
Now select the two upper first two nodes then right click and click To line
STEP 4
After that click and hold the node in the center and drag it leftwards

STEP 5
Left-click line between the nodes labelled 1 and 2 below right click it and tap To line

STEP 6
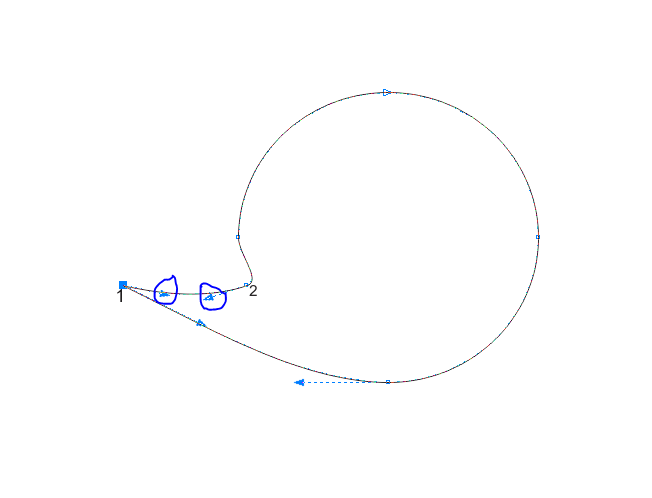
After that click node1 (i.e node labelled 1) then bend the line linking the 1 and 2 by adjusting those Pegs (The circled Arrows)
STEP 7
Now delete other nodes excluding node 1.

STEP 8
Select the shape and Duplicate it (To duplicate press CTRL + D). Then rotate the duplicate through 180 degrees.
Make another copy of the shape. This copy would be used later on.

STEP 9
Now select both shape 1 and 2 by holding the SHIFT key then weld them (Press the circled icon shown below)

STEP 10
Now add the duplicated shape and resize it to fit, right-click it then press CTRL + HOME KEY to bring it in front of the bigger shape

STEP 11
Now use the text tool to write Steemit , with font CALIBRI, resize it.

STEP 12
You can apply colours now. by selecting the shape and choosing your desired colour from the colour pallette

TIP
To change the shape outline colour, select the shape and right-click the colour you want in the colour palette
On completion of this tutorial, you have successfully designed Steemit logo.
This is awesome. Well detailed and east to accomplish.
Your work is impressive, we hope that you continue in this trend.
Steem on with your creativity.
Good post and a nice tutorial. I am going to have to brush up on my corel skills in the near future.
Nice tutorials... I would have to read it again, so I could try my hands on it.
Kudos @richi-3
Quite creative. Well done.