HOW TO DESIGN AND CREATE A STATIC WEBSITE
Hi steemians hope you are having a wonderful time, in today post I will be teaching you a tutorial on how to design and create a Static fashion/clothing Website from scratch to finish with images and video…. Don’t be scared it is not as hard as it might sound and you don’t need to be a genius in programming to get this done.
Before rushing to the topic properly, let us first understand some basic concept attached in designing a website which includes; Tools required, basic knowledge on HTML and CSS programming.
A Quick Preview of the tutorial i will be teaching you today
WHAT IS HTML
HTML stand for “Hyper text markup language” they are used for creating and designing the structure of a webpages, this program are written in a text editor (notepad++) and its executable file is saved as “.html” extension. Html program are used to begin and end the webpage design, its element are represented by a tag “<>”.
WHAT IS CSS
CSS stand for “cascading style sheet” they are used to design the layout of the web pages, note that CSS was primarily created to reduce the work load of HTML. (Example: when creating a large website, where colors and font are added each time on every single page of an HTML code, making it more long and complicated to process.) CSS helps to remove the style formatting from an HTML page by linking its external stylesheet stored in a CSS file to the HTML code.
MODE OF OPERATION
Website are written in HTML language and are design in “CSS” on a text editor which can be previewed offline on the web browser of your computer, note that the web browser reads this HTML documents and display them. When displaying these web pages it does not display the tags alongside, but uses these tags to display the document.
The finished website is then stored on the folder created on the desktop of your computer with an “.html” extension, which you can then proceed to host on any hosting platform with your domain name.
TOOL REQUIRED
The only tool required to design this static fashion website is;
- Computer
- Text Editor (As the name imply, a text editor is used to create, modify/edit and save html code. Example of a text editor is Notepad++).
HOW TO DESIGN AND CREATE A STATIC FASHION/CLOTHING WEBSITE.
For these project we are going to be working with XHTML and CSS to design a static fashion/clothing website.
STEP 1
Download a text editor for your pc, I will recommend NOTEPAD++ for windows user and then install it by following the simple installation step.
STEP 2
Open the text editor (Notepad++) and create your index page by typing the following code;
On the <title> tag you would type the name of the company (mike-makeover) after which you then save it on the folder of the desktop of your computer with the “.html” extension. (Example: index.html)

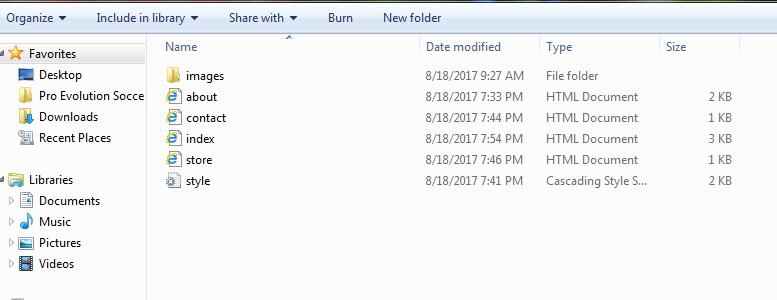
Note that all file and image used in this project should be stored on one particular folder of your desktop.
STEP 3
Create your <!DOCTYPE declaration> (DOCTYPE are used within the first two lines of the page, they are used to inform the complier on language “XHTML” used during coding, also it present the document type and help the browser to display webpages correctly.) and then type the code on the first line of the Notepad++

STEP 4
Edit the<html> tag and add the following: <html xmlns="http:/www.w3.org/1999/xhtml">

STEP 5
Write the following <Meta> code after the <title> tag (meta are used to give information to the search engine like Google about the description of the website, the keyword and about the author.)

STEP 6
Link your external CSS file to the html code by typing the following code; Example: <link rel="stylesheet" href="your file name.css" type="text/css" />

STEP 7
On the <body> section of the code, i will be creating the different part/segment of the website which includes:

STEP 8
Next is to Link all the CSS file with the HTML code ( On Step 6) and then create a CSS file on a new page of the Notepad++ with any name you wish to save it with.
Note: Always remember to save the file with the “.css” extension on the same folder of your project.
Now design the webpage by typing the following code:

STEP 9
Design the <div id="Header”> section of the web page on the "CSS” file of the notepad++. These can be easier done by typing the following codes on the #header

Preview the changes offline on the web browser of your computer system by clicking on the ”Run” bottom and then choose your preferred browser to preview the design website.
preview:

as you can see the website is still under construction and the interface is empty because we are yet to add finish touches
STEP 10
Design the <div id="wrapper”> section of the web page by typing the fo
llowing codes on the external CSS file #wrapper

STEP 11
Design the <div id="main”> section of the web page by typing the following codes on the external CSS file #main

STEP 12
Design the <div id="footer”> section of the web page by typing the following codes on the external CSS file #footer

Preview the changes offline on the web browser of your computer system by clicking on the Click on ->”Run” -> bottom and then choose your preferred browser to preview the constructed website.
preview:

take note of the changes, as you can see a line on the interface
STEP 13
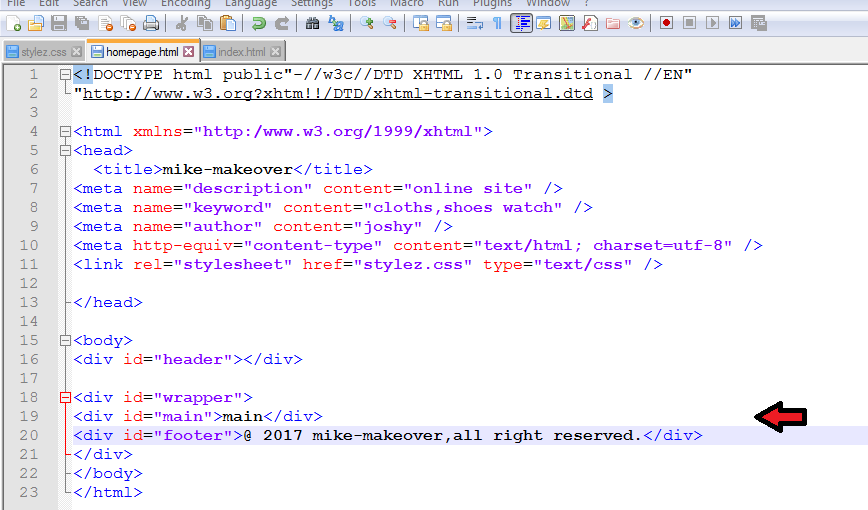
Next we would design the layout of the website. Firstly, go back to the HTML code section -> under the <body> tag and type the following: “2017 mike-makeover, all right reserved” on the <div id=“Footer”>, and also type main on the <div id=“Main”>.
Preview changes:

STEP 14
Next we are going to add image to the front page of the main section of the website (Note; all images should be stored on the same folder created for this particular project.).
choose picture from the created folder and upload it

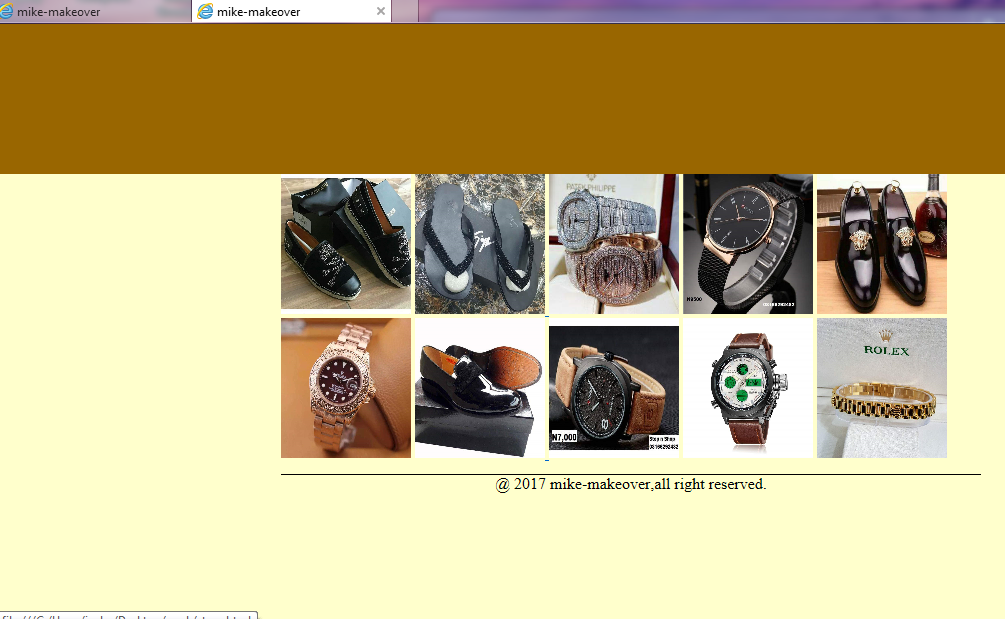
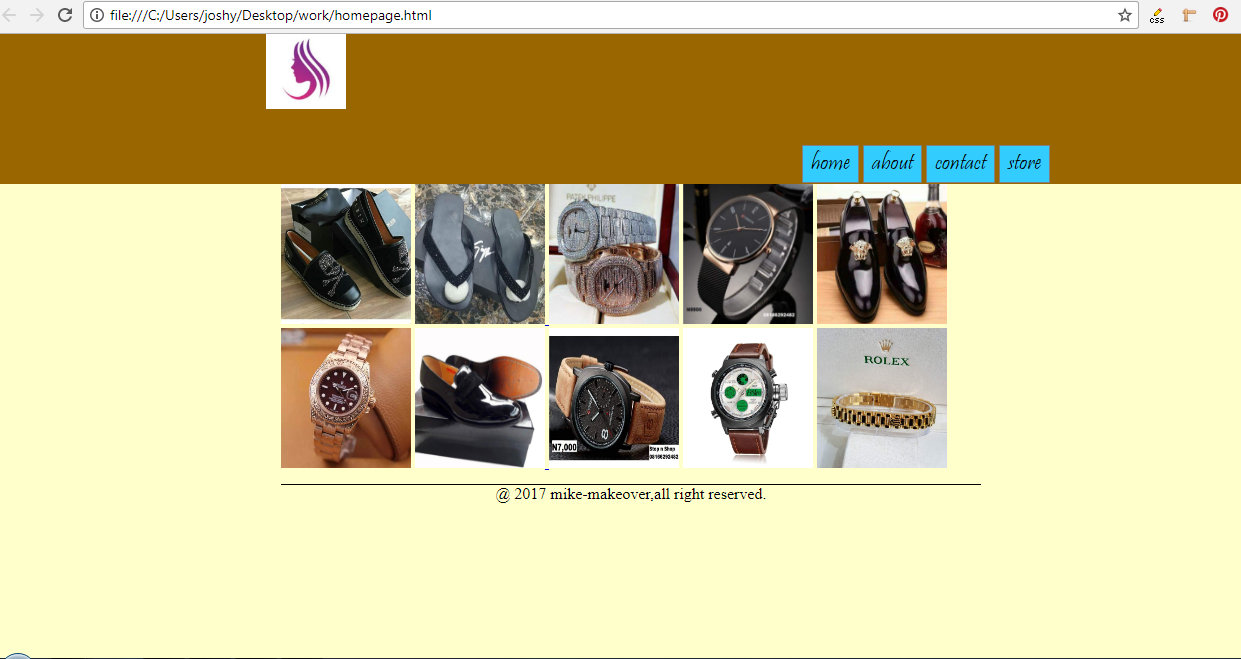
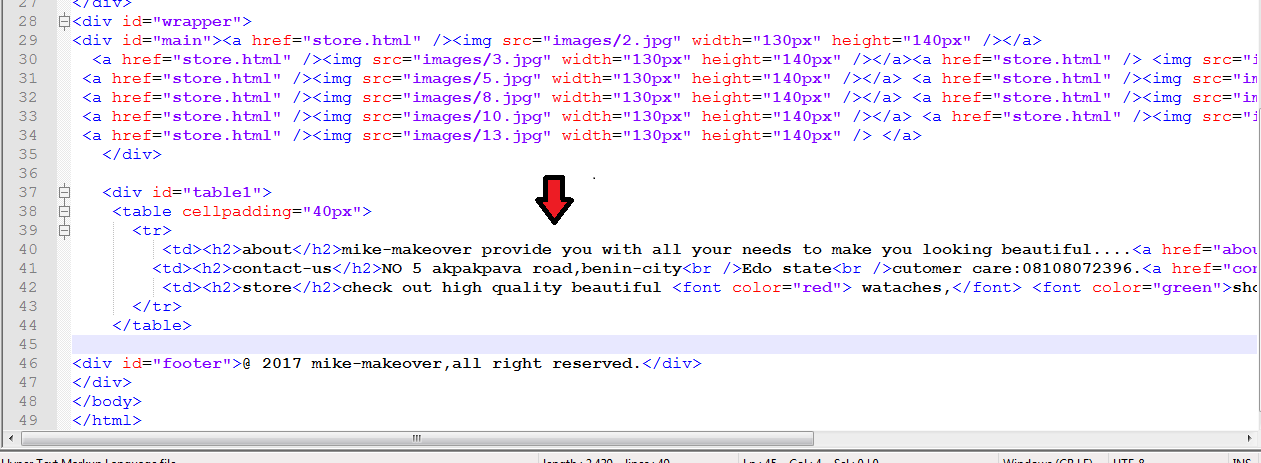
Since we are creating a fashion/clothing website we will be using a grid of shoes and wrist watches pictures on the main page, Go back to theHTML code Section go to <div id=”Main”> and add your image here with the following code:

Note: Src -> source of the image (example: img src="images/2.jpg”) the folder/name of the picture and the”.” extension.
preview
STEP 15
Next we are going to create the navigation bar (Home page, about page, Contact page and Store) for the website. Go back to the -> HTML code Section move to the <div id=”Header”> and then creates a new div. For this post i am going to name it < div id=” nav”>. After that, i will then create a list for the four links for this navigation bar by typing the following code:
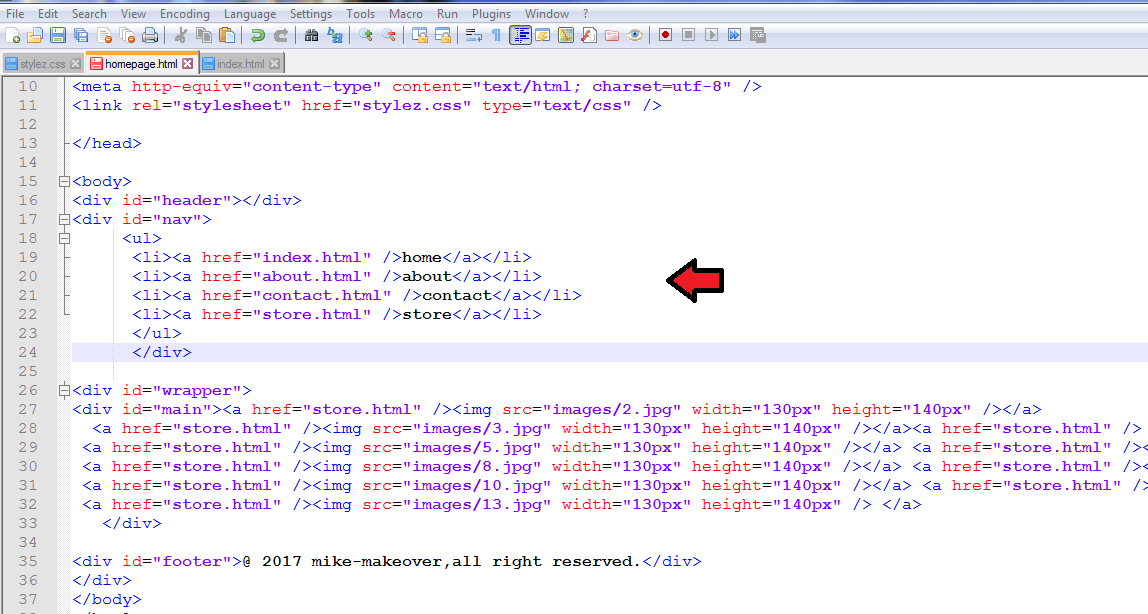
preview

STEP 16
Next we are going to style these links and the “LISTED links” on step (15), Go back to the->external CSS code Section -> and type the following code:

Note: ul -> means “Unordered list”
Li -> means “ list “
preview

STEP 17
Next we will create an effect on those links, that when you move your mouse over it, the link would change color or attributes an element. Go to the-> “external CSS code section” and under the #header type the following code below:

Note: there are four type of Link state which include “Hover, Active, Visited and Default” they are used to create effect on a web page when the mouse pass over them.
STEP 18
Next we are going to create a logo for the website, Go to the “HTML code section” -> under the <div id=“header”> and type the following code:

Note that the logo (image) should be on the folder we have created for this project for easy access
STEP 19
We are going to design the logo on the CSS code section, Go to “CSS” -> under the # header add the following code:

Preview of Step 18 and 19
STEP 20
Next we will add the company name to the website (company name: mike-makeover) by creating a div for the name. (example <div id=”mike”>) under the<div id= “header” > with <h2> tag and the name of the company.

Note:
<h2>are heading used within the<body>section of the code
STEP 21
Next we are going to design the company name on the “external CSS code section”. Go to CSS code section and under the # header type the following the code:

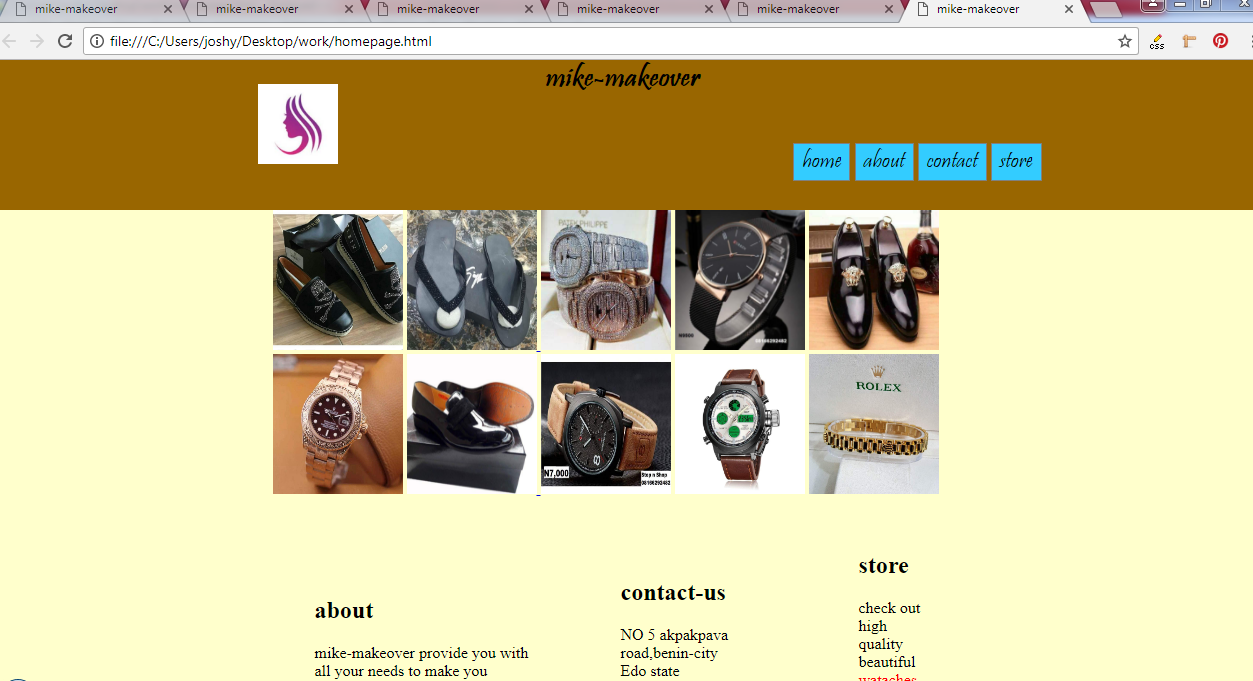
Preview the changes:

STEP 22
Now we are going to create a short description on the wrapper of the website (a short description of the company and its term of service) Go to the “HTML code Section“-> under the <div id=“Main” >and type the following code:
Note: At the end of the above code, I added a read more at the end of the write up , when you click on that link it would take you to the main page
preview:
STEP 23
Next we will design the short description which we have created in (step 22) the short description would be at the wrapper of the website; now we will be adding some shadow effect to it. Go to the CSS code section -> on the # wrapper -> # table1 type the following code to add shadow effect:

Preview changes

STEP 24
Next we will create and link the various pages which includes; About page, Contact page and Store page for these website. This can be easy done by just grabbing everything in the index page and pasting them on a newly created page and save it as “About page” .html

Delete the following code: the table and image code from it….as shown below, and you can add write up to the page if you wish to.
Preview changes

Apply the same produces for the Contact and Store Page.
STEP 25
Next is to host the finished designed website on any hosting platform (Godaddy). But for the purpose of these tutorial we won’t be hosting this website we just created.
WATCH THE VIDEO OF THE FINISHED WEBSITE DESIGN
CONCLUSION
On completion of the above steps correctly, congratulation you have successfully created and design a static fashion/clothing website. You can now use the knowledge to make other designs.
NOTE: ALL IMAGES AND VIDEO USED ARE ORIGINALLY MINE, AND ALL STATEMENT AND DEFINITION ARE GOTTEN FROM MY EXPERIENCE IN USING THIS SOFTWARE.
This is superbly done. Thank you for sharing.
Thanks for the feedback.... I will always try to write more of this