DIY bed frame for dogs & storage underneath
Have you ever searched the internet for a bed frame that a dog can live under, or one with extra space for storage? The options are limited and expensive. I will show you how I designed an easy and affordable solution.
This design can make any size bed frame up to California King. The bed size will determine the lengths of the 2x4 boards. I chose a bed height clearance of roughly 20 inches from floor to bed frame by using an 8 foot 4x4 post for the four corners. The height of the bed can be extended by using a longer post. Plywood can be used to cover the top of the bed frame depending on mattress type.
This design can be accomplished with a minimal amount of materials, tools, and skills. Just remember the bed frame should be square and level. In this case square means an equal distance between the corners of the bed frame, even though the bed frame is usually a rectangle shape.
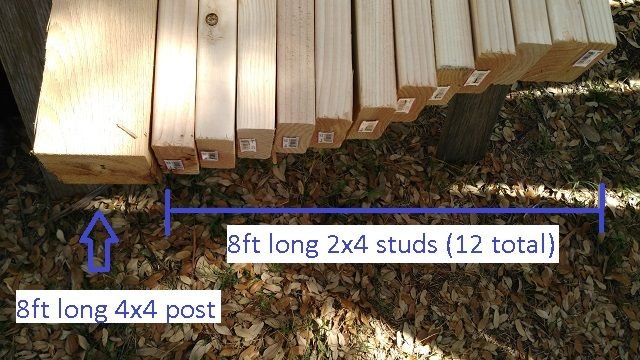
I used an 8 foot 4x4 cedar post. A longer post can be used to elevate the bed frame height more than 20 inches from the floor. I used 8 foot 2x4 studs that were straight. I bought 12 of them but only used 11 of them by carefully making use of scrap material from earlier cuts.
The cost of the boards was roughly $70. I chose a more expensive type of wood for the corner posts. I used premium decking screws 3 inches in length to connect the boards.
If you are not comfortable using various type of power saws it is possible to pay some supply stores a small fee to cut boards to length. I used simple hand saw to finish cuts and sanded the rough edges by hand.
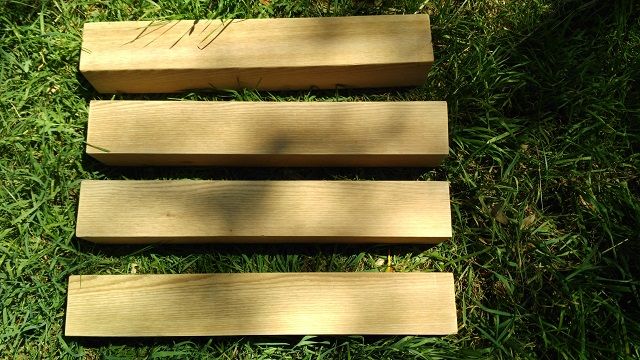
I cut my 8 foot post exactly in half, and then cut each half in half. This is an easy way to end up with 4 pieces that are exactly the same length without having to account for the width of my saw blade.

I cut out space for my 2x4 boards to rest on the top of each corner post.
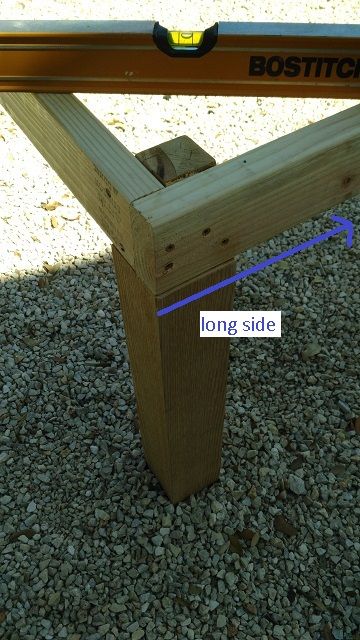
I used a level space to assemble the corners and adjusted them to be square. I used clamps to hold the wood together temporarily before using premium decking screws to attach the boards.
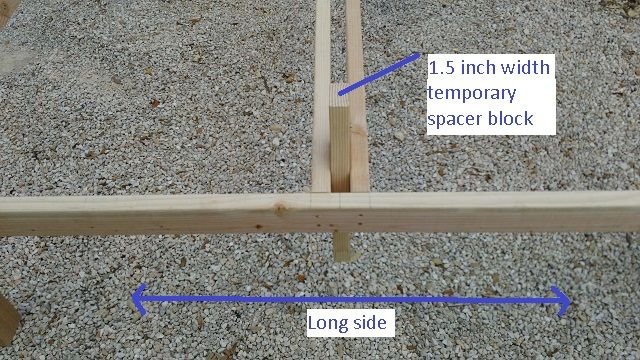
I secured a couple of 2x4 beams perpendicular to the long side, centered between the corner posts, with a 1.5 inch gap between them.
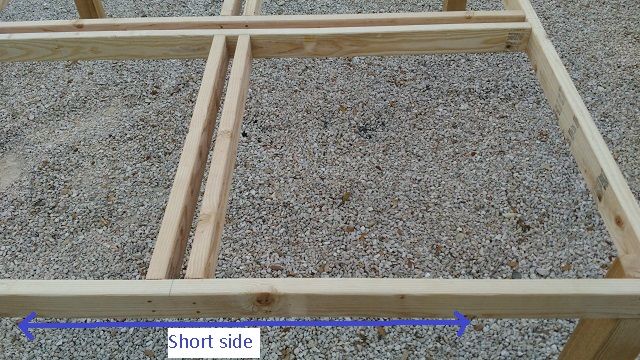
I did the same thing to the short side and left a gap in the middle of the existing beams.
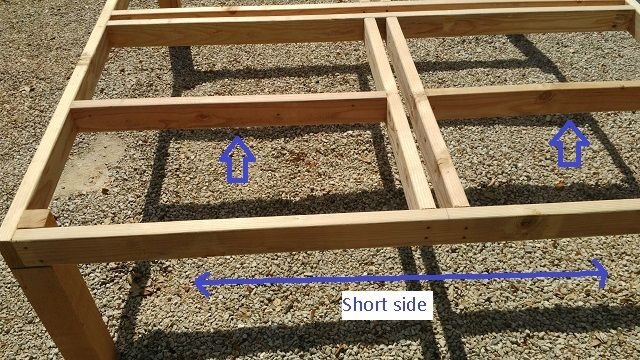
I secured a beam perpendicular to the long side in all 4 corners, centered between the corner and the middle beam, and left a gap in the middle of the existing beams.
I cut 2x4 posts that are exactly the same length as my 4x4 corner posts - 6 total.
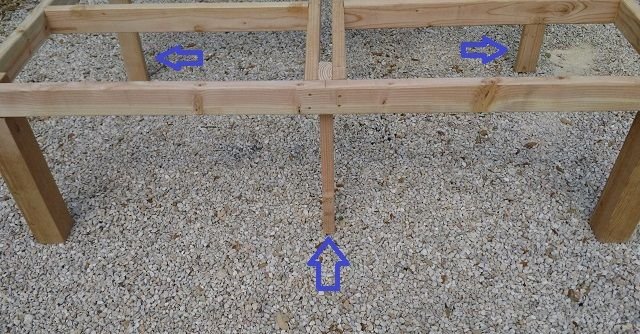
I attached the 2x4 posts between my middle beams on all 4 sides.
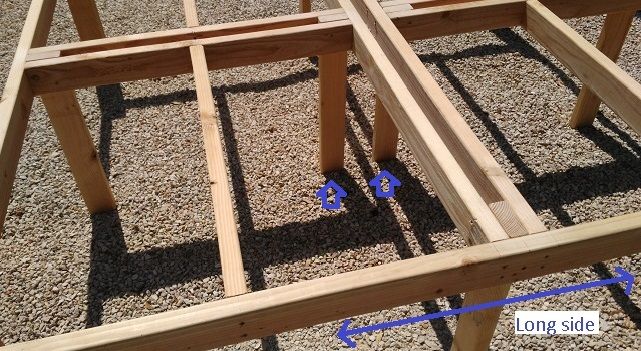
I attached a couple of 2x4 posts between my beams in the middle of the bed frame.
The pictures show a regular king size with a clearance of a little over 20 inches from the floor. That is all I needed to provide a home for my dogs and get some extra storage space in my room. Hope you enjoy this post feel free to use and share this design.