Homestead How To: Create A Swale & Berm For Water Management | Part 1

Homestead How To: Create Swales & Berms
When on the homestead, one of the largest things to take into consideration is WATER.
Where it comes from.
How it flows.
How to sequester it on the landscape.
In the following tutorial, we'll walk you through the first part of designing a swale and berm system on your land.
We were having some issues with water puddling in front of a building. Whenever it rains heavily, we can see water streaming down our path to sit right in front of the solar shed. We've been noticing this since last year and, after last week's constant rain and flooding, decided it was the time to get to work. We also have been envisioning planting blueberries and other native perennials and flowers in a swale and berm as functional landscape planting.
A Berm
Is essentially a mound of earth with sloping sides. They're used as landscaping features to add spice to flat land or, as in our case, to help with drainage.
A Swale
Is a low tract of land, especially designed to manage water runoff.
Steps
In part 1, we'll cover the basics of set up, finding contour/slope, laying out stakes, digging and staying on line. In part 2, we'll make sure the berm and swale are functional by finding level, adding more organic material and bed prep. In part 3, which is further down the line, we'll plant out the swale and berm to stabilize it and make our water catchment functional.
Whenever rain falls on the homestead, we want to catch it. This slows water down and makes our landscape more self-supporting. The goal is to not have to water that much and to hold as much water that falls from the sky on the land as possible. Deep mulch, ponds, and swales are some ways to do this.
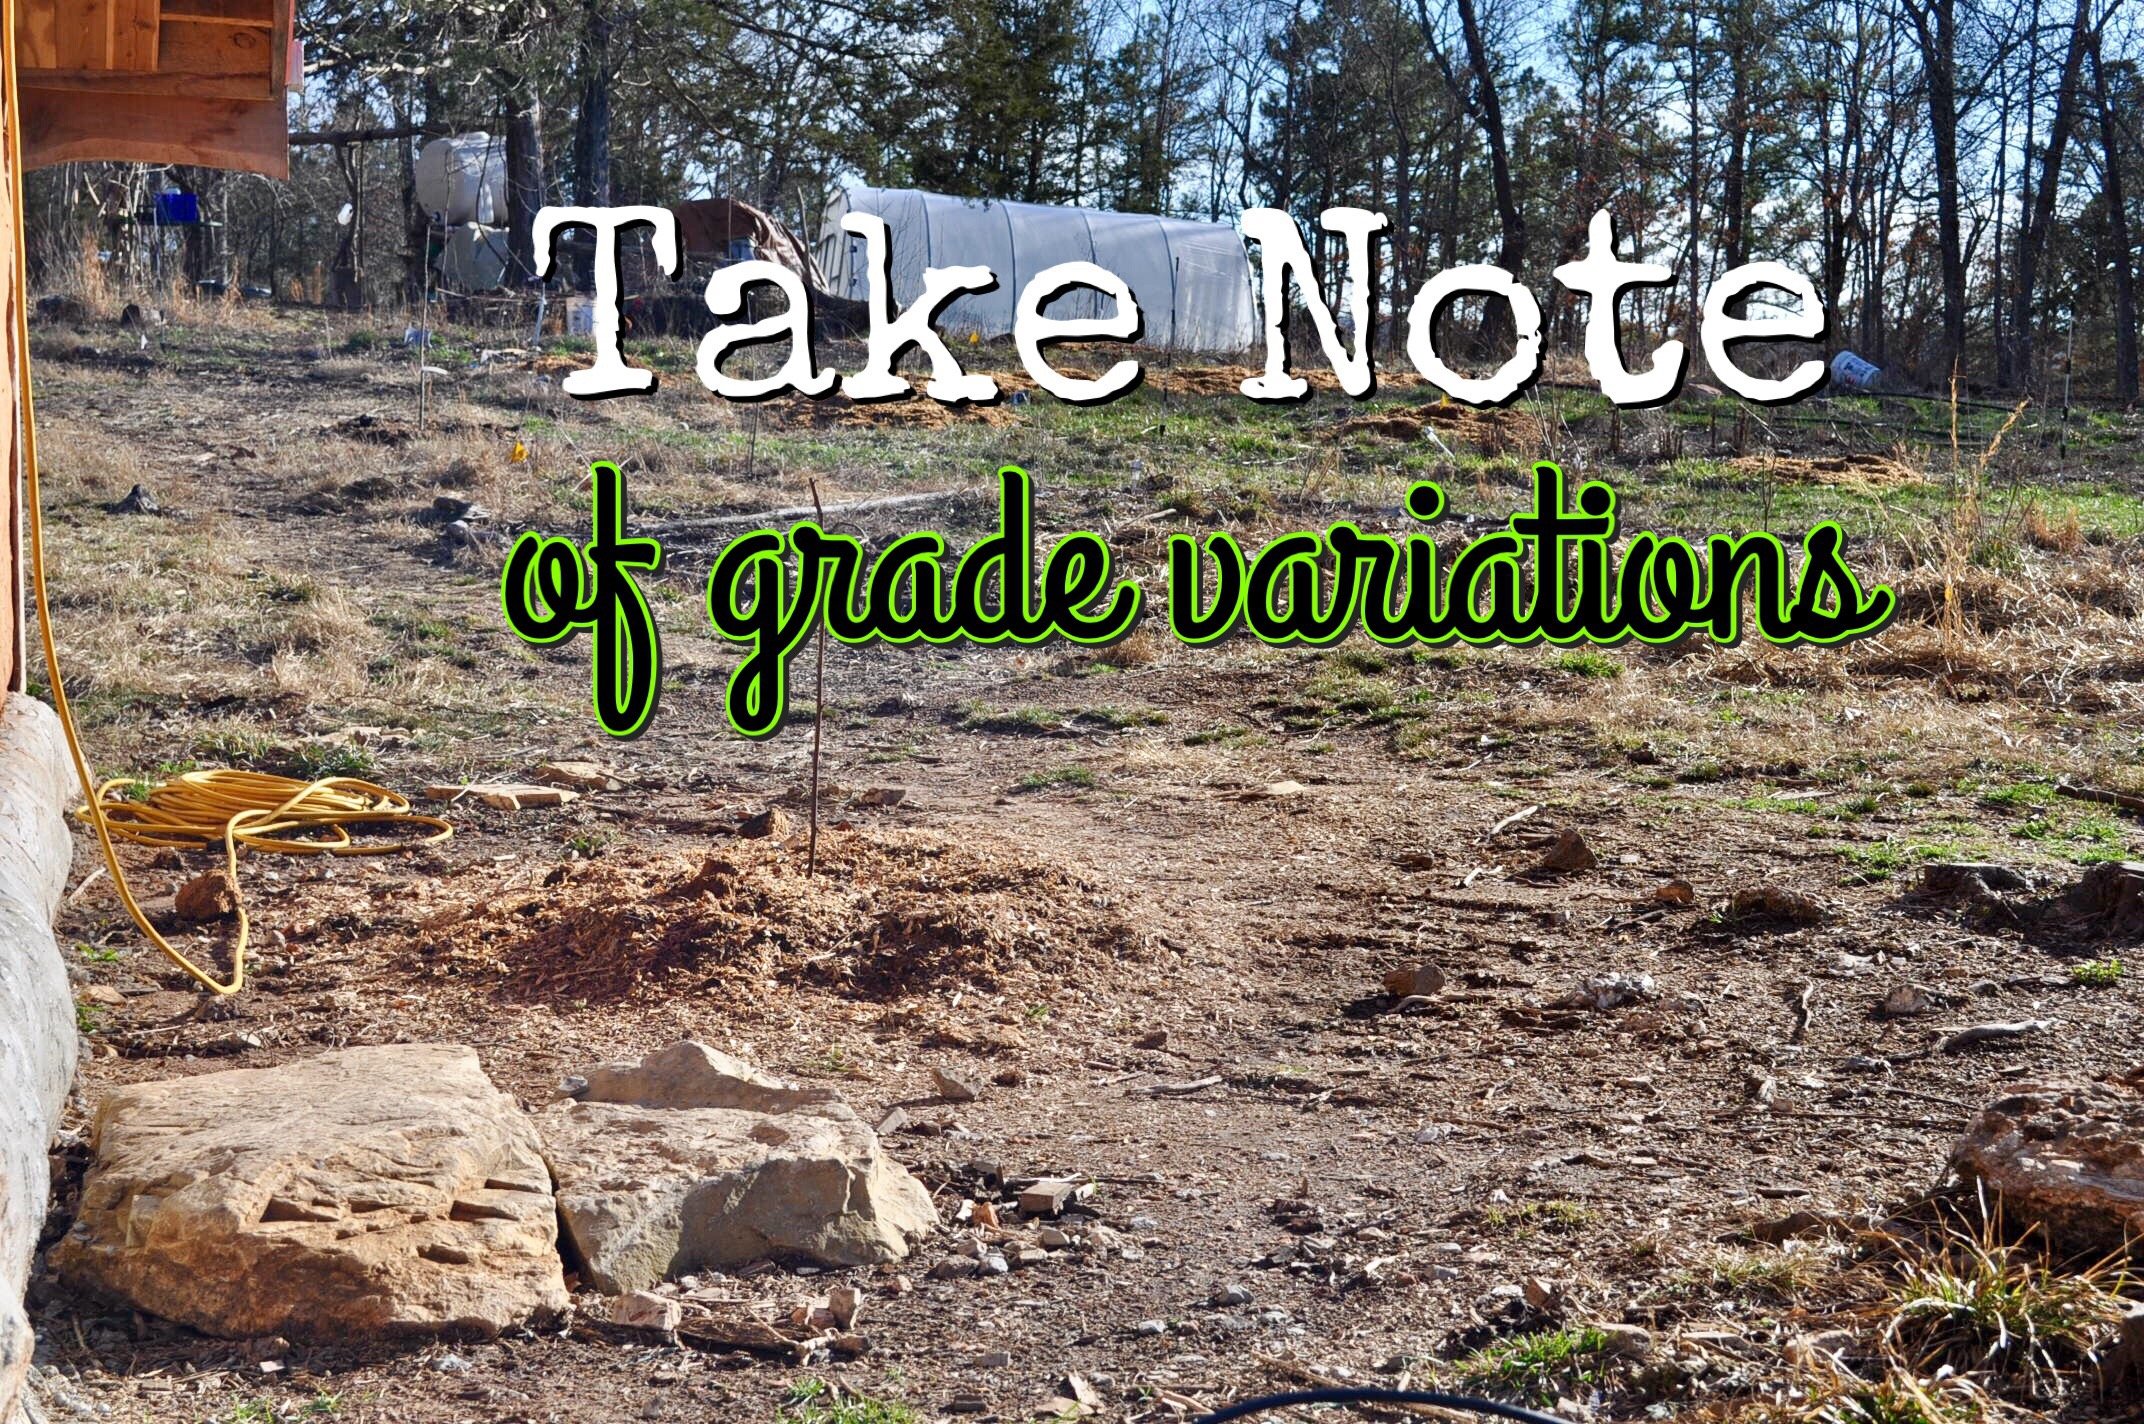
Take Note of Grade Variation
One of the first steps (which we've been making note of over a long period of time) is finding the slope of the area you're working with. Sometimes the eye is deceiving, but especially if you've been watching the area for a while, you have an idea of where the low spots are and how the landscape grade variates. In our case, this photo is taken from the point of view of the low spot. We're taking note of the route the water takes as it travels to the low spot. We're making a berm and swale with a specific intention- to channel water away from the building and into a swale.

Water Flows & Puddles
The Red arrows dictate where the water flows and the Blue Flag is where it puddles. Our goal in making this berm and swale is to detour the water from following this path. With some digging and careful observation, we should be able to make better use of this water that already wants to puddle on our land. We want it to stick around -- just not in front of the building. Observation is key here. We didn't notice this over night, but over a period of a year when watching when it rained heavily where the water flowed and where it sat.
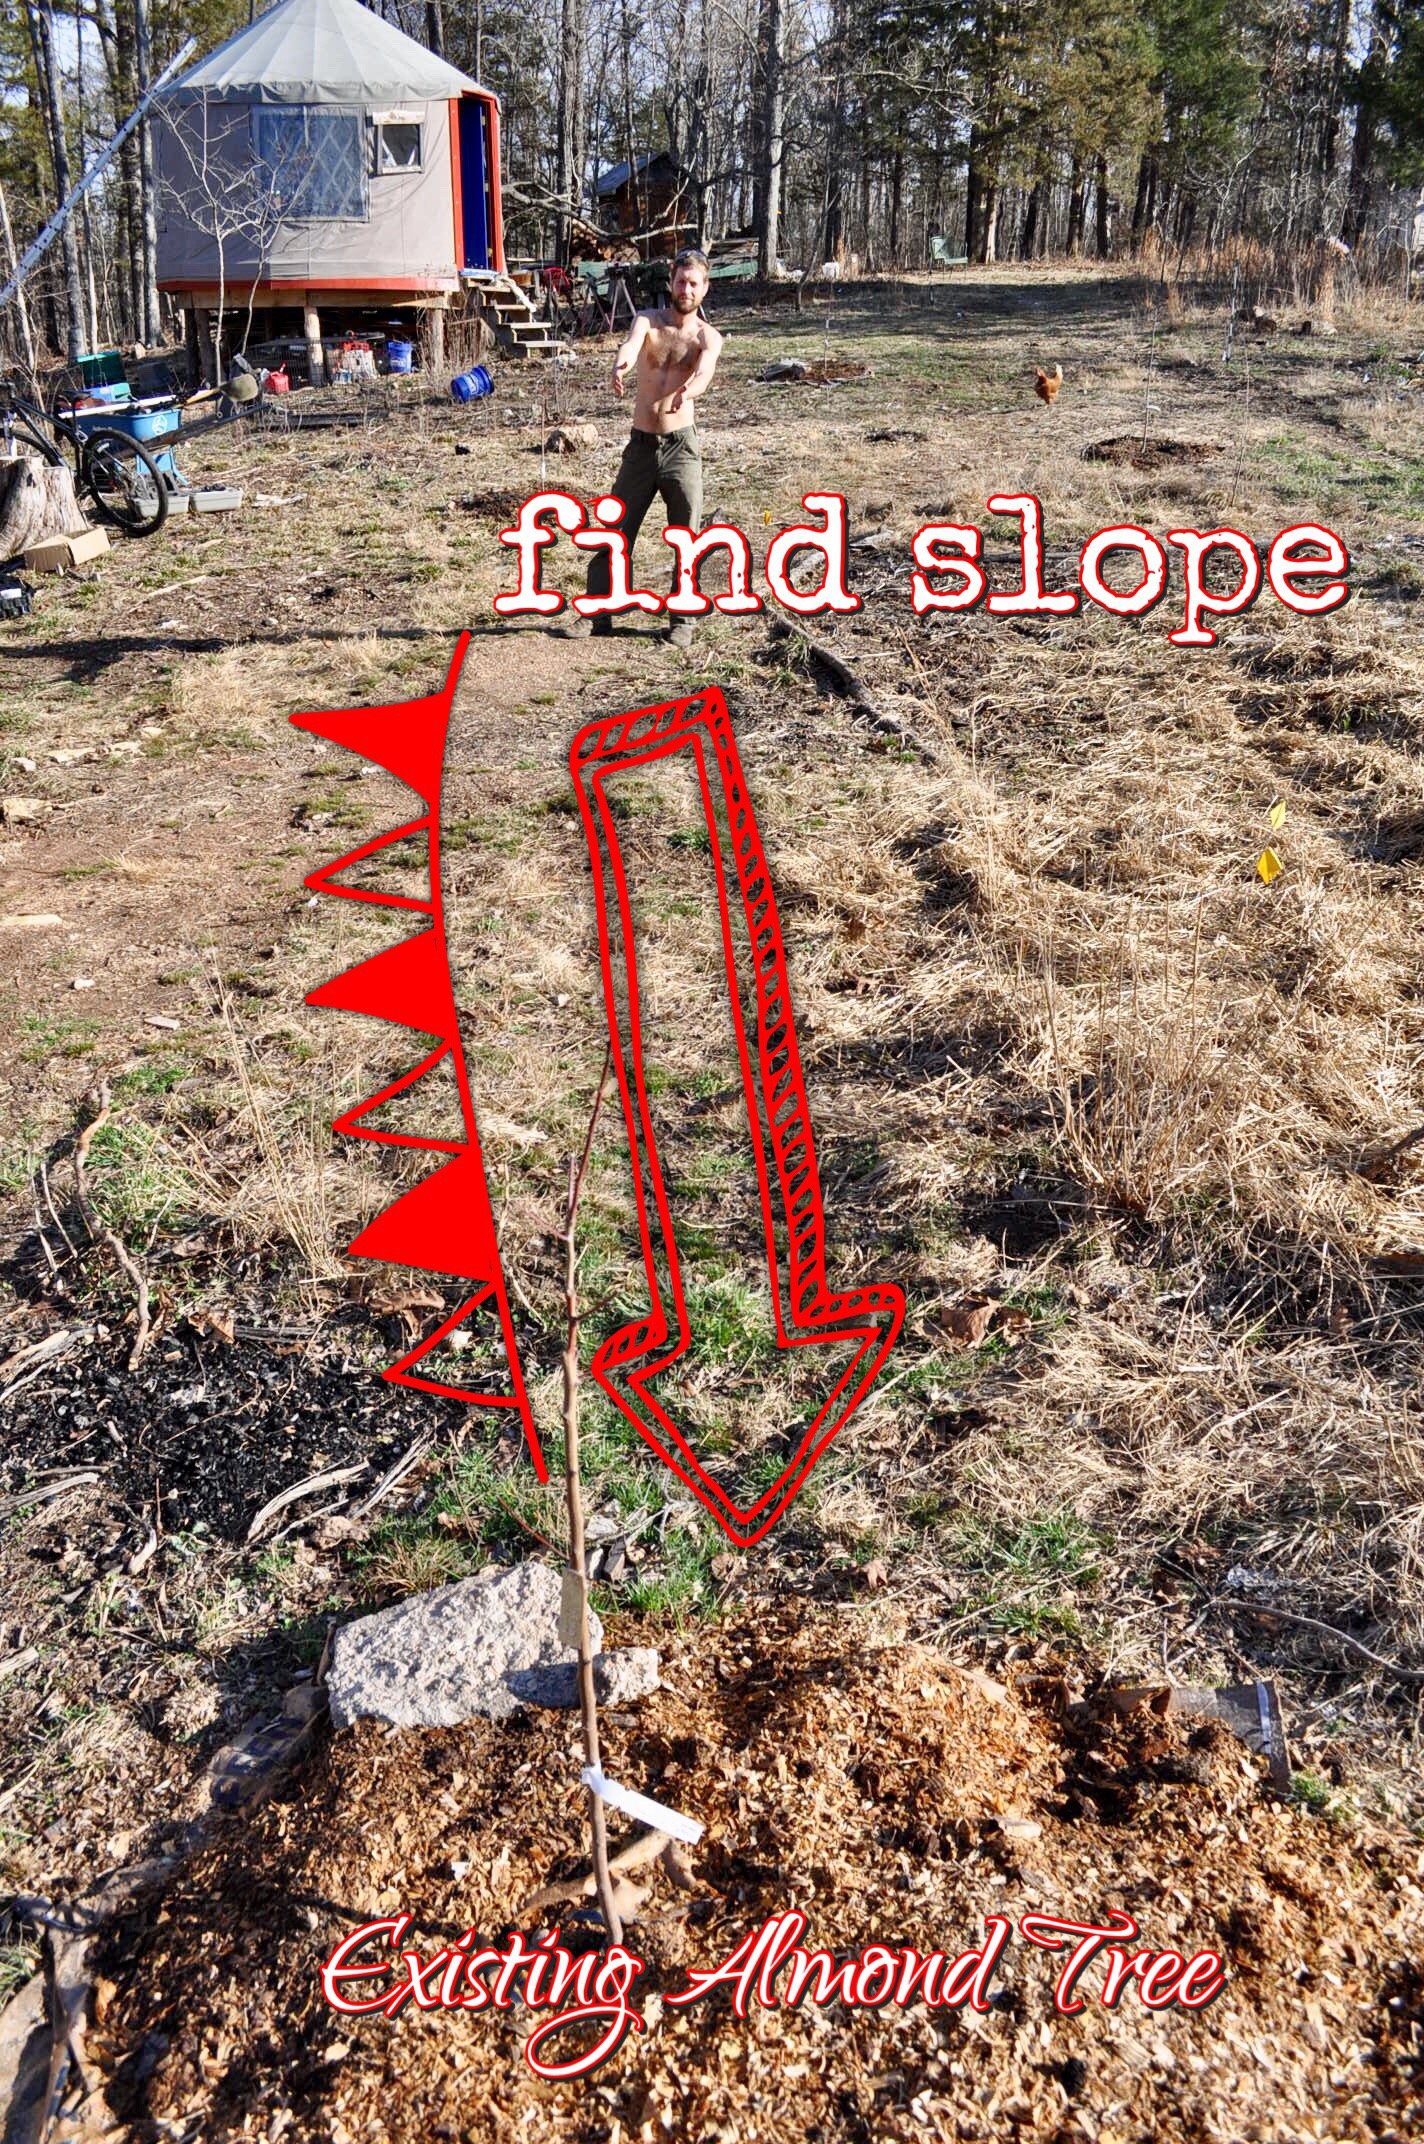
Find Slope/Contour
Pay attention to where the natural curve of the land slopes. In this case, we paid attention to
- The presence of the Solar Shed, a building
- An already existing bed with some perennials in it (they aren't moving!)
- An Almond Tree that obviously wasn't going to move either.
The goal is to follow the contour or natural slope of the land, while also taking into account existing aspects of the landscape. We decided to follow the path down and then follow a natural curve over to the Almond tree, encasing the backside of it in part of the berm so it could benefit from the watch sequestering as well.

Define Space by Staking Outer Boundaries
After you've gotten a feel for the slope and boundaries, now it's time to stake. We like to use stakes because we work together and it's easy to put your head down and not realize where you're digging. We decided the stakes would mark roughly the midway point of the berm. Lines help the human while you're hard at work and give a sense of consistency to your line.
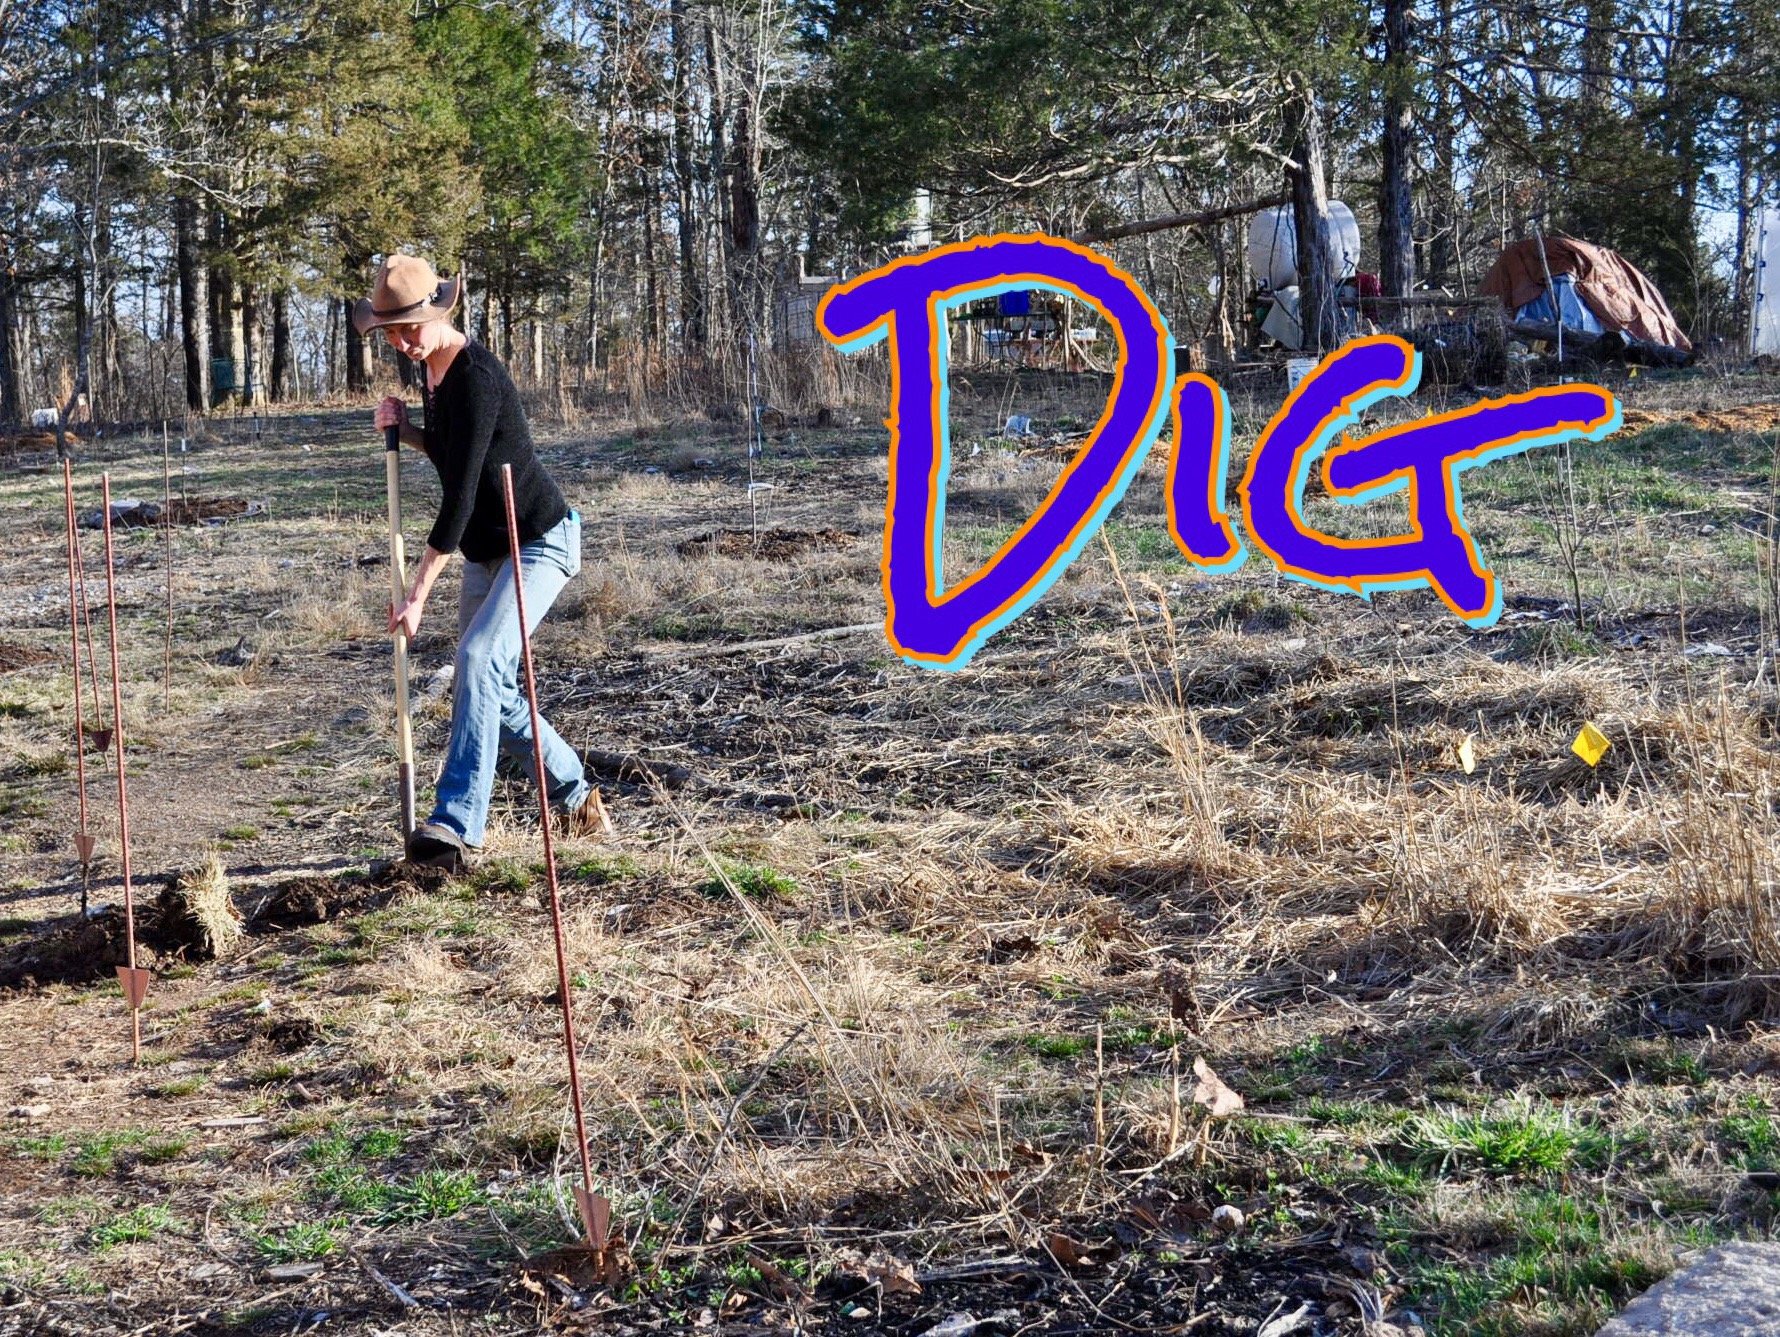
Dig!
Start digging! The soil was moist so this little bit of action felt good. Before we knew it, we had dug up some high spots in what will become the swale and transferred them to the berm. We're basically making a low point, the swale, and piling it onto the boundary, the berm, which will stop the flow of water. As we all know, water seeks the lowest point and, unless there is excessive force, cannot overcome boundaries very well.

Make Sure You're Following Your Line
Step back and take note of where you're digging and how the line looks to the eye. This is of course a fun and also practical project, so it's important to take note of your future vision of what the space looks like, what plants will fill in the berm and swale and how it fits into the landscape. While you're in the beginning stages of digging and moving soil is the time to amend or shift the shape so make sure you're happy with the curve.

Stand Back & Check The Flow
Earlier we had agreed upon the natural flow of the berm's contour. We stepped back and shaped the berm a bit (this will happen a lot more in Part 2) and assessed the flow so far. We were really happy with the look of it so far. We also made sure all of the swale was lower than the berm. We'll get more into this in part 2, this is generally just the initial dig and shaping of the new landscape feature.
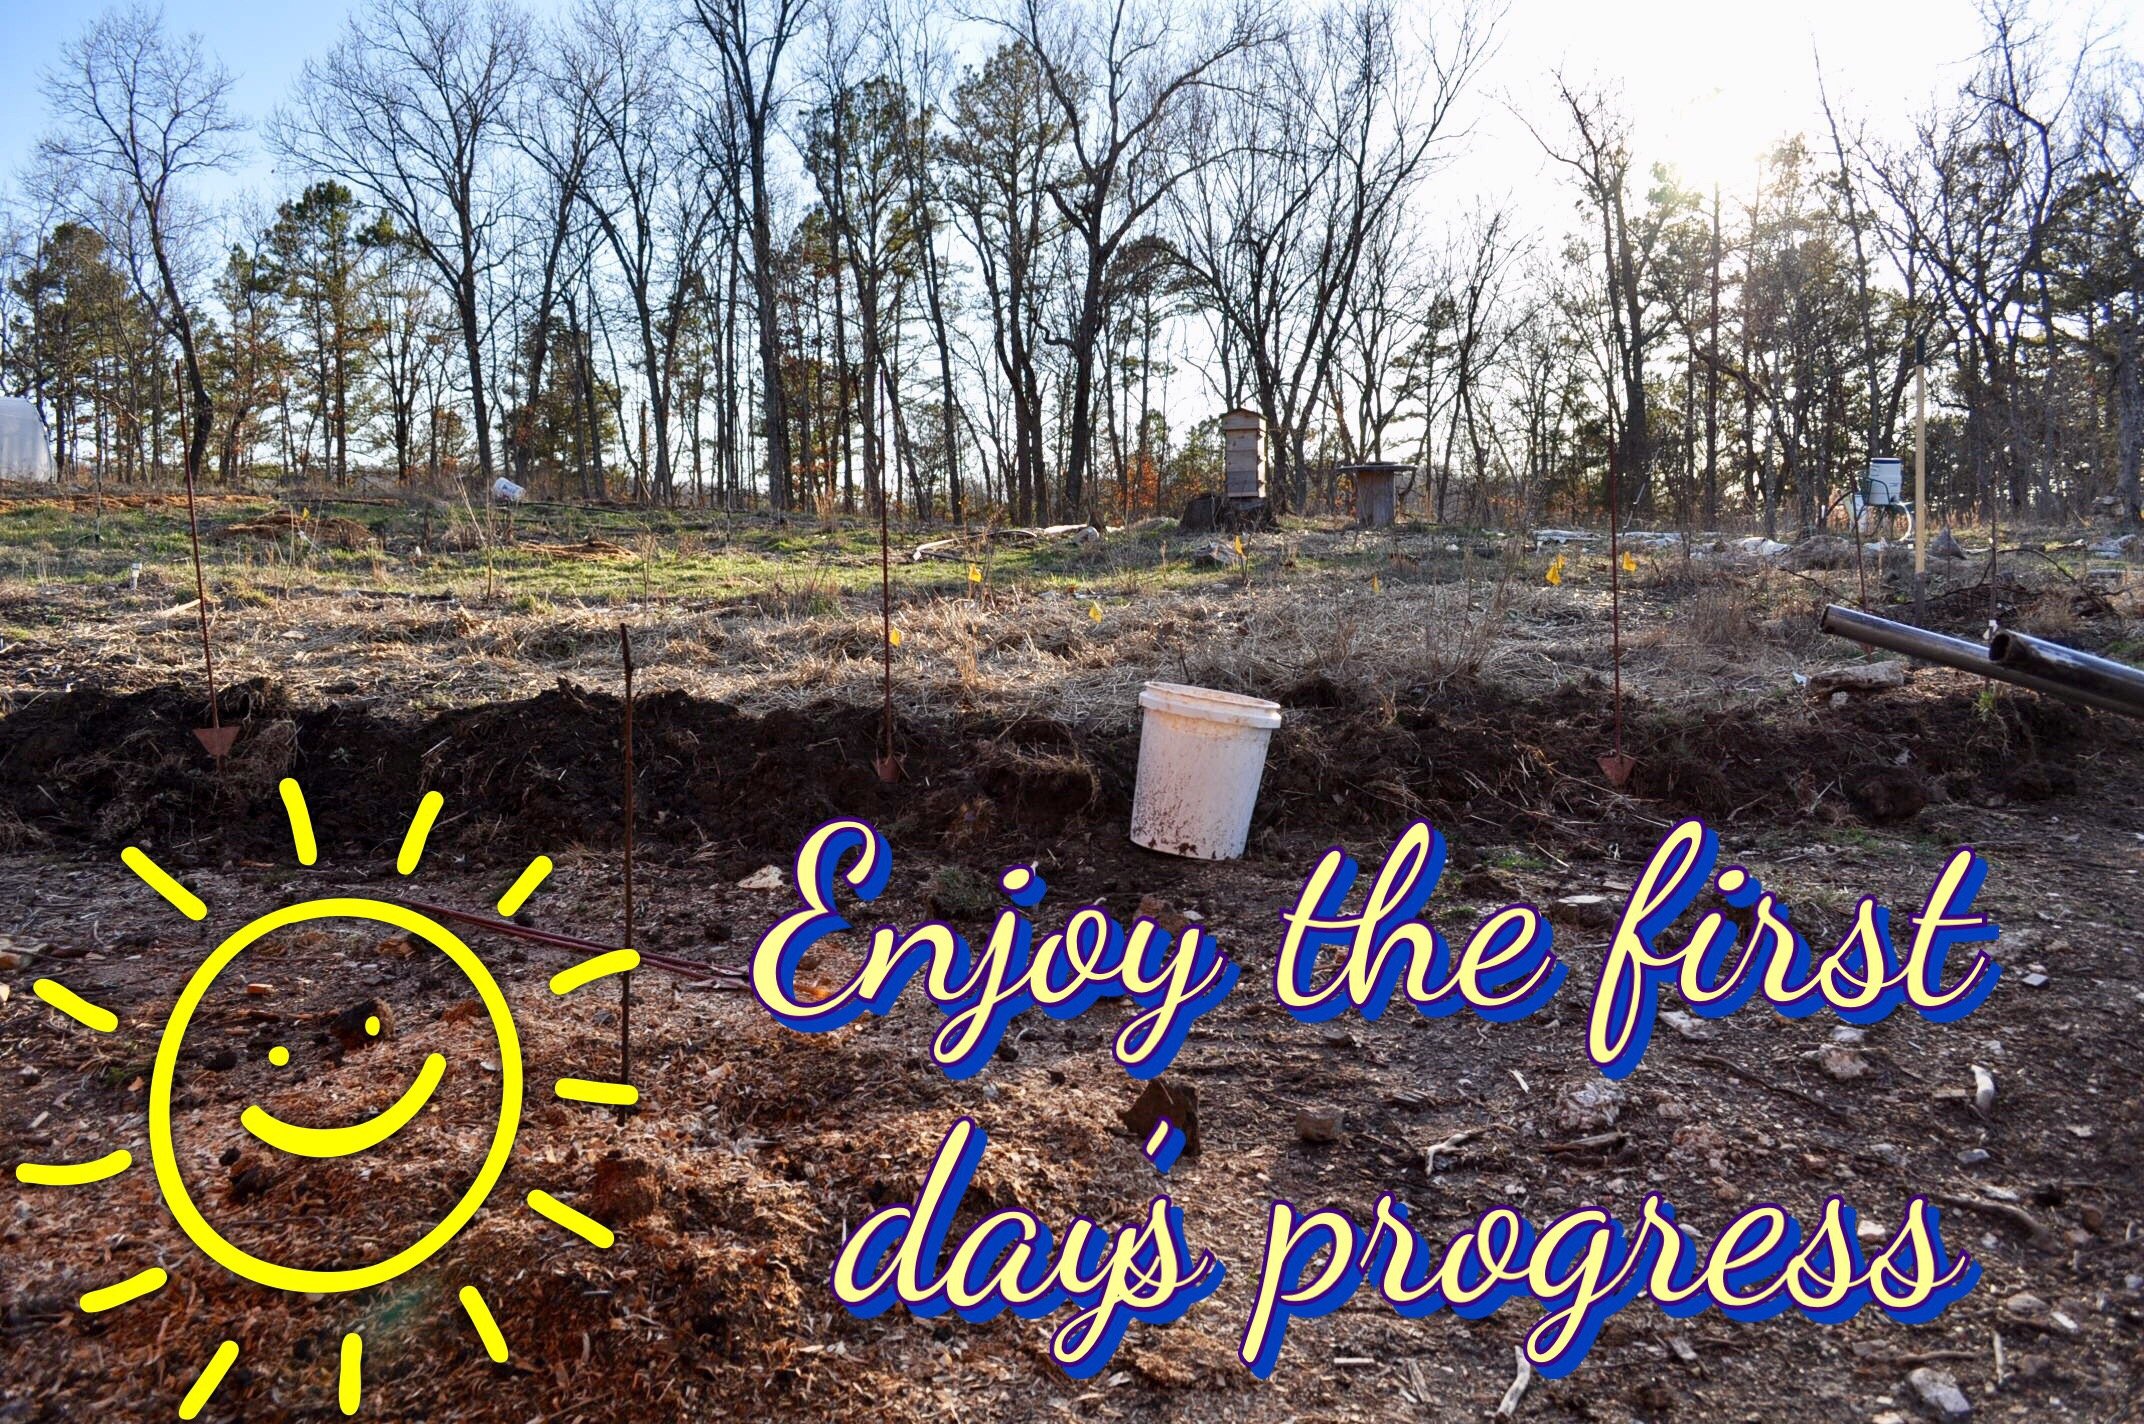
Enjoy the First Day's Progress
Take note of what you did that day. Usually, we like to start a project and observe our initial work over the next few days. How does the shape of the new feature feel, how does it sit on the landscape, did we miss any high points or any ways the water could continue to escape and puddle in errant areas. Congratulate yourself on a job well done on the first day! Making functional landscape features is a rewarding and fun part of the homestead.
Join us for Part 2 as we further sculpt the berm and swale, find level, add organic matter and talk more about our plans for the space.

I am SO GLAD you are doing a series on this! I am struggling quite a bit to figure this out on our land. Last spring I had my first lesson. We planted hundreds of garlic in the ground, on a sloped area thinking drainage would not be an issue. We had non stop rain in the spring, and heavy clay soil. We were out there in downpours digging trenches and diverting water. Then summer arrives and we end up with a drought.
I really want to figure this out! It's on the top 10 priorities for this year! My issue is that a lot of the permaculture books are apparently too advanced for me. I'm pretty good at teaching myself stuff but this has not been clicking together for me. This post was so easy to follow. I appreciate it. Thank you!! :)
YIkes, sounds like a hassle with the garlic. I've been there in the rain hustling to get something done. For sure not my fav thing to do.
So glad you appreciated it. The simplest way to thinking of water is to slow the flow so it can infiltrate the ground water. No bare soil, mulch, swales and planting on contour all can be usefu to manage water.
If you're finding most PC texts too advanced, I'd recommend Gaia's Garden by Toby Hemmingway, a great intro to PC concepts.
Good for you! Less watering is always nice. You're able to sit back and let the rain do your job for you. And if it also means that you're not having your solar shed flooded, that's good too! Looks like a lot of work, but it should pay dividends.
Most good things do take work to set up. But like you say the dividends are worth it! We're all about thinking of of future selves. A little hard work now saves us a lot later.
<3<3<3 I am so excited to see this whole project unfold!! With water in it! Thank you for sharing! It will give me some hope and excitement to try and work on my own! <3
Nice, happy to hear of your excitement. It's really amazing what some thought, a little muscle and a shovel can accomplish. GO for it!
Sooooo many rocks! Lol
I hear that so fully! In fact much of our digging is actually better done with a mattock and lots of 5 gallon buckets to haul the rocks off with. This spot was a nice treat.
Thanks for sharing this article.You are doing an amazing job
Thanks. It's simple and important work that we feel can benefit others.
Congratulations @mountainjewel! You have completed some achievement on Steemit and have been rewarded with new badge(s) :
Click on any badge to view your own Board of Honor on SteemitBoard.
To support your work, I also upvoted your post!
For more information about SteemitBoard, click here
If you no longer want to receive notifications, reply to this comment with the word
STOPSo great you guys, everyday we are getting closer to our dream of building the raw property and you're helping out a lot for our inspiration.
Thankd for taking the time to do this post. Believe it or not, I understand swells and berms better now. I like that you're doing a lot of your work by jand, that takes a lot of dedication!
I try yoo read as much as I can untill we get on property June 1st!!!!
Looking forward to part 2
YAY, day by day. I bet you're just itching. oooh, June 1st will be here before we know it. Really looking forward to seeing what beauty is unveiled when you get yours hands on it.
Glad you've grasped swales and berms a little better now. They can obviously be huge, but small is beautiful and functional too. By hand is really where it's at for us. We've cleared about an acre on a hill by hand (with a little help form a chainsaw) and really appreciate the empowerment involved in DIY handiwork. PLUS there are so many details that I pick up on because we choose to work with our bodies primarily and not machines. Species I've noted, soil strata, insects etc.. Slow and steady, steady and slow.
Thank you so much, I think we will have lots of beautiful unveiling moments!!!
So far as weekend warriors we haven't used any machinery yet except for a chainsaw and a wwed wacker, I feel what you're saying as far as empowerment.
....and soon I'll be saying remember a couple years ago when we still lived in the city!
haha right on! it is soooo like that!! blessings <3
Time is such a funny thing...
This is a great subject to write about. So many people find it really hard to understand water flow or be able to look at it and tell where it's going to go. I had a crash course last spring when building our house and having to do all the grade work in the yard. I learned that your eyes can often deceive you. But, I see you had what looks like an electronic level finder doodad. My contractor had one, but I never figured out how to use it, hence the mistake eyeballing it.
haha building buildings we have learned just how deceptive the eye is! my dad used to be a contractor so he gave us this when we retired. super helpful! also truly helpful when building foundations! it's definitely not too difficult, though people often think it is ;)