Preserving Cucumbers as Fresh Pack Pickles - Sweet and Dill Varieties
The first batch of garden preserving includes fresh packed sweet and dill pickles. With the overflow of cucumbers, I will soon be attempting fermented, and alternate ingredient pickle batches.
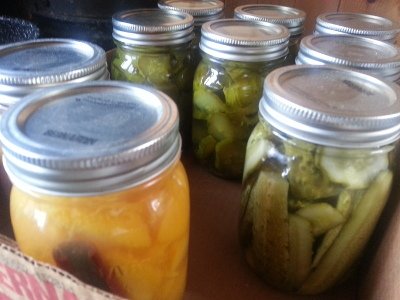
Cucumbers to be preserved as Pickles
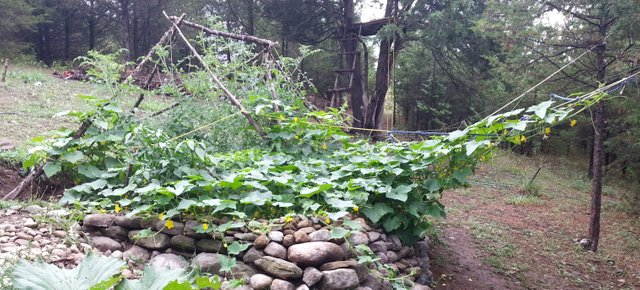
The cabin terrace garden has been relentlessly expanding - despite the fall weather approaching. The bees are thoroughly enjoying this oasis of constant flower blooms, there are always more than a few in the garden with me. The large cucumber leaves provide excellent cover for the flowers and the bees from the occasional sprinkling of rain. Many of the cucumber vines I have coaxed to climb the rope netting - this makes for a simple harvest. I still find the odd hidden cucumber that has grown too large for pickling - fresh cucumber has become the staple addition to summer lunch - so refreshing on a hot day. Previous post about cucumbers and the garden - Cucumber: Garden Update, Growing Tips, Uses + First Harvest.
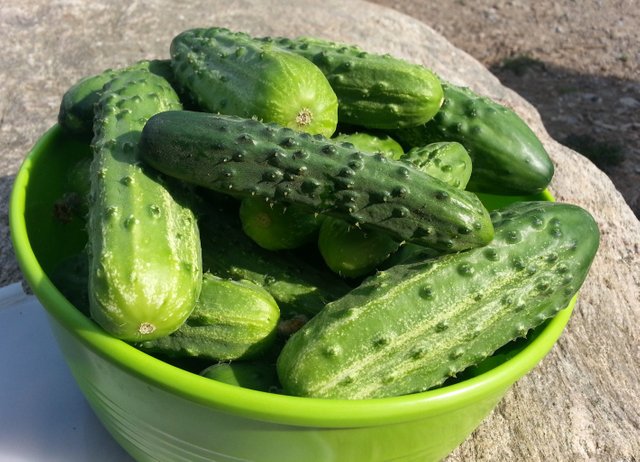
Below is the most recent cucumber harvest since making these pickles. The Sumter Pickling cucumbers have started to fruit. The cucumber on top of the harvest is a Sumter pickling cucumber variety - the rest are early picked Marketmore cucumbers. The Sumter pickling cucumber seems to grow slimmer, and the skin thickens and darkens quicker. A thicker cucumber skin would be desirable for a crunchier pickle - especially when making fermented pickles. We won't be fermenting in this post though, this pickle packing post is using the Fresh Pack Method for preserving.
Fresh Pack Pickling Ingredients
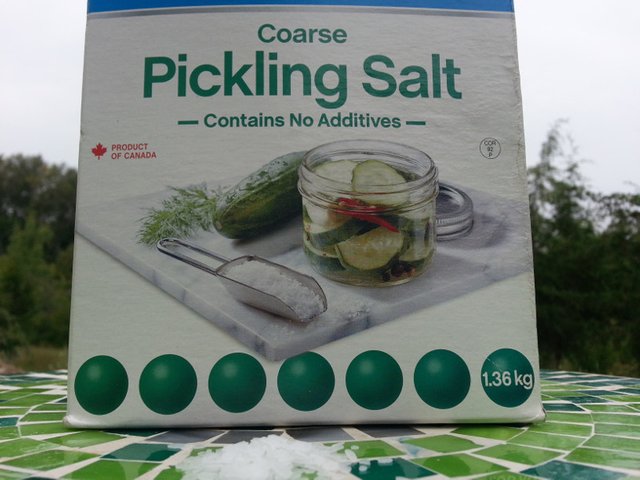
Pickling Salt and Soft Water
Pickling salt (and Kosher salt) is pure granulated salt with no additives. Non pickling salt often contains anti-caking additives that can make the pickling juice cloudy. Other additives like iodine can make the pickles turn a darker color. It is important to use soft water that does not contain minerals. Hard water that contains minerals can also turn the pickling liquid cloudy.
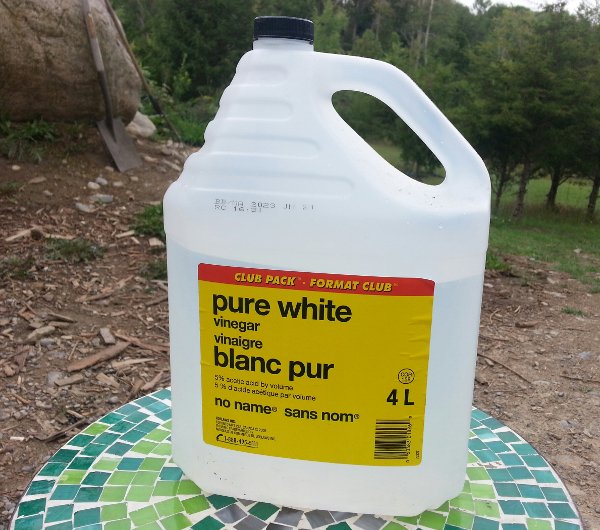
Vinegar
The acidity of vinegar is used to help preserve food - and adds tartness to the flavor. Low acid foods are more difficult to preserve and often require a pressure cooker for preserving. Vinegar, Lemon Juice, Citric Acid, and other acidic ingredients can be added to some food so it can be preserved with a standard boiling water stock pot - not a pressure cooker (unless your altitude is more than 1,000 feet above sea level). White vinegar will be used for this season, but next season we will be using apple cider vinegar. Both vinegar varieties are acidic enough for preserving, but when digested by the body, apple cider vinegar changes to alkaline - white vinegar remains acidic. The apple cider vinegar will darken most preserves, and the mellow fruity taste will alter the flavor of the preserved food - I am curious to taste the difference next year.
|
|
Sweetener
A sweetener is added to temper the tartness of the vinegar. I'm using white sugar as a sweetener for this batch of pickles. Brown sugar or honey can be used as a substitute. They will have a slightly different flavor. Many people do not use sugar with dill pickles - it's comes down to the desired blend of sweet and sour flavor for the pickles. With the next batch of sweet pickles I'll be testing the stevia herb as a sweetener.
Mason Jar Food Preserving Tools
In the picture below you can see some of the basic tools for the mason jar preserving process. Food is preserved in the mason jars, sealed with the Lid. The lid is held onto the jar with the Threaded Band during the pasteurization step where the jars are boiled at 100C (212F) for 25 minutes - to kill any contaminants inside the jar or food that would grow and spoil the food while stored on the shelf. Jars, lids, and threaded bands can be reused after gently washing and sanitizing - as long as they are not damaged and the sealing ring on the lid is in good condition.
At the bottom and far left of the picture above you can see the mason jar Funnel that helps pack the food and liquid into the jar. Beside the funnel is a non-metallic Scraper tool that is used to help remove air bubbles from the jar, and to scrape the top rim of the jar if food or liquid splashed onto it - we did not find a need for this tool for this pickling process. Next to the scraper tool is the jar Gripper tool - we used this to grip hot filled jars while the threaded band was screwed and tightened onto the jar. To the right of the gripper tool is the jar Tongs tool - used to lift hot jars out of boiled water.
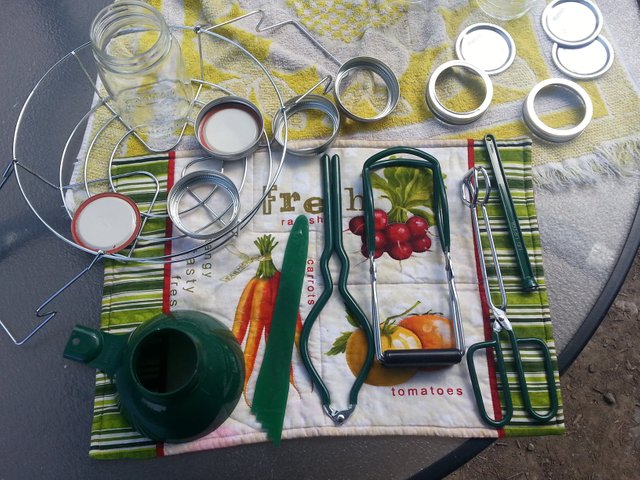
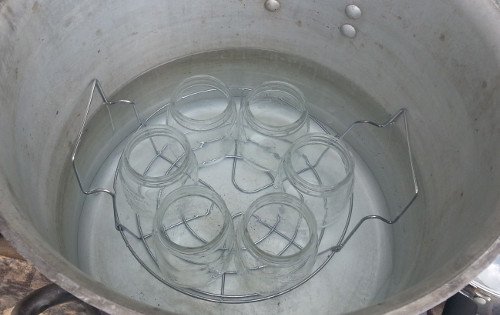
On the top-left of the picture above you can see the basket that mason jars can be loaded into then placed into the stockpot of boiling water for pasteurization or sterilization. Then whole basket with the jars can then be pulled out of the stock pot at once when the jars are finished boiling. We didn't used the basket - other than to keep the jars off the bottom of the stock pot. We ended up pulling the pasteurized jars out of the stock pot - one at a time - with the jar tongs. Next to the jar tongs are the more standard looking tongs - these were useful for taking and emptying the sterilized jars out of the boiling water. Next to the regular tongs you can see a non-metallic stick with a magnet on the end of it - used to assist with placing the lid on the jar - we did not use this tool.
Preserving Sweet and Dill Pickles
Cucumber Overnight Brine Soak
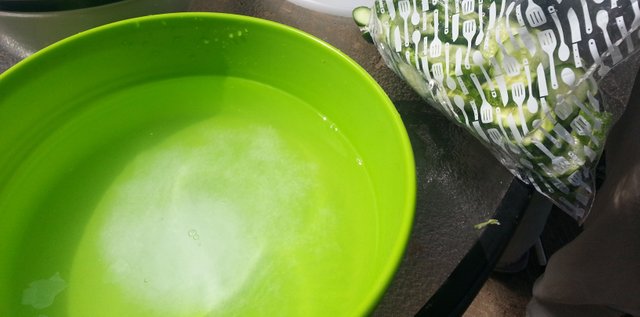
In preparation for the Fresh Packing method of pickle making, the cucumbers are cut into slices or spears and submerged and refrigerated for 12 hours in brine (5 cups water, 1/2 cup pickling salt). The 12 hour soak in brine draws water out of the cucumbers to help them stay crunchy. For crisp and crunchy pickles, the flower side of the cucumber - opposite the stem side - 1/16th inch of the tips of the cucumbers should be removed. They contain an enzyme that can make the preserved pickles soft.
Brine Recipe
5 cups water
1/2 cup pickling salt
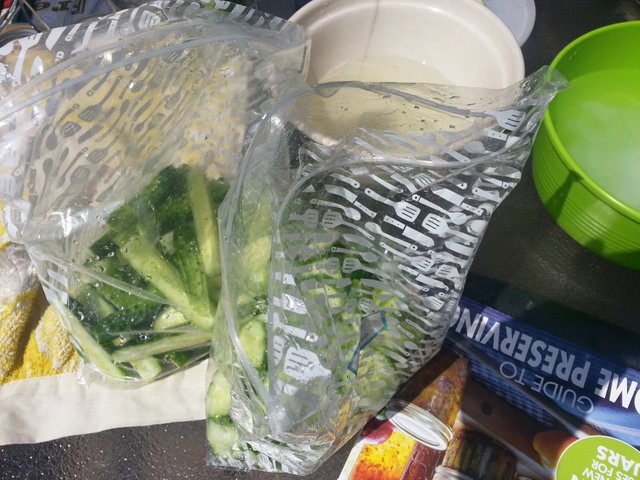
In the picture below you can see the two bags with cut cucumber slices and spears. These bags are filled with brine to just above the cucumbers, then placed in the fridge for 12 hours.
Jar and lid sterilization
In the picture below you can see the jars that have been washed, rinsed, then submerged and boiled in the stock pot to sterilize them. You can also see how the jars are emptied and removed with the regular tongs.
Careful: Very Hot
|
|
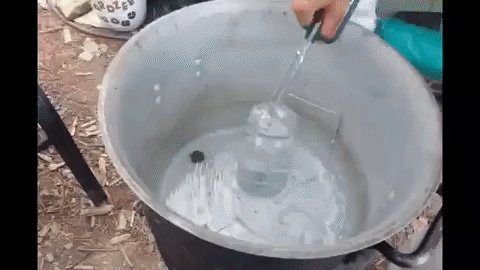
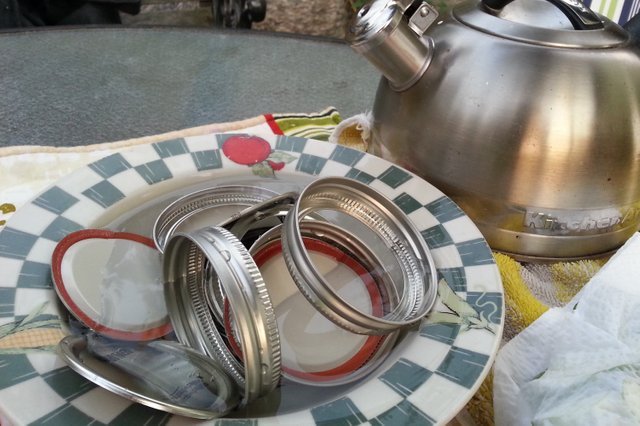
You can see the lids and threaded bands being sterilized in the picture below. Boiling water is not required for sterilizing the threaded bands and lids - boiling water sterilization can damage the seal on the lid - simmering water (82C / 180F). We placed the lids and threaded bands into the bowl, then filled the bowl with simmering water from the boiled kettle.
Fresh Pack Pickling
After the cucumbers have soaked in the brine for 12 hours, and after the mason jars and lids have been sterilized, the fresh pack pickled cucumber recipes are prepared for packing and preserving with pasteurization.
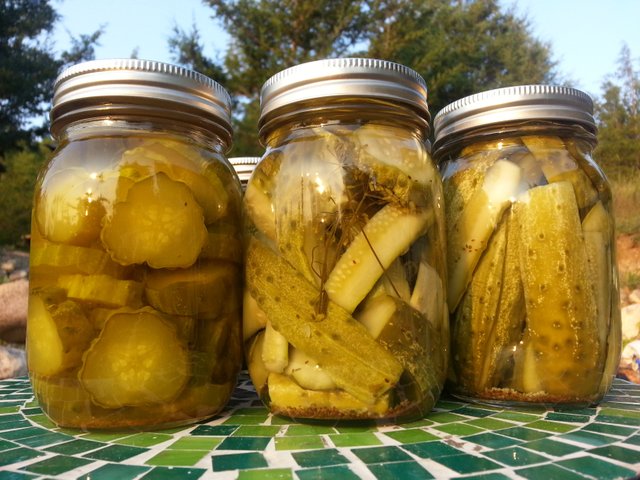
Simple Sweet Pickles
Sweet and tangy taste - sweet from the sweetener, tangy from the vinegar. A classic with sandwiches and veggie, cheese, and cracker platters, sweet pickles are also known as 'Bread and Butter' pickles. This name comes from the economic depression period - when sweet pickles were often one of the few food staples that people would have available. Sandwiches made with bread, butter, and sweet pickles were common. For these sweet and dill pickle recipes I wanted to keep it simple so it would be a standard for me to compare with the flavor of future pickle batches that will have alternate ingredients.

|
|
Sweet Pickling Liquid
- 5 cups Vinegar
- 1-1/4 cup Sugar
- 1/3 cup Pickling Salt
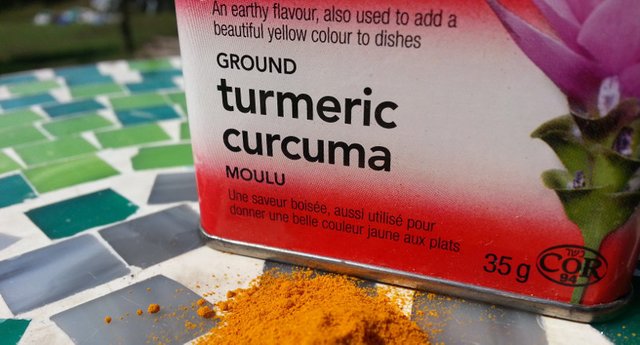
- 1 teaspoon Ground Turmeric
- 2 tablespoons Celery Seed
Sliced with flower tips removed, 12 hour brine soak, drained
- 6-1/2 lbs (3 kg) Cucumber
Sweet Pickle Packing
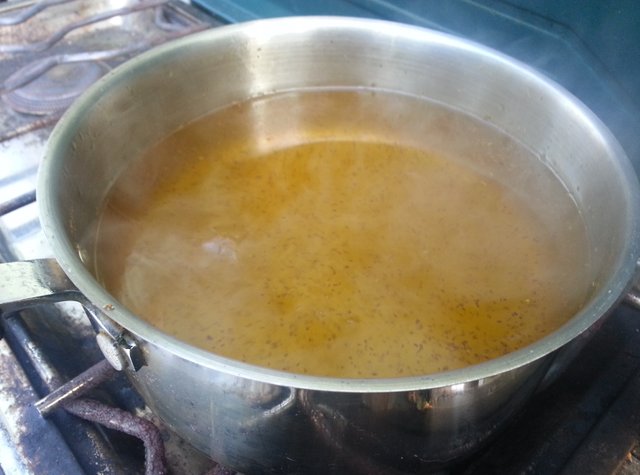
- The sweet pickling liquid ingredients are added to a sauce pan and brought to gentle boil for 15 minutes
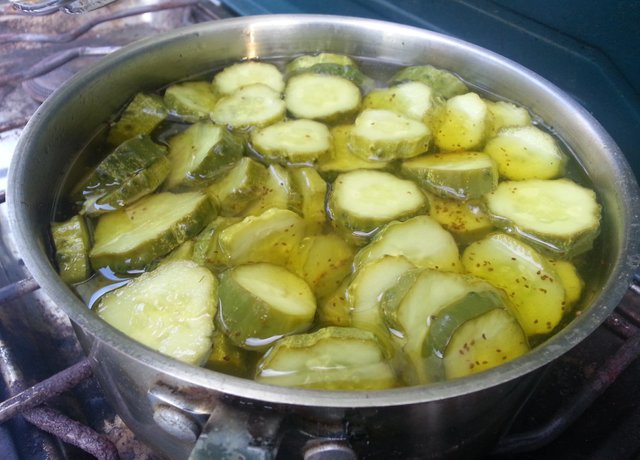
- Drained cucumbers are added to the pickling liquid and brought back to a boil
- The burner is turned off
Careful: Very Hot
|
|
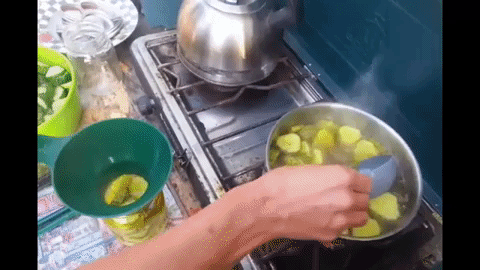
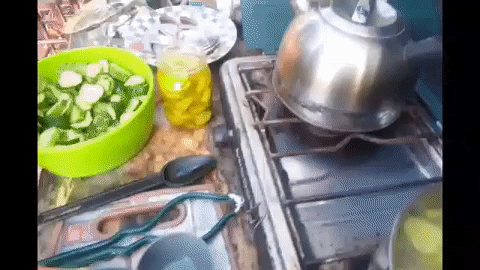
- With the help of the jar funnel, a ladle or measuring cup us used to fill the sterilized jars with the pickles and liquid
- Pickles should be packed to 3/4 inch (2cm) from the top of the jar rim
- The pickling liquid should be 1/2 inch (1cm) from the top of the jar rim
|
|
- Wipe any debris from the jar rim
- Place the jar lid onto the jar rim
- The jar will be hot, using the jar gripper tool or dry cloth to steady the jar, tighten the threaded band onto the jar
- Set jar aside until enough are ready for the jar pasteurization step
Simple Dill Pickles
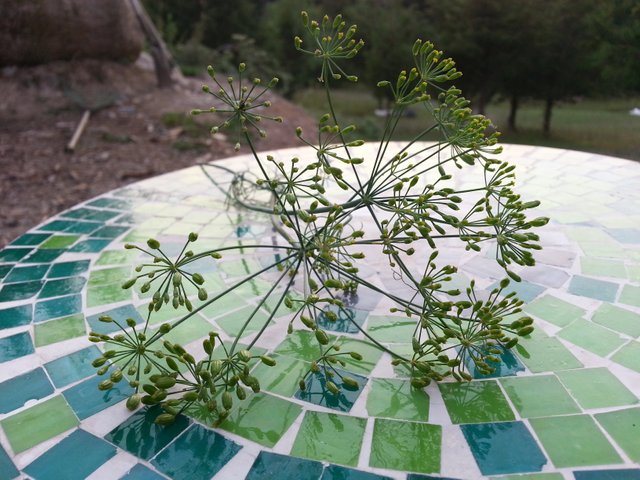
Along with sweet pickles, Dill pickles are common with sandwiches, snacks, and food platters. Dill pickles get their signature flavor from the flowers and seeds of the dill herb. A sprig of dill flowers or seeds is prepacked along with the cucumbers into each sterilized jar.
Dill Pickling Liquid
- 6 cups Water
- 6 cups Vinegar
- 1/4 cup Sugar
- 3/4 cup Pickling Salt
Evenly Packed into Sterilized Jars
- 8 lbs (3.6 kg) Cucumber sliced or speared with flower tips removed, 12 hour brine soaked, drained
- 2 tablespoons Celery Seed
- Dill flowers and or seed sprigs
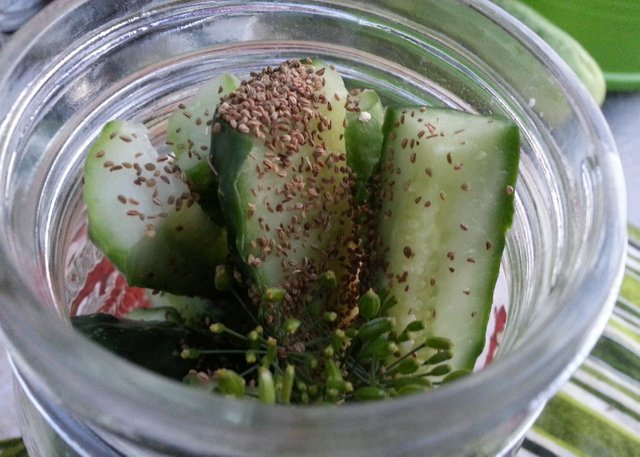
- Cucumber slices and spears that were 12 hour brine soaked and drained, dill sprigs, and celery seed is evenly packed into the sterilized jars to 3/4 inch (2cm) from the top of the jar rim
- The dill pickling liquid ingredients are added to a sauce pan and brought to gentle boil for 15 minutes
- The burner is turned off
Careful: Very Hot

|
|
- With the help of the jar funnel, a ladle or measuring cup us used to fill the cucumber packed sterilized jars with the dill pickling liquid to 1/2 inch (1cm) from the top of the jar rim
- Wipe any debris from the jar rim
- Place the jar lid onto the jar rim
- The jar will be hot, using the jar gripper tool or dry cloth to steady the jar, tighten the threaded band onto the jar
- Set jar aside until enough are ready for the jar pasteurization step
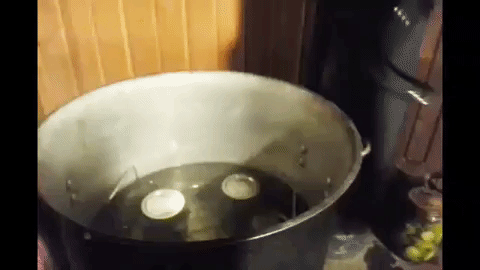
Pasteurizing the Contents of the Jars
After the pickles have been packed into the jars, they are placed into the basket in a stockpot with water filled to an inch above the tops of the jar lids. The stockpot water with the jars is brought to a rolling boil - 100C (212F) - 1 Liter jars for 15 minutes, 500 ml jars for 10 minutes . This pasteurizes the contents of the jars - killing all bacteria and spores, molds, and yeasts. Note: For altitudes 1,000 feet above sea level, 116C (240*F) boil must be maintained with a pressure cooker to pasteurize the contents of the jars.
- After the jars have been pasteurized for the proper amount of time and temperature, the burner for the stock pot is turned off
- Jar tongs are used to carefully remove the pasteurized jars from the hot water
Careful: Very Hot
|
|
Seal Check and Storage
After the jars have cooled, they are best stored at a cool 10-21C (50-70F) in a dark room or cabinet. After 24 hours the jar seals are checked - the lids should indent downwards and not pop up when pressed. At this time the threaded bands are removed and wiped along with the jars. The bands can be loosely screwed back onto the jars, or set aside.
Reference: Bernardin Guide to Home Preserving Canning Kit book.
Have a great day!
Great post @jackdub the .gifs and the details step-by-step! Great content! Always enjoy reading your post. It will be interesting to see how the fermented and apple cider vinegar works next time arround
Thanks - I always find things less daunting after seeing them done :) I was planning on making and using my own apple cider, but I might pick up a bottle of it in town tomorrow to give it a try this season - those would be some healthy pickles with apple cider vinegar, and stevia as a sweetener.
Oh my goodness - sweet pickles are my faaaaaaaaaaaaaavorite! I wish you sold jars of these for steem! I would have to get some from you right away!!!
I've lacto-fermented pickles before - and done the fresh pack method too! gotta say I love both - as they both have such distinct flavor!!!! mmmmmm delish!
You did a great job documenting it as well :) I actually posted a kimchi recipe tonight... made it last week and everyday it gets tastier and tastier as it ferments! mmmmmm :)
nice post @jackdub!!! :)
yayyyy very very nice work! i know this took a lot of work to produce this blog ... my hats off to you. how did you make your shor videos? i actually like your method more than the double boiler, pressure cooker method. thank you for sharing the reference and wow what a lot of work. there are many diff ways to do this but overall seems like any method equals a lot of work lol how long is the recommended shelf life? ive seen so many diff thoughts on this. one lady i know cans refular foods like spaghetti n meatballs or meats like pork amd chicken and beef combos. i tried it and got a lil sick. i dunno. guess if shtf i might eat anything but i think id prefer beans, rice and veggies. nuts, berries. of we dont have total blackout ...
Thanks - Yeah this was definitely a longer one - so many important steps to fresh pack pickle preserve safely :) I admit I do have a few posts i've held up while chipping away at this one :) I will conservatively give these pickles 1 year for best taste and 2 years on the shelf without worry - although I doubt they will lose much flavor, maybe texture, I'll know for sure in a year and a half or so - if I havent eaten them all. I would for sure be using a pressure cooker and following directions precisely for canning meat - it can be done safely - jerky I would personally trust more if it came down to it.
The video clips are 4-6 second .GIF animations that I created on http://giphy.com, with short videos that I uploaded there, then copied the link to the post. It lets you adjust where the clip starts and ends on the video.
@jackdub thank you so much for the info, it coincides with other info i gathered! loved your post so much!! deserves $200 USD!!
Love pickle
I am a sweet pickle kind of guy. I have never enjoyed dill pickles. My mom makes sweet pickles and half of my kiddos won't eat another kind than hers.
I had never thought about the need to use soft water. Thanks for pointing that out.
Hi jackdub,
Visit curiesteem.com or join the Curie Discord community to learn more.
I don't can but my relatives do. I remember my Granny canning all day long. She would fill shelves in the cellar with hundreds of jars.
Looks like you will be enjoying this crop for many months to come.
@jackdub Wonderful all your procedure applied to preserve pickled cucumbers. Excellent how the containers are disinfected so that delicious pickled cucumbers can be safely stored and stored. A classic for me is to place it rolled up inside the chaorma. Your animated images are stunning. His entire work was amazing. Have a great day.
Wow very well written post and the steps are really explanatory. I have never eaten a cucumber pickle though in India we do have quite a few varieties of pickles.
One of the reason can be you cannot keep them for long, as we usually keep pickles for like 1-2 years.
Thank you so much @jackdub for the detailed steps to preserve cucumbers as pickels at home. I don't grow cucumbers but sometimes we buy more than we can chew. This works very well. Thank you for the effort you put in to share the steps and photos. Truly appreciated.