Boiler kettle assembly
Received my boiler kettle yesterday, here is the assembly process.
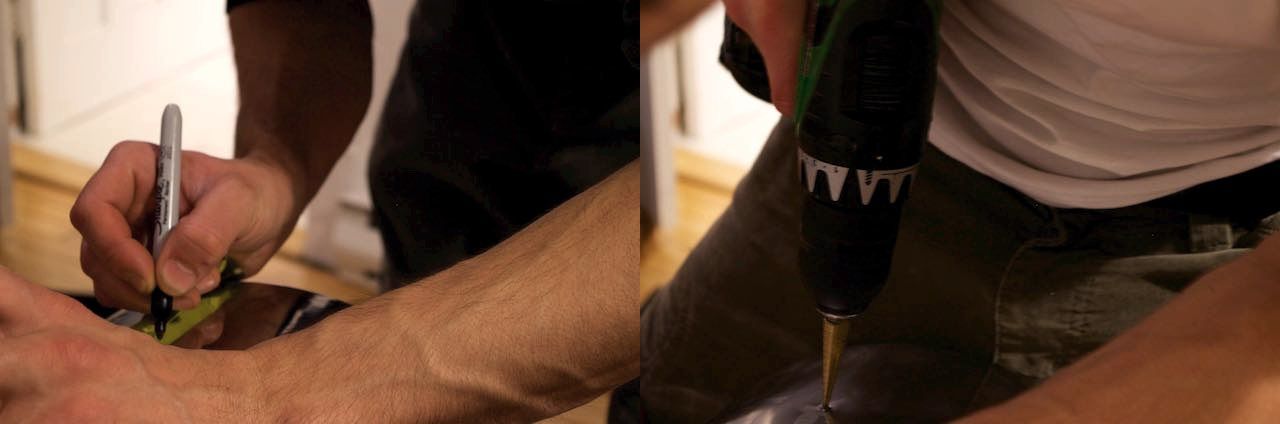
Marking holes at 3' center of the heating element, and 3.5 inches for the whirlpool valuable.
I'm missing a set of metal drill bit, so it took me a while with my titanium step up a bit. but it finally works out.
Punch the holes
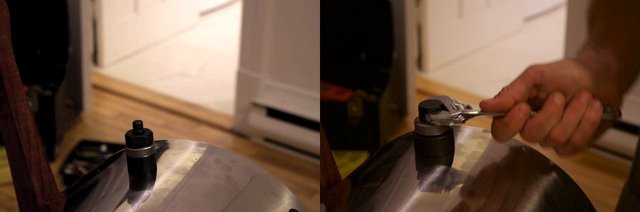
I Used the 1'' Knock out punch tool for the heating element and the 1/2 inch for the whirlpool valve. This kit I bought on Amazon for 65$ is so useful, I saved 30$ by making those holes myself and the result is way better than if I ordered it with the holes done by the shop. And I'm not over with this tool, quite happy so far.
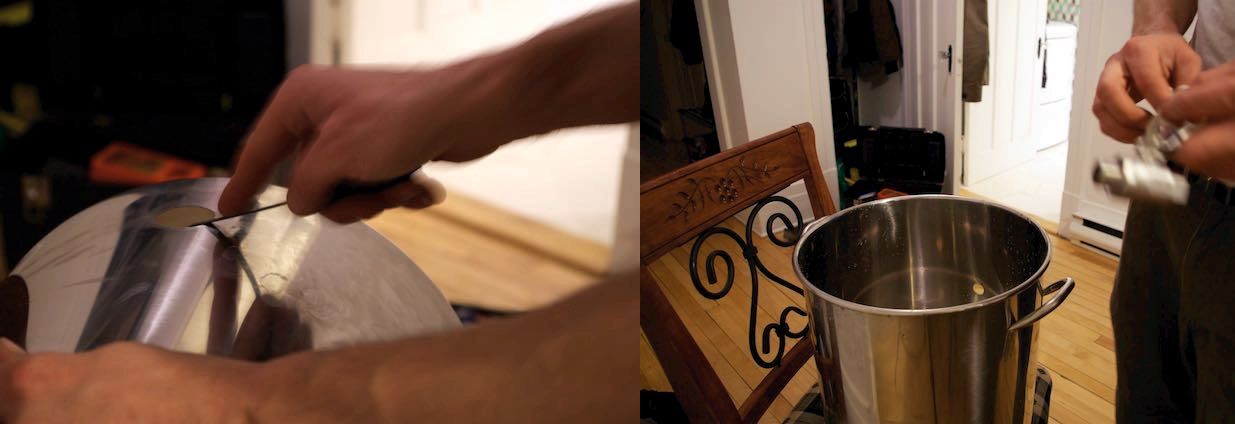
Smooth out the holes with a file, and then proceed for the valve assembling.
No a leak test has been performed so far since I'm missing a few pieces to connect the heating element on this kettle. I did fix the leak on the water tank element junctions using the 2 O-rings I did order, I finally find the o-ring recipe for this connection. I should get the parts by tomorrow.
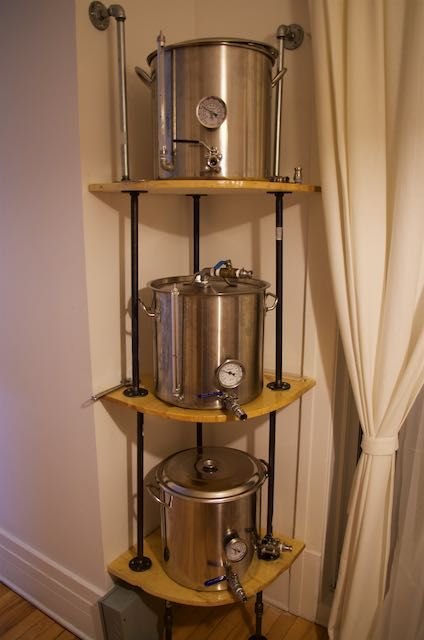
Start to look like something!!!
What's next?
- Heating Element for boiling kettle
- Conceive and build the fan duck
- Conceive and build the power unit
- Get a pump and perform a leak test
- Do a Brew test I guess 😛

[create by @skyleap]

More people need to follow your advice by planning their project and evaluating the cost of saving money at certain steps along the way, e.g. drilling the holes yourself and saving $30.00. Quite a savings for you.
Use to be project manager in the past... Draw / Plan / execute / troubleshoot are the 4 steps of that job 😉