CLASS 6 GRAPHIC DESIGN APPLICATION ASSIGNMENT ON BANNER CREATION by @stanleynnah
It's a pleasure to be taking part in the graphic design class organised by @atim1234 in the Steem Skillshare community, and in this post, I will be presenting answer to the assignment for graphic design class 6 that was undertaken by @nygls8.

QUESTION ONE
What site is used to remove backgrounds from images?
ANSWER
Taking off the background of a picture is in most cases very important. This is in order for the picture to align properly with the design that is being carried out by the graphic designer. Thus, if such background is not removed, it may likely cause a disparity between the background of the design being carried out and the background of the images that is imported.
Most applications have been developed for the particular purpose of removing the background of images, and some websites have also been designed for the same purpose.
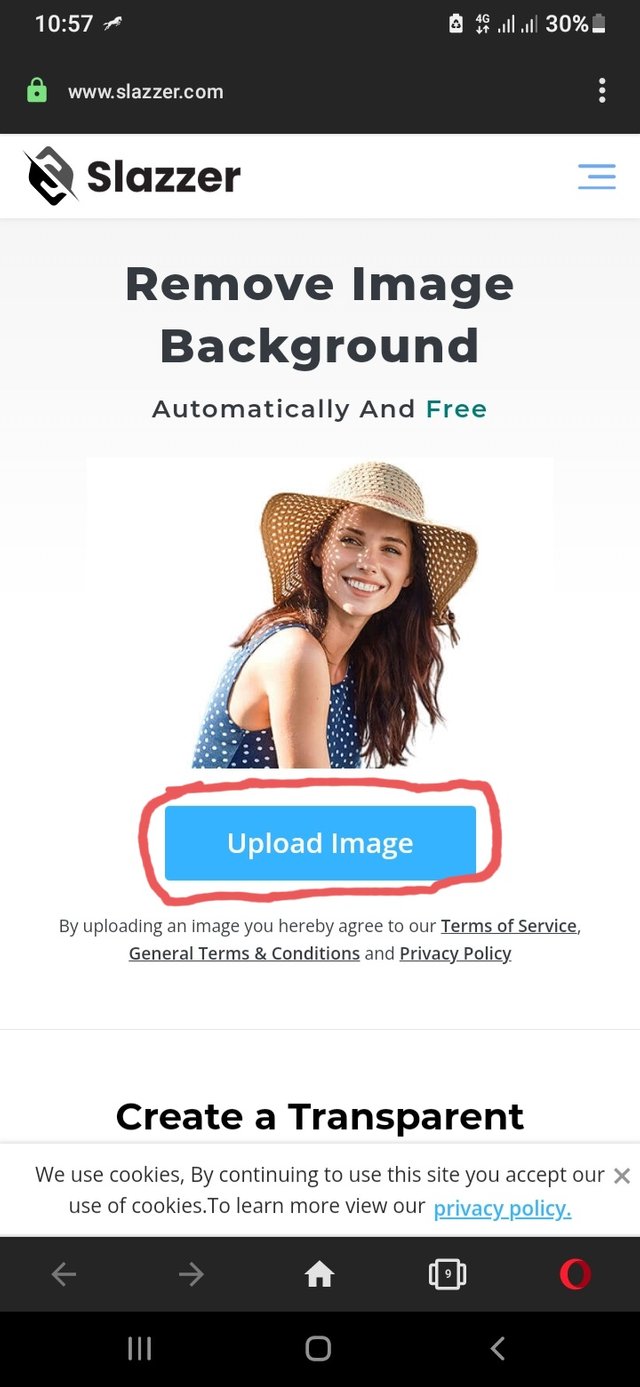
Example of a website that can be used for background image removal is slazzer
The process involves first; visiting the site on slazzer which will bring up the display of the screenshot below.

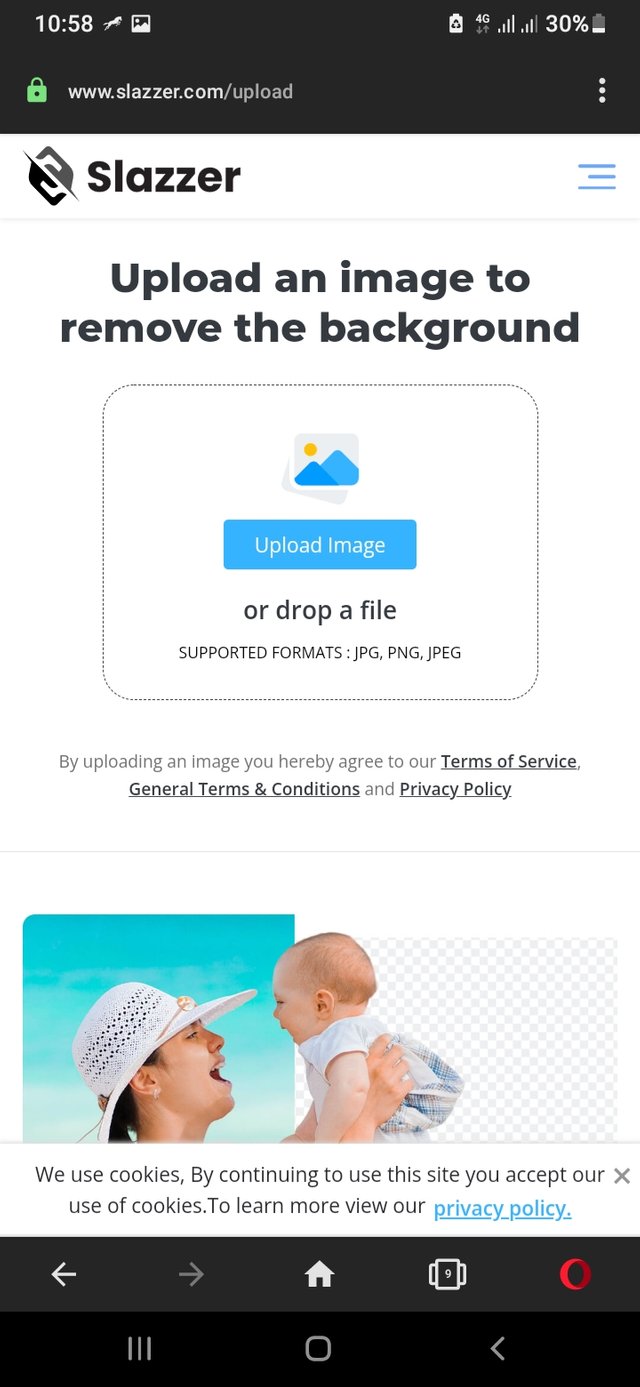
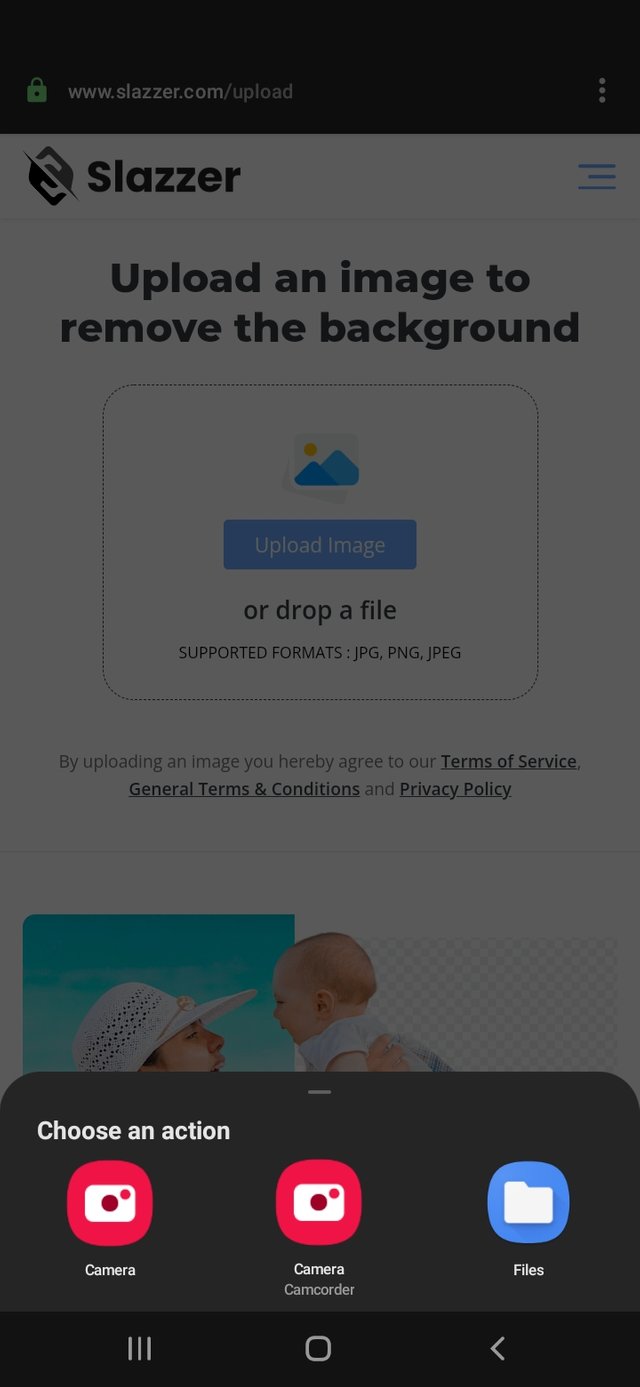
Furthermore, clicking on the upload image option will pop out another page with the same option from where you can now access your gallery in order to select the image you want to remove the background. Screenshots of the scenario is also attached below.
 |  |
|---|

QUESTION TWO
State 2 ways in which the banner size can be set and with picture illustrations too
ANSWER
The banner size of a project matters as various projects comes in different sizes. The size could be based on whether the project is a flier, billboard, complementary card or any other project.
With regards to the Pixel Lab application, there are basically two ways by which the banner size of a project can be set.
Firstly, the banner size of a project on the Pixel Lab application can be set by clicking on the 3 dots on the top right corner of the application, and then select the image size option which will then bring up the section for resizing the banner. This is shown in the attached image below.
The second way to set the image size on the Pixel Lab application is by selecting the "background option" in the application, and then select the image size option which will also bring up the section for resizing the banner. This is also described in the attached image below.

QUESTION THREE
Create a simple " THANK YOU" banner design appreciating our able graphic design headmaster @atim1234 for organizing this amazing graphic design class in the steem skill share community
ANSWER

This is the image of the final design
Below are the screenshots of the process that was used in creating the design.
![]()
The size of the banner was selected first of all as seen on the screenshot above.
![]()
Thereafter, background colour, text, and a circle shape was included in the design as seen in the screenshot above.
![]()
However, to make the design beautiful, the background colour was changed, some text were also changed, and the Steem Skillshare logo was included.

And here is the final design

I want to once again appreciate @atim1234 for the idea of organising the graphic design class which has been of great help in advancing the knowledge of the students and other members of the community at large, and also @nygls8 for the wonderful Graphic Design software class 2 held on the 27th of September, 2021.
Cc
@atim1234
@nygls8
@printskill
@lhorgic
Regards,
@stanleynnah

Dear @stanleynnah
Thank you for your participation in the Design App Class on Banner creation with the Pixel Lab Application.
Considering the content of answers, depth of knowledge, attachment of images, the layout of markdowns, style of presentation of the assignment, we have set the grading system for each question.
Here are your grades for Class-6 dated 27th Sept, 2021.
Wish you all the best. Keep engaging in upcoming classes.
Regards.
@niglys8
Thank you for the feedback.