How to Sew a Perfectly Polished Pencil Skirt
Pencil skirts typically have minimal seaming, front and back darts for shaping and a waistband. Of course there are lots of variations within that theme — ockets, pleats, seaming, etc. — but to start, a simple skirt with a side or center back zipper closure is a good choice.
Step 1: Cut out your skirt pattern pieces
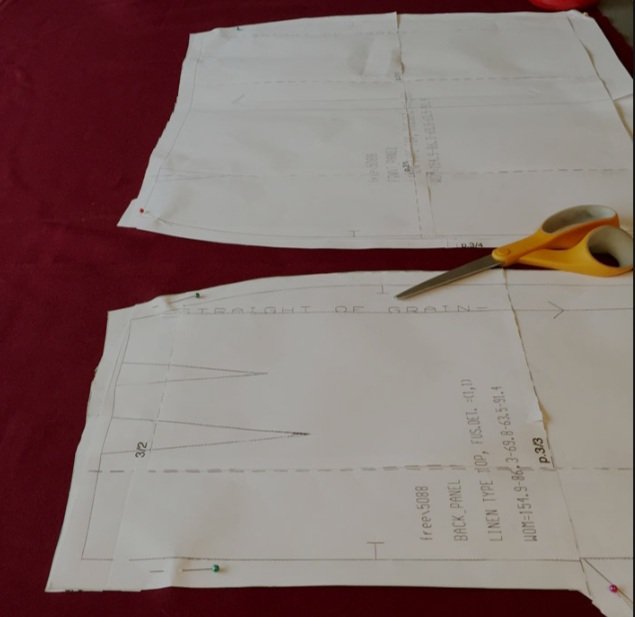
Cut out your pattern pieces, making sure you lay out the pattern pieces according to the grain lines indicated.
Step 2: Transfer pattern markings to your pieces
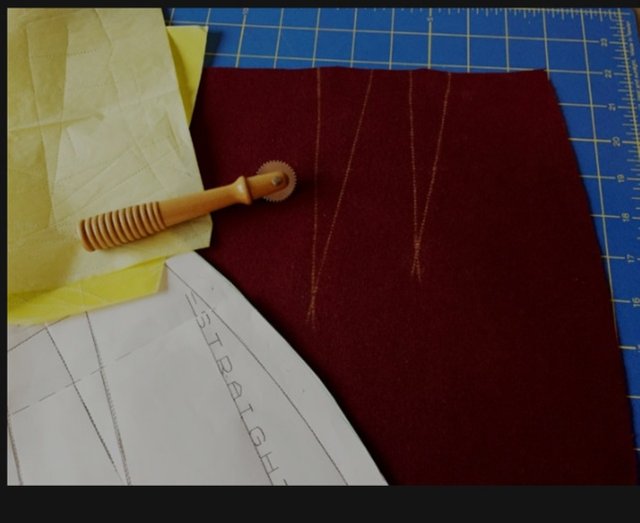
Carefully transfer your pattern markings to your skirt pieces. You can use dressmaker’s carbon paper, which is a paper coated with chalk on one side. Place the chalk side against the wrong side of your fabric and use a tracing wheel to transfer the dart markings to the fabric. You could also use tailor’s tacks to mark the darts and other markings. Be sure to transfer all the markings, such as the zipper placement and any hem pleat.
Step 3: Sew and press the darts
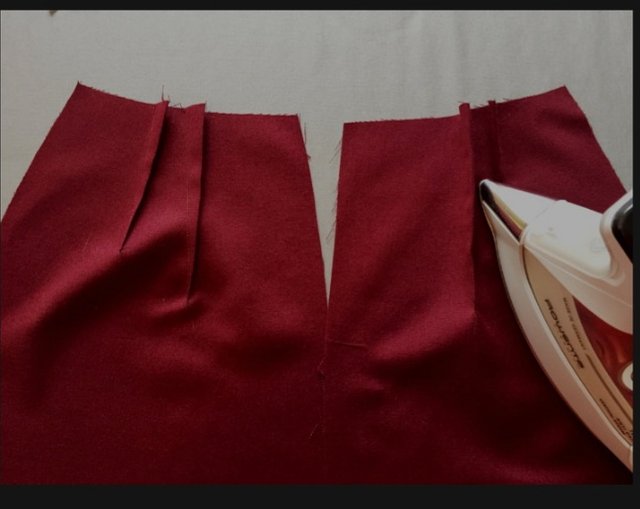
When sewing these waist darts, start at the waist and stitch toward the point, taking the last few stitches very close to the edge. Tie off your threads in a knot. Carefully sew the darts on the front and back pattern pieces, and then press towards the center.
Step 4: Insert the zipper
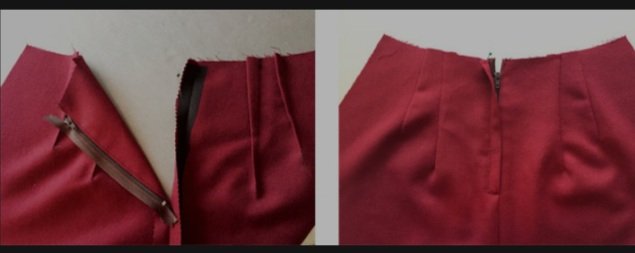
Here I decided to do a lapped zipper as my zipper didn’t quite match my fabric. A lapped zipper can hide the zipper entirely, so it’s a good choice for that instance, and also looks very nice when placed on the side seam.
In the center back you can use a lapped zipper, a centered zipper or even an invisible zipper. Add strips of lightweight interfacing to the seam allowance where you will be inserting the zipper to support the fabric and eliminate any pulling or puckering.
Step 5: Sew the seams
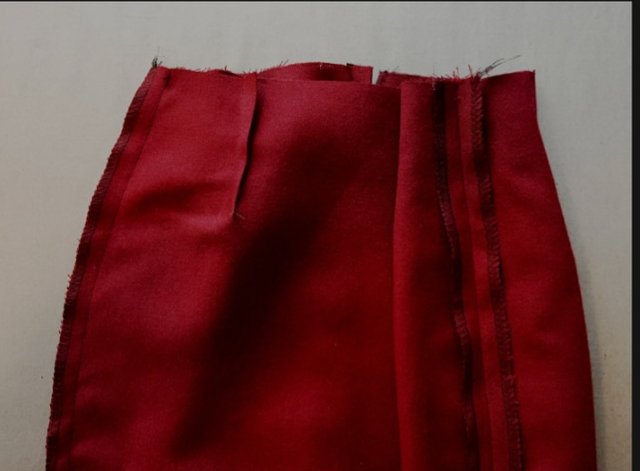
Sew up the remaining seams of the skirt and then press the seams. For this example I chose to overlock the side edges of each pattern piece, which allows the seams to be adjusted if need by for additional fitting. Also you can press the seam open, which gives you a less bulky seam allowance than if you overlock both sides of the seam allowance together.
I will continue the remaining 5 steps on my next post
Thanks for making share my skill
#steemexclusive
#steemitblog
#steemit
#newbie
#steemcameroon
Great skills, educative Post as well
Thanks for sharing
Wow!
This is simple steps to follow.
I Know I'm not a fashionistar actually but following this steps of yours, I believe I would make my pencil skirt perfectly well. Thanks for sharing with us.
Keep steeming 😊