Tutorial - How to make a photomontage or change the background of your image using GIMP? - Club75

Hello Steemit friends, today I come to show you how you can replace the background of an image where we go out, keep our png and the quality of our images, and many more things, using the Gimp application. To make it easy to learn for everyone, I have made an easy to follow step by step so that anyone can practice it at home. I hope you can join me and enjoy my content for the day.
GIMP (GNU Image Manipulation Program) is a free and open source program for editing digital images in bitmap form, both drawings and photographs. It is part of the GNU project and is available under the GNU General Public License and GNU Lesser General Public License. It is also known for being perhaps the first great free application for non-professional or expert users Wikipedia, GIMP
REPLACE THE BACKGROUND OF YOUR IMAGES WITH GIMP
(STEP BY STEP)
Before starting this tutorial, you should go to download this application from its Web Site: https://www.gimp.org.
-- STEP 1--
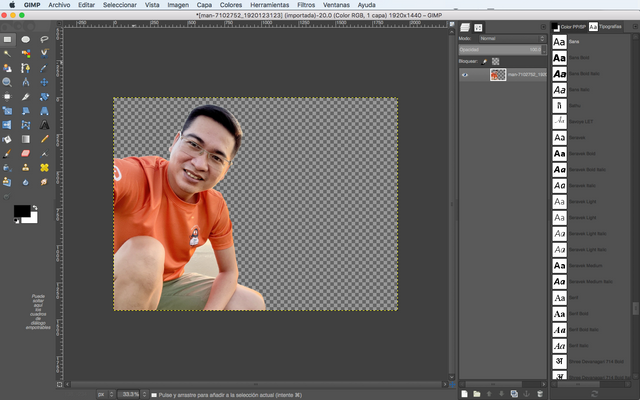
In this first step, you will learn from opening the application to opening the image you want to edit and getting it ready to start.
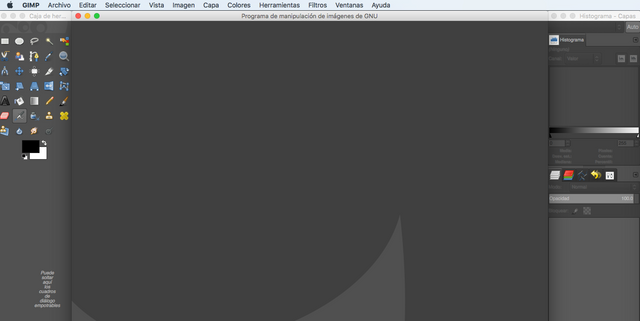
1.1. Open the GIMP application
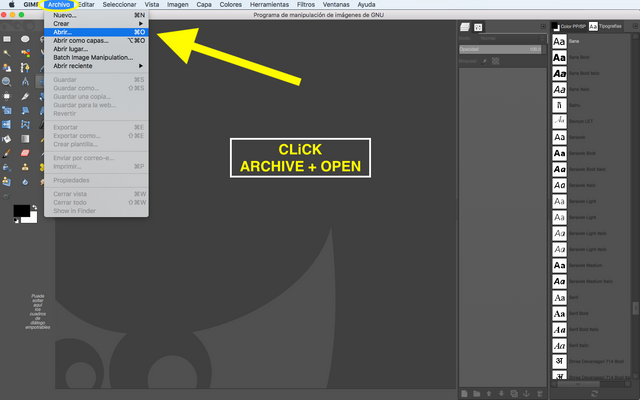
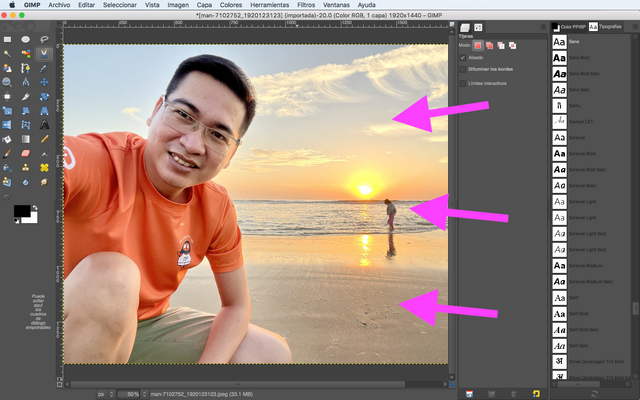
1.2. Select the image you want to edit
-- Step 2 --
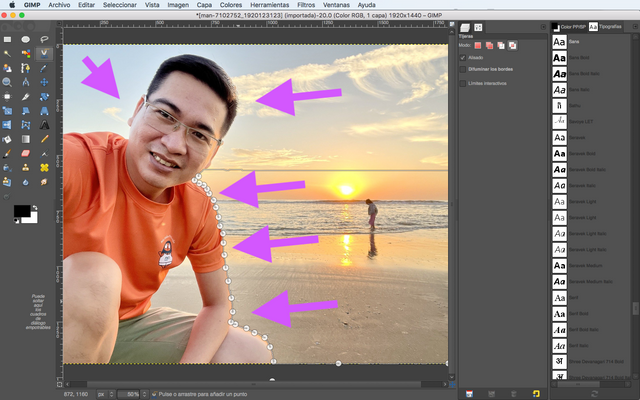
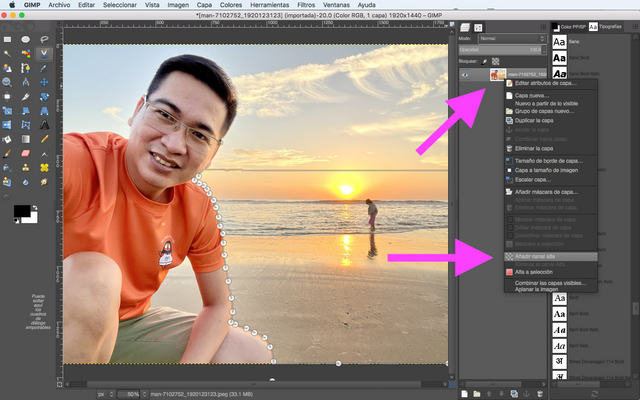
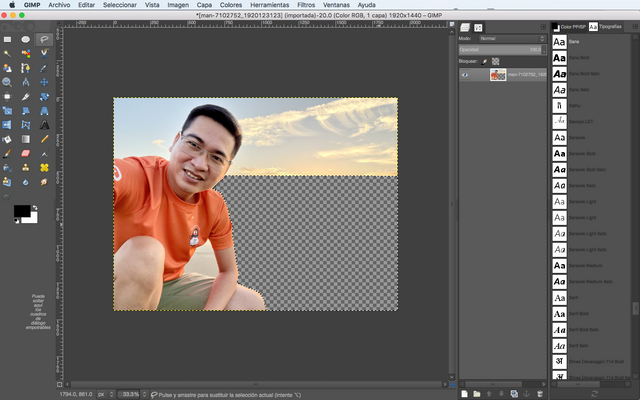
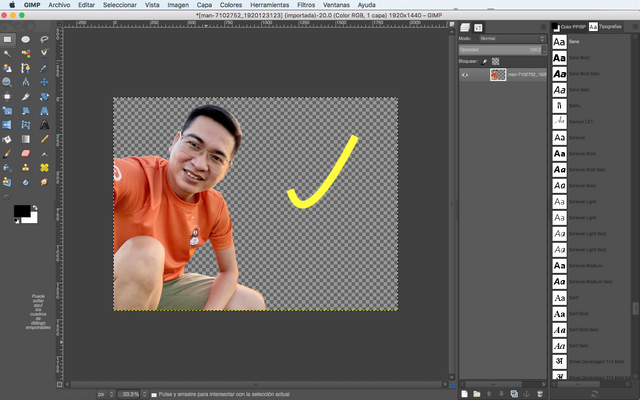
In this second step, you will learn how to extract or remove the background using the simple selection tool. You must border the part you want to extract or remove. When you have outlined the part of the image you want to extract or remove, you must "add the alpha channel" in the layers section, so that the background can be transparent, and you can use this image as a png. Then just hit clean or (ctrl + x) to cut that part (the background).
2.1. Select the area you want to extract or remove "example"
2.2. Add the alpha channel to have a transparent background
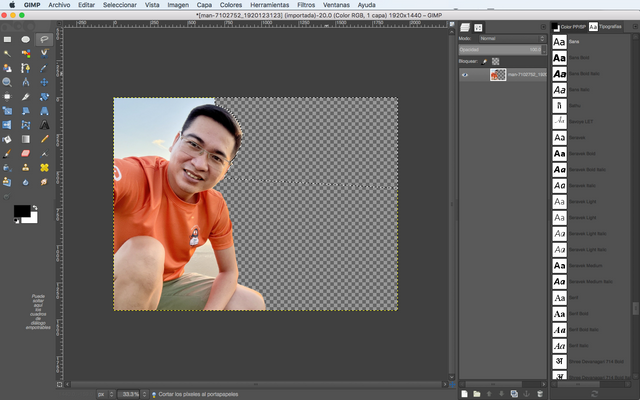
2.3. Clean or cut the selected area
-- Step 3 --
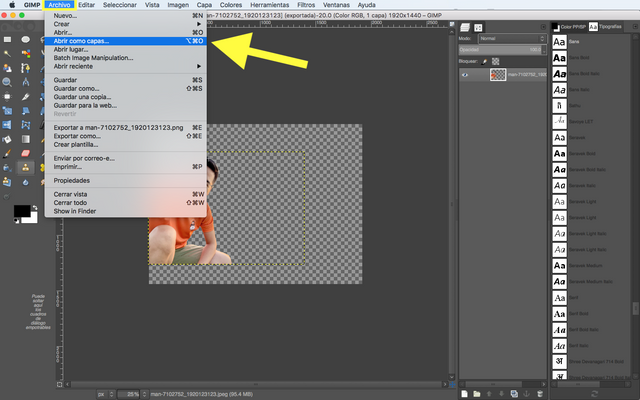
In this third step you will learn how to insert the new image you have downloaded to replace the previous background. It's very simple, just insert the image, adjust the size of the real layer, bring the boy's png image to the front, and finally combine both layers to extract a perfect image.
3.1. Insert image as a new layer
3.2. Bring to the front the png image extracted from the previous one
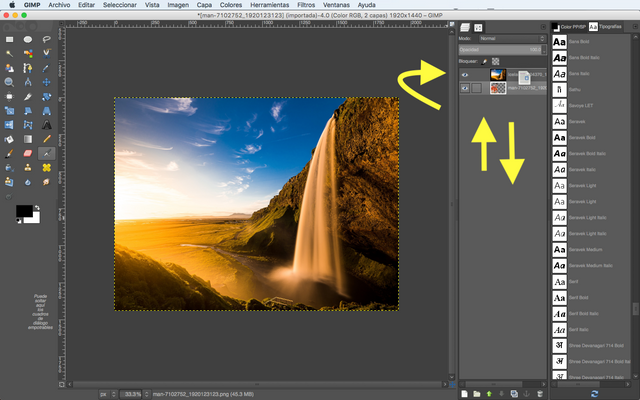
3.3. Merge layers
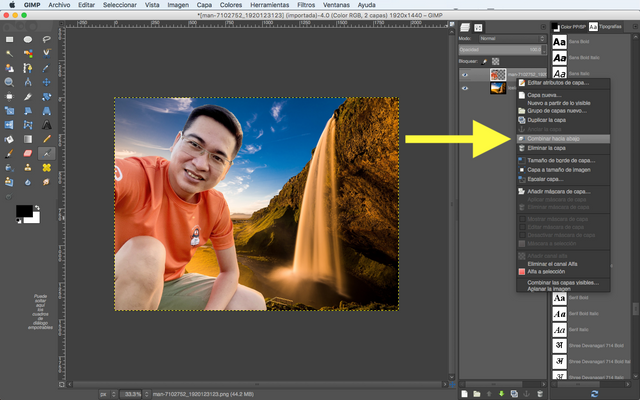

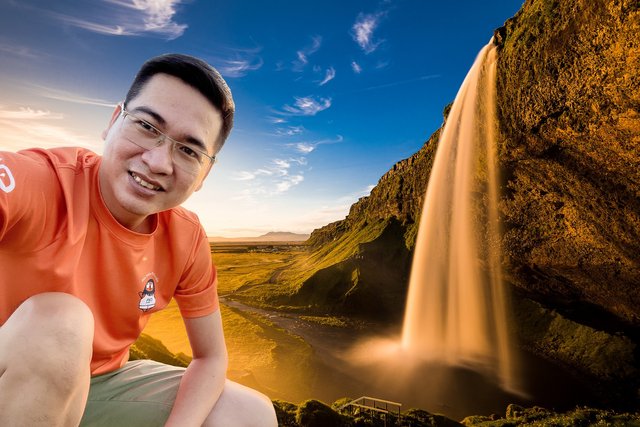
Image ready and extracted
As you can see it's a very easy procedure, it's all a matter of practice. Once you have colored, extracted the part of the image you want to have with another background, and you know how to insert the image as layers, the rest will be very simple, just insert another image for another background and that's it.

Background image pixabay.com
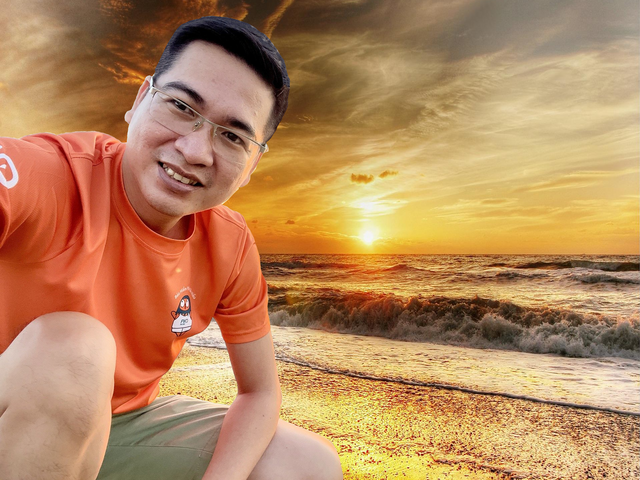
 Background image pixabay.com
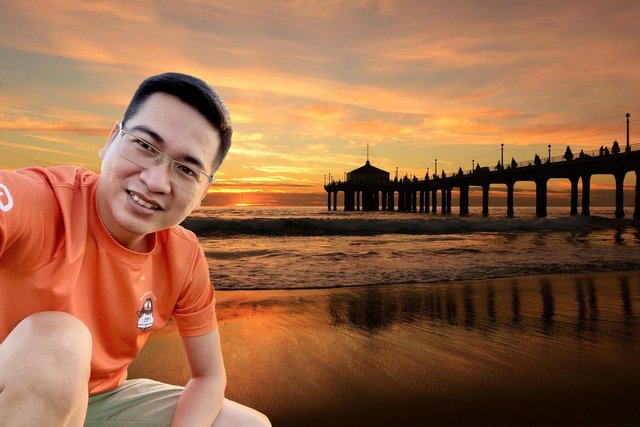
Original image

Thank you very much for coming and joining me in this new publication, I hope it has been useful, enjoyable, and that you get the best out of everything. Also, I hope you can get to know me a little better, and invite me to be part of your groups of friends and communities.
Greetings and may God bless you always🙏 BYE

Translated with www.DeepL.com/Translator (free version)
Hola amiga, muy util y lindo este tutorial de como cambiar los fondos de las imagenes, hay muchas aplicaciones para esto pero solo en los software como este quedan con mucha mejor calidad.
Gracias por formar parte del #club75✅
Sarita, agradecida con todas tus visitas y consejos.
Espero que esta publicacion pueda ser util para las mujeres del grupo y para cualquier persona que la necesite.
Excelente post amiga, cuando pueda voy a descargar la app para practicar y ver que tal me va, gracias por compartir. Saludos.
Agradecida con tu visita amiga, es bien facil de usar. Esa aplicación las traen las canaimas del gobierno por defecto. En youtube hay tutoriales muy buenos, porque siempre es mejor ver las cosas en video. Saludos
Hola linda! Muy útil la herramienta que nos compartes hoy, me gusta mucho las ediciones de imágenes e innovar. Por ahora uso PicsArt pero me gustaria utilizar esta aplicación, gracias por el tutorial muy bien detallado. Gracias por compartirlo, te deseo éxito y muchas bendiciones. Abrazos 🤗💗
Agradecida por tu visita de apoyo y bellas palabras.
Esta aplicacion es muy buena de verdad, es como una version mas sencilla de photoshop. La diferencia de picsart y este tipo de aplicaciones de escritorio esque siempre mantienen la calidad de entrada, ademas se guardan especialmente para subir a la web, porque desde picsart directo a la web, siempre se pierde algo de calidad.
Si amiga eso he notado. También me di cuenta es como una versión de Photoshop. Espectacular me encantó, desde ya la estaré descargando para empezar a usarla.Genial contenido. Abrazos 🤗
Hola excelente tutorial para cambiar el fondo, no se ve difícil de usar, que aplicación usas para realizar tu portada?
Agradecida con tu visita amiga, es facil de usar pero no mejor que photoshop, este programa lo conoci porque venian en las canaimitas con el software de fabrica. La aplicacion con que hice esta imagen la imagen principal es Picsart "premium", y luego la paso por este mismo gimp para que al subirla a la web de Steemit no pierda calidad.
Que buen tips amiga me sucede que hago las imágenes de calidad y cunado las veo en la PC no se ven tan nítidas yo uso Picsart pero no el premium, chévere gracias por el dato estaré buscándolo.
Picsart es muy bueno y rápido para hacer las cosas, el premium lo vi compartido en el grupo de mujeres de steem en el telegram o whatsapp esta, buscala como archivos o algo 'picsart gold algo asi'. Si no en google, pero es como un version hackeada, donde tienes acceso a todo sin pagar.
Entiendo, en photoshop te aparece el nombre técnico, algo parecido a 'exportar imagen para web', es para cuando se suban a la web no sufran esta desmejora por la compresión, al igual que en gimp también habilitas todas las opciones para exportar y nivel de compresión 0. De no hacerlo así, las letras o imágenes insertadas como capas en picsart 'no se me vieran nitidas'
Excelente amiga gracias por la información 👌🏻
Thank you very much for the support @pelon53, I have already pleased the tag requested. Thank you for your support and for visiting me.
Well guided tutorial. Please add #learnwithsteem tag for such valuable post.
Thank you very much for the support, I have already pleased the tag requested. Thank you for your support and for visiting me.
Super! Thanks for this