Steem Women Club Community Contest #8 ' Handicrafts ' Time to Show Ingenuity || Puppy harness/Arnés de cachorro

Hi friends here I am back!
in this case to present myself in contest # 8 of @steemwomensclub.
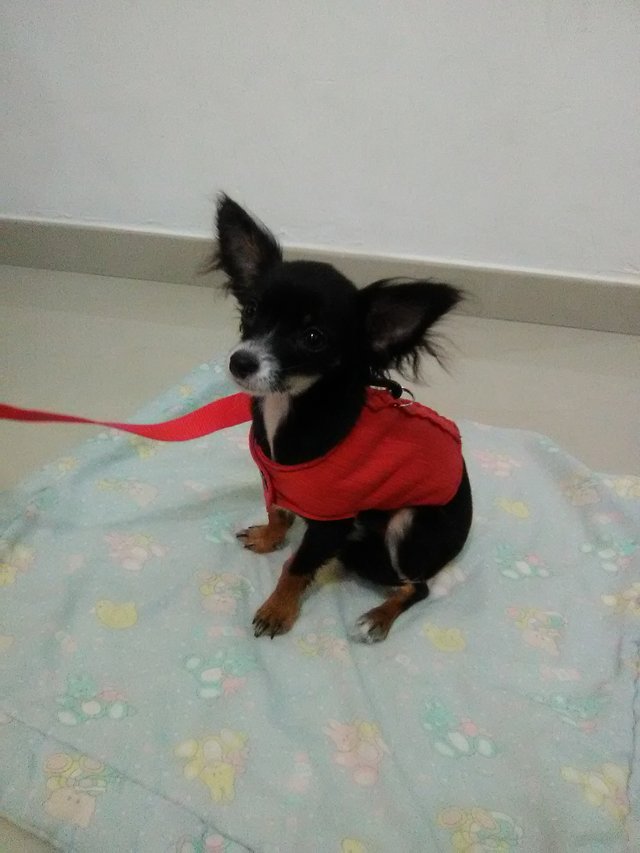
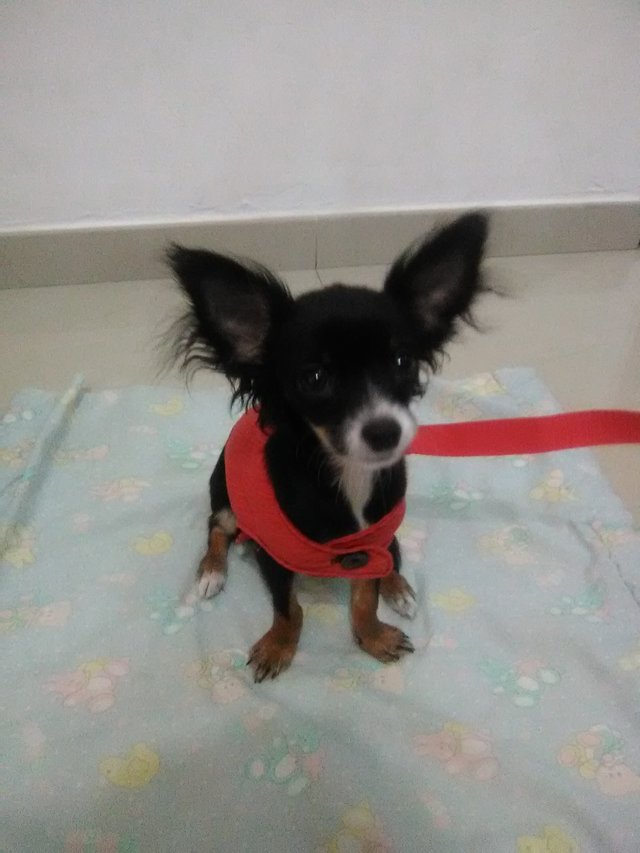
I will show you one of my creations! A harness for puppies, in my case for my chihuahua named '' Alvin''😀
Thanks for the great support to the community
@steemcurator01 @steemcurator02 @steemcurator06 @Booming @booming01 and @booming04
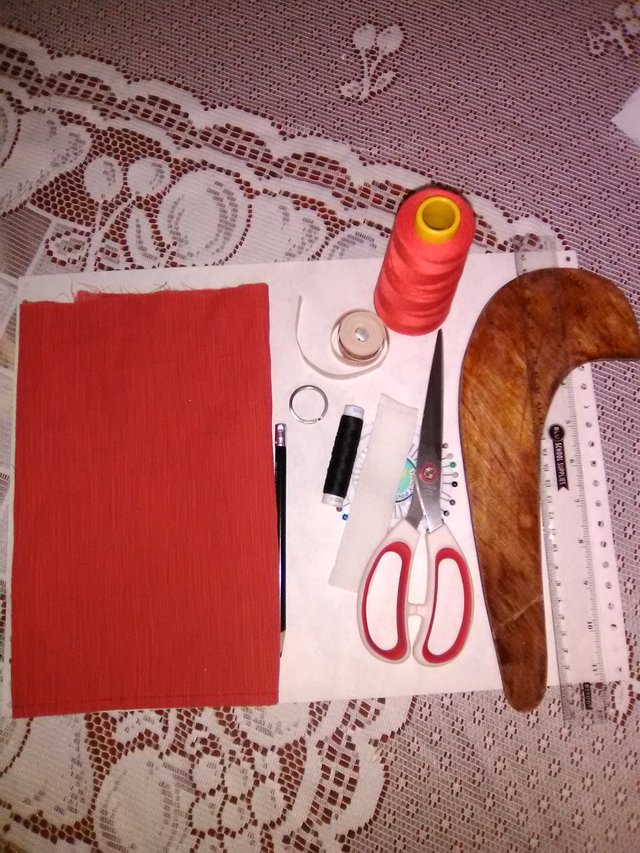
THE MATERIALS TO USE
Scissors
Pencil
Measuring tape
Red thread (or your preference)
Black thread
Pins
1 Sheet
Red fabric (or your preference)
Curved ruler (French)
Normal ruler
Magic closure
Key ring
A belt
PROCESS
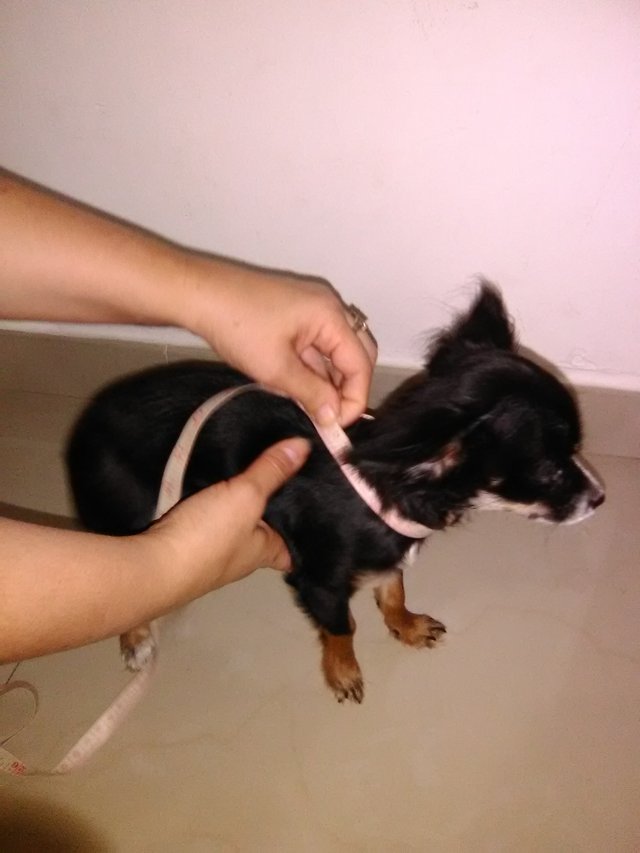
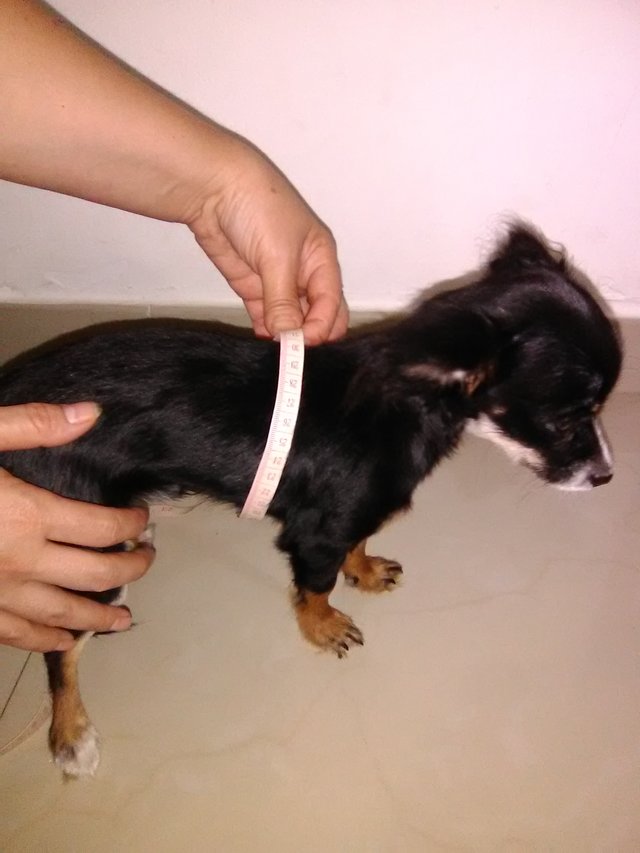
The first thing to do is take the measurements of our puppy, which would be the contour of the neck and the contour of the chest.
Then the following steps would be:
Step 1
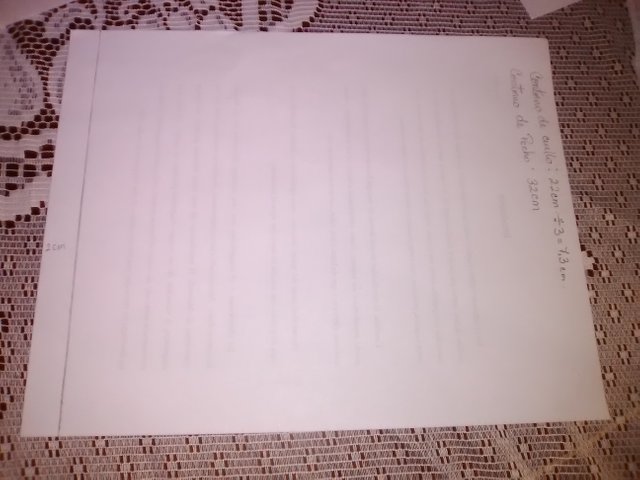
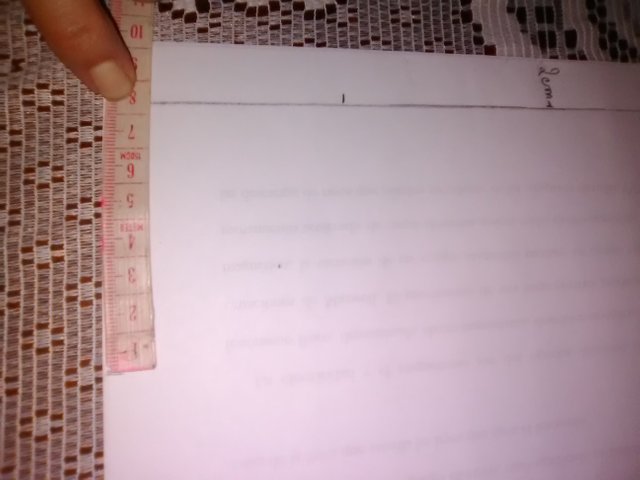
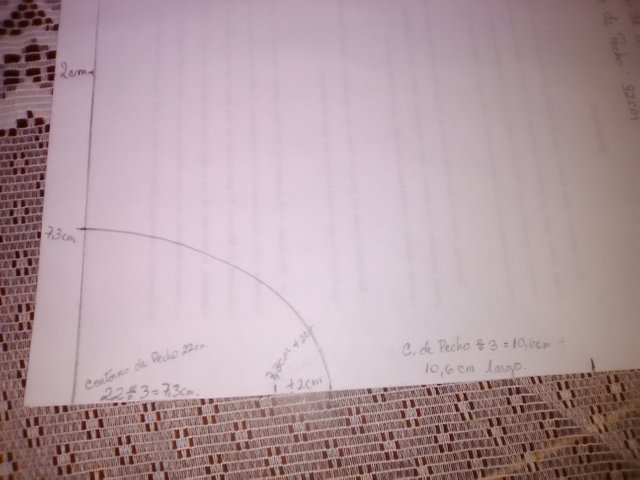
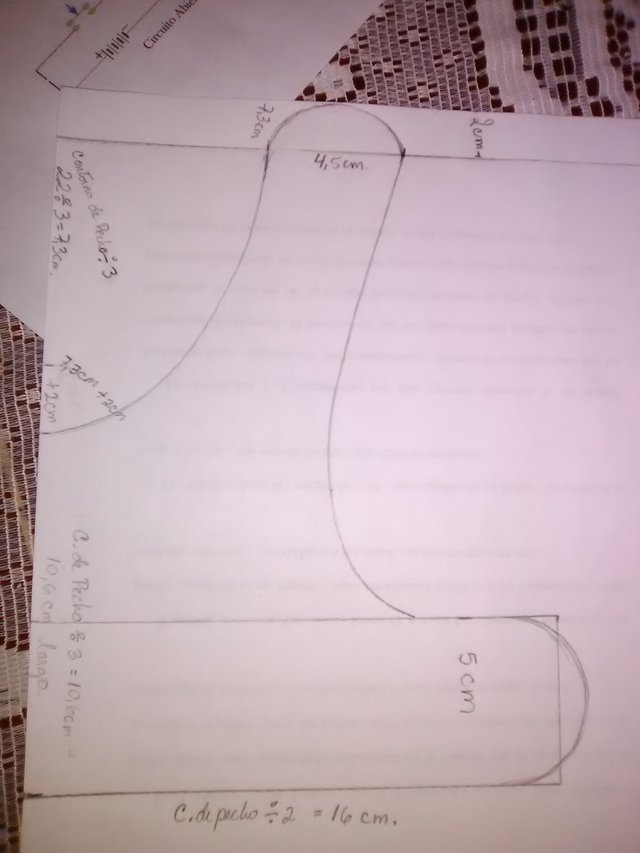
On a letter-type sheet we draw a vertical line leaving 2cm wide.
Step 2
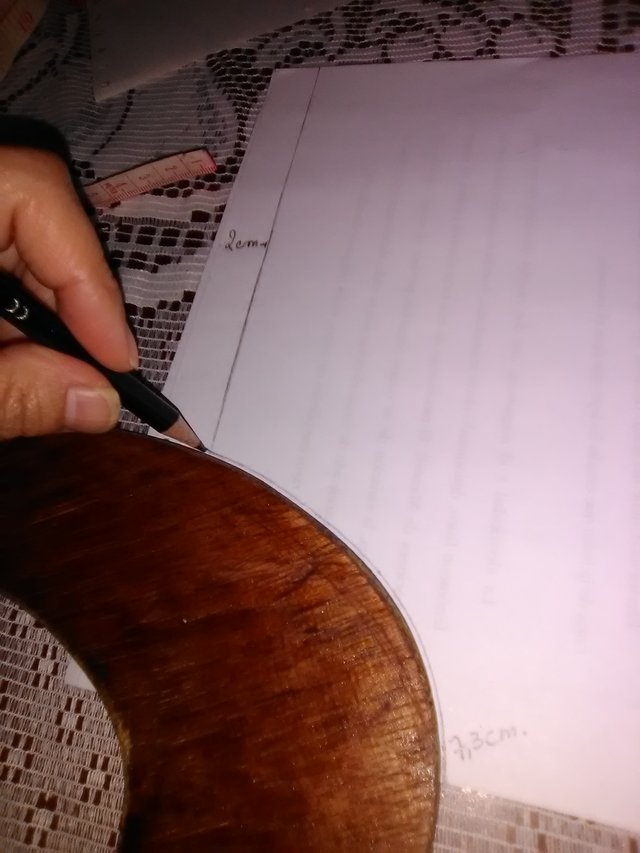
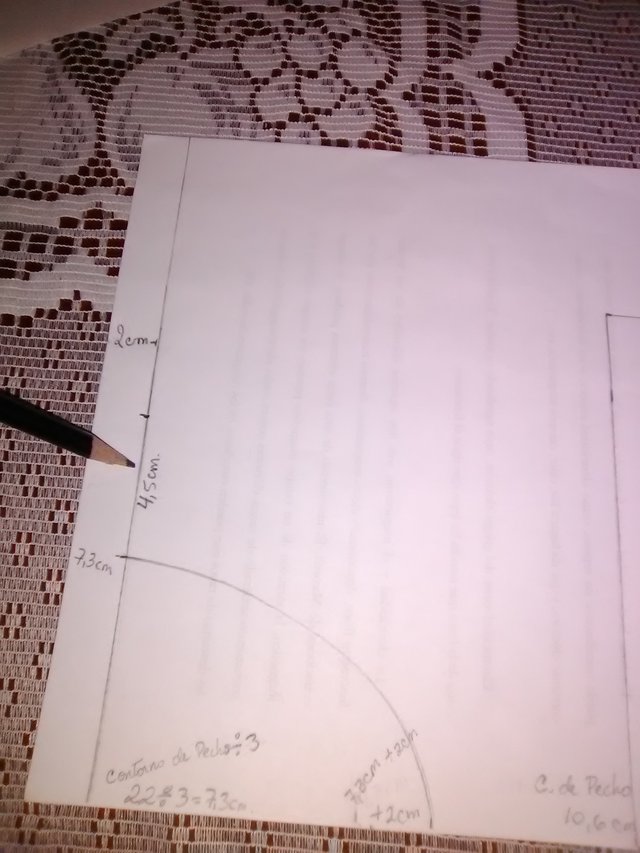
We divided the neck contour by 3 [➗3️⃣], my puppy's neck girth was 22cm and the result was 7.3cm. We place that result and place it on the vertical line.

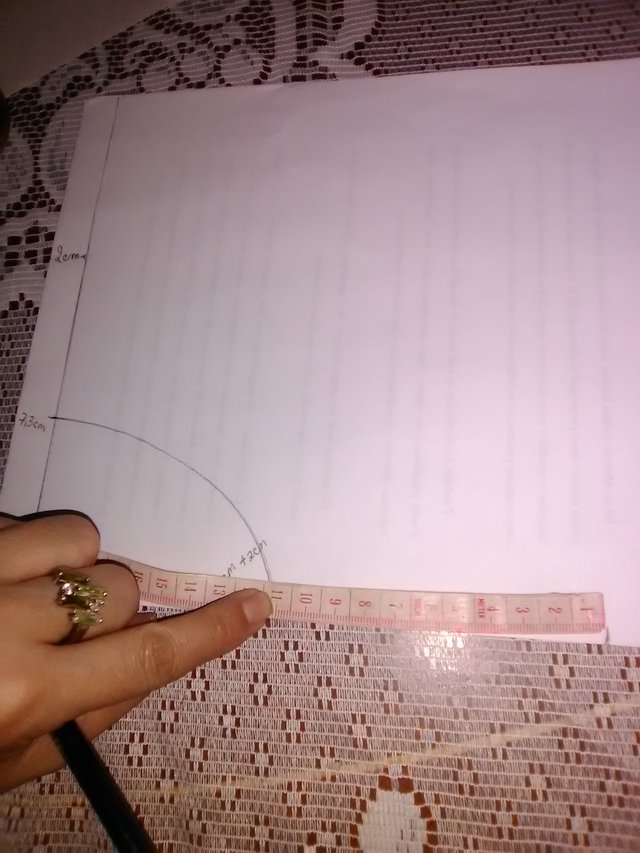
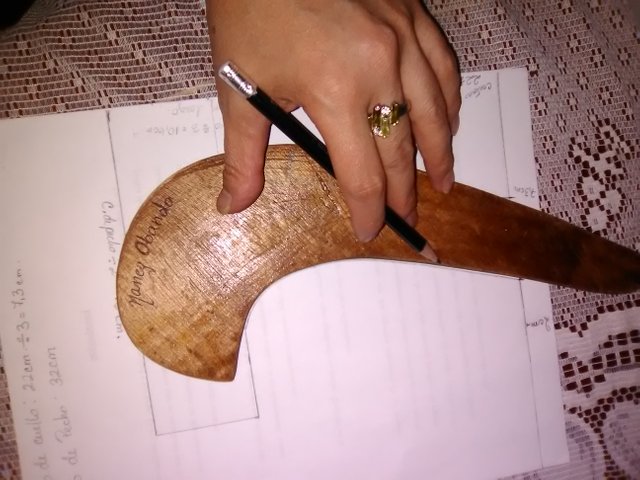
And in the lower part we mark the same measurement (7.3cm) + 2cm (Standard), from that point we make a semi-curve with a French curved ruler or freehand to the top point.
Step 3
Then we left the thickness we want, I left 4.5cm.
We divided the chest contour (32cm in my puppy) by 3 [➗3️⃣], in my case it was 10.6cm. "That would be the length measurement where the breast bra will be made."
Step 4
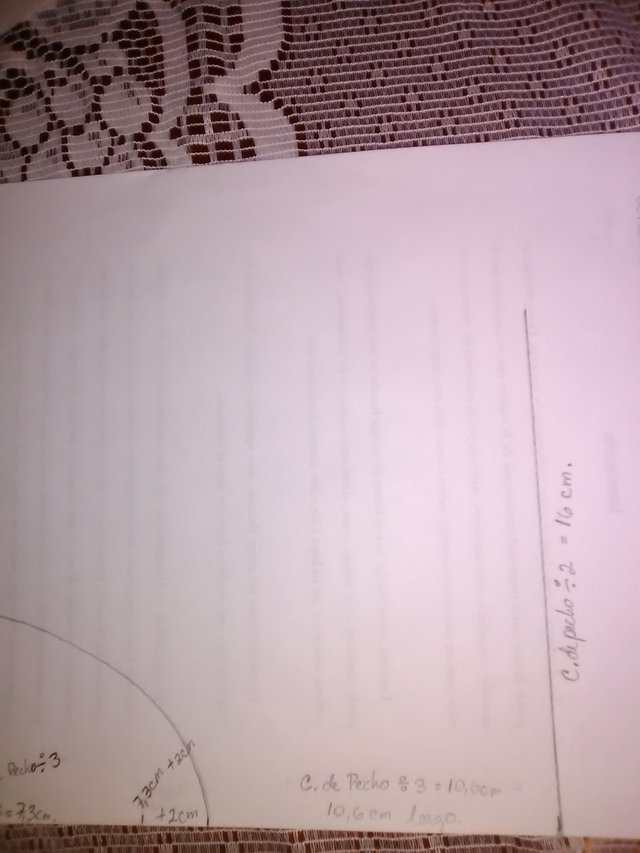
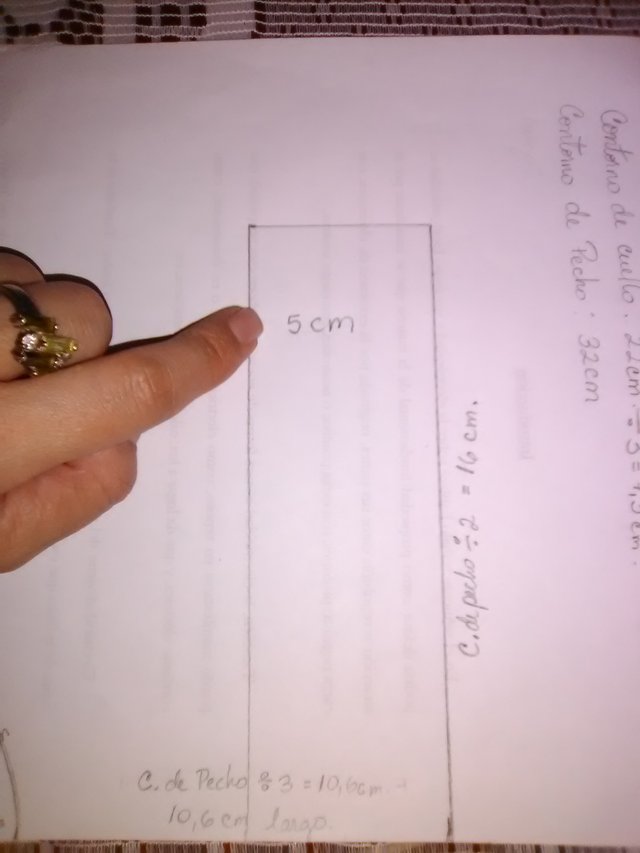
We divided the chest contour by 2 [➗2️⃣], to make the chest bra, in my puppy the result was 16cm. We draw a vertical line up with the 16cm. Then, we draw the measurement of the thickness that we want to give it, (I left it 5cm) we draw a new line of 16cm and we finish closing at the top.
Step 5
We go to the top where we leave the measurement of the thickness of the neck contour and from that point we make a last semi-curve
Step 6
I, in the parts where the thickness is, I rounded it, but it is to taste. They can leave it like that, straight.
Step 7
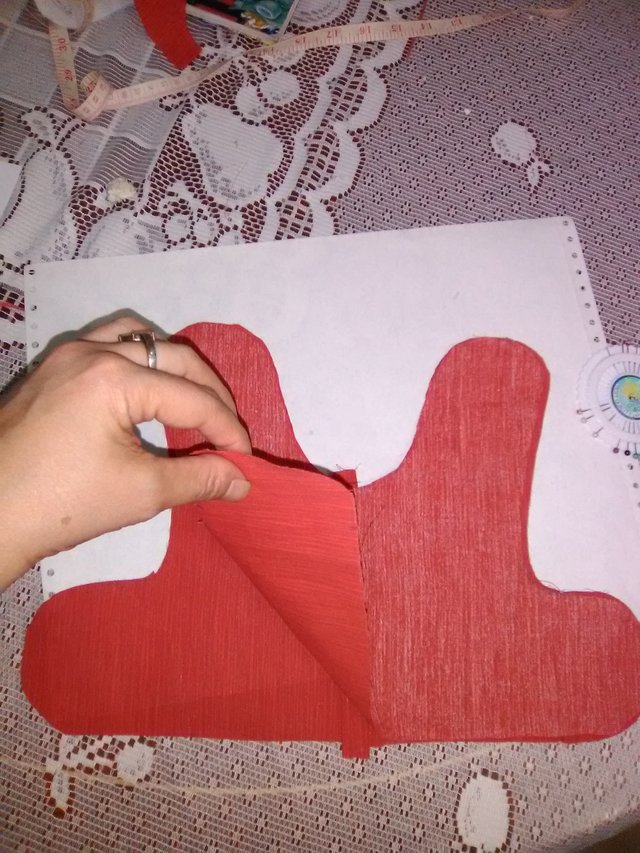
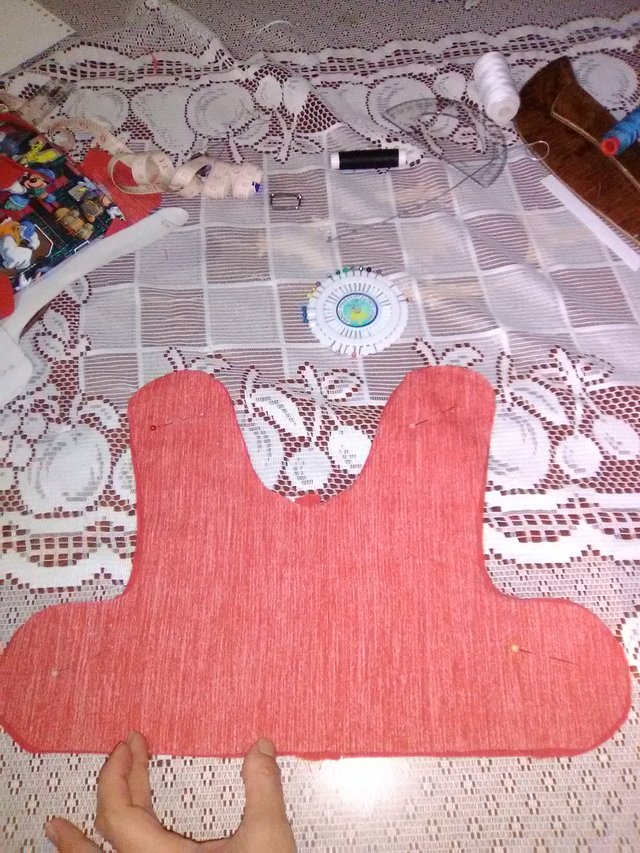
We cut out and get our pattern.
Step 8
We fold the fabric in half. Then we transfer the pattern to the fabric leaving 1.5cm of seam and cut.
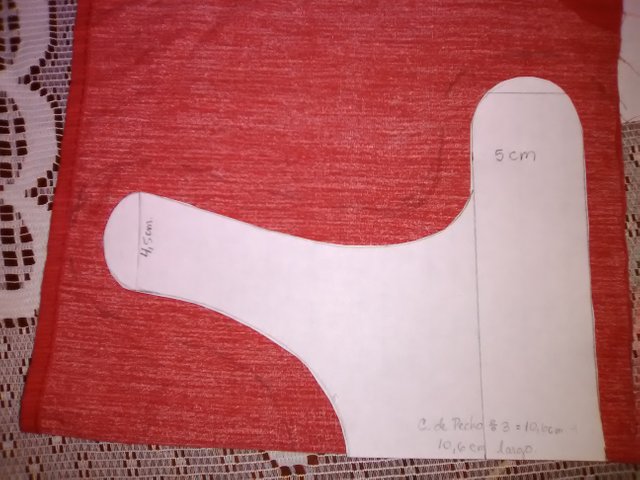
We do it again to obtain 2 pieces (front and rear).

Step 9
We make a strip where the key ring is inserted, with the measurements that we obtain by measuring the mold, "the fabric in the middle from top to bottom." In my case it gave me 17cm long by 4cm (standard) wide.
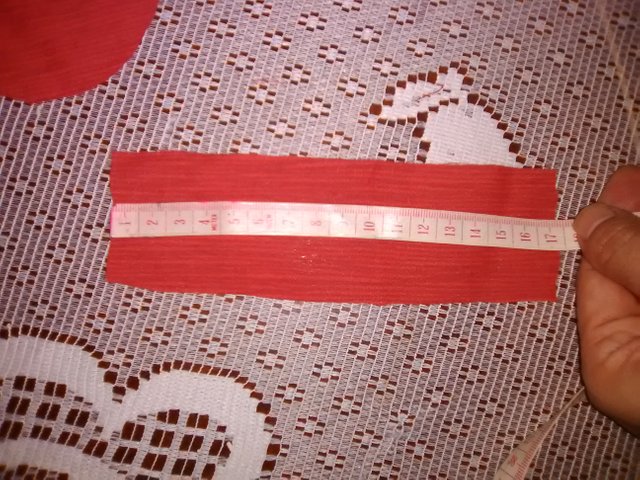

We cut this measurement and then we fold the fabric inside out leaving 1cm of seam, we cook and then we turn to the right.
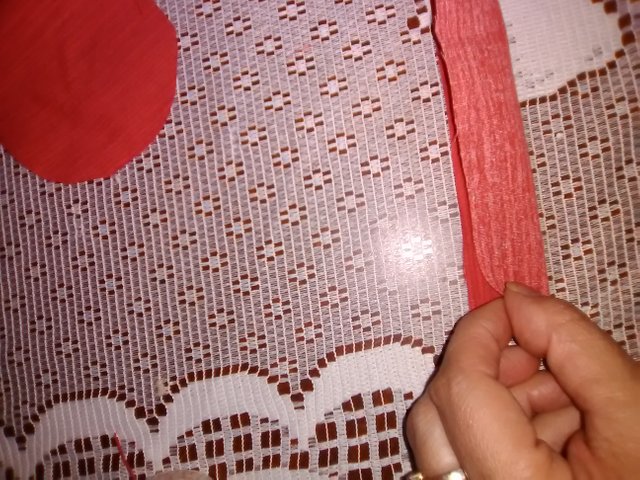
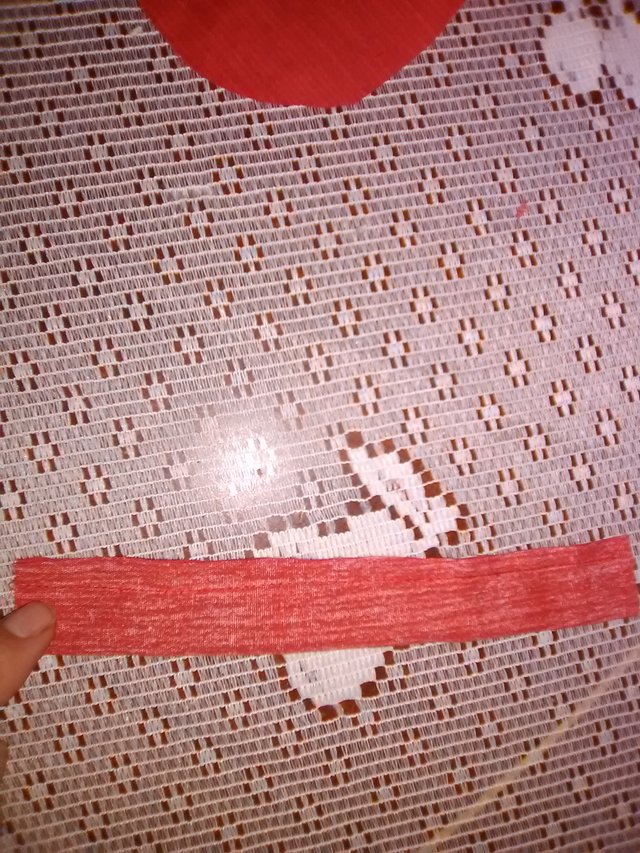
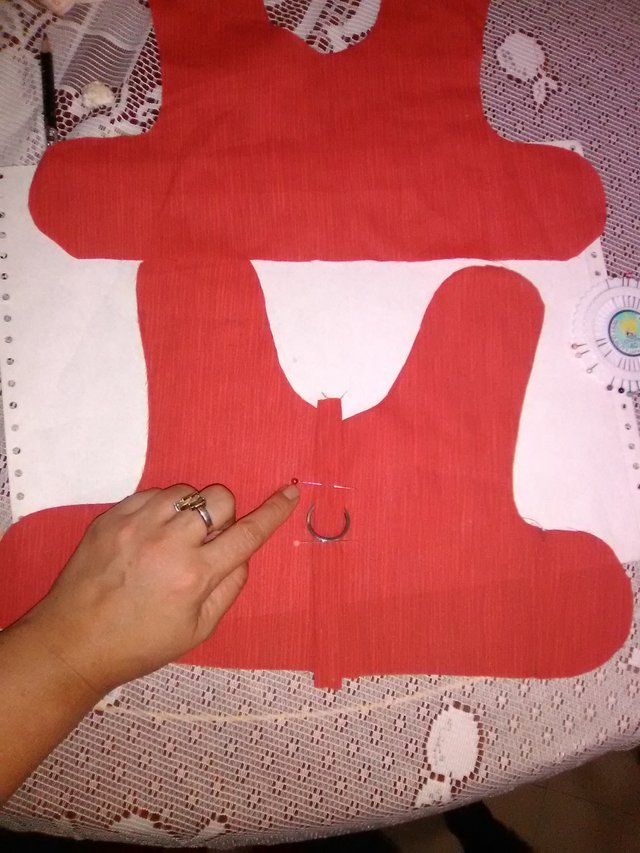
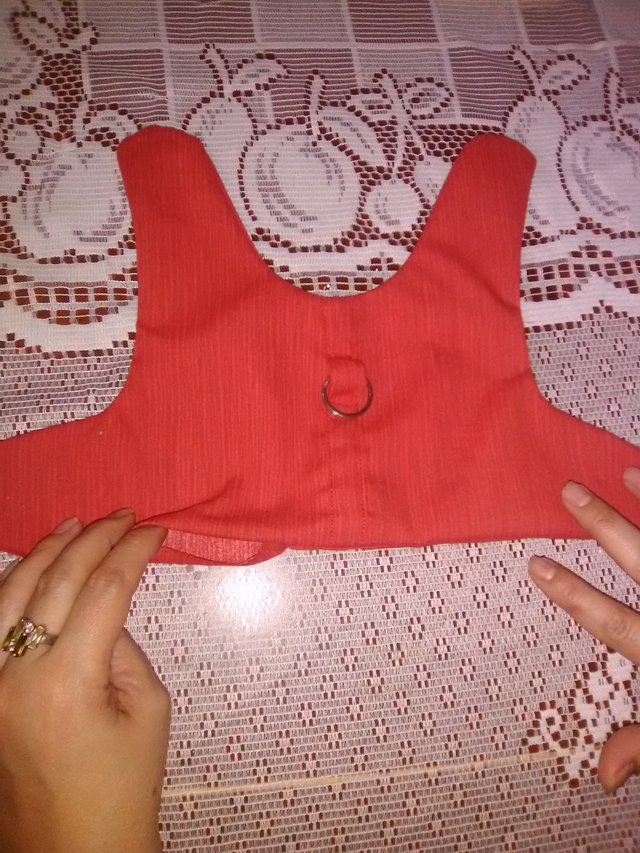
In this strip we place the ring of the key ring, and then cook.

Step 10
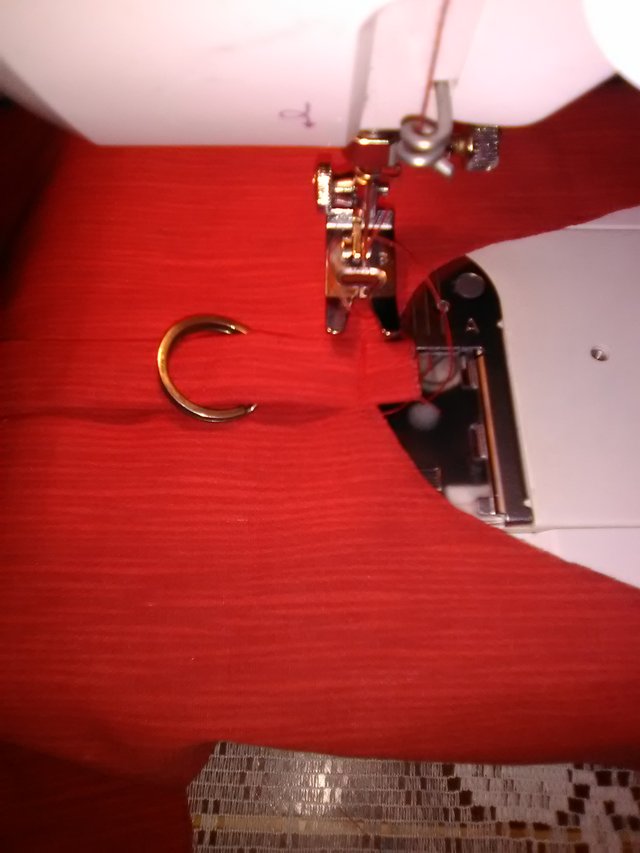
We place the strip in the middle of the front front piece and we sew it so that it is fixed.
Step 11
We place the back piece face to face, to cook we leave from `` 0.5cm to 1cm of seam ''. We start to cook from one end and before finishing cooking we leave a few centimeters uncooked, I left 7cm, which would be where we will turn the fabric, once it is finished cooking.
Step 12
Once the fabric is turned over, we close the ends that we leave open.

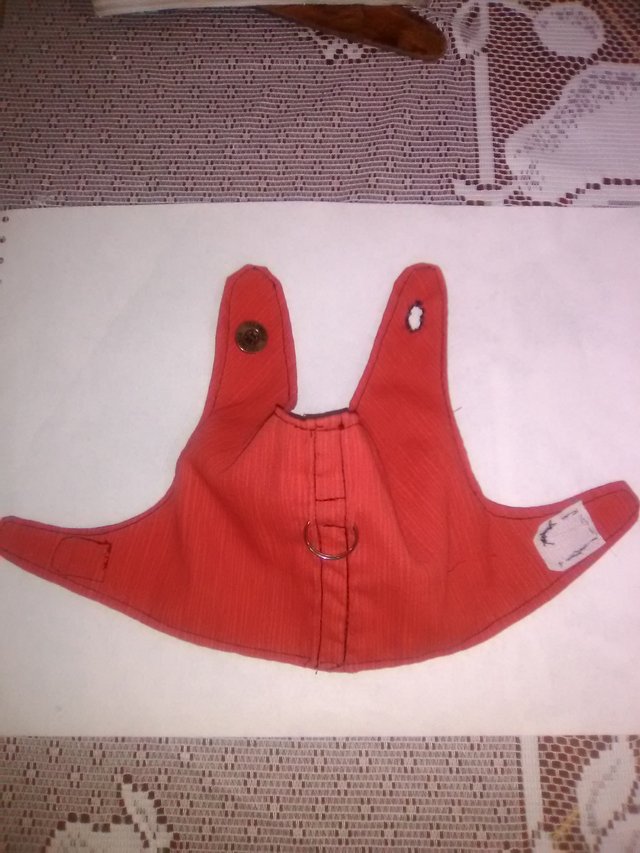
Step 13 We can put buttons or magic closures on the neck strap and the chest strap, to hold. I used the button for the neck strap and the magic closure for the chest strap. That is at ease.
RESULTS

🌷 🌷 🌷 🌷 🌷 🌷 🌷 🌷 🌷 🌷 🌷 🌷 🌷 🌷 🌷 🌷 🌷 🌷 🌷 🌷 🌷
Buenas, amigas aquí estoy de vuelta!
en este caso para presentarme en el concurso #8 de @steemwomensclub.
Les mostraré una de mis creaciones!. Un arnés para cachorros, en mi caso para mi chihuahua llamado ''Alvin''😀
Gracias por el gran apoyo a la comunidad
@steemcurator01 @steemcurator02 @steemcurator06 @Booming @booming01 and @booming04
MATERIALES A UTILIZAR
Tijera
Lápiz
Cinta métrica
Hilo rojo (o de tu preferencia)
Hilo negro
Alfileres
1 Hoja
Tela roja (o de tu preferencia)
Regla curva (francesa)
Regla normal
Cierre mágico
Aro de llavero
Una correa
PROCEDIMIENTO
Lo primero que hay que hacer es tomarle las medidas a nuestro cachorrito, que sería el contorno del cuello y el contorno del pecho.
Luego los siguientes pasos serían:
Paso #1
En una hoja tipo carta trazamos una línea vertical dejando 2cm de ancho.
Paso #2
Dividimos el contorno del cuello entre 3 [➗3️⃣], el contorno del cuello de mi cachorro fue de 22cm y el resultado fue 7,3 cm. Ese resultado lo colocamos lo colocamos en la línea vertical.
Y en la parde de abajo marcamos esa misma medida (7,3cm) + 2cm (Estándar), desde ese punto hacemos una semicurva con una regla curva francesa ó a pulso hasta el punto de arriba.
Paso #3
Luego dejamos el grosor que queremos, yo le dejé 4,5cm.
Dividimos el contorno del pecho (32cm en mi cachorro) entre 3 [➗3️⃣], en mi caso fue 10,6cm. ''Eso sería la medida del largo donde se va a realizar el sujetador del pecho''.
Paso #4
Dividimos el contorno de pecho entre 2 [➗2️⃣], para realizar el sujetador del pecho, en mi cachorro el resultado fué 16cm. Trazamos una línea vertical hacia arriba con los 16cm. Luego, trazamos la medida del grosor que queremos darle, (yo le dejé 5cm) trazamos una nueva línea de 16cm y termiamos cerrando arriba.
Paso #5
Nos vamos a arriba donde dejamos la medida del grosor del contorno del cuello y desde ese punto realizamos una última semicurva
Paso #6
Yo, en las partes donde está el grosor, lo redondeé, pero es a gusto. Pueden dejarlo así, de forma recta.
Paso#7
Recortamos y obtenemos nuestro patrón.
Paso #8
Doblamos la tela por la mitad. Luego trasladamos el patrón a la tela dejándole 1,5cm de costura y recortamos.
Lo volvemos a realizar para obtener 2 piezas (delantera y trasera).
Paso #9
Realizamos una tira donde va metido el aro del llavero, con las medidas que obtenemos midiendo el molde, ''la tela en la parte del medio desde arriba hacia abajo''. En mi caso me dió 17cm de largo por 4cm (estándar) de ancho.
Recortamos esa medida y luego doblamos al revés de la tela dejándole 1cm de costura, cocemos y luego volteamos al derecho.
En esta tira colocamos el aro del llavero, para luego cocer.
Paso #10
Colocamos la tira en la mitad de la pieza delantera frontal y pasamos costura para que quede fija.
Paso #11
Colocamos la pieza trasera frente con frente, para cocer dejamos de ''0,5cm a 1cm de costura''. Comenzamos a cocer de un extremo y antes de terminar de cocer dejamos unos centímetros sin cocer, yo dejé 7cm, que sería por donde voltearemos la tela, una vez terminada de cocer.
Paso #12
Una vez volteada la tela cerramos ese extremos que dejamos abierto.
Paso #13 Podemos colocarle botones o cierres mágicos en la tira del cuello y en la tira del pecho, para sujetar. Yo utilice el boton para la tira del cuello y el cierre mágico para la tira del pecho. Eso es a gusto.
RESULTADOS
-All images are my authorship captured by my Alcatel Cameox phone.
-Todas las imágenes son de mi autoría capturadas por mi telefono Alcatel Cameox.
Invito a @andreinamar y @gilena a participar en este creativo concurso!
que lindo y coqueto amiga
buena idea
saludos
#venezuela #afable
Gracias amiga, se agradece tu comentario, saludos.
Se ve espectacular 🙂🙂🙂
😊😊
Hola @nancy0 me gusta mucho tu creación, a parte que Alvin es muy tierno...felicidades..!!
Hola, amiga @samynathy, gracias, me alegra mucho que te haya gustado. Sí Alvin es un amor🥰
Hola @nancy0. Quedó muy bello ese arnés, gracias a tu explicación ahora cualquiera de nosotras sería capaz de intentar hacerlo. Me encanta es muy práctico y hermoso. Mucha suerte amiga, saludos XOX
Hola @saracampero, muchas gracias, un gusto conocerte y formar parte de esta comunidad. Espero que les sirva a todas las que tengan un cachorrito, saludos. 😊🥰
hi @nancy0 I have confirmed your contest entry. wow this is awesome! You made a very nice gift for your lovely friend :) it must be quite enjoyable to do this. You are very resourceful. You did a very good job. I am glad you explained in detail. Thank you for participating in the contest. Keep sharing quality posts in the community. I strive for you to prepare quality posts and win. Like our motto, we are strong together. If you have a problem, reach out to me on discord. Good luck :)
Hello, @steemwomensclub thanks to you for opening this community, where we can give each other support, and share each of our qualities, I am very happy to participate in this community of women since they all have incredible ideas and do great work, thank you very much for your beautiful message and I hope you do well, thank you for your support, greetings. 😊😊💕
Hermoso...
Muchas gracias, amiga @sabrip, me alegra que te haya gustado.🤗
Hola amiga, te felicito tu trabajo esta muy pulcro y tu perrito alvin muy colaborador, se ve hermoso con su arnés nuevo.
Suerte en el concurso!!!
#venezuela #affable
Hola amiga, muchas gracias por tu comentario.
Saludos.😍😘
Thanks a million for your great support @steemcurator01