Steem Women Club Community Contest #8 ' Handicrafts ' Time to Show Ingenuity || Pink Flamingo Print Handbag
Hi, Steemit community and friends of SteemWomen's Club! ✨
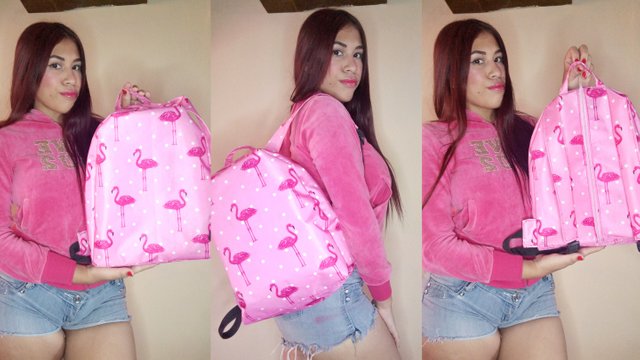
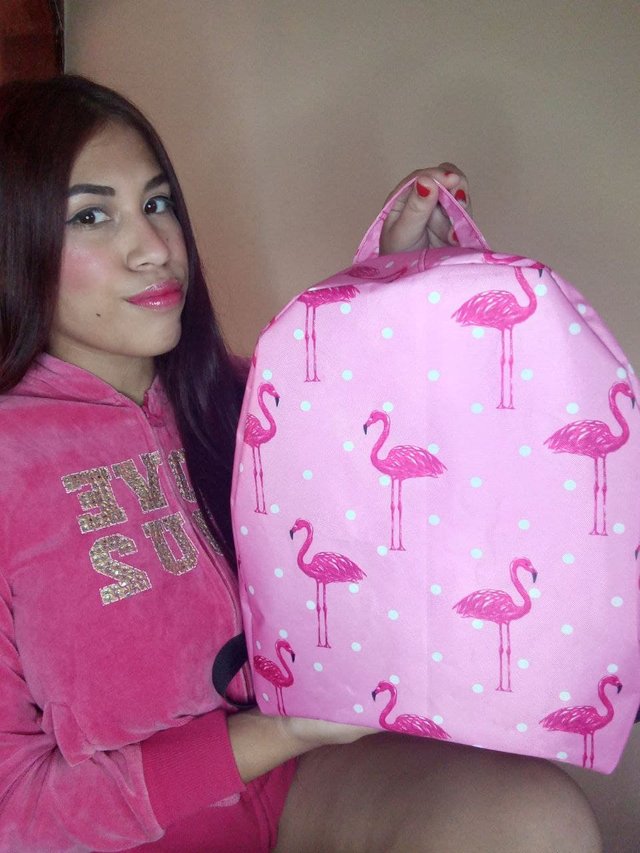
Since @steemwomensclub invited me to enter their contest I didn't hesitate much to do so, plus it tasted perfect to me this week's theme. I had just bought a printed fabric to make me a new bag and leave aside the old bag I already had, that's why I will be presenting you how to make my favorite bag model, besides presenting you the exact measurements to make a medium size bag, perfect for girls, teens and adults.
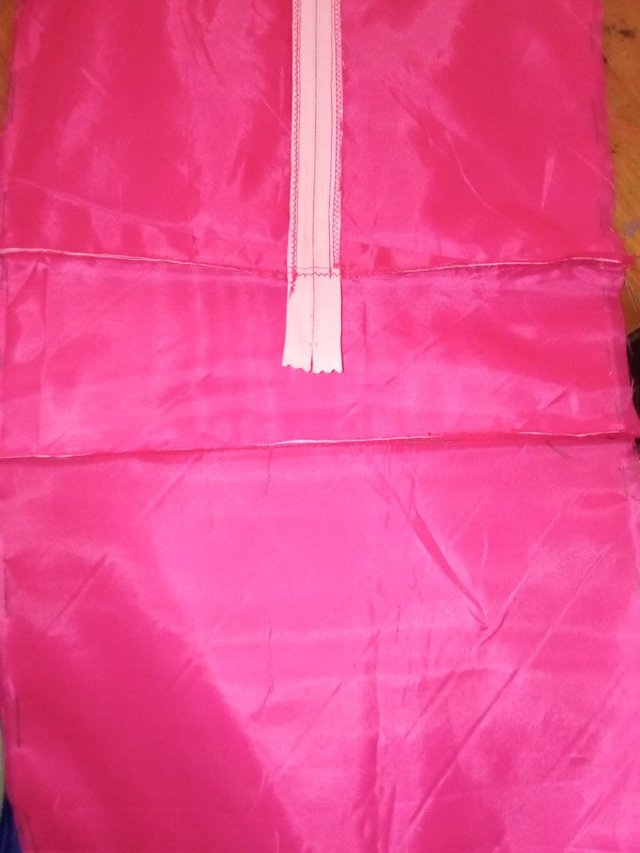
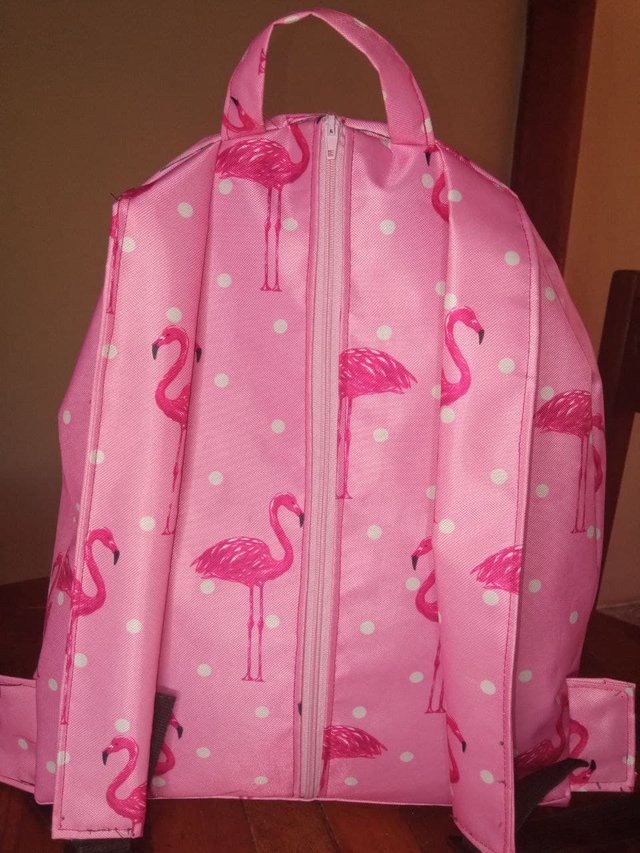
One of the things I like the most about this bag is its security, it has only one zipper and this is positioned just behind, where the back goes. It is practical and very safe to go out on the street, if in our locality abounds the danger of wanting to open the bags and steal us, this model can save us.
Desde que @steemwomensclub me invito a que participara en su concurso no dude mucho en hacerlo, además que me cató perfecto el tema de esta semana. Justo había comprado una tela estampada para hacerme un bolso nuevo y dejar de lado el viejo bolso que ya tenía, es por ello que les estaré presentando como hacer mi modelo de bolso favorito, además de presentarles las medidas exactas para hacer un bolso en tamaño mediano, perfecto para niñas, jóvenes y adultos.
Una de las cosas que más me gusta de este bolso es su seguridad, solo tiene un solo cierre y este está posicionado justo atrás, donde va la espalda. Es practico y muy seguro para salir a la calle, si en nuestra localidad abunda el peligro de querer abrir los bolsos y robarnos, este modelo nos puede salvar.
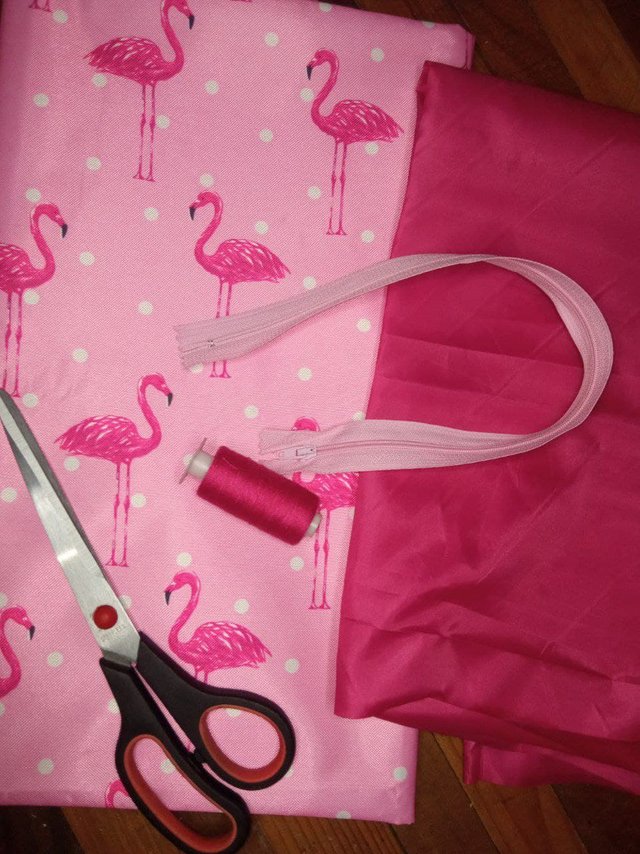
Materials:
For a medium size bag (35cmX30cm)
- 50cm of Lonetta Fabric (In this case I bought 75cm of fabric because the print was not placed correctly)
- 50cm of Taffeta Lining Fabric.
- 1 small thread.
- 1 zipper of 40cm.
- Needle, Scissors, Threads, Sewing Machine.
Materiales:
Para un bolso en tamaño mediano (35cmX30cm)
- 50cm de Tela Lonetta (En este caso yo compre 75cm de Tela debido a que el estampado no estaba ubicado correctamente)
- 50cm de Tela Forro Taffeta.
- 1 Hilo pequeño.
- 1 Cierre de 40cm.
- Aguja, Tijera, Hilos, Maquina de Coser.
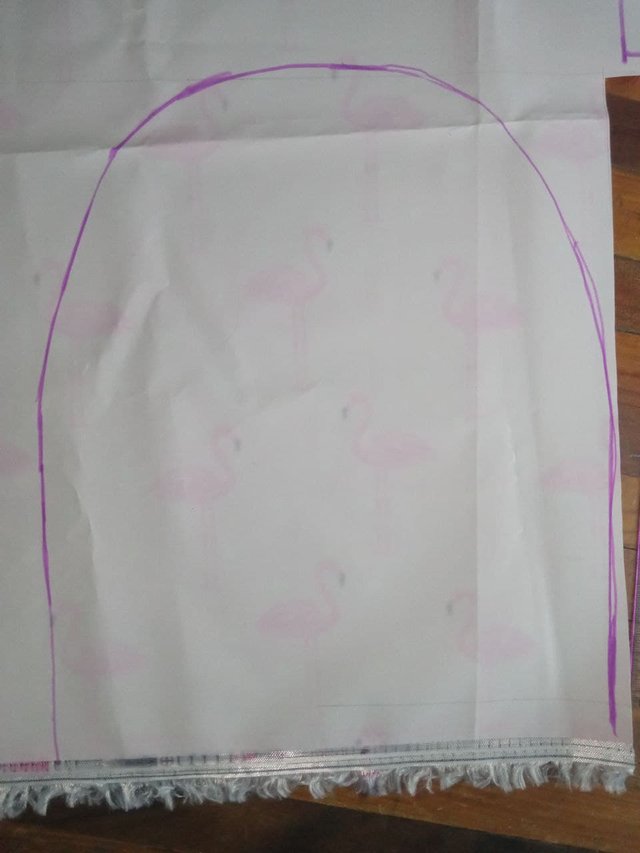
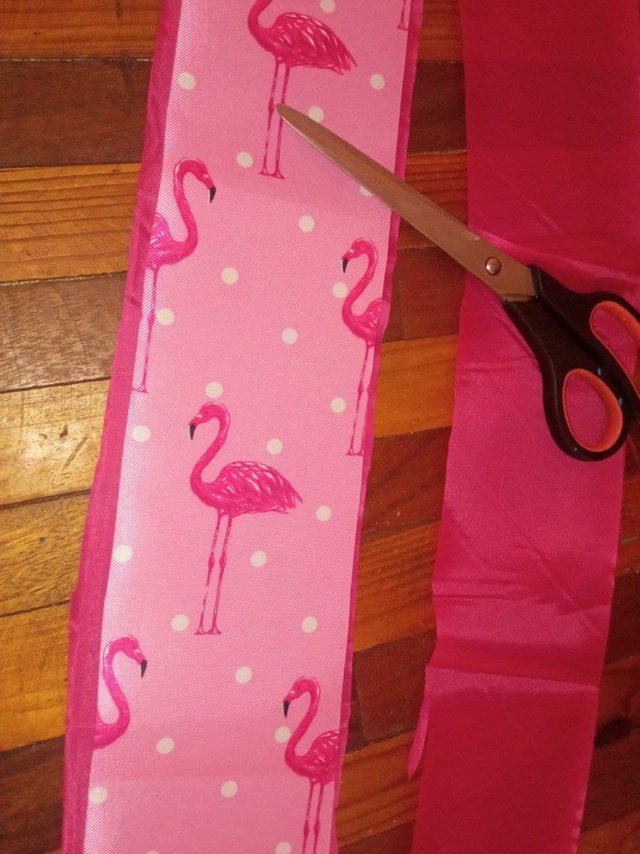
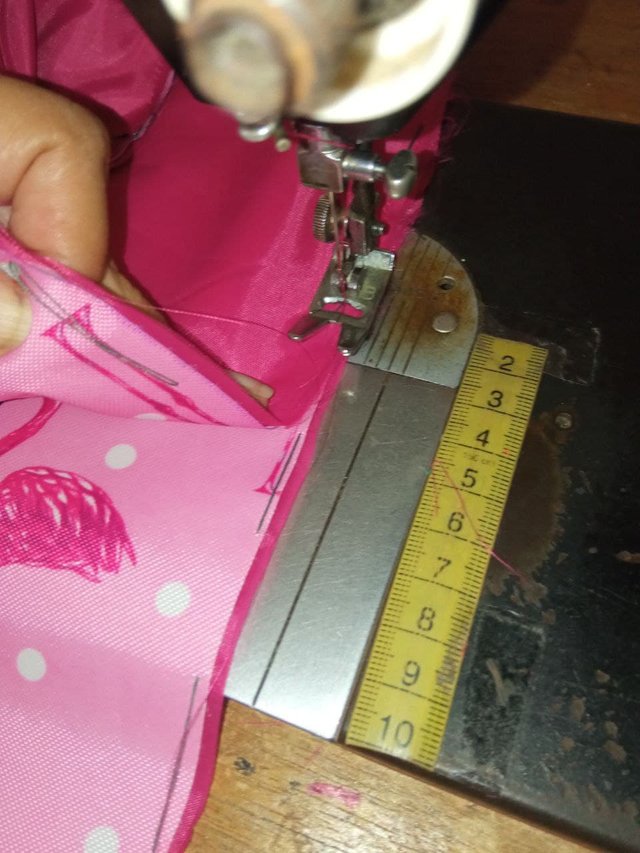
We mark all the pieces
First we must cut all the pieces of the bag, for this we will place them in this way: A simple bag has 7 pieces, the front piece, the back piece, the piece that goes to the sides, the bottom piece, a small piece to be the handle and two pieces that are the strings. That is what we are going to cut, for this we need a ruler or a meter, a pencil or a marker and a pair of scissors.
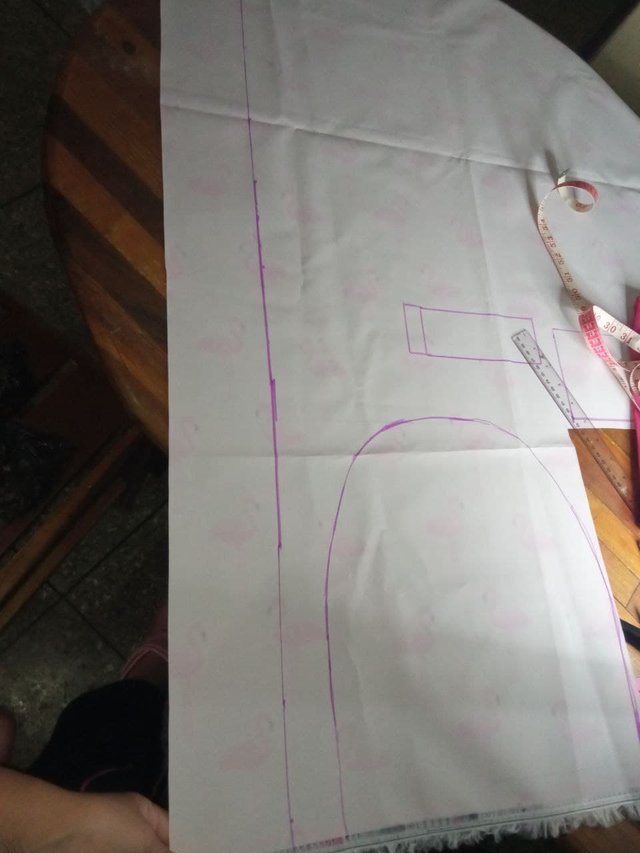
- We mark two similar pieces, only one should be 2cm wider than the other. This piece should be 30cm wide and 35cm high, with a semi-circle at the top. We can use a sheet of paper to make the shape before marking on the fabric.
Marcamos Todas las Piezas
Primero debemos cortar todas las piezas del bolso, para ello nos ubicaremos de esta manera: Un bolso sencillo posee 7 Piezas, la pieza de adelante, la pieza de atrás, la pieza que va a los laterales, la pieza de abajo, una pieza pequeña para ser el asa y dos piezas que son las cuerdas. Eso es lo que vamos a cortar, para ello necesitamos una regla o un metro, un lápiz o un marcador y unas tijeras.
- Marcamos dos piezas similares, solo que una debe ser 2cm más ancha que la otra. Esta pieza debe ser de 30cm de ancho y 35 de alto, con un semi-circulo en la parte superior. Nos podemos ayudar de una hoja de papel para hacer la forma antes de marcar en la tela.
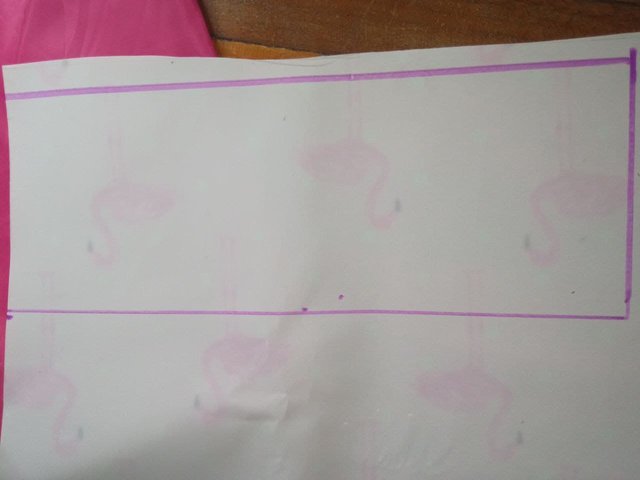
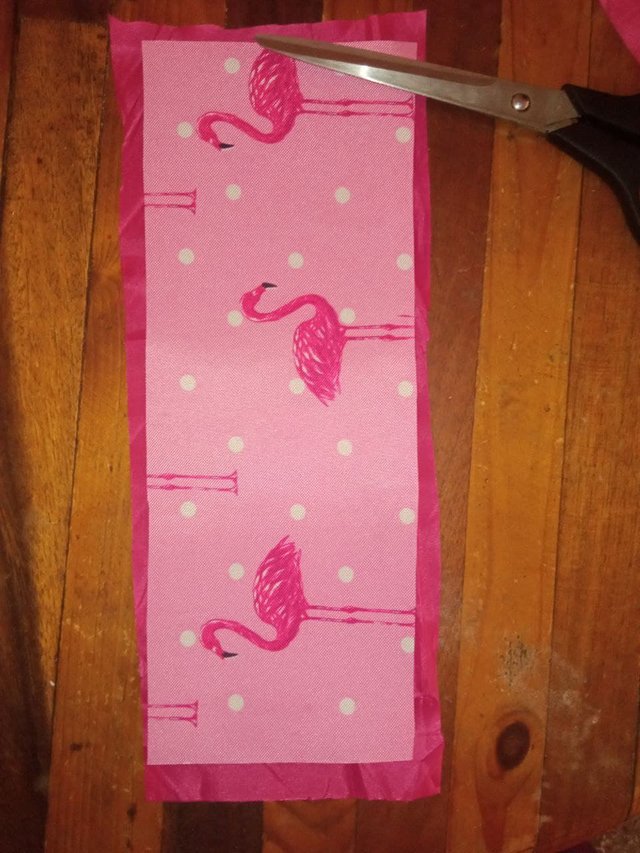
- Then we mark a rectangle, this is the base piece. The measurements are 30cm long and 10cm wide. The length of the base should always be equal to the width of the large semicircular piece, we must keep this in mind at all times, otherwise the base may be too small and it will not look good.
- Después marcamos un rectángulo, esta es la pieza de la base. Las medidas son 30cm de largo y 10cm de ancho. El largo de la base siempre debe ser igual que el ancho de la pieza grande semicircular, debemos tener en cuenta esto en todo momento, de lo contario nos puede quedar pequeña la base y no se va a ver bien.
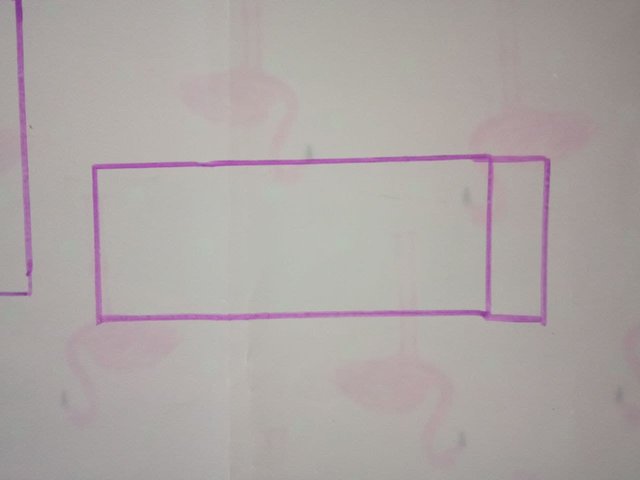
- We must also mark a small rectangular piece, this will be the handle of our bag, that piece with which we can hold the bag with one hand. The measures are 18cm long and 8cm wide.
- También debemos marcar una pieza pequeña rectangular, esta será el asa de nuestro bolso, esa pieza con la que podemos sostener el bolso con una mano. Las medidas son 18cm de largo y 8cm de ancho.
Then we mark a very long piece, this is the piece that goes on the sides of the bag, the measures to mark them are 95cm long and 10cm wide, the same as the width of the base piece of the bag.
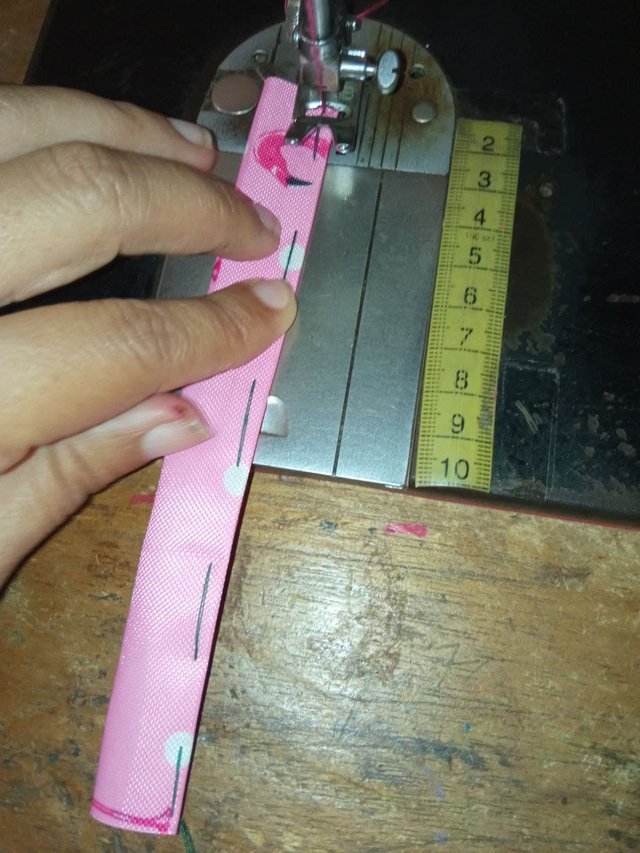
Finally we mark two pieces exactly the same, the strings of the bag, we can do two things: Mark a fair measure or mark a standard measure that we will adjust with other ribbons. In this case I used the second option and the piece that I marked has the following measurements
Luego marcamos una pieza muy larga, esta es la pieza que va en los laterales del bolso, las medidas para marcarlas son 95cm de largo y 10cm de ancho, igual que el ancho de la pieza base del bolso.
Por ultimo marcamos dos piezas exactamente iguales, las cuerdas del bolso, podemos hacer dos cosas: Marcar una medida justa o marcar una medida estándar que ajustaremos con otras cintas. En este caso utilice la segunda opción y la pieza que marque tiene de medidas

Cutting the fabrics
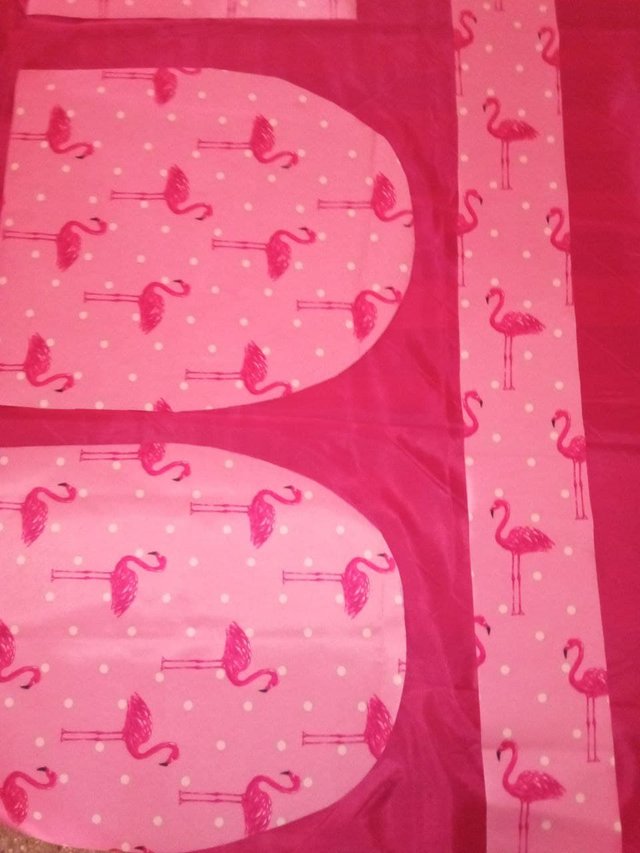
Now we must cut the fabrics, for this we use a special scissors for fabrics, not just any scissors because a bad scissors can cut the fabric badly and it would not be a uniform cut. We will cut all the pieces where we marked, without leaving the lines and taking into account that the cuts should be as straight as possible, if we do not have a good pulse we can cut a little bigger to perfect later.
- The larger semicircular piece should be cut all the way through the middle lengthwise, as well as its lining.
Corte de las Telas
Ahora debemos cortar las telas, para ello utilizamos una tijera que sea especial para telas, no cualquiera ya que una mala tijera puede cortar mal la tela y no sería un corte uniforme. Todas las piezas las cortaremos por donde marcamos, sin salirnos de las líneas y teniendo en cuenta que los cortes deben ser lo más derecho posible, si no tenemos buen pulso podemos cortar un poco más grande para perfeccionar después.
- La pieza semicircular más grande debe ser cortada por todo el medio a lo largo, igualmente su forro también.

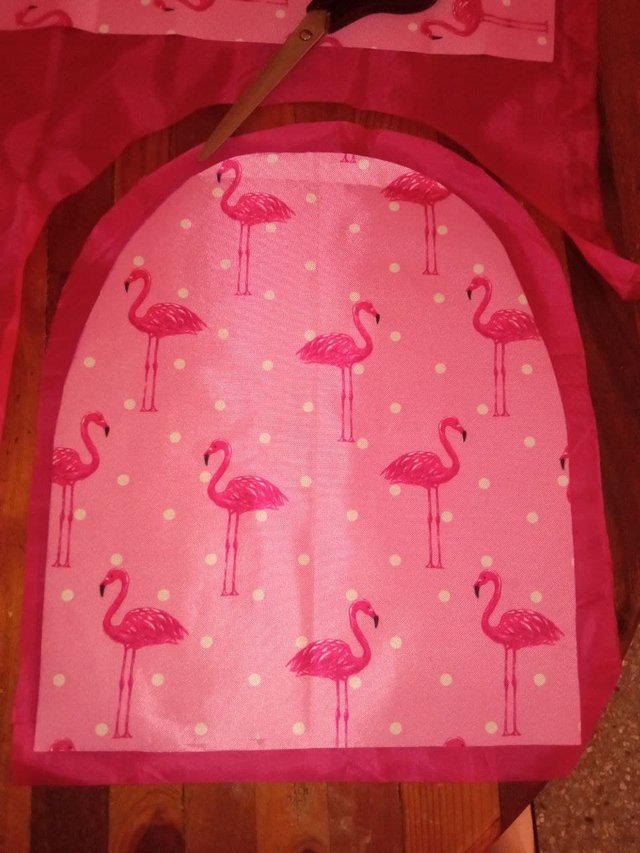
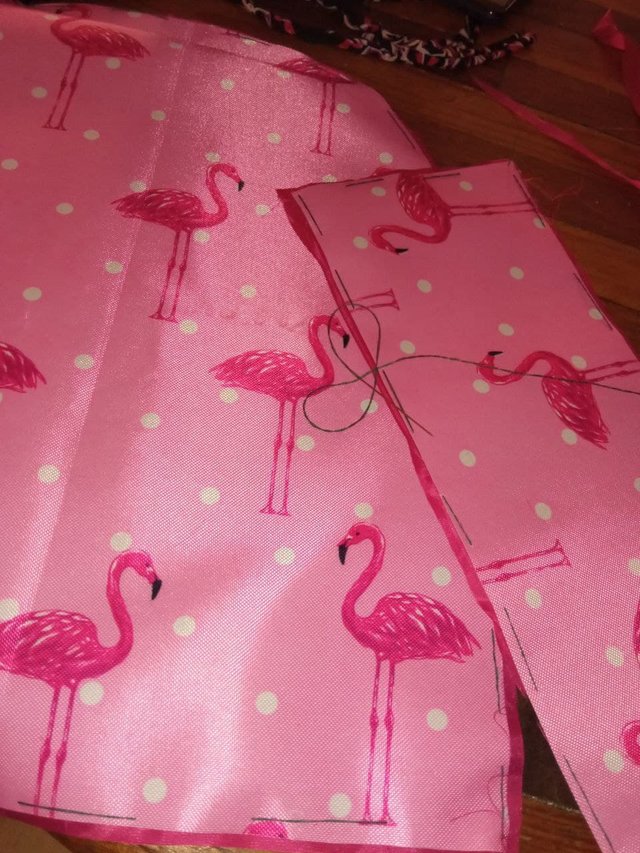
After we have all of our lonetta pieces ready we move on to taking the lining out of each of the pieces in the taffeta lining fabric. This fabric is thin, as my bag is pink with flamingo print the fabric I will be using for the lining is fuchsia.
- We must position all the pieces of the bag, except the handle and the strings, on the lining fabric. Then with a scissors we proceed to cut following the mold we have already placed, preferably one size larger than the lonetta piece.
Después de tener todas nuestras piezas en lonetta lista pasamos a sacar el forro de cada una de las piezas en la tela de forro taffeta. Esta tela es delgada, como mi bolso es rosado con estampado de flamencos la tela que estaré utilizando para el forro es fucsia.
- Debemos posicionar todas las piezas del bolso, menos el asa y las cuerdas, en la tela de forro. Luego con una tijera procedemos a cortar siguiendo el molde que ya colocamos, preferiblemente de un tamaño más grande que la pieza de lonetta
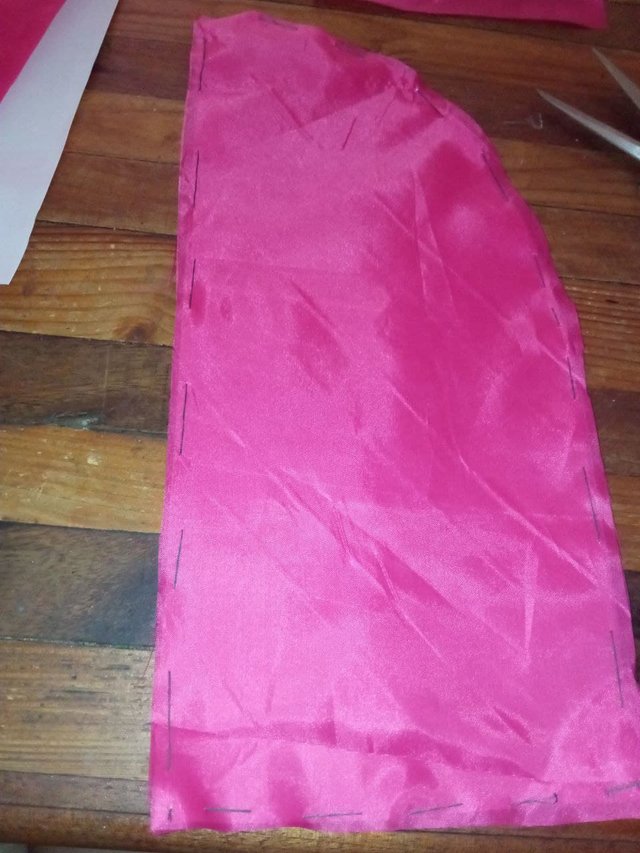
Securing the lining to each piece of fabric
One of the best tips I can offer is to do this step, we will take longer in the sewing process, but it is much easier (if we make a mistake) to unpick in this way, and even at the time of passing it through the machine we already know what we are going to do and we will have fewer mistakes. To do this we take any color of thread, if it stands out it is much better, a needle and proceed to secure each lining in each corresponding piece, making fairly long stitches, it is only for positioning.
Asegurar el forro a cada pieza de la tela
Uno de los mejores consejos que puedo ofrecerles es hacer este paso, vamos a tardar más en el proceso de costura, pero es mucho más fácil (si nos equivocamos) descoser de esta manera, e incluso al momento de pasarlo por la maquina ya sabemos lo que vamos a hacer y tendremos menos equivocaciones. Para ello tomamos cualquier color de hilo, si resalta es mucho mejor, una aguja y procedemos a asegurar cada forro en cada pieza correspondiente, haciendo puntadas bastante largas, solo es para posicionar.
Sewing of the pieces
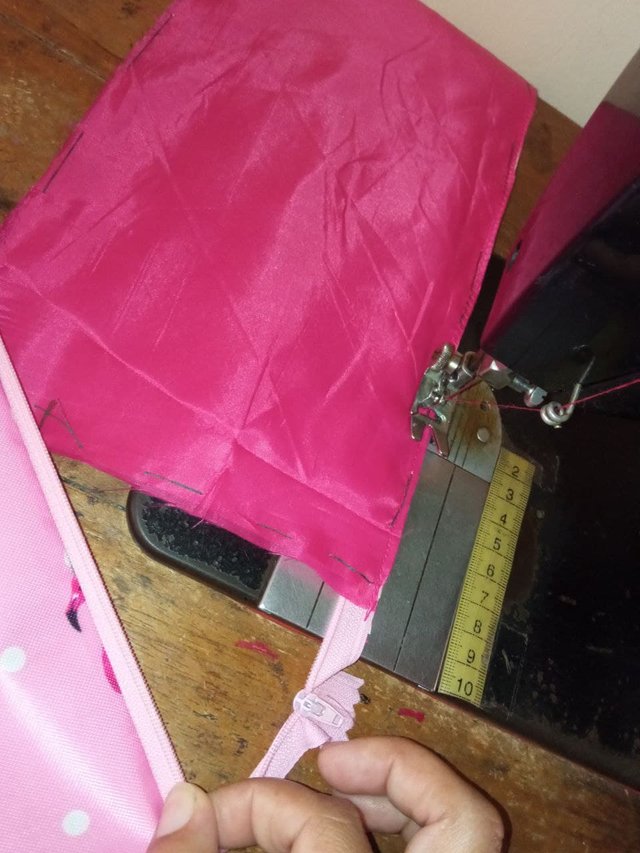
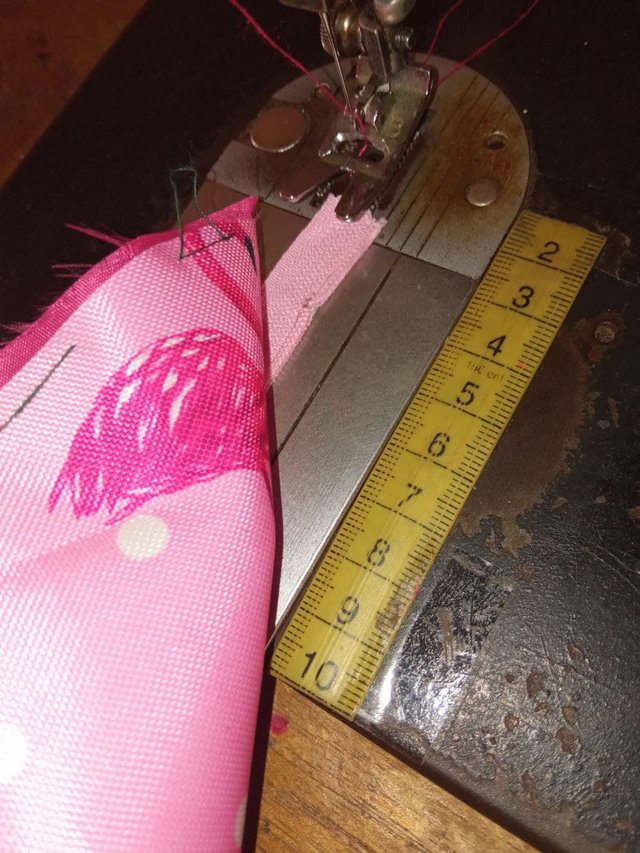
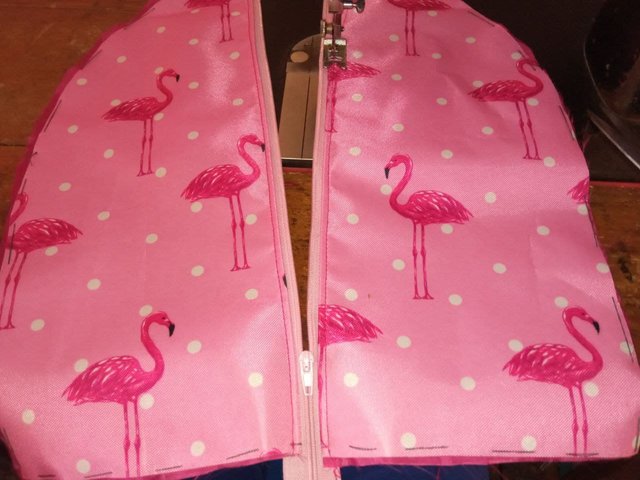
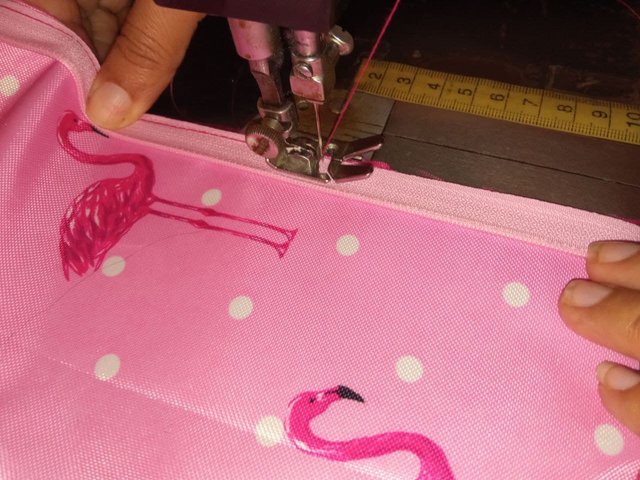
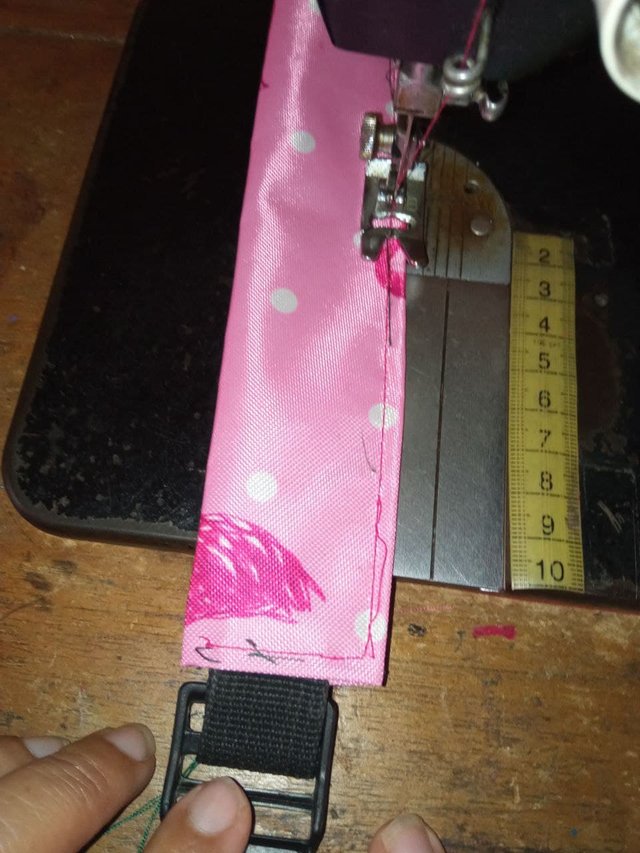
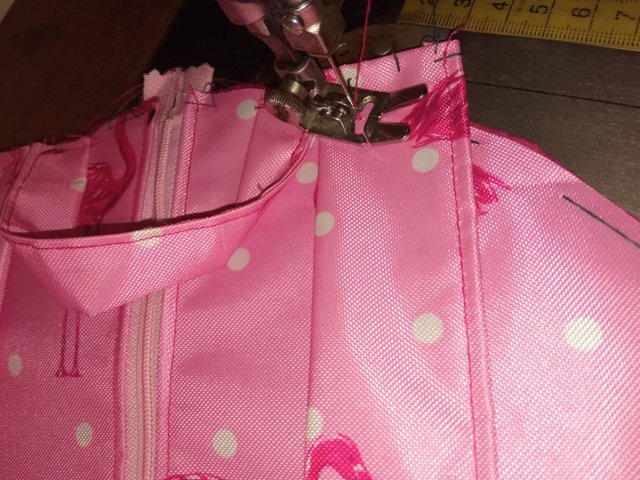
- Now comes the moment of truth, the part where we are going to sew the whole bag. We must start by gluing the zipper to the piece that is cut in half. As the size is 35cm, the 40cm zipper will be long, but we can cut it later perfectly.
Costura de las Piezas
- Llega el momento de la verdad, la parte donde vamos a coser todo el bolso. Debemos empezar por pegar el cierre a la pieza que esta cortada a la mitad. Como la medida es 35cm, el cierre de 40cm nos va a quedar largo, pero podemos cortarlo luego perfectamente.
- Then we must sew the two large semicircular pieces to the base of our bag, each of the pieces on each long side of the base. Leaving the small sides of the base free.
- Luego debemos coser las dos piezas grande semicirculares a la base de nuestro bolso, cada una de las piezas en cada lado largo de la base. Dejando libre los pequeños laterales de la base.

- Then we must sew the handle, secure the sides inwards and fold in half, lengthwise. Then we sew a single seam.
- Después debemos coser el asa, aeguramos los laterales hacia adentro y doblamos por la mitad, hacia lo largo. Luego pasamos una sola costura.
Note: As my print is of flamingos and these should be straight, I had to cut the long strip of the sides in half, then turn it over so that the flamingos were straight and sew it at the end.
Nota: Como mi estampado es de flamencos y estos deben quedar derechos tuve que cortar la tira larga de los laterales por la mitad, luego volterarla para que quedaran derechos los flamencos y coserla en el extremo.

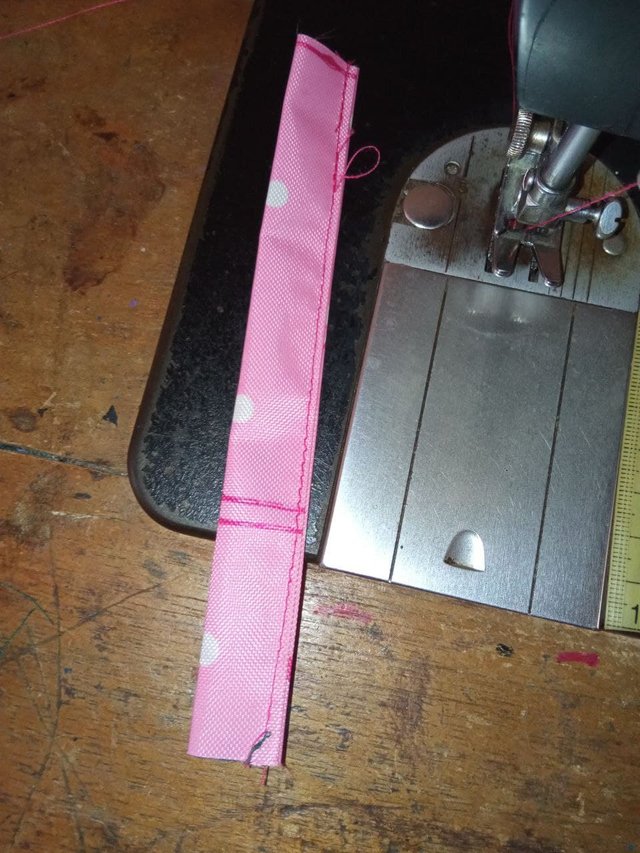
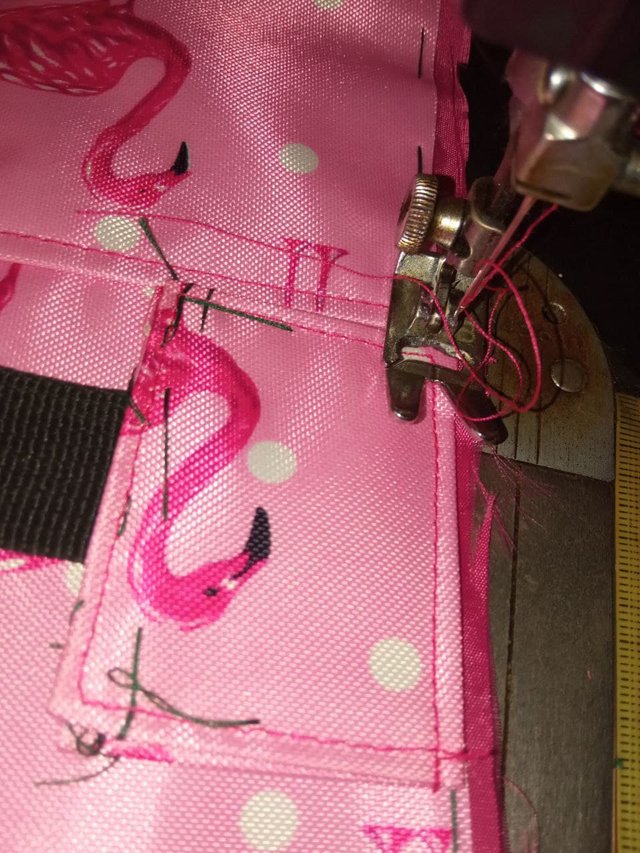
- Then we sewed the strings of the bag, I had to select an old bag I had and remove the strips along with the fasteners, to place them to this new bag. As in the handle part, I also had to tuck the ends of the fabric in, place the fasteners and fold the piece of fabric. Then run it through the machine and repeat the same process with the other string.
- Después pasamos a coser las cuerdas del bolso, tuve que seleccionar un bolso viejo que tenía y quitarle las tiras junto con los ajustadores, para colocarselos a este nuevo bolso. Como en la parte del asa, también tuve que meter los extremos de la tela hacia adentro, colocar los ajustadores y doblar la pieza de tela. Después pasarla por la maquina y repetir el mismo proceso con la otra cuerda.
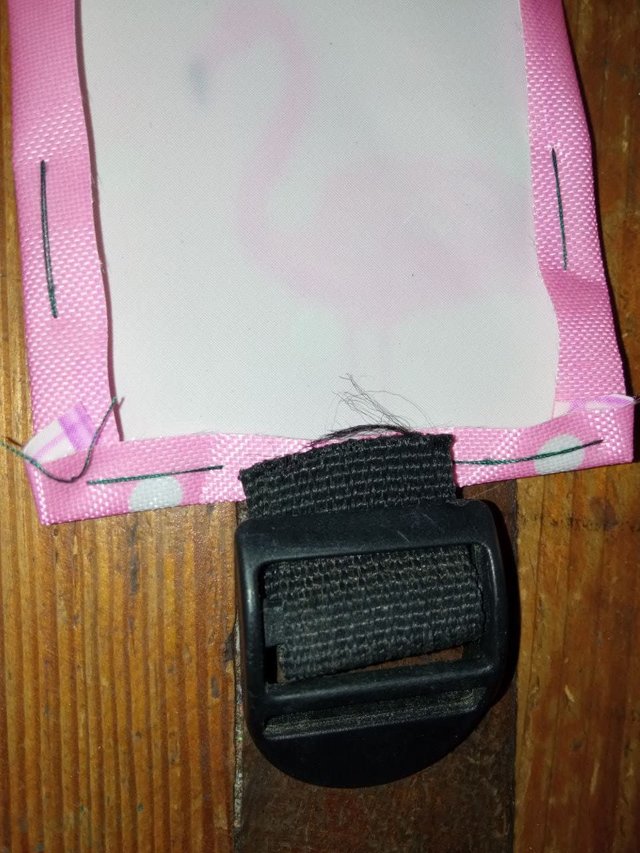
Note 2: A small piece that I forgot to cut and I had to do it later was the piece that holds the other string that goes in the adjusters, it is a small piece of 8cmx8cm that is folded like the handle, but before sewing the string in the middle must be included.
Nota 2: Una pequeña pieza que olvide cortar y tuve que hacerlo después fue la pieza que sostinen la otra cuerda que va en los ajustadores, es una pequeña pieza de medidas 8cmx8cm que va doblada igual que el asa, pero antes de coser debe estar incluida la cuerda en el medio.
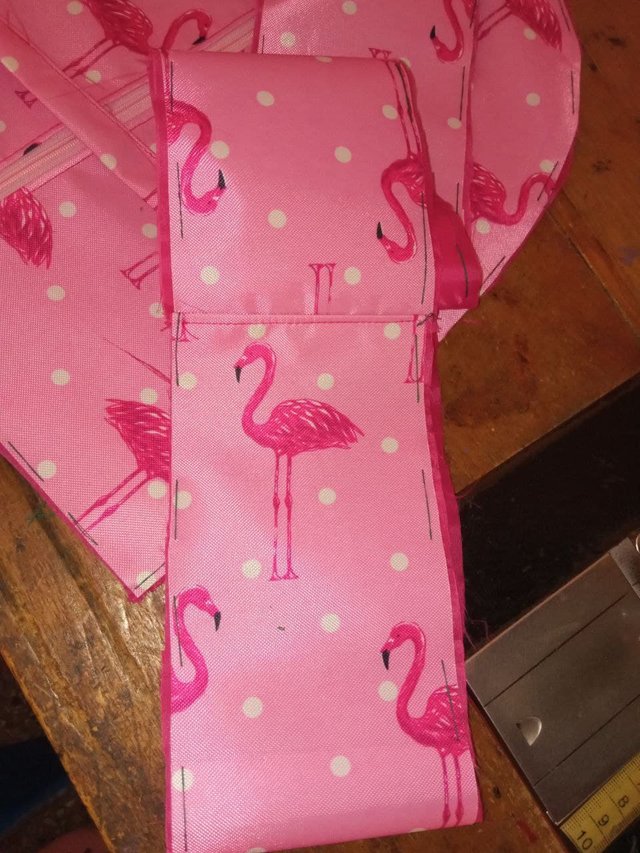
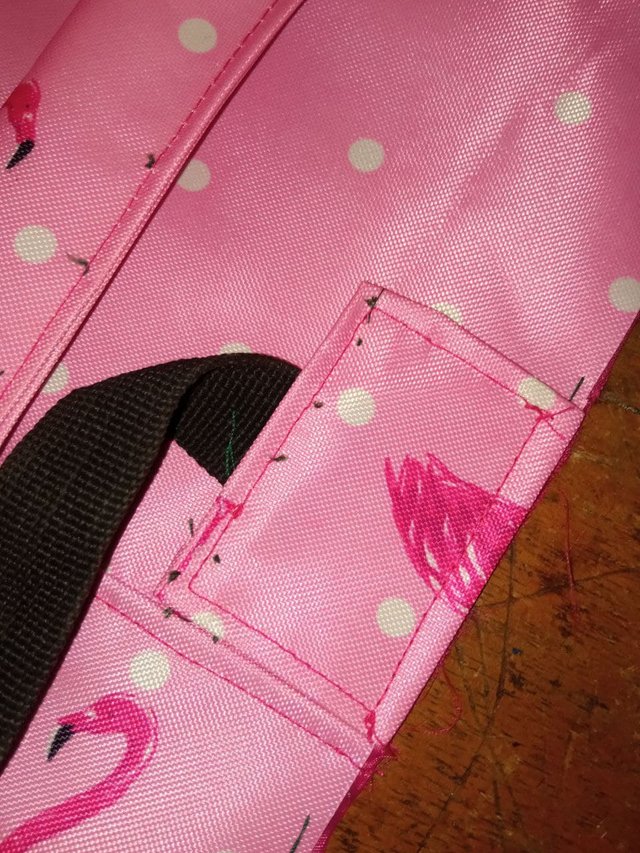
- Almost to finish we must sew the handle together with the cords to the semicircular piece that has the clasp. The handle is positioned in the center of the piece and each rope at each end of the handle. The two small pieces with the other ropes should go at the bottom of the semicircular piece.
- Casi para terminar debemos coser el asa junto con las cuerdas a la pieza semicircular que tiene el cierre. El asa la posicionamos en todo el centro de la pieza y cada cuerda a cada extremo del asa. Las dos piezas pequeñas con las otras cuerdas deben ir en la parte inferior de la pieza semicircular.
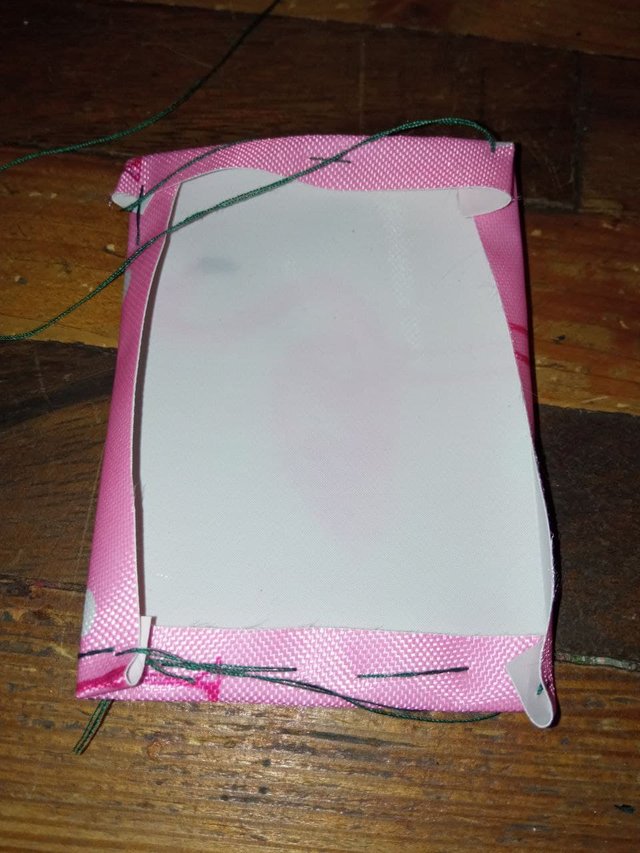
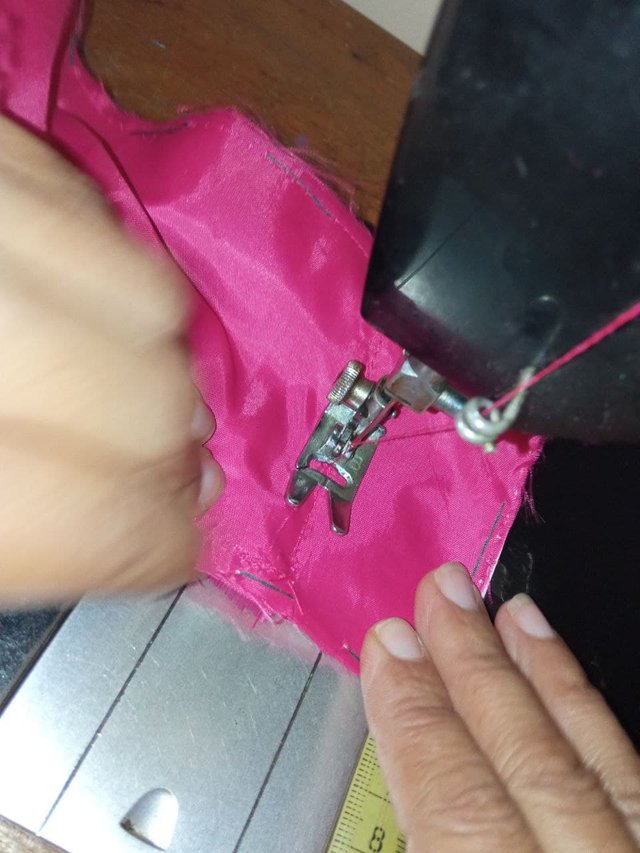
Finally we must place the longest piece, this piece is the one that will unite and close the whole bag. To do this, all the outer pieces must be facing inwards and the zipper must be open so that the bag can be turned over.
The piece is glued first to one of the two semicircular pieces, then to the other piece and finally to each end of the base.
Por útlimo debemos colocar la pieza más larga, esta pieza es la que va a unir y cerrar todo el bolso. Para ello todas las piezas extenas deben estar hacia adentro y el cierre abierto para poder voltear el bolso.
La pieza va pegada en primer lugar de una de las dos piezas semicirculares, después de la otra pieza y por último de cada extremo de la base.

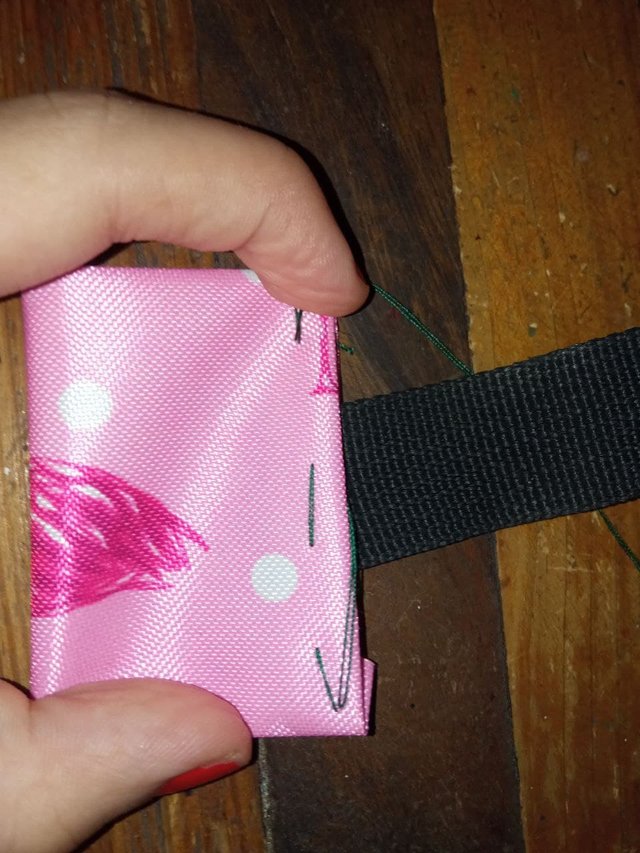
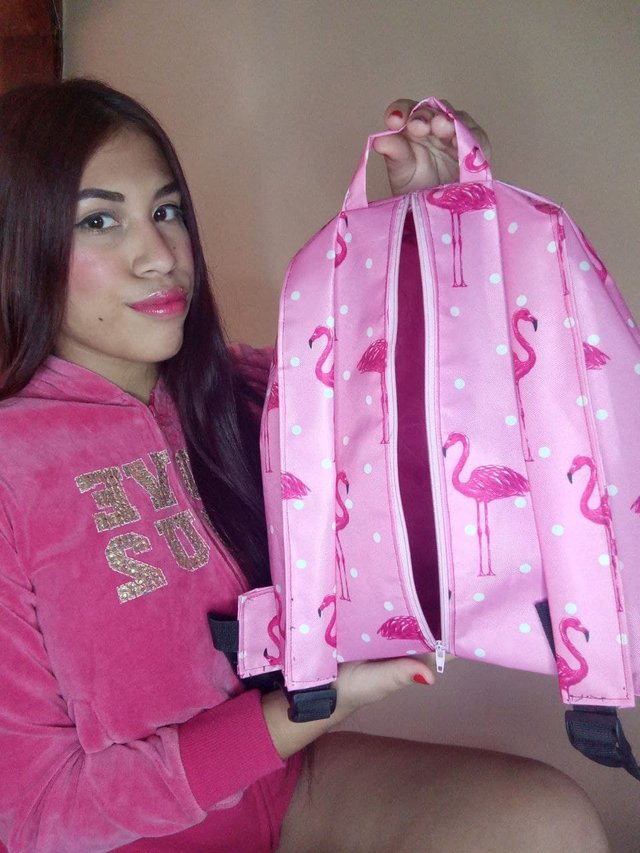
After sewing the whole bag, we can reinforce some of the seams, such as the base or the handle together with the strings. It is also possible to place a ribbon at each seam of the fabrics to cover them and not to be noticed at the moment of opening the bag. Finally we must turn the bag upside down and that's it.
Después de coser todo el bolso, podemos reforzar algunas costuras, como por ejemplo la parte de la base o de la asa junto con las cuerdas. También es posible colocar una cinta a cada unión de las telas para taparlas y que no se note al momento de abrirlo. Por ultimo debemos voltear el bolso y eso es todo.
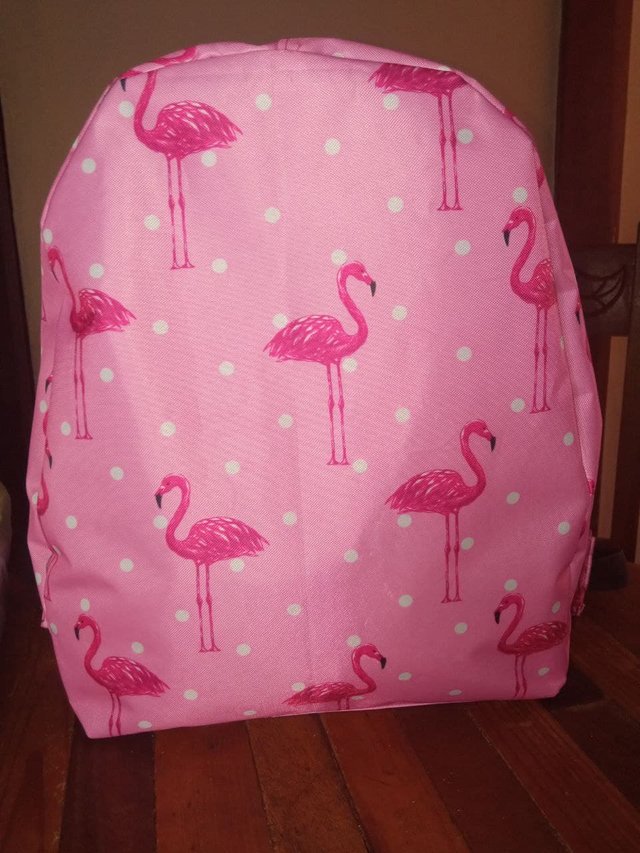
It is definitely my favorite design, I love to use it and I love how it looks so different from the others. It is important to use the right fabric, the lonetta fabric is especially for making bags of all kinds, we can also use semi leather or some kind of leather, it all depends on the taste of each person. I am very happy with this bag, I hope you liked it, see you soon!
Definitivamente es mi diseño favorito, amo usarlo y amo como se ve tan diferente a los demás. Es importante utilizar la tela adecuada, la tela lonetta es especialmente para hacer bolsos de todo tipo, también podemos usar semipiel o algún tipo de cuero, todo depende del gusto de cada persona. Yo estoy muy contenta con este bolso, espero que les haya gustado, nos vemos próximamente!
Pictures of my property. Camera: CellPhone Xiaomi Redmi 9. All content is my property, published exclusively for Steemit. Many thanks to the @steemwomensclub community for organizing this contest and for the space to publish everything related to the world of women.


Espectacular tu bolso, me gusta mucho el estampado de flamingos, piñas y unicornios jejeje. Exitos !
Muchas graciass! Me encantó también estampado, estaba apunto de comprarlo también 😂❤️
Un lindo diseño, muy original!
Suerte en el concurso!
#venezuela #affable
Muchas gracias! Es muy lindo 😁
Quedé fascinada con este bolso, me encanta l lugar donde esta el cierre y como lo has explicado permite que cualquiera se anime a realizarlo. Saludos!
Graciaaass!! Si gustas puedes intentar hacerlo, no es muy complicado. Saludos😁
Bellisimo y facil de hacer
me lo prestas je ej je
Graciass❤️❤️
Que bello el estampado del bolso y además donde colocas el cierre es muy seguro.. gracias por compartir!!
Ay! Muchas gracias! Amo este bolso, saludos 😁😁
Very nice! Excellent step by step explanation. Beautiful, practical pack, bag
Thanks!!😁✨
Me encanto el bolso
Gracias😁😁
The competition ended yesterday. Continue to prepare quality post in the community. But I'm glad when you get high votes from the curator.thank you :)