💅💅 GET YOUR NAILS DONE LIKE A PRO! 💅💅 // 💅💅 PINTA TUS UÑAS COMO UNA EXPERTA 💅💅
Get your nails done like a PRO!
I was about to polish my nails and I thought it might be a good idea to show what I've learnt! I'm no professional manicure, but it's something that I really like and I find it really relaxing, so I'm self-thought on how to do this!
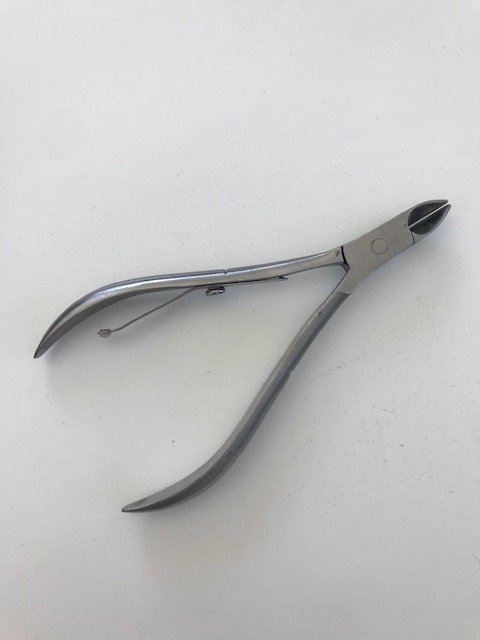
1st step: Getting everything ready!
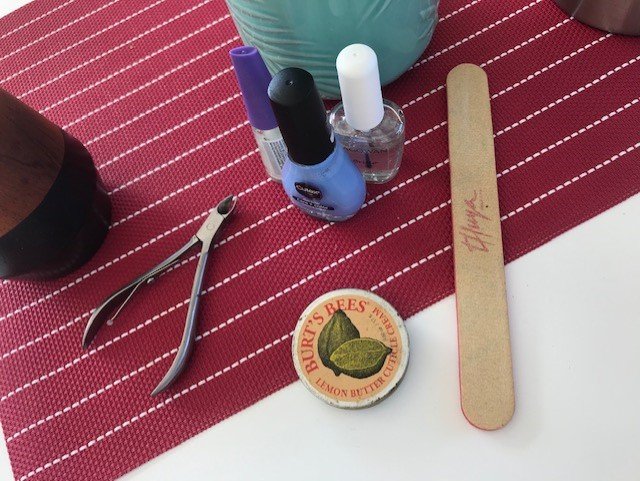
Make sure you have everything that you need with you, that's a lime, nail plier, cuticle cream (or any moisturising cream you have), base polish, any colour polish that you want and top coat.
Don't forget to unpolish your nails before starting!
2nd step: Filing your nails
Pick up the lime and start filing your nails. Bare in mind what shape you want to give them, I've always had them in a squared shape, but there are plenty styles that you can choose:

Make sure that your lime is always in a parallel position from your nails, so that you avoid filing them and leaving different layers. This will help on getting them to be stronger!
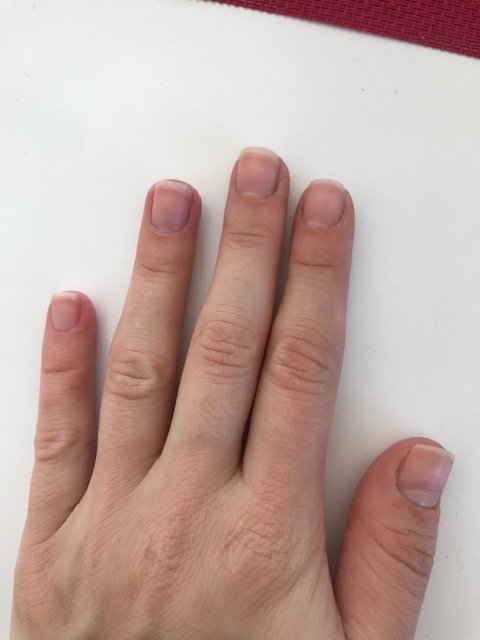
3rd step: Moisturising your cuticles and removing them
This step is optional. I find cuticles really bothering from time to time and I always like to have them removed so that I don't remove them myself 😓
At first, you should put some moisturiser on your cuticles before pushing them.
Afterwards, with your cuticle remover, you start cutting the edges very carefully so that you don't get hurt. I tried to take a picture of me while doing it, but it was impossible lol.
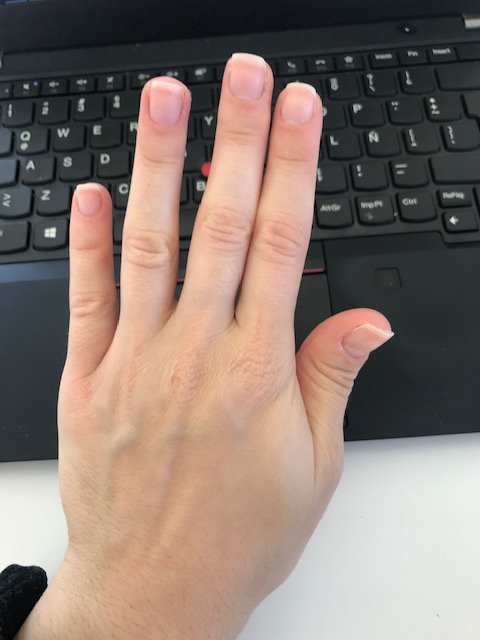
And this is the final result, our nails are ready for some nail polish:
4th step: putting some base coat and nail polish!

At first, you should put on a layer of base coat, so that your nails are protected and don't get stained with the nail polish. It has happened to me before and I can surely tell you that it's no fun, lol.
Let them dry for a couple of minutes and then add the first layer of the colour you've chosen:
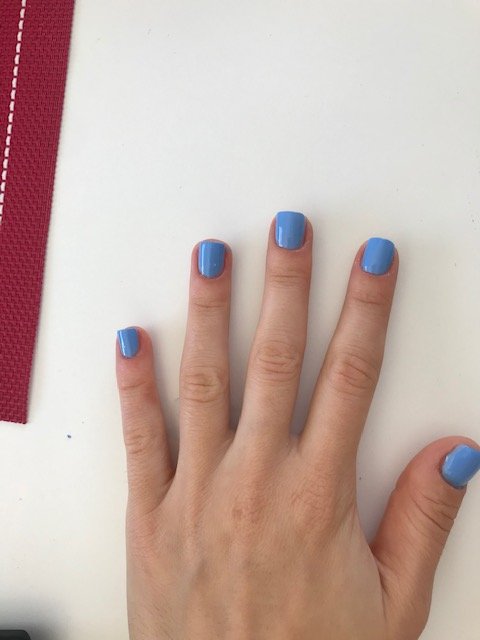
PRO Tip: Never, ever shake the nail polisher. Never. I mean it, lol. By shaking it, you're mixing the polisher with the air and once you get your nails painted, you'll notice that little bubbles start to show. What you can do is to roll the nail polisher gently in your hands, this works way better.
5th step: 2nd layer and top coat!
I let the first layer of nail polisher dry for at least 10 minutes, then I apply another one and one it seems to have set, I apply the top coat so that the colour lasts longer! :)
Final result:
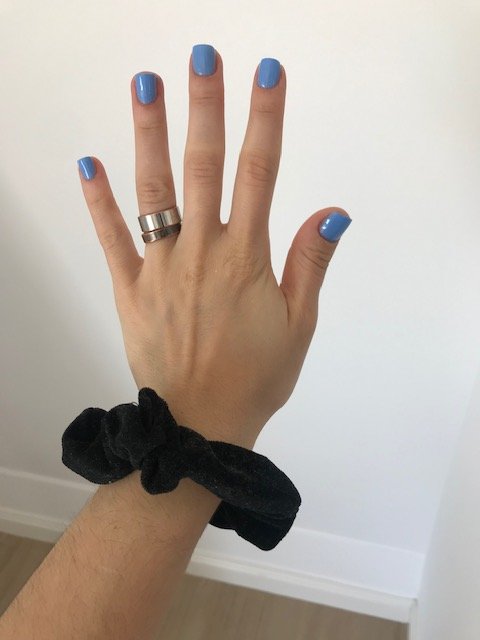
PS: This is my favourite colour :)
Hope you find it useful!
@steemcurator01 @steemwomensclub @svm038 @ngoenyi @saracampero

{Español}
.png)
Pinta tus uñas como una experta!
No soy una manicura profesional, pero como es algo que realmene me gusta y me parece muy relajante, aprendí por mi cuenta mirando e investigando... y tengo que decir que bastante bien me manejo 🤪🤪
1er paso: Preparar todo!
Asrgúrate de tener todo lo que necesitas cerca: una lima de uñas, alicate de cutículas, crema humectante, base, el color que deseas aplicar y el brillo.
No olvides quitarte el esmalte antes de comenzar!
2do paso: Limar las uñas
Toma la lima y comienza a limar tus uñas. Ten presente el estilo que quieres darles, hay muchísimos por elegir. Yo las uso desde siempre cuadradas, pero tienes un estilo diferente según quieras experimentar:
Asegúrate de siempre limar de forma paralela a las uñas para evitar crear capas y que de esa forma se descamen. Esto hace que las uñas se vuelvan más débiles y sean mas propicias a quebrarse.
3er paso: Hidrata tus cutículas y remuévelas
Este paso es opcional. En mi caso, las cutículas son realmente molestas y prefiero cortarlas, antes que arrancarmelas y que termine siendo mucho más doloroso. 😓
Primero, aplica algo de crema humectante (en mi caso, tengo una especialmente para cutículas, pero puedes utilizar cualquiera) y con un palito o el mango de una cuchara, empújalas hacia abajo.
Luego, con tu alicate de cutículas, comienza a cortarlas con mucho mucho cuidado, ya que puedes lastimarte. Intenté tomarme una foto mientras lo hacía, pero era realmente imposible jajaj
Este es el resultado final, ahora nuestras uñas están listas para pintar:
4to paso: Pintate con base y dale la primera capa de color
Primero, aplica la base o porcelana, como la conozcas en tu país, para que tus uñas esten protegidas del color. No es divertido quitarte el esmalte y ver que tus uñas se encuentran teñidas, te lo aseguro jajaj
Deja que seque por unos minutos y luego agrega la primera capa del color que hayas elegido:
PRO Tip: Nunca de los nuncas agites el esmalte, nunca nunca nunca. Lo que haces es mezclar el aire que tiene el frasco con el esmalte y, de esta forma, aparecen pequeñas burbujas de aire al aplicarlo en tus uñas. Para evitar esto, lo que puedes hacer es rodarlo entre tus manos, el resultado es el mismo, sin mezclar el esmalte con el aire!
5to paso: 2d capa de color y top coat/brillo!
Entre ambas capas de color, yo dejo unos 10 minutos a que el esmalte se seque, luego aplico la segunda. Dejo otros minutos que transcurran y recien ahí aplico el brillo para que el color dure más tiempo!
Resultado final:
PD: Este es mi color favorito! :)
Espero sea de utilidad!
WOW!!! Amazing👌😍... self care is more important.. i will try this😉
Hola preciosa como estas? Que lindo te quedo jeje xD Me diste una idea para publicaciones futuras. Jeje GRacias peciosa. Saludos y mucha suerte en la comunidad.