[ESP/ENG] Tutorial Como Hacer una Cajita de Sorpresa// Tutorial How to Make a Surprise Box
Hello to all the friends of steemit, this time we focus on another small and entertaining craft for those moments of giving to our loved ones is entertaining and does not take much time I hope you like this entertaining post, I will show you my step by step I hope be as clear as possible any questions ask.

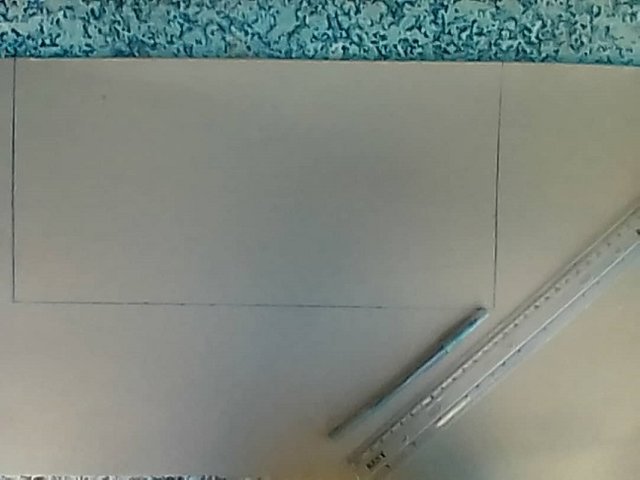
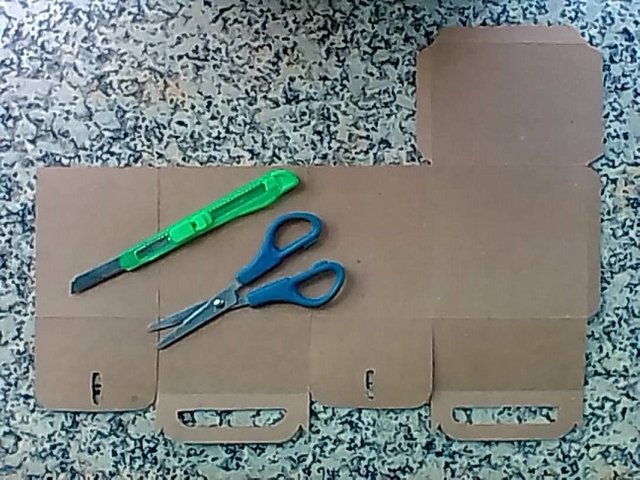
Paso1
Vamos a marcar en nuestra cartulina un rectángulo que medirá 36cm de largo x 18cm de ancho.
Step 1
We are going to mark on our cardboard a rectangle that will measure 36cm long x 18cm wide
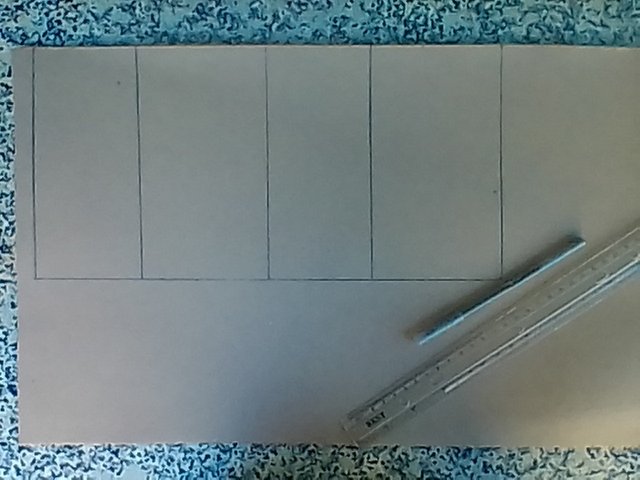
Paso 2
Vamos a dividir nuestro rectángulo en 4. La 1era y 3ra división serán de 8cmy de 10cm de ancho c/d 1
Step 2
We are going to divide our rectangle into 4. The 1st and 3rd divisions will be 8cm and 10cm wide c / d 1
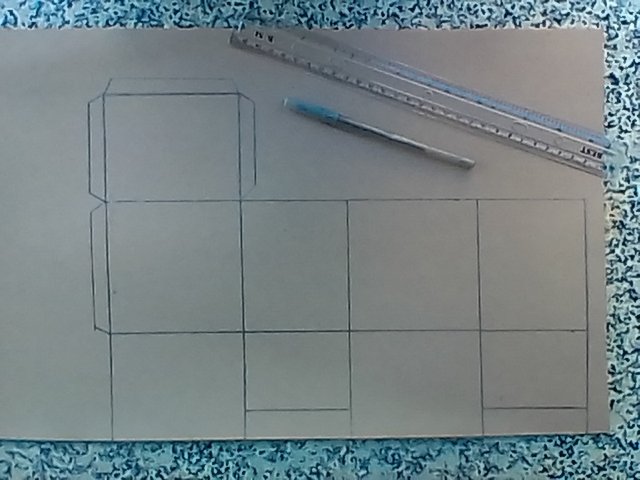
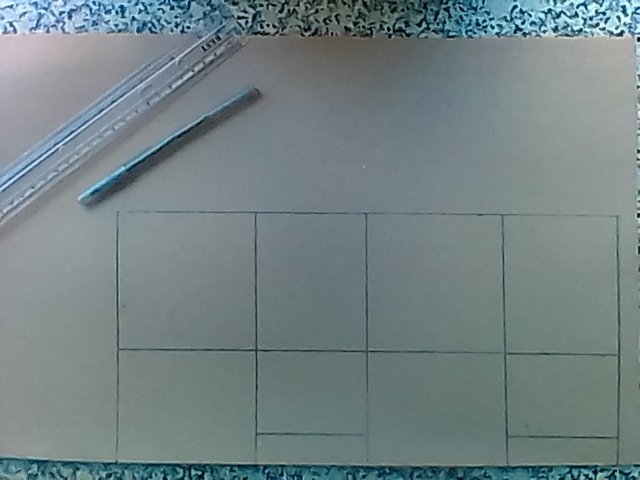
Paso 3
Vamos a trazar una línea divisoria de 10cm de alto desde la parte inferior de nuestro rectángulo y en la1era y 3ra casilla vamos atrasar una línea de 6cm de alto contando la línea divisoria que acabamos de trazar primero.
Step 3
We are going to draw a dividing line 10cm high from the bottom of our rectangle and in the 1st and 3rd boxes we are going to move back a line 6cm high by counting the dividing line that we just drew first.
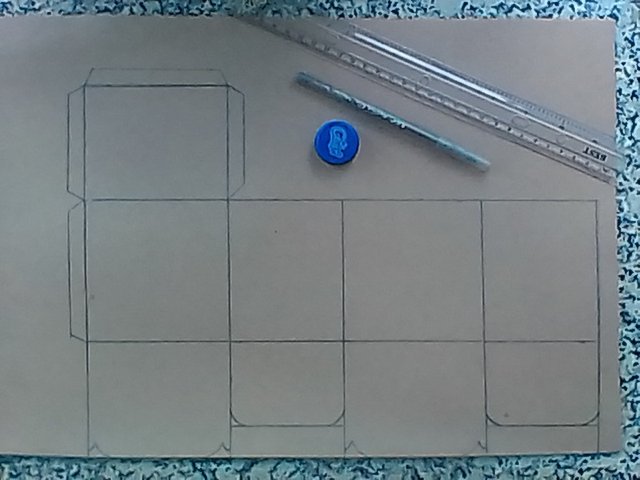
Paso 4
Vamos a sacar la base de nuestra cajita de regalos de la última división que va a medir 8cm de ancho x 10cm de largo la cual vamos a hacerle 3 pestañitas de 1cm de ancho c/u y también a nuestro último recuadro hasta la línea divisoria que debes medir igual que las pestañas de nuestras base.
Step 4
We are going to take the base of our gift box from the last division that is going to measure 8cm wide x 10cm long which we are going to make 3 small 1cm wide tabs each and also to our last box up to the dividing line that you must measure the same as the eyelashes of our base.
Paso 5
Para las curvitas de nuestra 1era y 3era división vamos a medir de esquina a esquina de ambos lados 1,5cm marcamos 2 puntos y por allí vamos a trazar con algo redondo una semi curva yo utilice una pequeña tapa. En cuento a la 2da y 4ta división mediremos desde la parte superior 0,5cm hacia abajo y haremos un punto que le denominaremos punto 1 en la misma parte superior vamos a medir nuevamente 0,5cm de ancho hacia dentro marcaremos otro punto nro 2 partiremos desde hay 1cm hacia abajo marcamos otro punto y lo marcamos otro punto y lo llamaremos punto 3 luego procedemos a unir el punto 1 con el punto 3 sin tocar el punto 2 hasta hacer una especie de cachito para lograr la curvita de lo que será las asitas de nuestra cajita haremos lo mismo en la primera y tercera división desde el punto 3 hasta la parte superior mediremos con nuestra regla esquinada 1,5cm marcamos dos puntos y hacemos la misma operación con la tapa.
Step 5
For the curves of our 1st and 3rd division we are going to measure from corner to corner of both sides 1.5cm we mark 2 points and there we are going to draw a semi curve with something round and I use a small cap. Regarding the 2nd and 4th division we will measure from the top 0.5cm down and we will make a point that we will call point 1 in the same top part we will again measure 0.5cm wide inwards we will mark another point number 2 we will start from There is 1cm down we mark another point and we mark another point and we will call it point 3 then we proceed to join point 1 with point 3 without touching point 2 until we make a kind of little bit to achieve the curve of what will be the asitas of In our box, we will do the same in the first and third division from point 3 to the top, we will measure with our 1.5cm corner ruler, we mark two points and do the same operation with the lid.
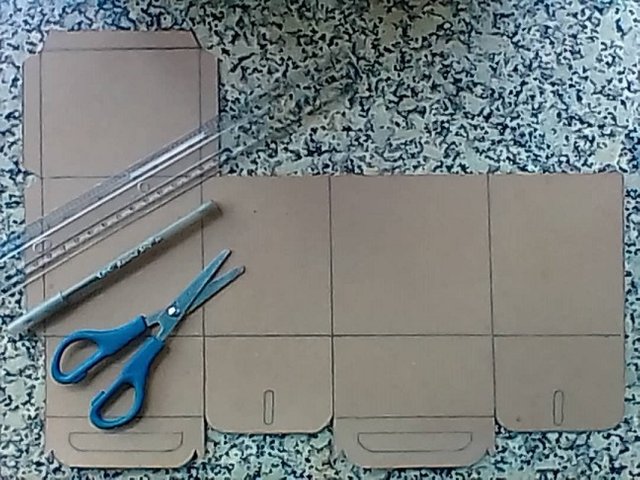
Paso 6
Con la ayuda del exacto vamos a abrir los cuadritos de las asas y delos aseguradores también vamos a trazar una línea con el exacto una sobre línea para poder doblar nuestra cajita
Step 6
With the help of the exact one we are going to open the squares of the handles and of the belays we are also going to draw a line with the exact one an over line to be able to fold our box
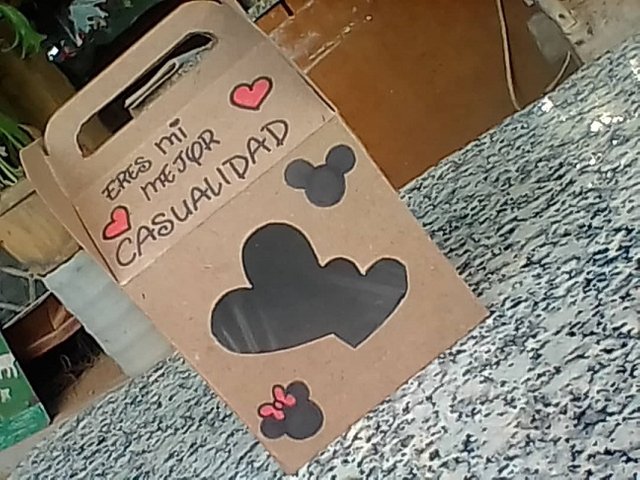
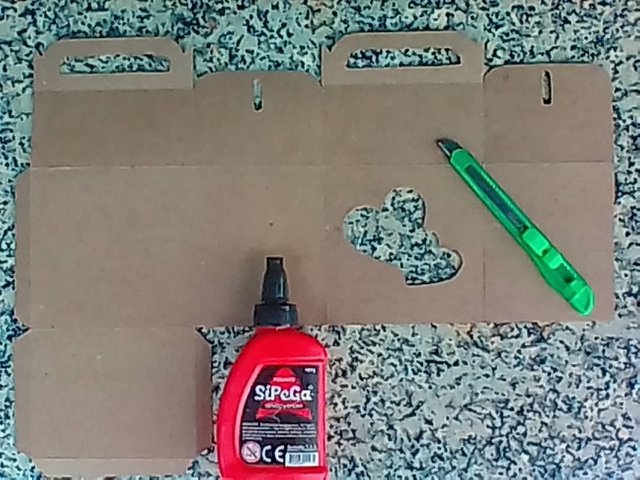
Paso 7
Por último y terminar nuestro trabajo adornamos a nuestro gusto los motivos que desees para regalar a la persona deseada y listo espero que les guste mi paso a paso de nuestra cajita.
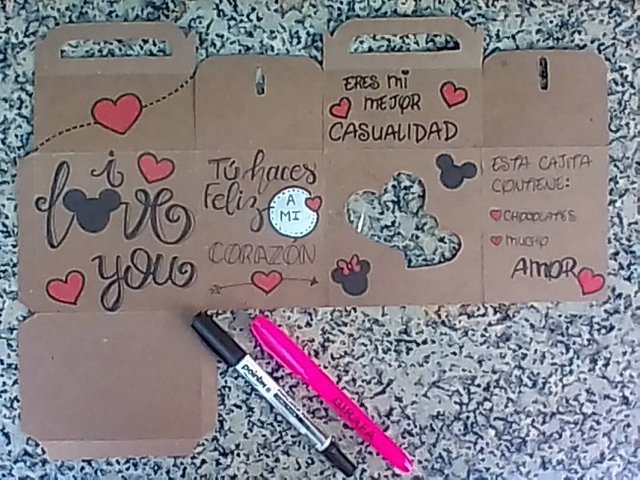
Step 7
Finally and finish our work we decorate to our liking the reasons you want to give to the desired person and voila I hope you like my step by step of our box.


Espero que este post sea útil para ti. ¡No olvides dejar un comentario! Hasta un próximo post...
Te quedo hermoso. El procedimiento de hacerlo es verdaderamente fácil. Me encanto
Q hermoso amiga me encantan las manualidades y no todo el mundo sabe elaborar una caja así te felicito, gracias por compartirla
Linda cajita, no sabia hacerla voy a intentarlo:-)
Hermoso, yo también elabore unas muy parecidas a estas para el cumpleaños de mi hijo.
Que facil y que linda, y con lo costosas que estan las bolsas de regalo jejeje. Excelente tutorial!