[ENG-ESP] Tutorial: Porta-Colores Tipo Pulpito// Tutorial: Pulpit Color Holder
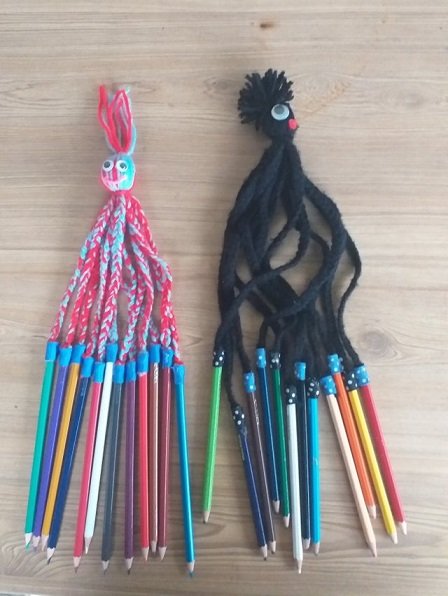
Hello friends of steemit, this time I will show you a simple and definitive way to end the usual disorder with the colors of our children. It is a practical necklace holder for figurines and I decided to make it octopus type so that the colors do not get lost and keep them sorted here is the step by step I hope you like the tutorial.
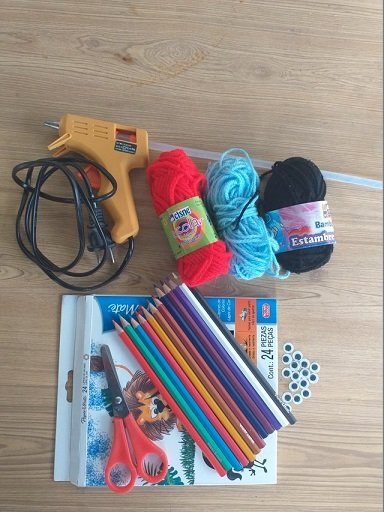
Materiales que utilizaremos para nuestro tutorial:
.Tijeras
.Ojos locos
.silicón en barras
.Colores
.Pistola de silicón
.Cualquier tipo de pelota o bolita plástica
.Estambre del color de tu preferencia
Materials that we will use for our tutorial:
.Pair of scissors
.Crazy eyes
.silicon bars
.Colors
.Silicone gun
Any type of ball or plastic pellet
.State of the color of your preference

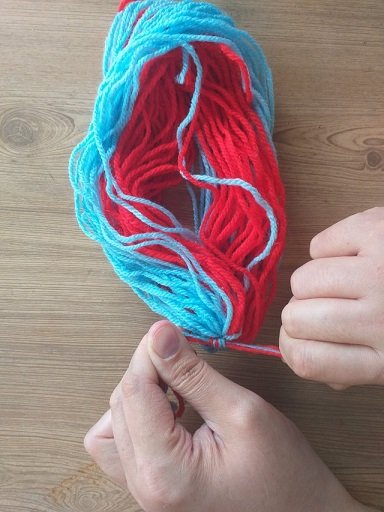
1er paso
Utilizando una libreta como referencia le daremos exactamente 48 vueltas con el estambre de color azul y el rojo para los tentáculos de nuestro pulpo.
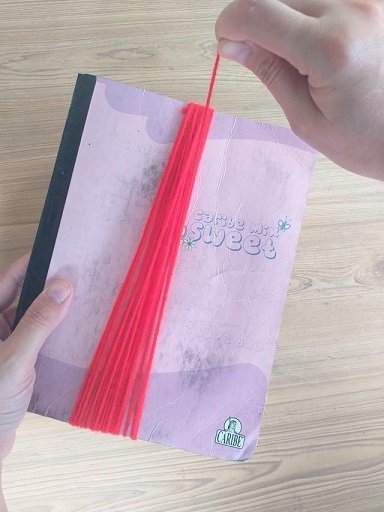
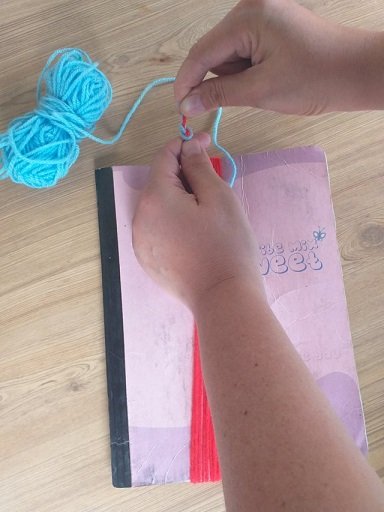
1st step
Using a notebook as a reference, we will give it exactly 48 laps with the blue stamen and the red one for the tentacles of our octopus.
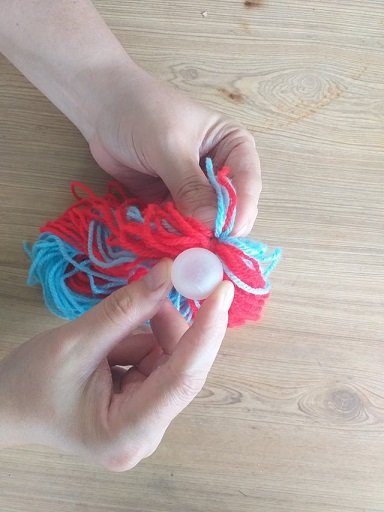
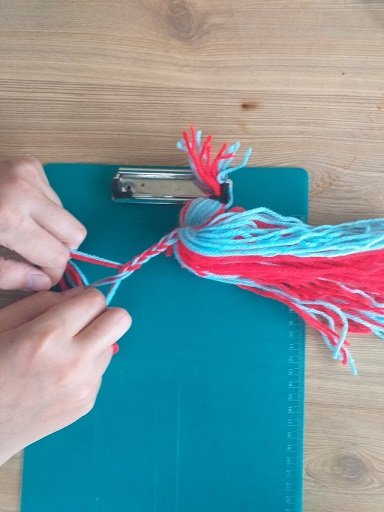
2do paso
Para el cabello de nuestro pulpo es cuestión de si lo quieres corto o abundante todo depende de la cantidad de estambre yo corte 6 tiras de 10cm asegurándolas tiras con 2 nudos de la siguiente manera.
2nd step
For the hair of our octopus it is a matter of whether you want it short or abundant, it all depends on the amount of yarn and I cut 6 strips of 10cm securing them with 2 knots as follows.
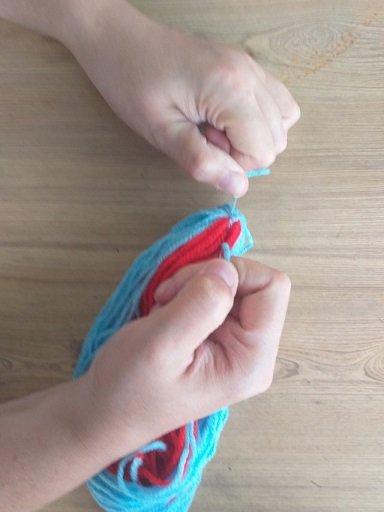
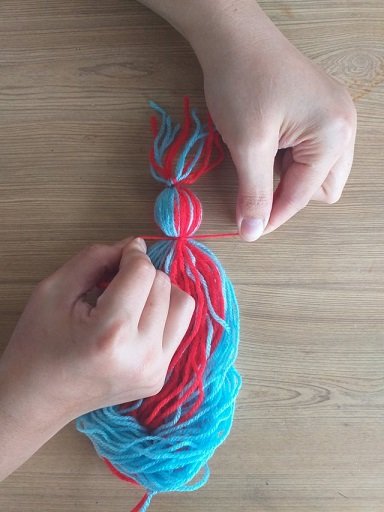
3er paso
Colocamos la bolita plástica en la parte interna del nudo asegurándonos cuidadosamente que quede bien cubierta y asegurándola bien con una tira alrededor con varios nudos como lo ven en estas imágenes.
3rd step
We place the plastic ball on the inside of the knot making sure carefully that it is well covered and securing it well with a strip around it with several knots as seen in these images.
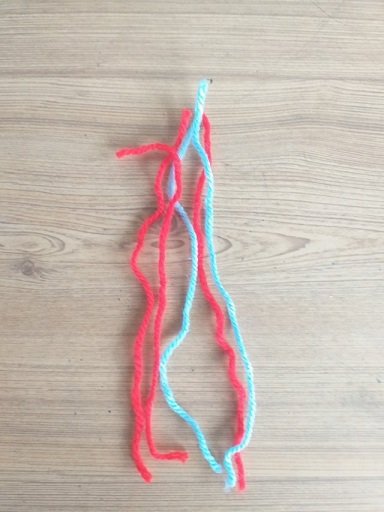
4to paso
Lo siguiente, será cortar las tiras para armar los tentáculos, como se muestra en la imagen:
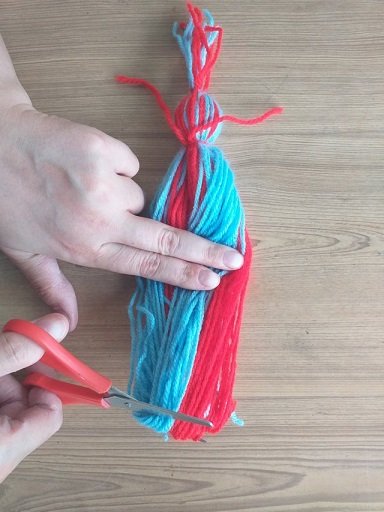
4th step
The next thing will be to cut the strips to assemble the tentacles, as shown in the image:
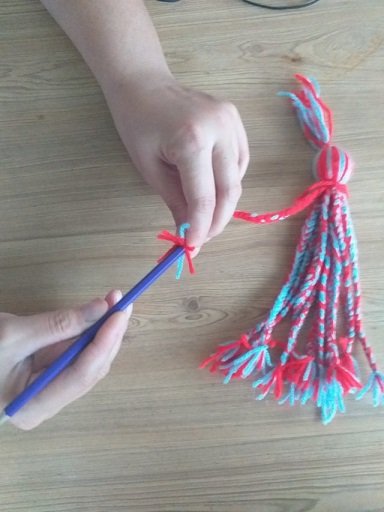
5to paso
Con 9 pelos de estambre comenzamos a tejer tipo clinejas si lo puedes hacer sola hazlo como te muestro en esta imagen o sencillamente pide ayuda.
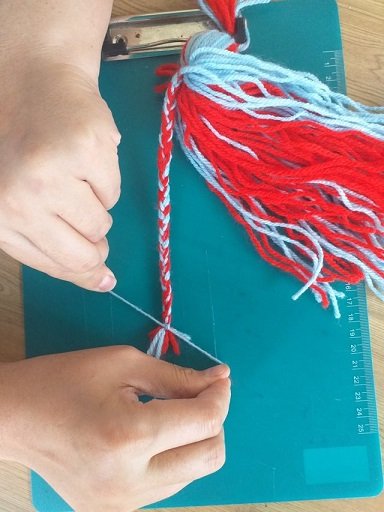
5th step
With 9 threads of yarn we begin to weave clinejas type if you can do it alone do it as I show you in this image or simply ask for help.
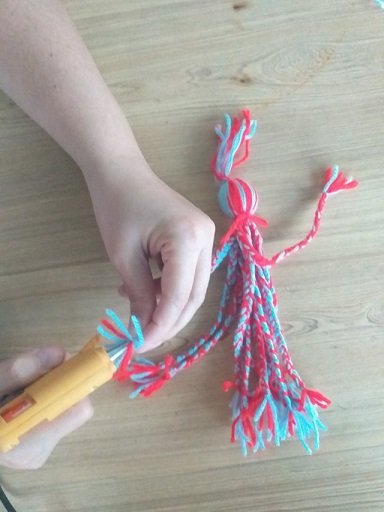
6to paso
Una vez que hayas terminado de hacer cada tentáculo, debes pegar con silicon cada color así:
6th step
Once you have finished making each tentacle, you must glue each color with silicone like this:
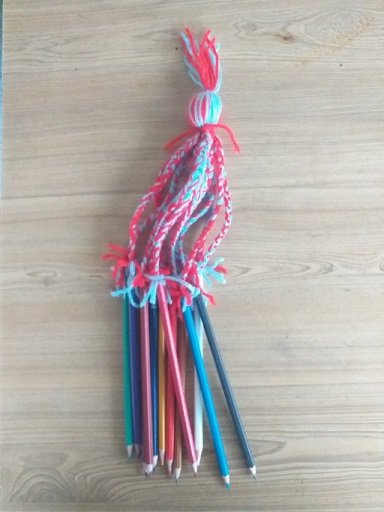
Bueno ya casi listo nuestro pulpo –porta colores para darles unos toques más para embellecerlo
Juega con tu imaginación para decorarlo yo en lo personal utilice cinta adhesiva de color azul para decorarlo más utiliza lo que tú quieras y así mejora la presentación .
Well, our octopus is almost ready - it has colors to give them a few more touches to beautify it.
Play with your imagination to decorate it and I personally use blue tape to decorate it more, use what you want and thus improve the presentation.
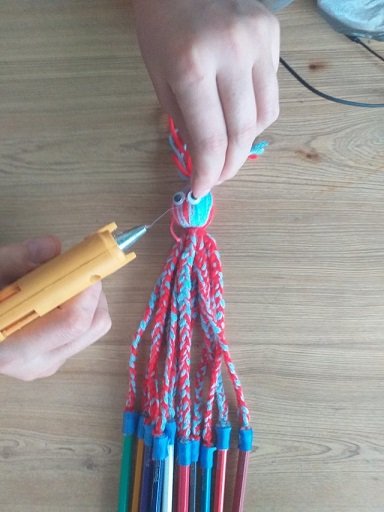
Sólo queda pegar los ojitos con unas gotas de silicon y la boca y listo mi gente espero les guste este paso a paso de cómo mantener los colores de nuestros hijos en orden los espero en mi próximo tutorial.
It only remains to glue the eyes with a few drops of silicone and the mouth and that's it, my people. I hope you like this step by step on how to keep our children's colors in order. I wait for you in my next tutorial.>
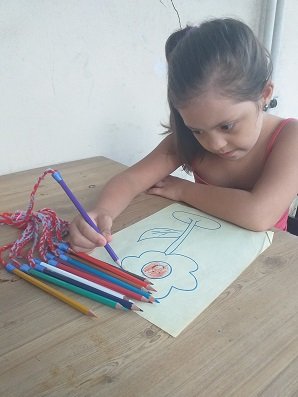
Muy contenta usando los colores ordenadamente
Very happy using the colors neatly


Espero que este post sea útil para ti. ¡No olvides dejar un comentario! Hasta un próximo post...
Conchale! Que buena idea! Nunc lo había visto! Me parece genial! Muchas gracias por compartir! Lo puedo hacer con los lápices de maquillaje! Jejeje! Saludos!
¡Hola! claro que si, pienso que es una excelente opción para mantener los lápices de maquillaje en orden y todos a mano, sería muy práctico. Si lo haces, me etiquetas por favor. ¡Saludos!
Excelente tu trabajo amiga ya se como solucionar ese problema de los colores de mis hijos.
Congratulations, your post has been upvoted by @dsc-r2cornell, which is the curating account for @R2cornell's Discord Community.
Hola @erikapda nos gustaría invitarte a unirte a nuestra comunidad creativa Draft Crearte dónde puedes compartir tus talentos monetizandolos en steem.
Puedes visitar nuestro concurso de la semana Aquí