[ENG-ESP] Sandalias de Rqdo. Baby Shower Niña // Sandals by Rqdo. Baby Shower Girl
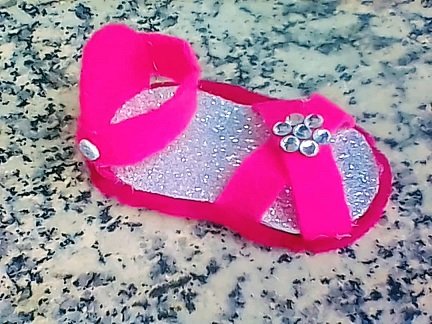
Hello, beautiful people of Steemit. This time I bring you another step-by-step tutorial, where we will learn how to make beautiful baby sandals, which can be used as a souvenir for a girl's Baby Shower.
*Cartón 📦
*Foami Plateado
*Foami Blanco
*Foami Rosado
*Silicon Frío
*Chenil Fucsia o Blanco
*Pedrería a tu Gusto
*Lápiz ✏️
*Tijera✂️
- Cardboard 📦
- Silver Foami
- White Foami
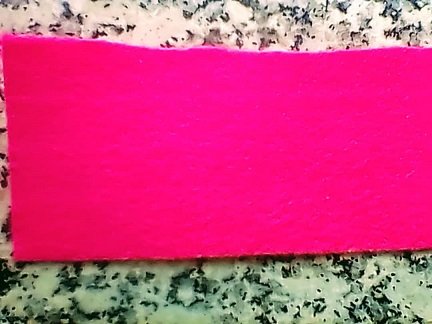
- Pink Foami 💗
- Cold Silicon
- Chenil Fuchsia or White
- Rhinestones to your liking
- Pencil ✏️
- Scissors✂️

Paso 1: Con una tapita de Jugo marcamos 2 Círculos que queden muy Juntitos.
Step 1: With a cap of Juice we mark 2 Circles that are very close together.
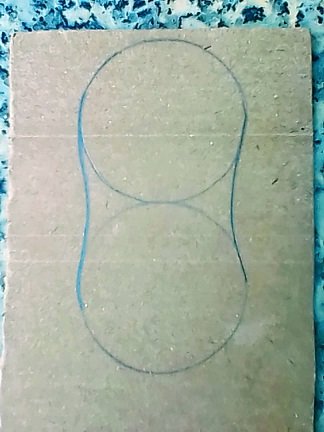
Paso 2: Trazamos dos líneas curvas hacia dentro en ambos extremos para unir nuestros Círculos, y Procedemos a Cortar.
Step 2: We draw two curved lines inward at both ends to join our Circles, and we proceed to Cut.
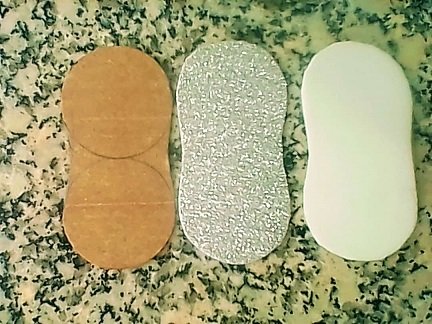
Paso 3: Procedemos a marcar esta forma en el Foami Plateado y Blanco. Y procedemos a Cortar y Luego a Pegar cada cara de Foami por Ambos lados del Cartón.
Step 3: We proceed to mark this shape on the Silver and White Foami. And we proceed to Cut and Then Paste each face of Foami on Both sides of the Cardboard.
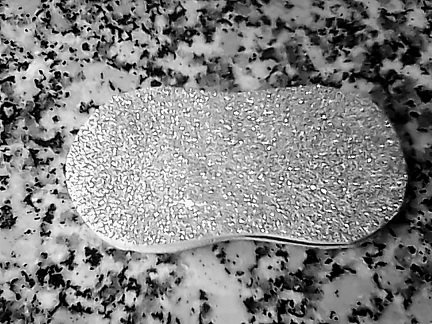
Y quedará así, está será la Suela de Nuestra Sandalia. La parte Plateada va hacia arriba y la parte Blanca hacia abajo.
And it will remain like this, this will be the Sole of Our Sandal. The Silver part goes up and the White part goes down.
Paso 4: En el Foami Rosado vamos a marcar un círculo con nuestra tapita de Jugo, pero en Vez de cortar Circular vamos a Cortar como una puertita. Procedemos a Cortar
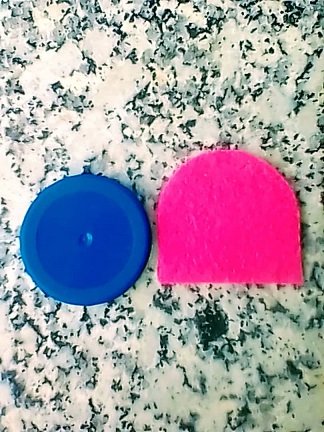
Step 4: In the Pink Foami we are going to mark a circle with our Juice cap, but instead of cutting Circular we are going to Cut like a little door. We proceed to Cut
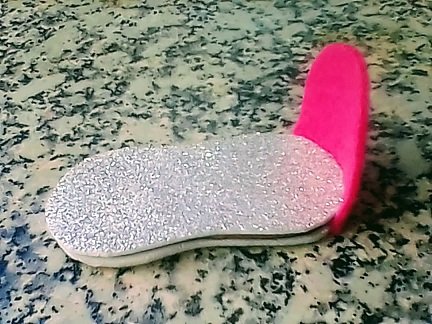
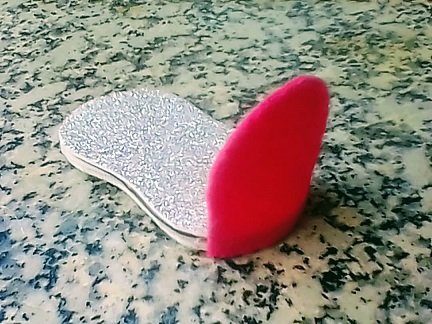
Paso 5: Procedemos a Pegarla en uno de los Laterales de nuestra Suela.
Step 5: We proceed to Glue it on one of the Sides of our Sole.
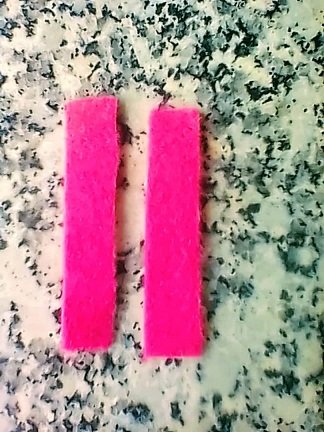
Paso 6: en Nuestro Foami Rosado procedemos a Cortar 2 tiras de 6cm de Largo x 1cm de Ancho. Y cortamos
Step 6: in Our Pink Foami we proceed to Cut 2 strips of 6cm Long x 1cm Wide.
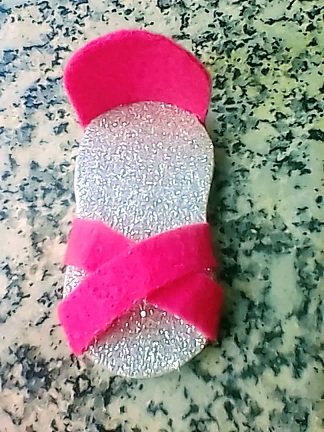
Paso 7: Procedemos a Pegarla Diagonal en cada extremo de la Suela que Nos queden Cruzadas
Step 7: We proceed to Paste it Diagonally on each end of the Sole that we have Crossed
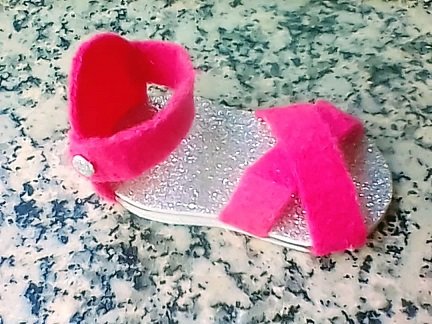
Paso 8: Cortamos otra tira en el Foami Rosado, pero está medirá 7cm de Largo x 1cm de Ancho, la cortaremos y Pegaremos en la parte superior de la Puertita que pegamos primero de extremo a extremo. Cortamos un círculo pequeño en el Foami Platedo y lo vamos a pegar en uno de los extremos de la Tira el cual será el seguro de nuestra Sandalia.
Step 8: We cut another strip in the Pink Foami, but it will measure 7cm long x 1cm wide, we will cut it and glue it on the upper part of the little door that we glued from end to end first. We cut a small circle in the Silver Foami and we are going to stick it on one of the ends of the Strip which will be the safety of our Sandal.
Paso 9: Con el chenil Fucsia vamos a proceder a pegarlo por toda la Orilla de la Suela y cortamos el excedente.
Step 9: With the Fuchsia chenille we are going to proceed to stick it all over the Edge of the Sole and cut the excess.
Paso 10: Por último aplicaremos la Pedrería de Nuestro gusto, en el Frente de Nuestra Sandalia como prefieras. Y Listoo, hazlo tu mismo; fácil, rápido, sencillo y hermoso.
Step 10: Finally, we will apply the Rhinestones of Our Taste, on the Front of Our Sandal as you prefer. And Listoo, do it yourself; easy, fast, simple and beautiful.
¿Te gustó el resultado? Comenta si te gustó la idea.
Did you like the result? Comment if you liked the idea.

Espero que este post sea útil para ti. ¡No olvides dejar un comentario! Hasta un próximo post...

Excelente y muy original, fuiste elegida para mi top 10 mejores post #craftycontent