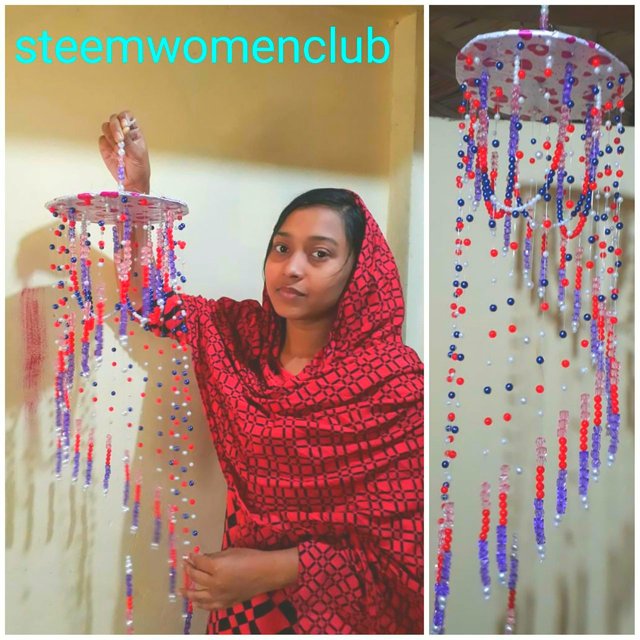
🧬🧬🧬Steem Women Club Community Contest #15 CONTINUES LAST 26 HOURS! | DIY(Do İt Yourself) Art.puthir doorbell crafts || by @bristy1
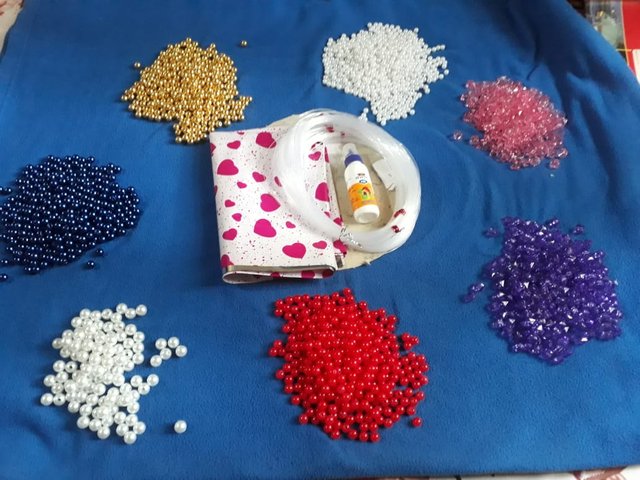
★Ingredients required for making beaded fringe: -
- Beads
- Rug yarn
- Cardboard
- Sharp scissors
- Wrapping paper
- A large needle
- A pen
- Scale
- White tape
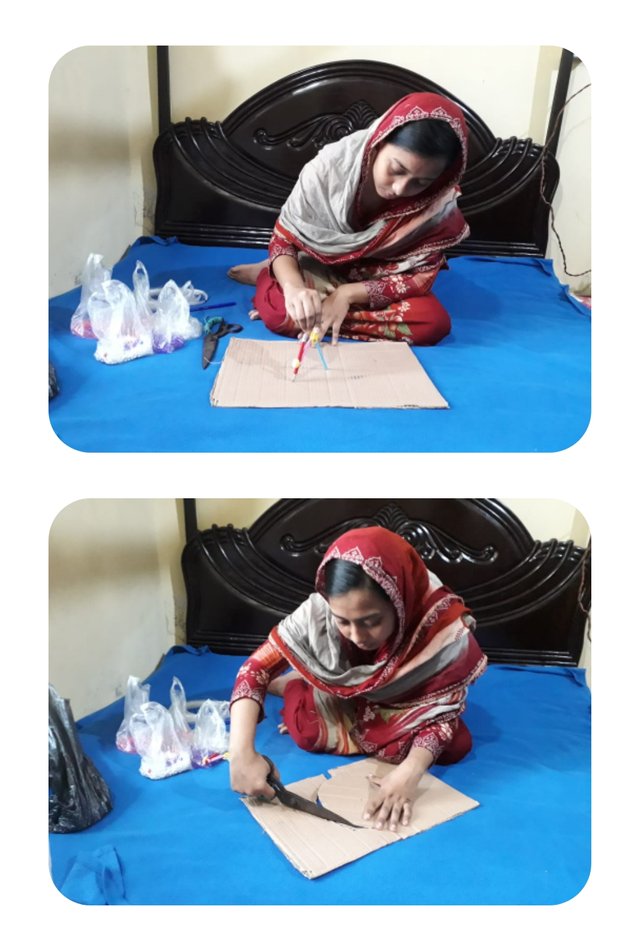
★Step 1★
The way I made the main thing in the fringe with cardboard-
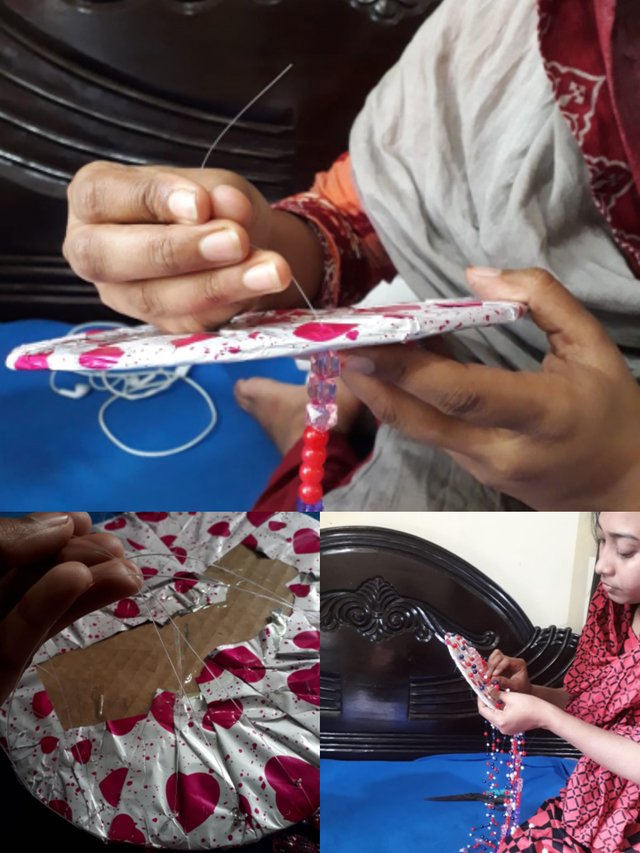
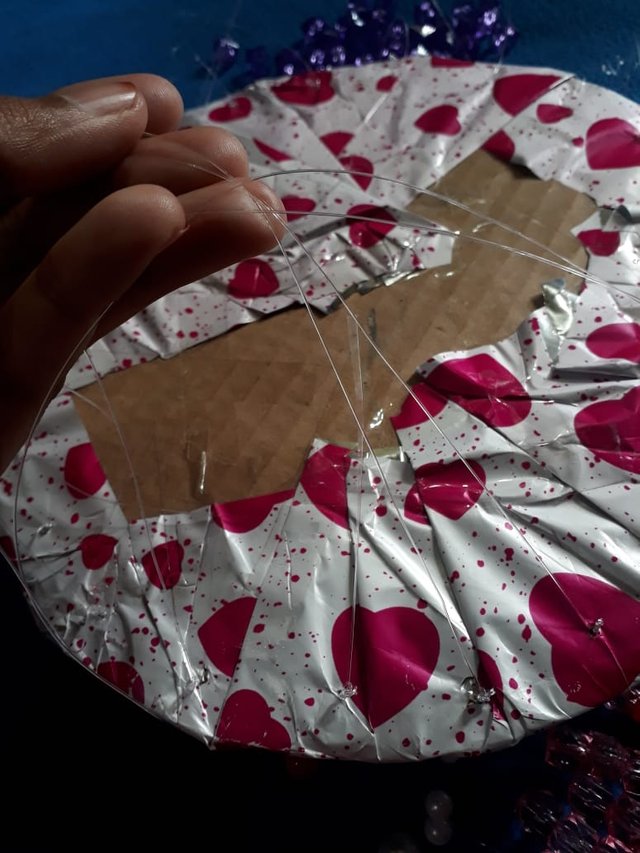
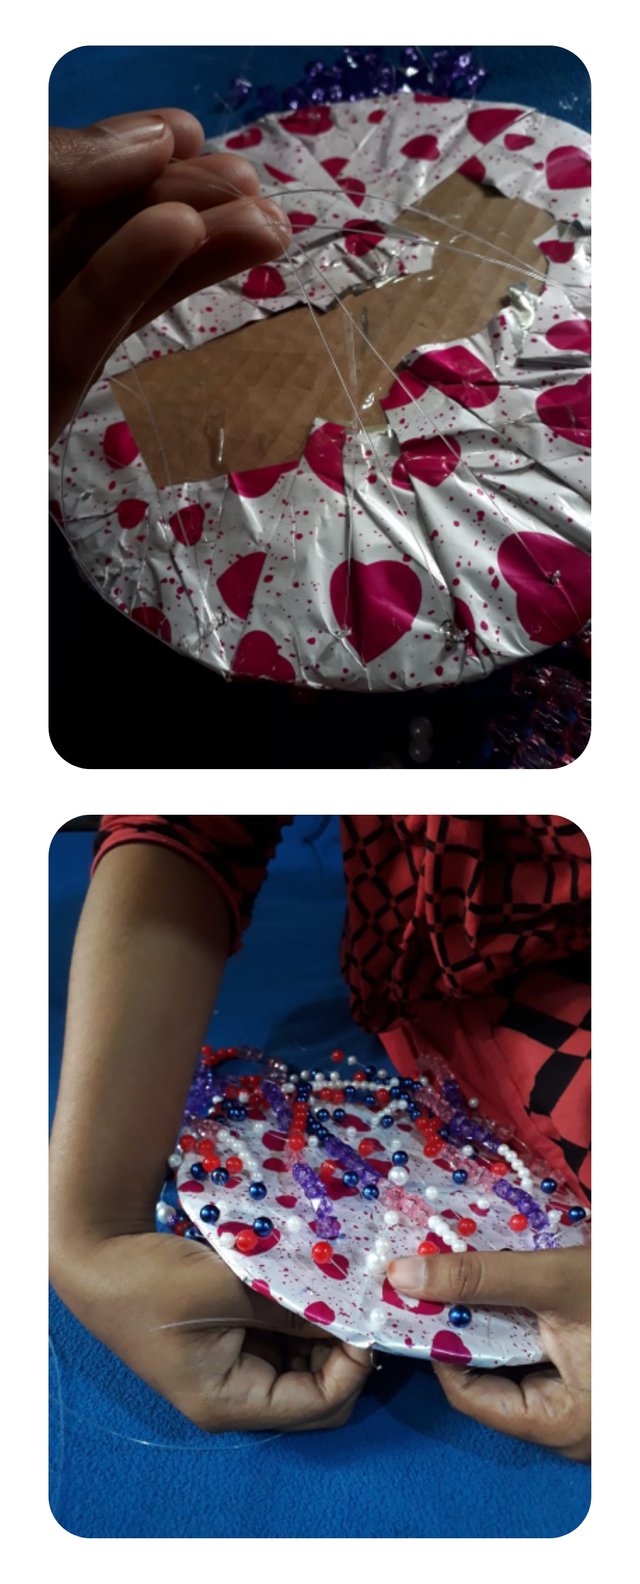
I first sat down to make the main thing in the fringe. From where the beads will continue to descend. For this I took a cardboard. With the help of a compass, I took a circle with a radius of 8 cm. I cut it into rounds with the help of sharp scissors.
Then I took a wrapping paper, put the cut cardboard on top of the wrapping paper, cut the wrapping paper accordingly. Then I wrapped the cardboard with the wrapping paper with the help of a tape. I wrapped it very well so that it would not open.
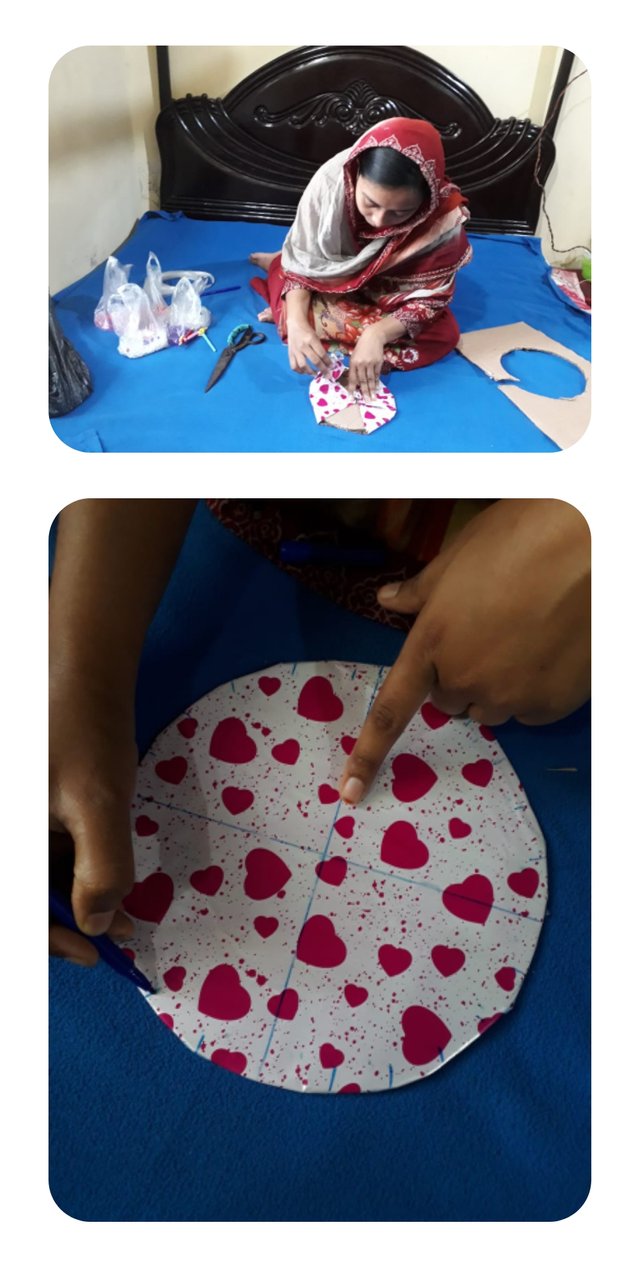
Then with a scale and a pen I marked along the middle of this round cardboard. Then 1 cm on the edge of it and gave it a point. I made small holes in those points with the help of a needle. After piercing all the points, I put the cardboard aside.
★Step 2★
How to make fringe: -
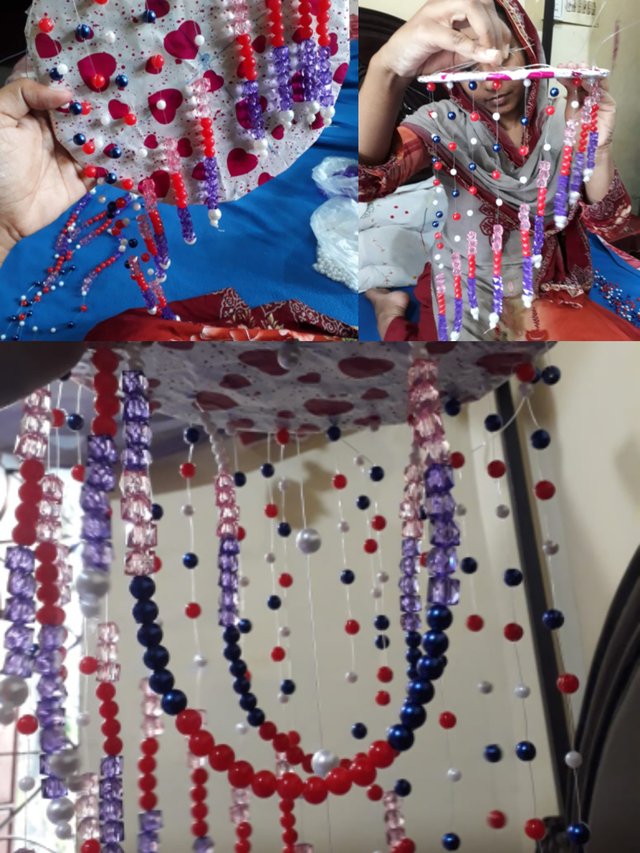
I used different colored beads to make the fringes. These are red, purple, pink, blue and white. The beads are of different designs, different from one another. I took all the beads 100 grams. I bought 2 types of small and big white beads.
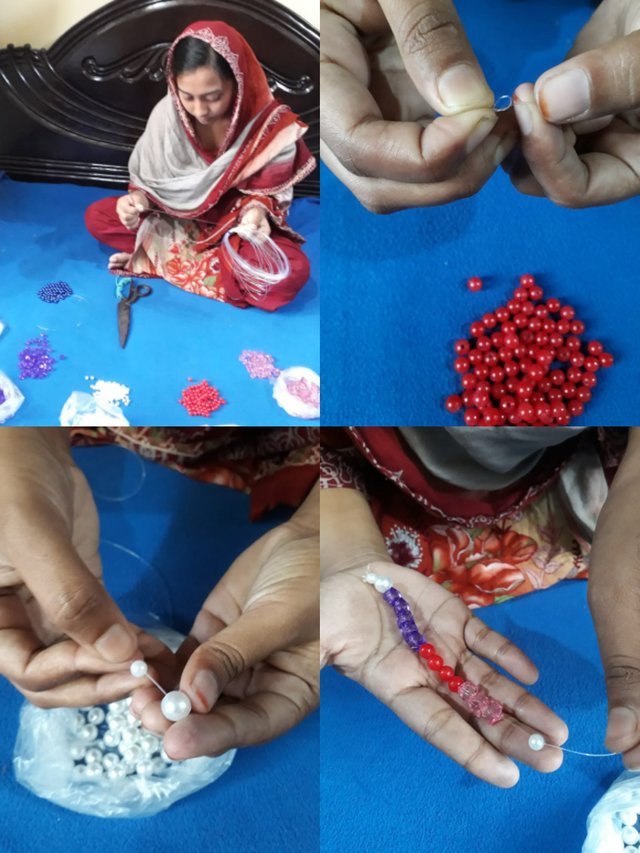
Then I started working, I took a bundle of yarns, cut a yarn measuring 10 inches. In this way I cut a few yarns with an extra 3 inches of each yarn. For example, the size of the first yarn is 10 inches, the second one is 13 inches, the third one is 16 inches. In this way, I cut the yarn step by 3 inches extra.
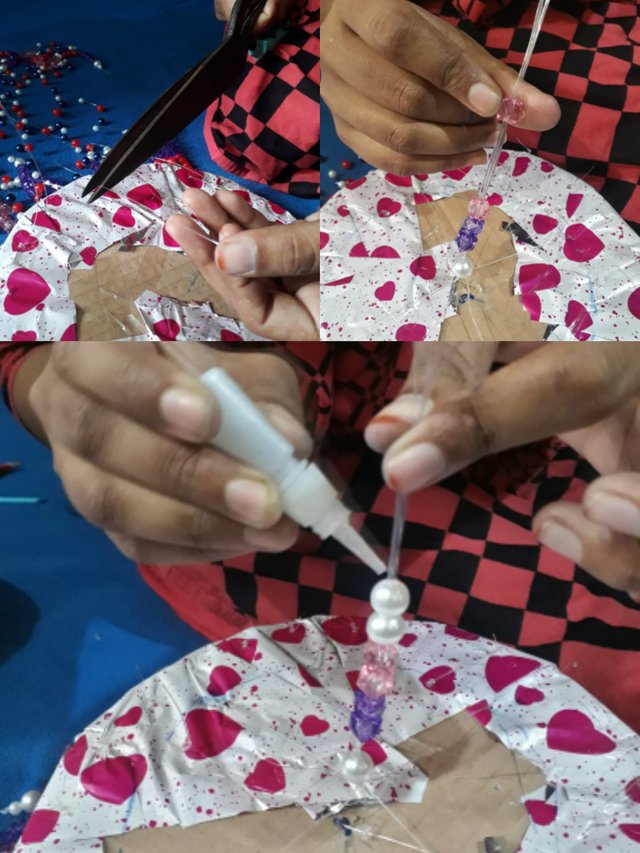
I tided up on one end of the yarn well so that it does not come off after putting it on. After tided up, I took the beads in front of me. I took something out of all the beads. Then I put a small amount of white beads on the other side of the thread. Then I gave a big white bead. The reason for giving the small bead first is that its hole is smaller than the big beads so the last part of the thread will not penetrate and come out.
★Step 3★
After giving a big white bead I gave 5 purple beads, then 4 red beads and finally 3 pink beads.
In the same way, I made the lower part of the rest of the yarns in the same way with these beads.
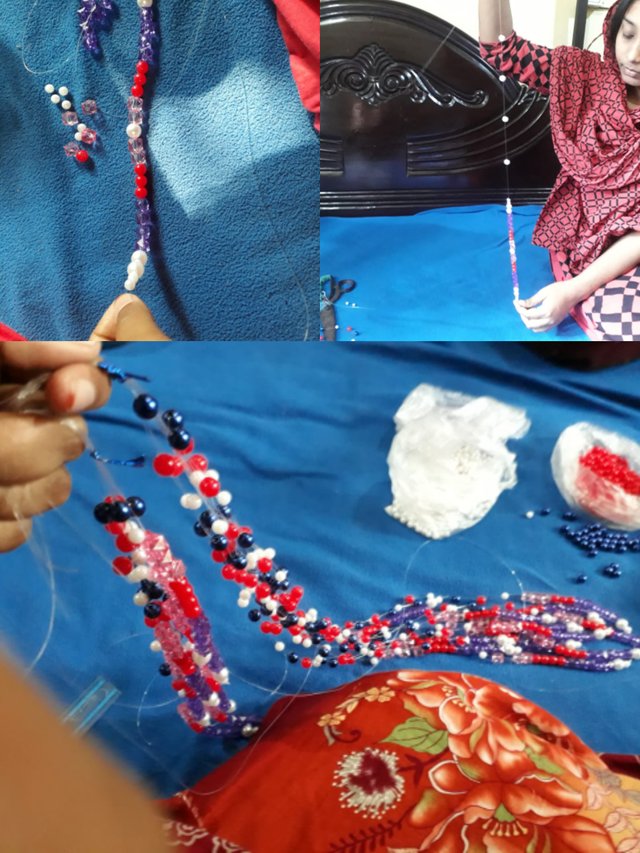
The second fringe is one step bigger than the first fringe, so I cut it 3 inches extra earlier. After giving the beads like the first fringe I added a beads to make it even bigger. But not in the same way as the previous ones, I took it 1.5 inches above the previous ones. I used a technique to get the beads up. I took a small white bead and held it 1.5 inches above the previous bead, twisted the yarn and inserted it again into the white bead and gave it to tided up. I gave it in such a way that it will be straight.
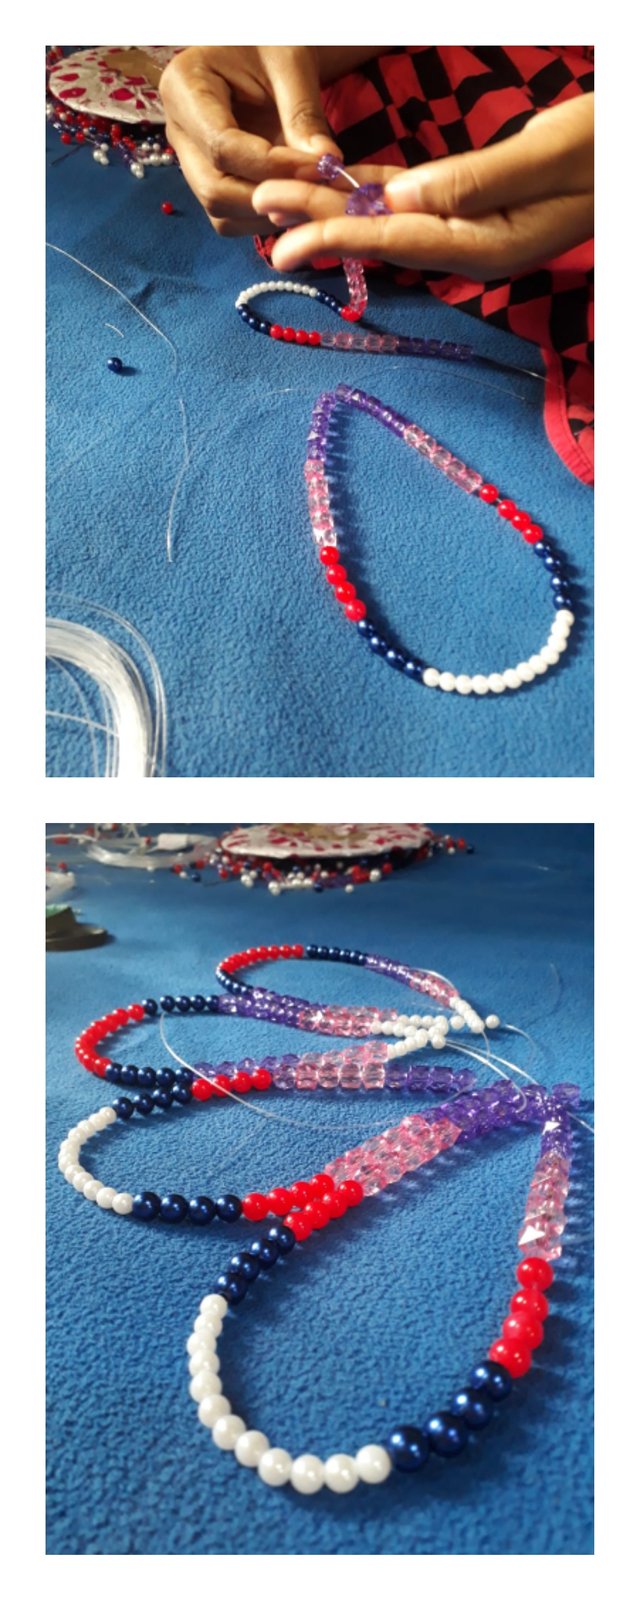
In this way, after making the 3rd fringe like the 2nd fringe, I added another extra bead. This time I gave a red bead I gave the little white bead 1.5 inches above, just like I gave the red bead. I added white, red bead and blue bead in the 4th fringe. Like the white and red bead, I also took the blue bead.
After making it like the 4th fringe in the 5th fringe, I put a small white bead on top of the blue fringe again. In this way, I made 23 fringes in white, red and blue in all the subsequent ones.
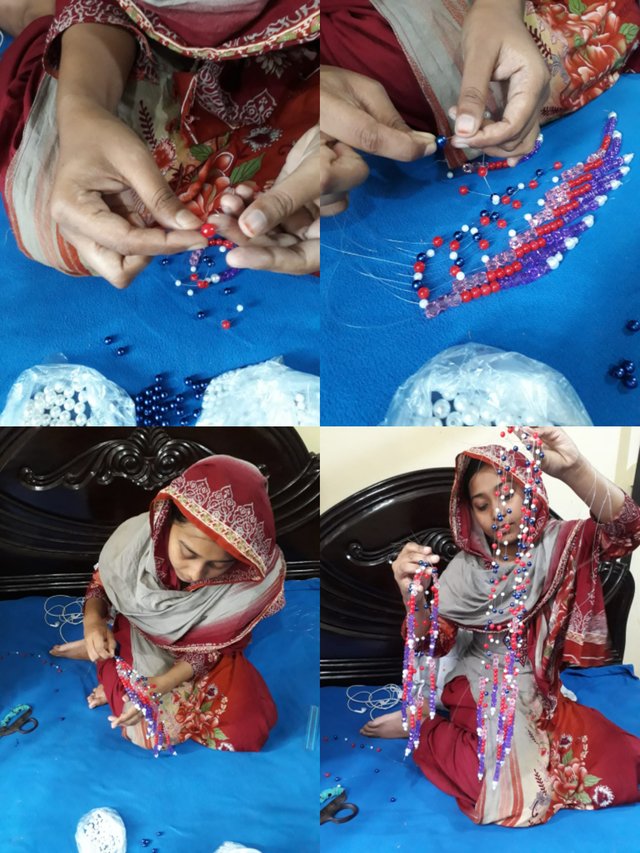
After making the edge fringes, I made 4 fringes for the empty space in the middle of the fringe. For these I cut the yarn by 15 inches. Of these, 2 fringes are different and 2 fringes are different. I put a small white bead in the middle of the two fringes, and blue, red, pink and purple bead on the two sides. On the other two fringes, I gave red in the middle, and blue, purple, pink and white from the 2 sides to the top. I made 4 fringes for hanging. Both ends of these fringes will be glued to the cardboard.
I made another long fringe. For this I cut a long thread. I put some bead in the thread.
★Step 4★
How to attach the fringes to the cardboard: -
I moved the fringe from small to large. The 1st fringe is the smallest and the last fringe is the largest and the 1st and the last fringe move side by side.
So I first put the fringe that I made first through the hole in the edge of the fringe. Then I put the 2nd fringe on the left side of the 1st fringe. In this way, I continued to give the big fringes on the left side. The last fringe I gave is the largest fringe and it is located on the right side of the 1st fringe.
After attaching the fringes in this way, I took the bead taken for the empty part in the middle of the fringe. I marked the middle of the cardboard with a pen and pierced it again with a needle to attach it.
I made the long fringe by making a hole in the middle of the cardboard and attached it.
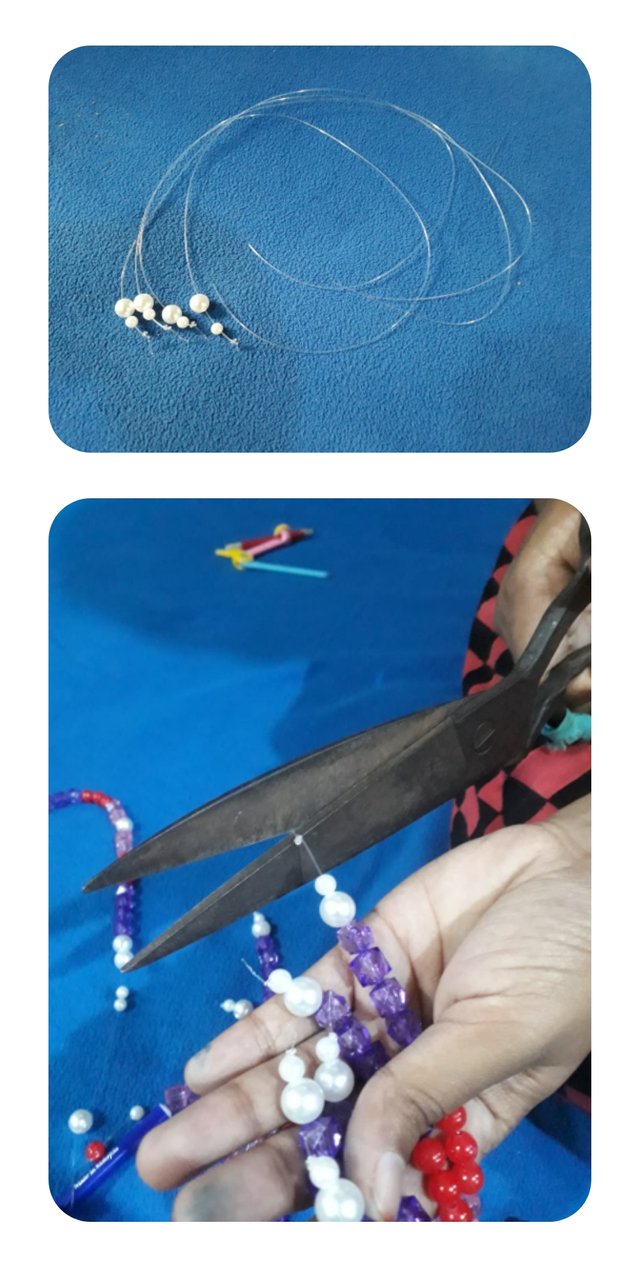
Then I cut 4 large threads to hang the fringe on top and tied it with white beads. Then I tied 4 yarns keeping equal distance between the cardboard and tied the yarns well on the top. I put some bead there too, so that it becomes hard. The complete fringe is finished.
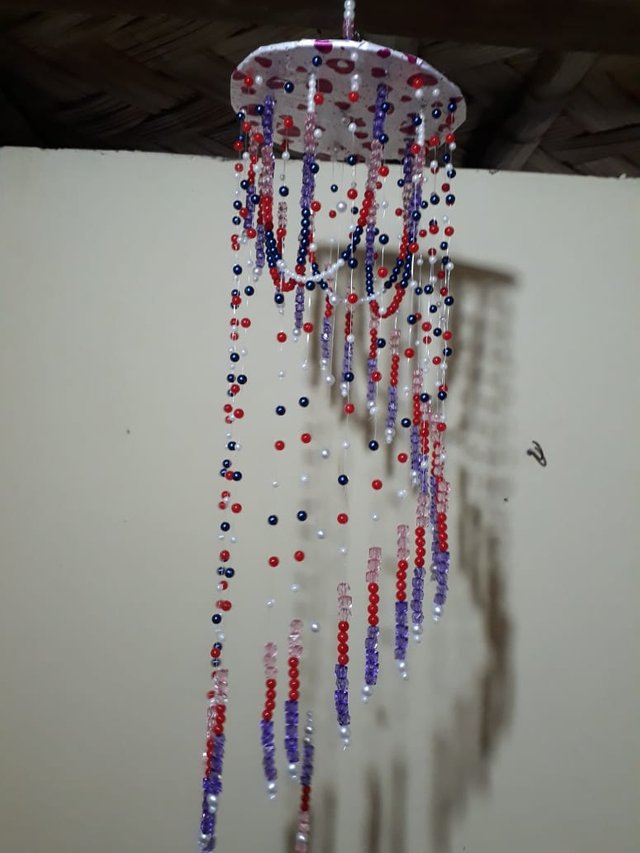
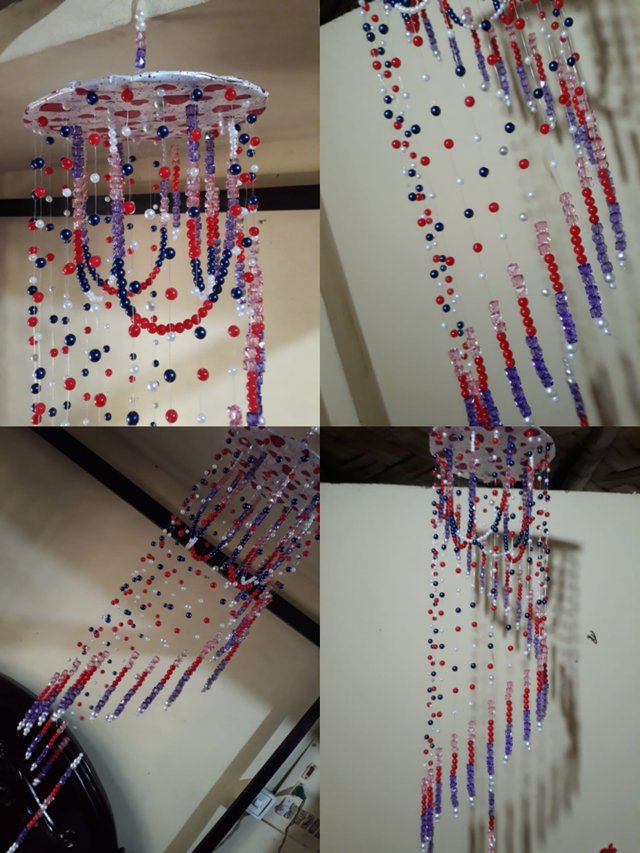
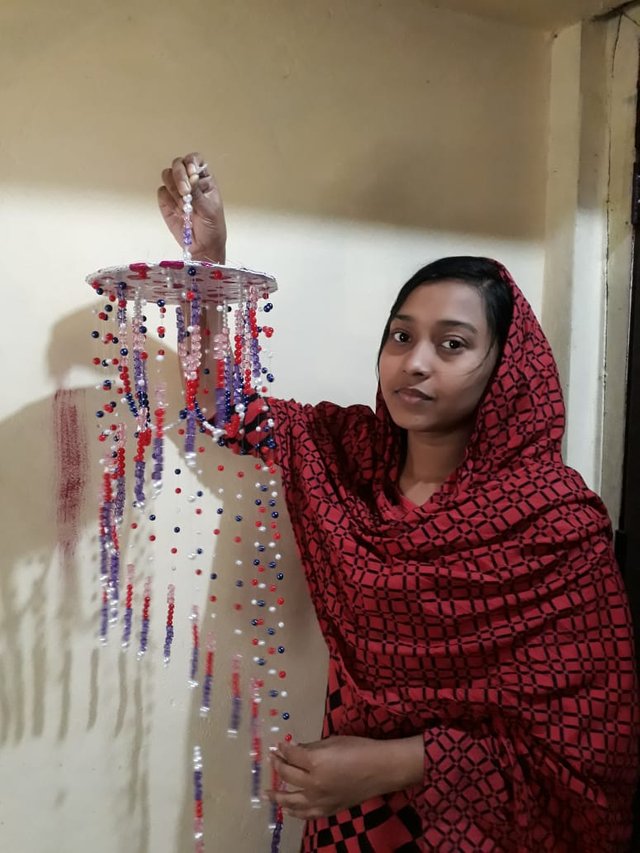
Then I cut the extra threads. I hung it on the table in my room.
I invited one of my friend for join to this contest and community, @brittilicious
Special thanks those people's who read my post.
💦
💦 BRISTY 💦
💦

Made an awesome jar. I will also try at home to make one like yours.
thanks mam..you can try it at your home
Hello @bristy, very beautiful what you did. Thanks for sharing
thanks a lot
Felicidades te quedo hermoso, tienes mucha creatividad. Quisiera seguir viendo estos post de calidad.
Thanks mam for you complement..
Felicidades amiga muy lindo. Haré uno para mí, me encantó. Gracias por la idea
thanks much,and i am happy that you like it
Hola, te quedó muy bello.
thanks dear
UNCOMMON ONE...MAYBE IT'S TAKEN
LONG TIME WHEN YOU MADE.
thnx
Que buena idea gracias por compartirla.
Wa alaikum salam my dear sister @bristy1
Thank you for participating in our newest contest. Your work is good, I like it. With simple materials, a useful work has been created.
Here is another contest that can you participate 😍😍😍
Guide to Welcoming New Users to Steem Women Club Community | Support for New Users
Here is another one!
Steem Women Club & Steem Men's Club Join Contest | Participate in "Register Your Friends on Steemit" Contest | | Grand Prizes Total 150 steem.
I am very glad if i can see you in our Telegram Group. Here is our Telegram Group "Steem Women Club Asia" Let's meet there https://t.me/joinchat/xrPIdD_5ZUA3ZDE1
yes i will
Really beautiful and very well explained step by step. Beautiful work. Thank you for sharing
thank you so much
Me encanto super creativo y lindo
lot of thanks