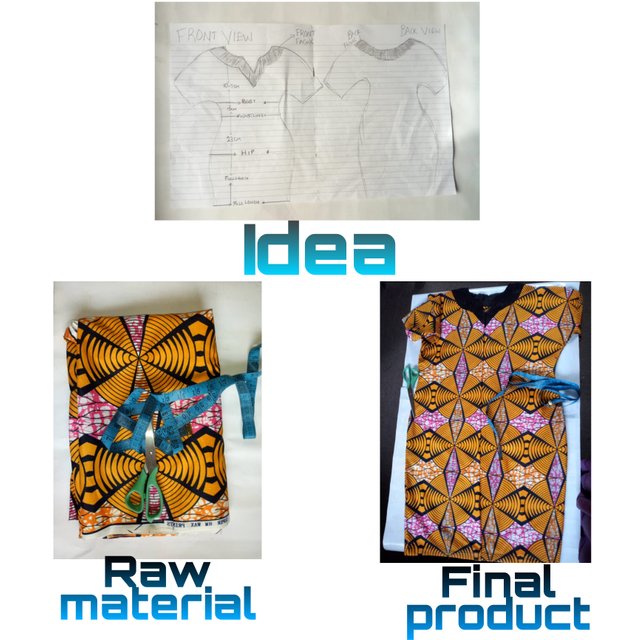
Making My Ankara Danshiki Dress
Hi Steamians
Thank Goodness I’m finally able to drop this and I promise you it’s going to be worth the wait.
Going through my rack where I keep some of the fabrics I’ve had, then stumbled on this very beautiful fabric I made sometime back, a thought came to mind, this would be beautiful on my baby sister.so, here I am.
This post is about this beautiful piece of fabric, which is also known as “ Ankara” in this part of the world.I’m going to share with you how I made it.
As much as I try to avoid sewing, I find myself enjoying and having fun at every step each time the opportunity avails me, however, I’m not a professional designer, I do this at my pace and sometimes as leisure.
Allow me take you through the journey of achieving this Beautiful dress I made for my sister which is called Bubu or Danshiki by some and its suitable for every weather conditions.
Another interesting thing about this design is that, you wouldn’t need much fabrics to for it, I actually used 2yards (36×45) ×2 for the dress.
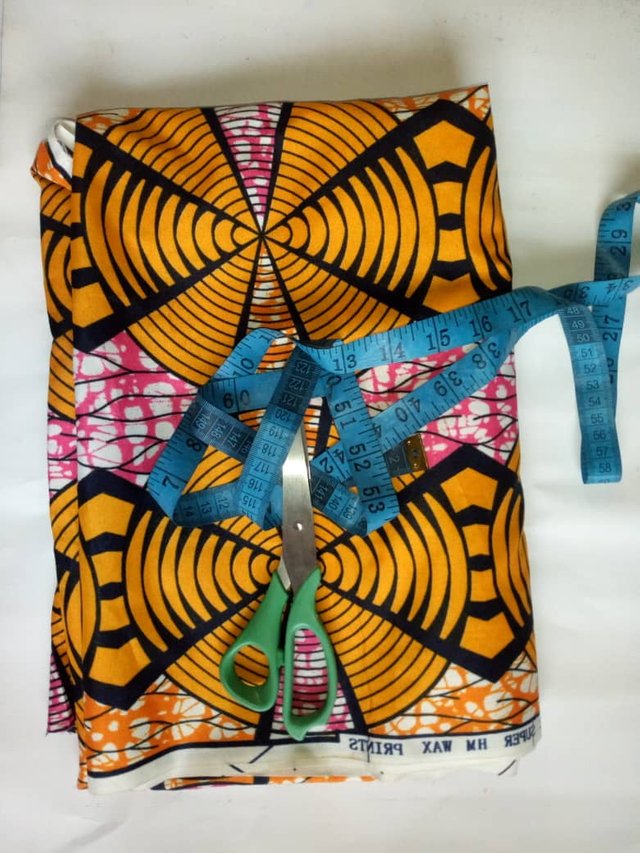
I hope you don’t think we’re digressing, lol, Don’t bulk your head much about this little maths here, what I’m trying to explain is this, Ankara has the usual length of 45inches and 35inches in width, this makes a yard, but I used 2.
What I am hoping to achieve in reality.
-Tape measure
-Hip curve(ruler)
-Tailor’s Chalk
-Scissors
-Thread
-Sewing Machine
- 1. Take Accurate body measurements:
Every design has its required measurements, focus on your design and let someone help you out with this if possible.
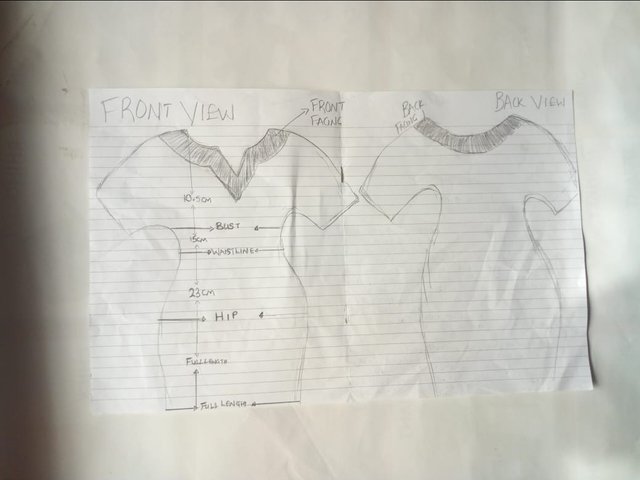
For this design, place your tape, take a measurement from your centre back, that’s, the back of your neck, where the spinal cord is, move horizontally down to where you want your sleeves to stop.I used, 16inches, Please see below.
- 2. Dress Length:
The length of this dress is 40inches, then added 1.5 for seam allowance for the hemp, please feel free to use your desired length.
- 3. Shoulder:
Firstly, I marked 7inches for the shoulder, but I extended it by 9inches to make it 16inches because of the sleeves to get the sleeves as it is attached to the dress.
- 4. Sleeves Length:
Horizontally, I used 16inches,width 9inches, using 0.5 to join both sides ( detailed explanation on how I got the sleeves below)

- 5. Neck line:
A dress is never complete without this design, I used 3inches for the front depth with 2.5 for the neck line.Accordingly, I used 4inches for the opening in front (V) shape, making everything 7inches. then 1inch for the back depth but same width as that in front.
- 6. Hip:
This is the largest part of what I used in putting my fabric on fold,the hip measurement for this dress is 40,40÷4=10, because its a free dress,I added 2inches for ease, it became 12 inches.
- 7. Shoulder Slope:
Taking a careful look at your shoulders, it’s never straight but sloppy,place the tape on the end of the sleeves, take out 1inch and you’ll be left with 8inches, connect it to the neck width.
- 8. Insert Horizontal Measurements:
With the fabric on fold using the largest body measurement, here,the hip is the largest, 40inches.
- 9. Hemp:
Hemp is the bending on the full length, I added 1.5inch to the full length measurement
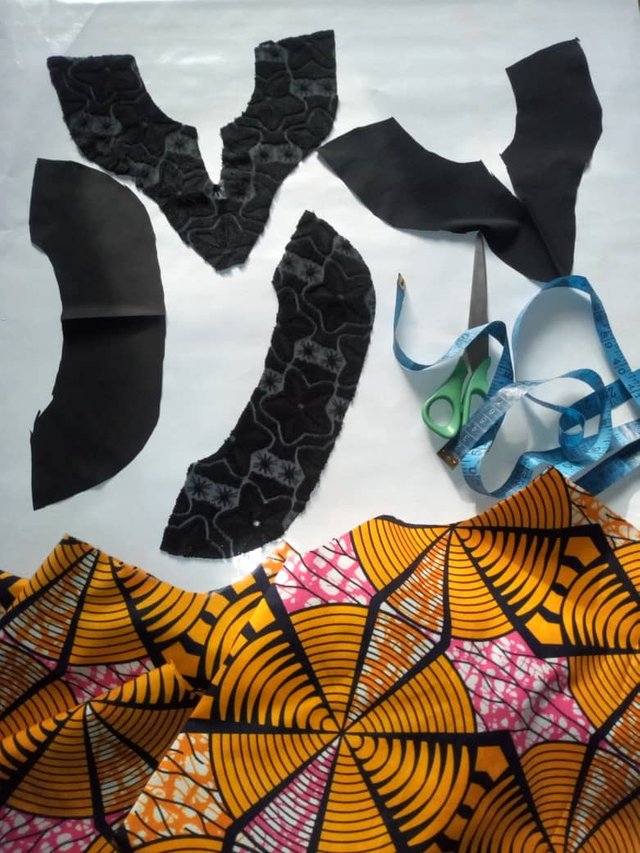
- 10. Back Pattern:
After cutting the front pattern, I left the neck depth to guide me on how to cut the back pattern, Then aligned the front to the back, making sure everything sits well, then cut, please note,the front and back pattern has to be the same.
- 11. Full Length:
Next thing I did was going over full length of the dress, because its fitted down, I took out 2inches from what I have on hip and that formed the hemp. You may decide to transfer the same measurement you have on the hip to full length if you want it free down there.
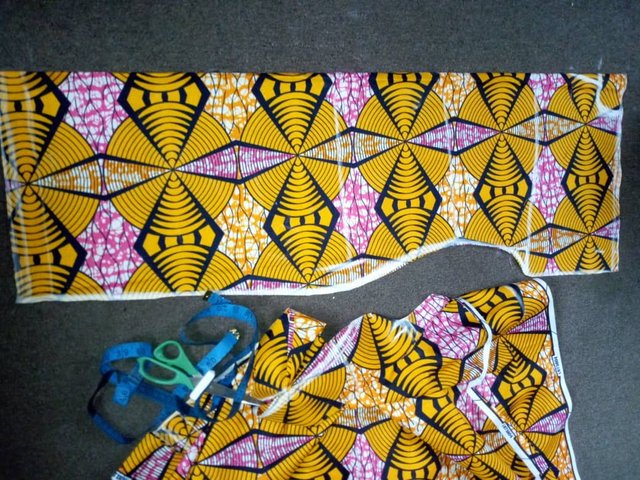
The fabric was folded with the largest body measurement which is hip measurement of hip to the sleeve opening (16inches, horizontally)
Inserting Horizontal measurements:
While on fold, everything to the sleeves made it 15inches ,
To get the bust, place the tape on 1 to 10.5inches vertically, measure and use the circumference of bust, divide by 4, then add 2inches for ease, not forgetting the seam allowance.
To get the waistline, repeat same, but from 1 to 15 inches vertically, that's the waistline, measure the circumference of waistline, add 2 for ease, divide the circumference of the hip by 4,
hip measurement is 40,40÷4=10, because its a Bubu, and should be free, I added 2inches, = 10+2,12.
Waistline
I used waist circumference, divide by 4,30÷4=7.5, so, 7.5+2.
Facing is a lining applied to the edge of a fabric or neckband/collar for it to be neat and clean after sewing by turning it.
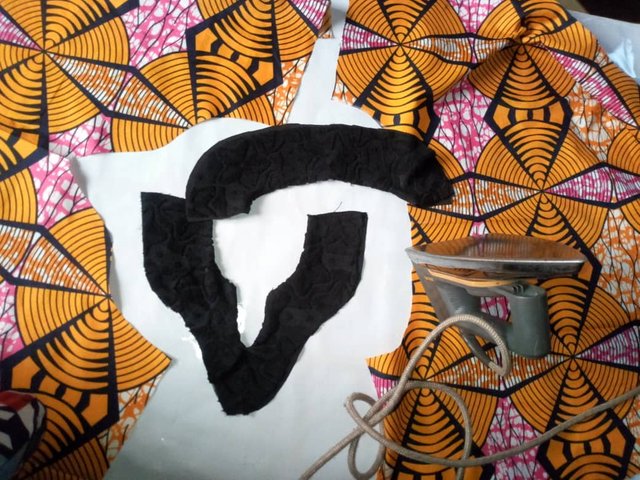
Before putting the facing to the neck, make sure the right sides are facing each other, then sew, I mean, the main fabric and facing, then top stitch and notch, notching helps the fabric to relax neatly, then, turn inside out and iron. See below.
Things To Note
- Be sure your fabric is on fold
- Always Add seam Allowance
- Every measurement should be as desired.
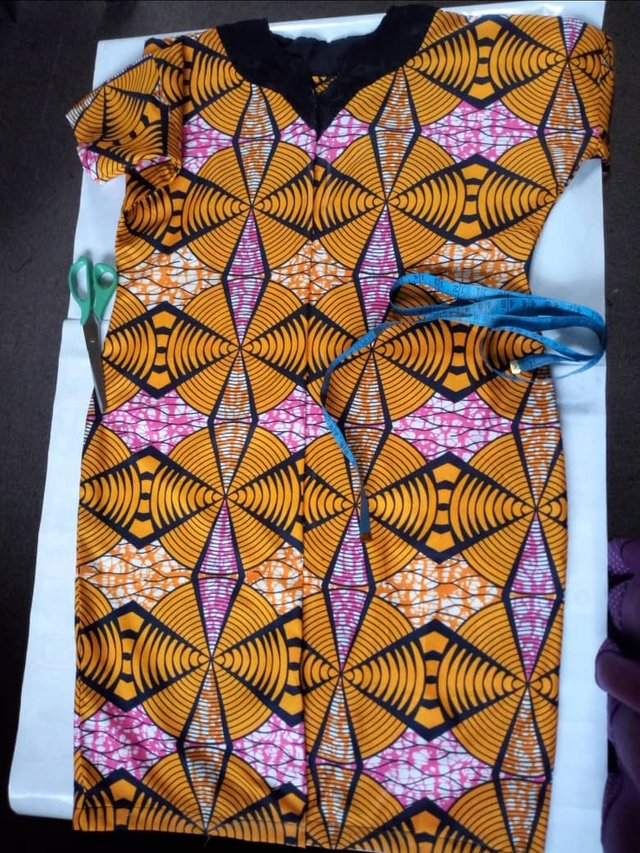
Here’s the final look, thank you for reading, I hope you try this if you are a designer too.
Feel free to share your thoughts with me in the comments section.
Thank you