How I Made Tie Dye Fabrics with Marbling Method.

It started on Sunday but many weeks before then, I had gotten materials needed for the practical with includes:-
Dye (6 different colours)
Caustic Soda
Sodium hydrosulphite
Rubber hand gloves
Over 30 yards of 100 percent cotton fabric
Two big bowls etc....
After securing all necessary materials, I had my friends @innovator05 and @bob-dray come over to my place which is quite spacious for us to work with.
Let's say the fabric was 30 yards, we divided it into 3 parts and we took one each. We all did different works with different colours, methods, and designs but I did mine using the Marbling method with a shade of green and purple dye.
WHAT'S MARBLING IN TIE AND DYE?
In tie and dye, marbling is a method whereby the fabric isn't tied in order to get designs or patterns but instead, the fabric is either squeezed or spread open while the dye solution is poured or sprinkled on it to achieve different kinds of designs and patterns.
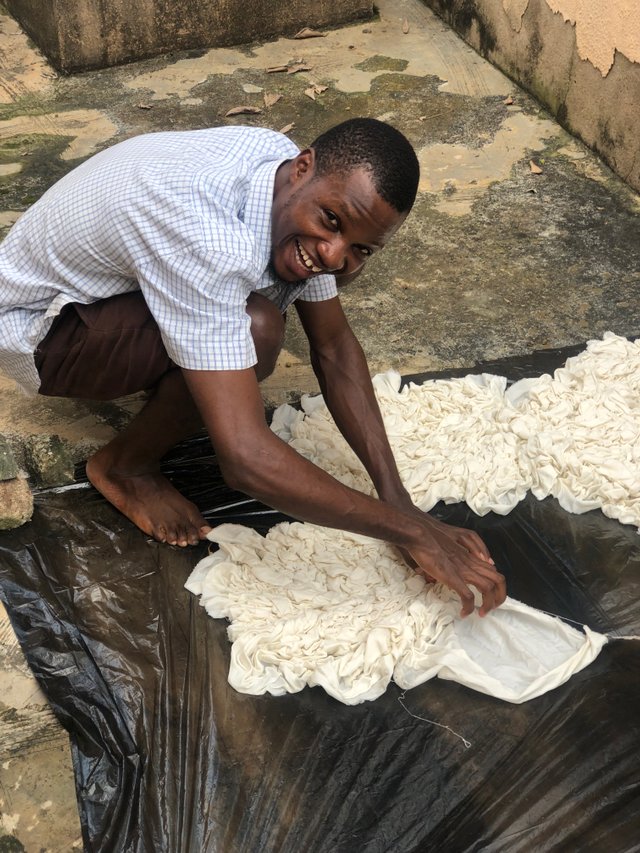
I started working on my own fabrics by cutting them into smaller units and then, I got them wet so I could easily squeeze them before applying my dye solutions.
After getting them squeezed in my desired manner, I then proceeded to boiling some water to prepare the dye solution. I chose a green dye and a purple dye for my works and after some minutes when the water was hot already, I poured the green dye (lightest colour first) into a bowl and added Caustic Soda and Hydrosulphite to it before adding and mixing it up with the hot water.....
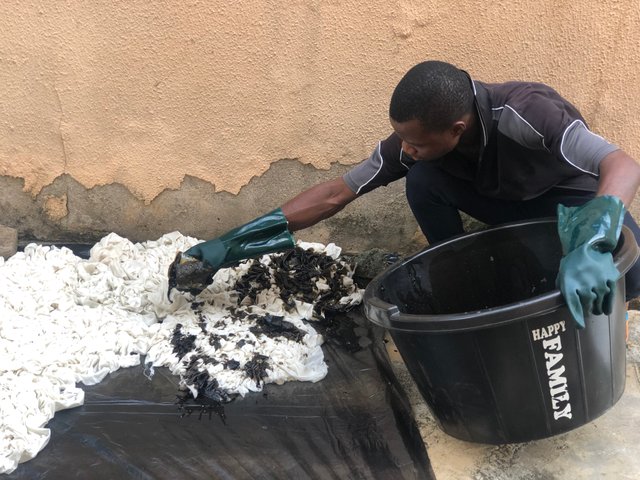
After I had prepared the dye solution, I started pouring it on the fabrics and I was also leaving some spaces in between intentionally in order to achieve some beautiful effects.
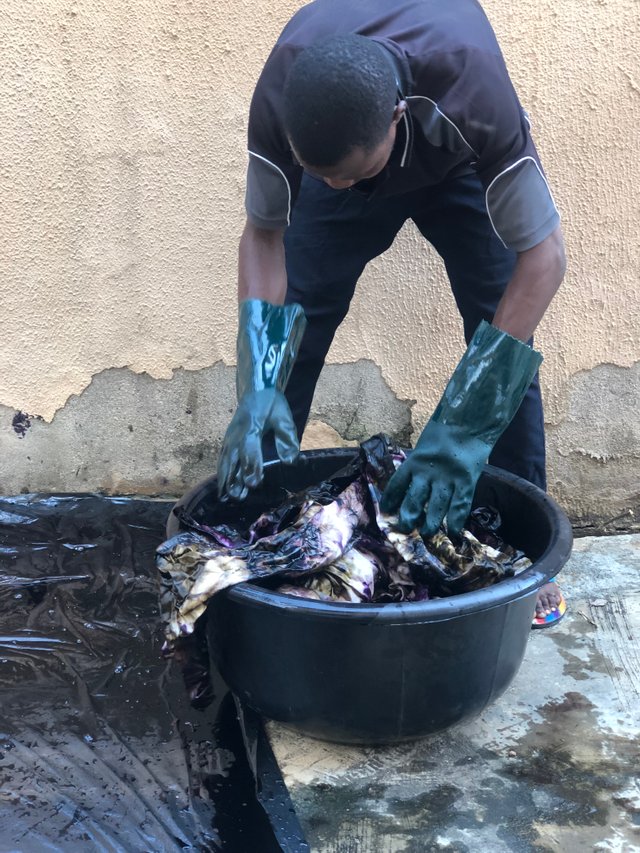
I did the same thing with the second colour (Purple) and after the two applications of the dye solutions, I wanted for about 20 minutes for the fabrics to absorb the dey solution well enough.
After 20 minutes of leaving the dye solution to penetrate into the fabric well, I still left it for some time to oxidize well so I can get to see the real colours the fabric had gained.
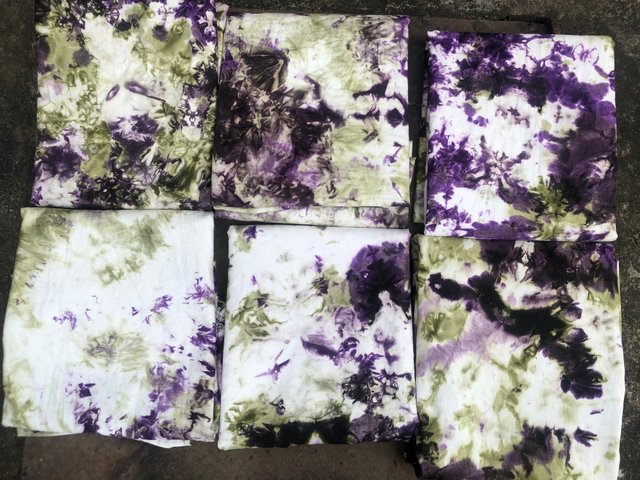
After some crucial observations of the colours finally obtained, I started washing the fabrics out of water and spreading them to dry up!
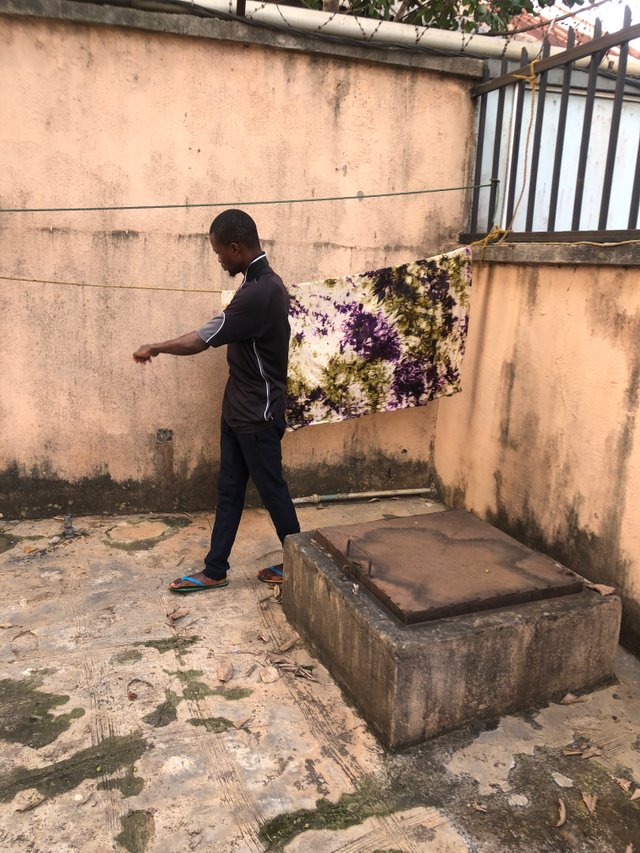
It took some hours to get them dried up and ready for packaging and it was all wonderful experience as the results really impressed me a lot.
Kindly share your thoughts as comments below, I'll be glad to read and reply them all. Thanks.
I must commend your effort and the energy you put into this work it's simply amazing and I love the outcome as well. Good job bro
Thank you so much brother.
It wouldn't have been so easily possible without you guys.
Wonderful! What are you going to do with these materials? They look like paintings!
They are going to be some sort of uniform somewhere.
Looking like a painting is the actual thing I love about it, and there's more to come!
great! I look forward to seeing more!
Sure you will!
Hi. Beautiful colors turned out. I will nominate your post for the competition.
#wox-bestpick
Thank you so much friend.
#wox-bestpick of the day goes to @tezzmax
This post is nominated by @irinal
Thank you so much @irinal @worldofxpilar.
I've experienced these techniques myself in a costume production for the scene, we made a big piece of fabric with different textures in blue, it was used as the sea, the sky, curtains of a palace and others.
I like the colors you used here, those designs make wonders!!
Thank you friend.
I am glad you love the colours, I really appreciate that!
Surely you will find more possibilities for those experiments! :)
Best vibes for all the projects, @Tezzmax!!
Thank you friend.