Home Work Task of Tron Fan Club Tutorial || Work with TronLink Web Wallet & Witnesses Voting by @moneyster
.png)
Background Image Source- Canva.com/Location

Assalam-o-Alaikum Steemians !
As per the guidance of @engrsayful who is working as a Moderator in this Tron Fan Club community, I decided to write a Homework Task by using my Cryptocurrency related knowledge. Let me go through all the questions given by @engrsayful.
.gif)
 |
|---|
- INTRODUCTION OF THE TRONLINK WEB WALLET
TronLink Web Wallet is an extension based application or tool that we can use as an add-on in our web browsers such as Firefox and Chrome. Here we have the ability to create a private wallet in the Tron network and we can also import our previously created Tron wallet into this TronLink Web Wallet. This TronLink Web Wallet interface is very simple and fast as compared to other Web-based wallets.
This TronLink Web Wallet is a very secure application to manage our Tron private wallet in a very clear manner. The most interesting thing about this TronLink Web Wallet is that it is working as a decentralized application. Therefore, our private keys and all the assets in this wallet are highly secured.
In this application, we can Transfer TRX, TRC-10, TRC-20 and TRC-721 based tokens for all the other Tron Wallet holders. At the same time, we can Transfer our Tron based Assets from this TronLink Web Wallet to any other exchange platform.
- REVIEWING THE TRONLINK WEB WALLET
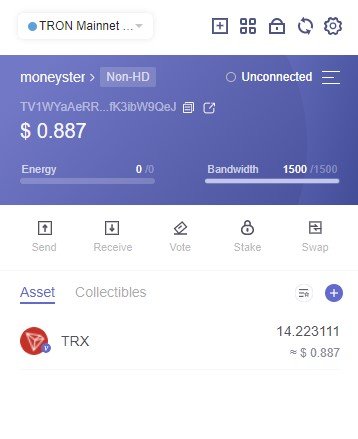
Here I have attached a screenshot of my TronLink Web Wallet. You can see the interface is very simple and informative. We can see an overview of our assets in the main window. In addition to that, we can see some additional features such as Send, Receive, Vote, Stake and Swap features. Currently, I have only 14 TRX at the time when I took the screenshot. We also manually add some other Tron based Tokens by using the "+" sign of this window and we can further include any Contract address to important that token name here. Then, we can easily swap those tokens into any other tokens or Trx within a few seconds. Because some internal swapping exchanges are also integrated to this TronLink Web Wallet as added features.
First of all, I have to open the official website of the tronlink platform. Therefore, I will go to https://www.tronlink.org/ URL to download my TronLink Web Wallet extension
 |
|---|
After installing the Chrome Extention, we can see a window like the below-attached screenshot. Here I will choose the "Import Wallet option as having already Created a Tronlink wallet". If we don't have any Tron Private wallet, we can easily click on the "Create Wallet" icon.
 |
|---|
After that, we can see a window to include our Private key. Here we can enter our Private key with a simple password. We can use that password each time when we open this Tronlink wallet.
 |
|---|
Finally, I have linked my Tron wallet with the Tronlink web application like the below-attached screenshot.
 |
|---|
- STAKING 10 TRX TO ACHIEVE TRON POWER & ENERGY
First of all, I have to click on the "Stake" icon to achieve Tron Power & Energy. Below I have included a screenshot to demonstrate the first step.
 |
|---|
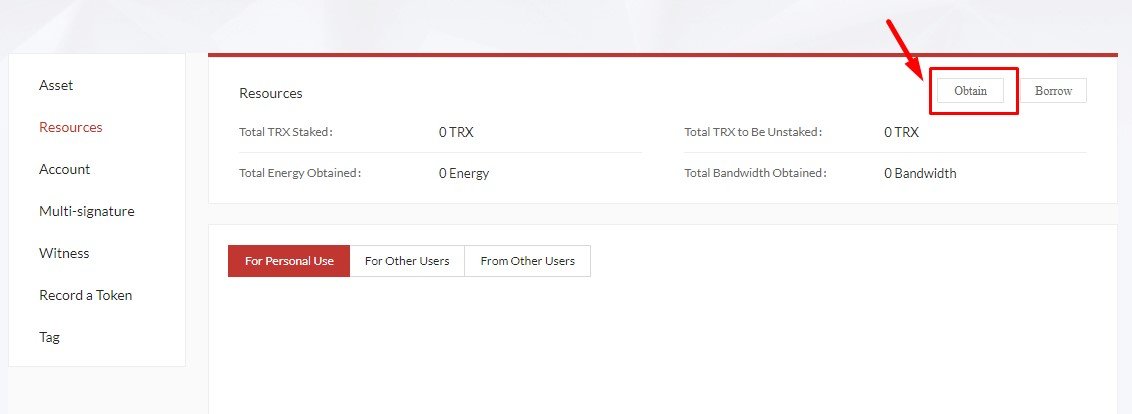
Then, it will automatically direct us to another window from the URL of https://tronscan.io. Here we can see all the details of Staking Tron. So, I will use the "Obtain" icon to demonstrate further steps.
 |
|---|
After that, we can see a new window with the relevant details of Resources and Tron Power. So, I will select the TRON Power and Energy option with the amount of 10 TRX. Finally, we can click on "I confirm to Stake" button to complete the Transaction.
 |
|---|
As the second step, I will again click on the "Obtain" icon to achieve Tron Power & Bandwidth. At this time, I have to select the "Tron Power & Bandwidth" option from the given menu with the amount of 10 TRX. Finally,we can click on "I confirm to Stake" button again to complete the Transaction. Below I have included a screenshot of the Final result.
 |
|---|
First of all, I have to click on the "Vote" icon to distribute our valuable vote among Witnesses. Below I have included a screenshot to demonstrate the first step.
 |
|---|
Then, I can see another window with all the Witnesses' details including APR percentage, Productivity and Reward Distribution Ratio. So, here I will choose "Poloniex" to distribute all of my pending Votes. Therefore, I have to click on the "Vote" icon and "+" icon like the below-attached screenshot.
 |
|---|
After that, I can click on the "Confirm to Vote" button to complete this Transaction. Here I;m going to distribute my total of 20 votes like the below attached-screenshot.
 |
|---|
Finally, I have successfully, voted for a Witness in the Tron Blockchain. Further, we can claim our rewards after the relevant time period. You can refer to the below screenshot to see the Final result.
 |
|---|
First of all, I have to click on the "Vote" icon to open the Voting related Information dashboard. Below I have included a screenshot to demonstrate the first step. Currently, I don't have pending claimable rewards. So, I have to wait at least 6 hours to claim my rewards. Let's wait.
 |
|---|
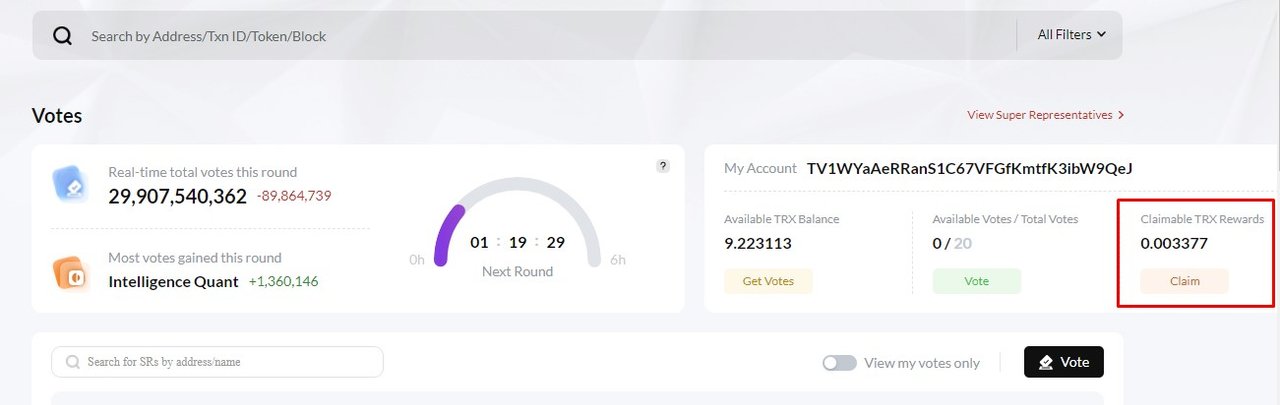
After 6 hours, I have opened again the Voting related Information dashboard by clicking on the "Vote" icon. But,I couldn't see any pending claim rewards. I think this was happened due to the inactive situation of the votes SR. Therefore, I Voted for another witness again. Finally, I was able to see Claimable rewards after more than 6 hours. So, here I can easily click on the "Claim" icon to claim my pending rewards like the below-attached screenshot.
 |
|---|
I have studied all the explanations given by @engrsayful to create this article and the below sources to further study these topics and I have explained all the above facts in my own words.
Cc -
10% benificiary set for @tron-fan-club
You have done your homework in a very beautiful way and each of your writings was very beautiful. Good luck to you.
You've done your homework nicely. Which was very nice to see. He has presented a beautiful description of everything to us. You have arranged everything and presented it to us. Thank you for sharing with us.
Thank you very much for your participation and hopefully I shall check all those at a time very soon
Thank you very much for your cooperation. Its pleasure to participate in your lesson.