HOW TO CONFIGURE METAMASK TO SUPPORT BINANCE SMART CHAIN NETWORK, FUND, AND MAKE BSC TRANSACTIONS.
Hello everyone,
It's my pleasure to be a member of this community and today I will be talking on MetaMask and how to make it compatible with Binance Smart Chain.
Since I started using the cryptocurrency and system during early 2020, I have undoubtedly learned a lot through my costly errors. After my experience, I can say that I have paid some expensive price which is why I will keep offering useful contents that will help us understand the various crypto and blockchain concepts.
Today, we'll look at how to make MetaMask compatible to the Binance Smart Chain.
Ethereum-based currency can be sent and received using the MetaMask wallet. This gives off the notion that it is primarily utilized for connecting to DApps with its suitable built-in browser and carrying out Ethereum-based tasks.
Today I'll demonstrate how the MetaMask can be set up to work with Binance Smart Chain and how to conduct BSC transactions with it.


The Binance Smart Chain is a blockchain technology. It is similar to Ethereum but differs from it in that it has a high transaction speed and a low transaction cost. Since customers are continually looking for ways to conduct transactions effectively and affordably, this advantage is what has driven its continuous growth in activity.
Contrary to the Ethereum network, where transaction fees are paid using the native token (ETH), gas expenses in the Binance Smart Chain are covered by BNB, the native currency of the blockchain.
For andriod users, start by installing the MetaMask Weller using playstore. If you are using an IOS, install the MetaMask wallet using Apple store.
| Downloading MetaMask from playstore | Default interface of MetaMask |
|---|---|
 |  |
Looking at the above we will see that the default network of MetaMask is Ethereum. Therefore, we will have to make it compatible with Binance Smart Chain before carrying out any BSC related transaction otherwise we will lose our funds.
To do this, we will first go to settings and then click on networks.
| Clicking on settings | Clicking on networks |
|---|---|
 |  |
When you must have clicked on networks, a list of network options which does not include BSC will be shown.
Seeing that the network options does not automatically display BSC, you will have to manually add BSC by clicking on add networks.
In adding the BSC network, it is important to note that each network comprises of a testnet network and a mainnet network which works exactly the same way but for the purpose of this publication, I will be adding a testnet BSC network of which the details can easily be found on Google.
| Searching for the BSC testnet network details | Inputting the BSC testnet network details |
|---|---|
 |  |
After adding the network, confirm details in other to successfully add the BSC network.
| Confirmation | Successfully added |
|---|---|
 |  |
There's no way you can carryout transactions using the just added BSC network without having BNB or any BSC token in your MetaMask wallet. In other to fund the BSC testnet wallet, you will have to use a BNB faucet which can be gotten from Google.
Copy your BNB wallet address and add on the BSC faucet option after you must have searched for it using Google search engine.
| Copying your wallet address | Funding your wallet |
|---|---|
 |  |
After clicking on the funding amount, the funding request will be accepted and be transferred to your MetaMask wallet within few minutes.
| Accepted funding request | BNB transferred to wallet |
|---|---|
 |  |
Now that you have funded your BNB wallet, you can now move to making transactions.
To carryout this part, we will be creating an additional wallet where we will be transferring the BNB to.
Creating an extra wallet is quite easy on the MetaMask for it requires just clicking on the three horizontal lines afterwhich you click on create new wallet.
| Creating additional wallet | Creating additional wallet |
|---|---|
 |  |
Now that you have created an additional wallet, you can now proceed with your transaction by setting the wallet with BNB as sender while the one without BNB will be set to be the recipient. Afterwards click on next to proceed.
| Setting sender and recipient | Input the amount to send |
|---|---|
 |  |
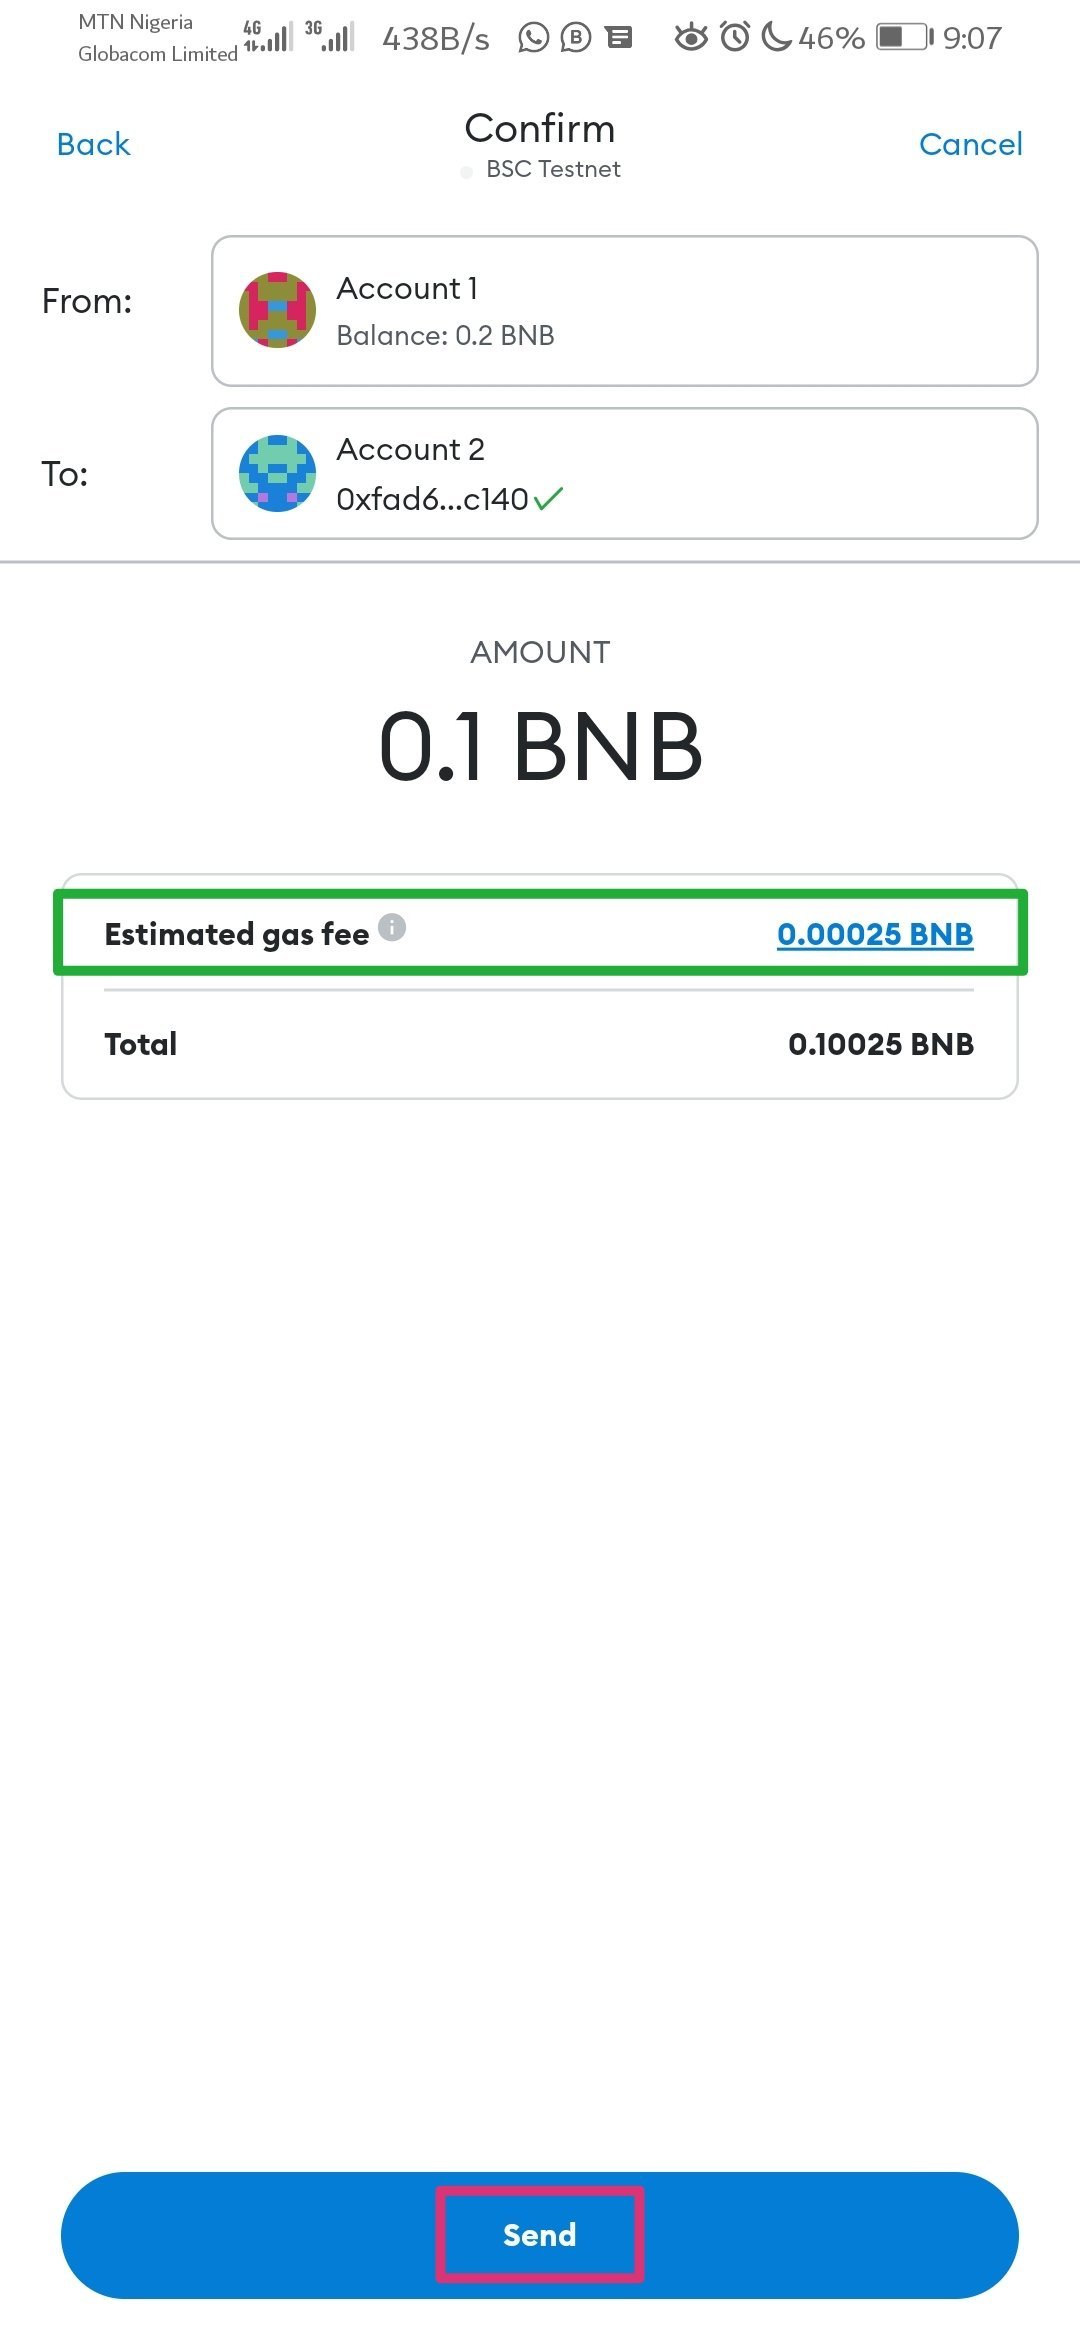
After entering the amount you will have to pay an amount of gas price. If the gas fee is OK for you, click send in other to execute the The transaction.
| Executing transaction | Executed transaction |
|---|---|
 |  |
Now that you have executed the transaction, wait for fee minutes for it will be completed and the BNB transferred to your recipient address.
| Confirmed transaction | BNB in the recipient address |
|---|---|
 |  |
Looking at the above, you will see that a successful transfer of 0.1BNB has been made using the MetaMask wallet at a very low gas price.
The MetaMask wallet which is a non-custodial Ethereum based wallet is used in the safe storage of cryptocurrencies. But it doesn't support some blockchain tokens on default which is what that has lead me into making this publication in other to show how to make the MetaMask wallet compatible with popular blockchains such as BSC. The MetaMask wallet is also used in interacting with DeFi platforms using its inbuilt web wallet.
10% to @Tron-Fan-Club
Tweet link
https://twitter.com/Changeyouseekk/status/1553671316024315904?s=19
Note: You must enter the tag #fintech among the first 4 tags for your post to be reviewed.
Increase your activity to get better support. Thanks.
Ok brother