HOW TO DRAW A VIKING
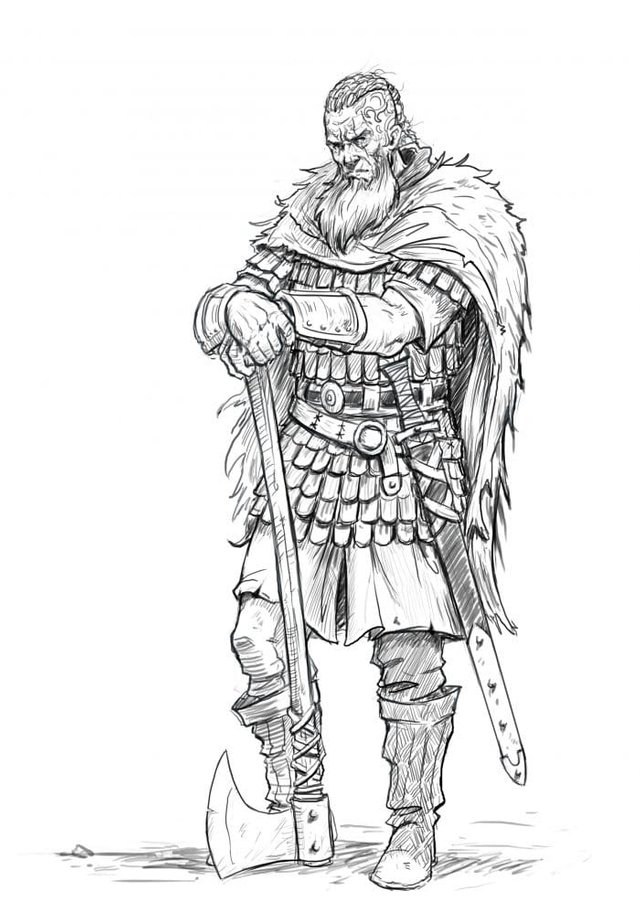
In this tutorial, I will teach you how to draw a Viking raider. This, easy to follow, step by step tutorial will guide you through the whole process of creating a nice and believable Viking sketch. We will start drawing a dummy, that will serve us as a base over which we will draw our final sketch.
LET´S DRAW A VIKING
Once we will have our references gathered, it will be time to start our drawing. In this tutorial, I will draw our character in a 3/4 standing position. The character will be standing in a relax posse, with his hand crossed over his ax´s shaft butt. Let´s start with the torso!.
STEP 1: THE TORSO AND THE HIPS
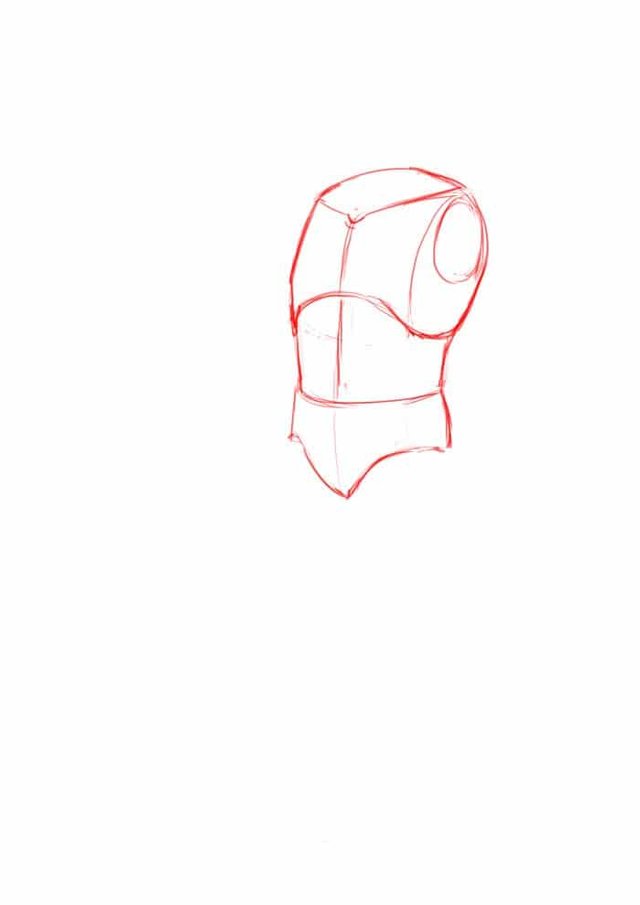
The upper part of the torso will be the rib cage area, depicted in the image above, and the bottom part will be the lower ribs. as you can see we need also to divide the cage with a vertical line, where the pectoral muscles are divided into two. We will also create a shorter side with an ellipse where the shoulder and arm will be connected to the body.
Drawing the hips will be the next step in our journey. I usually start drawing the hips and the crotch like if our character was wearing a short swimsuit or male underwear. It simplifies the process creation and makes things easier to understand. Remember to keep the torso and the waist separated from each other. The space in between them will be the abdominal area.
STEP 2: THE LEGS
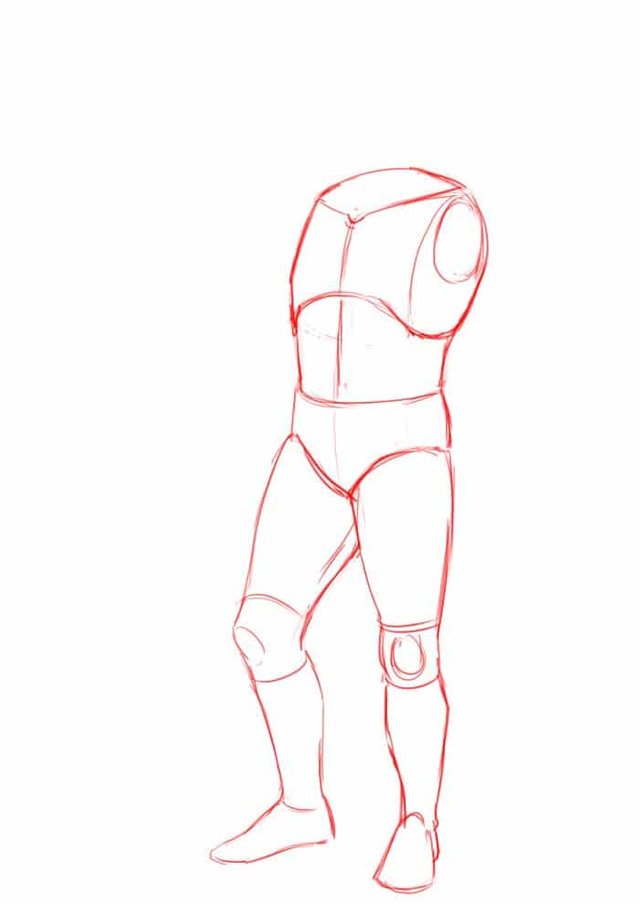
Our character will be drawn in a relaxed pose. One leg will be fully extended so the weight of the body will be loaded on top of it. This leg will be drawn almost fully frontal. The other leg will be bend indicating it´s free of the major part of the body weight and we will draw it almost sideways.
The thighs will be drawn as massive tubes. This “tubes” will be wider when connecting with the hips and will become thinner when reaching the knees.
THE CALVES:
For the right leg, we will draw a curve line on top and another one under. The curve line on top will be longer than the one on the exterior side, but still shorter if we compare it with the curve line bellow that follows.
The left´s leg left side will be drawn almost in a straight line representing the shin. The other side will be drawn like a curved line, representing the calve.
THE SHINS:
Will be drawn as a straight line. It will starts on the knee and will end on the feet.
THE KNEES:
The kneecaps will be drawn as ellipses.
THE FEET:
One foot will be drawn frontally. The one on the right will be placed almost fully frontally and the one on the left in a very open 3/4 angle, almost sideways.
STEP 3: THE ARMS
THE LEFT ARM
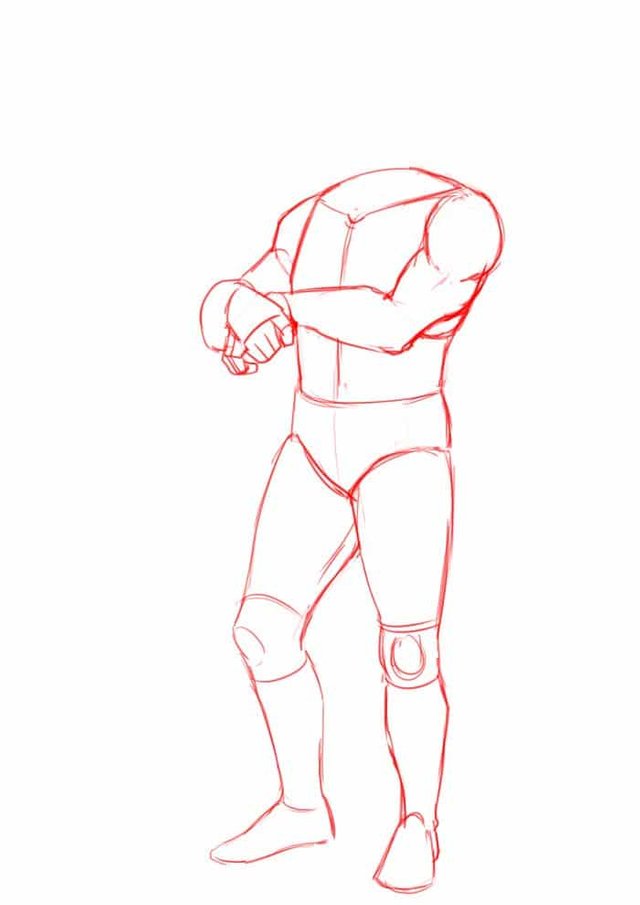
The next step will be to draw the arms. We will start with the left arm. The left side shoulder, which is almost totally hidden from the viewers perspective will be drawn as a short curve line coming out from behind the upper part of the torso. The biceps will be barely visible because immediately we will draw the forearm. Due to the perspective, the forearm will be placed almost frontally to the viewer, so it will appear to us like a short body part with the hand coming out of it.
Due to the relax posse the hand will be drawn laying casually on top of something, with the fingers close grabbing something ( the right arm´s wrist and hands ), with the exception of the index finger, which is not fully closed. This indicates the hand is not a tight fit and it´s not fully close over the object is grabbing
I´ve defined clearly the different parts of the arms, separating the shoulders, from the biceps with the triceps and the forearms, so you can read better the different parts of the arms.
THE RIGHT ARM
The Right Arm´s shoulder is almost a full circle. The Biceps and Triceps will be drawn as a couple of curves. The Biceps will be drawn like a long curve and the triceps below will be drawn way shorter. The triceps will be followed by a descendant line that will connect it with the elbow.
The forearm will be drawn in a similar fashion than the thighs. You gotta think in some sort of cone-shaped tube, wider near the biceps and more narrow on the wrist area.
The hand will be laying over the ax’s butt and will be covered almost fully by the left hand. Regarding the fingers, only the pinky will be really visible and not fully. Due to the perspective, you can barely see the ring and the middle fingers. The index and the thumb will be not visible at all.
STEP 4: THE HEAD
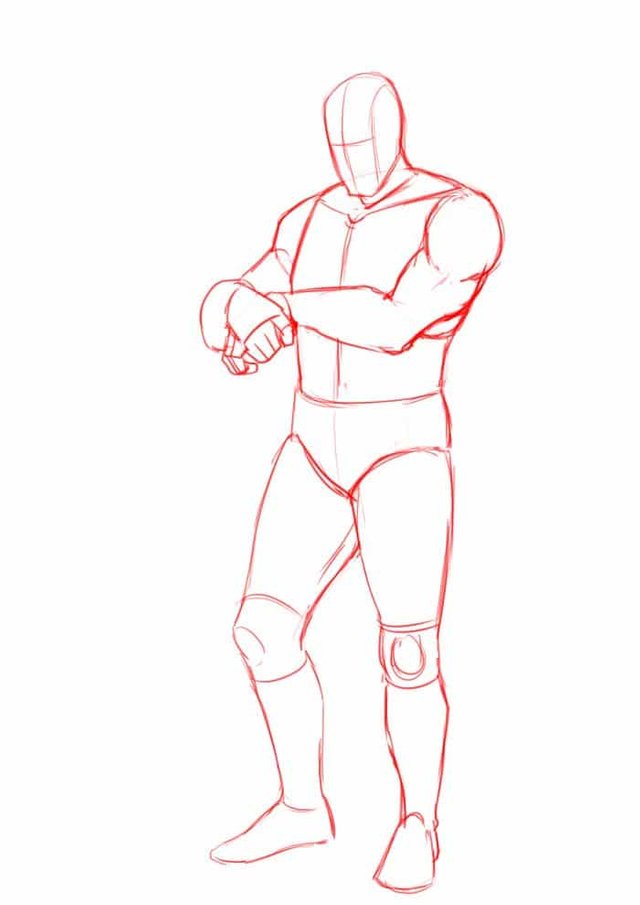
The head will be drawn as an ellipse with a square shape on the bottom. The head will be placed on a slight 3/4 angle, so the squared bottom will be shorter on the right side and longer on the left. I will divide the head with a vertical curve. This curve will leave two half, one considerably bigger than the other, again due to the 3/4 angle. Next, we will draw a horizontal curve line. This curve will be crossing the head a little bit above of the center of the ellipse and will help us to define where the eyes will be placed.
On the bigger side of the head, You can see another vertical curve that divides again the head. This line will help us to discern the front of the face, were the eyes, the nose, and the mouth will be drawn, from the side of the head where the ear will be placed.
STEP 5: THE AXE
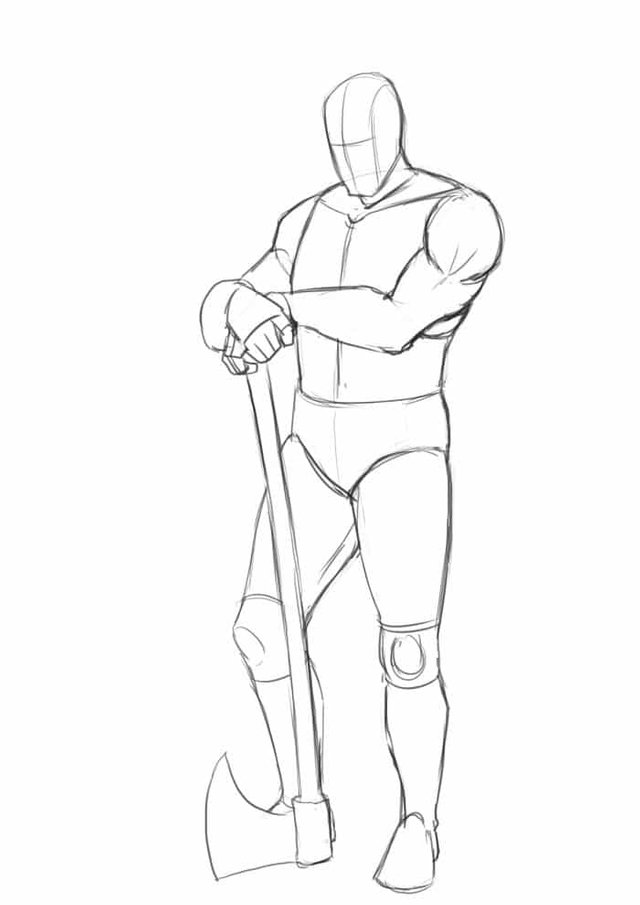
The dummy on the images I showed you on the earlier steps was highlighted in red so you could see clearly and very schematically how the different parts of the dummy are built. When sketching, your drawing will look more like the image above.
The next element we can draw is the two-handed ax. This weapon will be drawn in a vertical position, with the ax’s blade laying on the ground and our character’s hand crossed over the shaft’s butt. You should pay attention to the fact that the shaft is not fully straight and is slightly curved towards the end. Also, the way the ax’s blade will be placed will hide almost completely the left foot.
STEP 6: THE SKIN CAPE
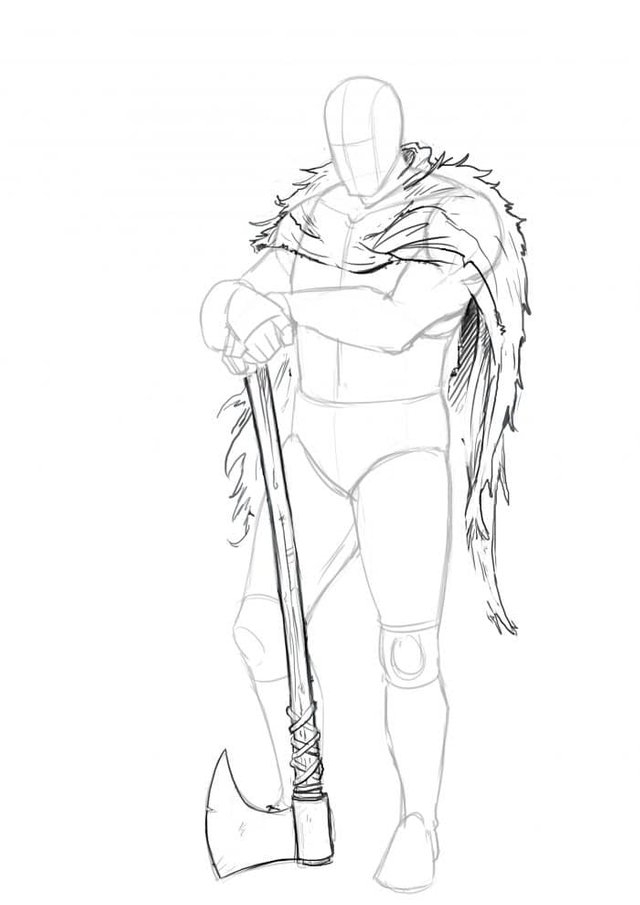
Now starts the fun part! We are going to dress our dummy like a true Viking raider. The first thing you gotta do is to reduce the visibility of the dummy so when drawing our Viking on top it will help us as a base structure and will not interfere much with the final drawing. You can do that by using a kneaded eraser. It will remove some of the graphite from the dummy sketch and will leave you with a very light version of the original sketch. If you are working in digital the solution is even easier, just reduce the opacity of the dummy’s sketch layer to 20%. I
The character’s cape will be made of animal skins so it will be quite furry and rough. This means the sides of the cape should be drawn like a succession of little peaks representing the fur’s tufts. This tufts should be drawn irregular, in a random position and of different sizes.
Regarding the ax, you just gotta follow the original sketch and add some extra details like the little ropes near the blade, the veins, and marks of use on the shaft’s wood and some indentation on the edge of the blade.
STEP 8: THE BODY ARMOR AND THE SWORD
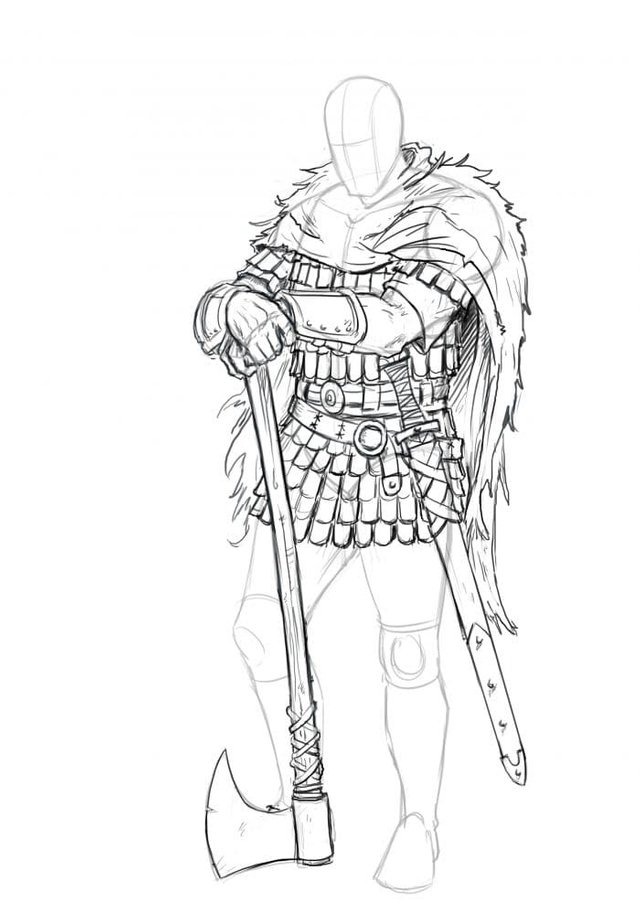
Now we are going to focus on the body armor and the bracelets. These protective elements were very common during the middle ages. The armor is a “scale” type armor. Basically a succession of little metal plates. The “scales” of the armor are placed side by side like a stripe of plates that surrounds the body. Stripes are placed one below the other, starting from the shoulders and going to the thighs. The scales of stripe above will cover in part the scales of the stripe below. The armor will cover also the shoulders and part of the biceps.
Below the armor, you can see the sleeves of a shirt. This gives the impression of a third layer of clothing on our character( the cape, the armor, and the shirt ), which gives more realism. The bracelets will be made of a mix of leather for the strips and metal for the protection plate.
As you can see, in this step we will draw also the skin of the arms and the hands. Follow the dummy sketch and draw the hand and arm details carefully. Respect the knuckles placement on top of the fingers and the finger joints when detailing.
The belts around the waist and the sword will be the final elements we will be drawing on this step. The first belt will be a thick leather belt tight around the waist. The second one, the sword’s belt will be crossing from the left side of the waist to the right hip do to the sword hanging on this side. Regarding the sword, I tried to be as historically accurate I could. Viking sword used to be single hand weapons, with a small curved cross guard and a big pommel.
STEP 8: THE HEAD
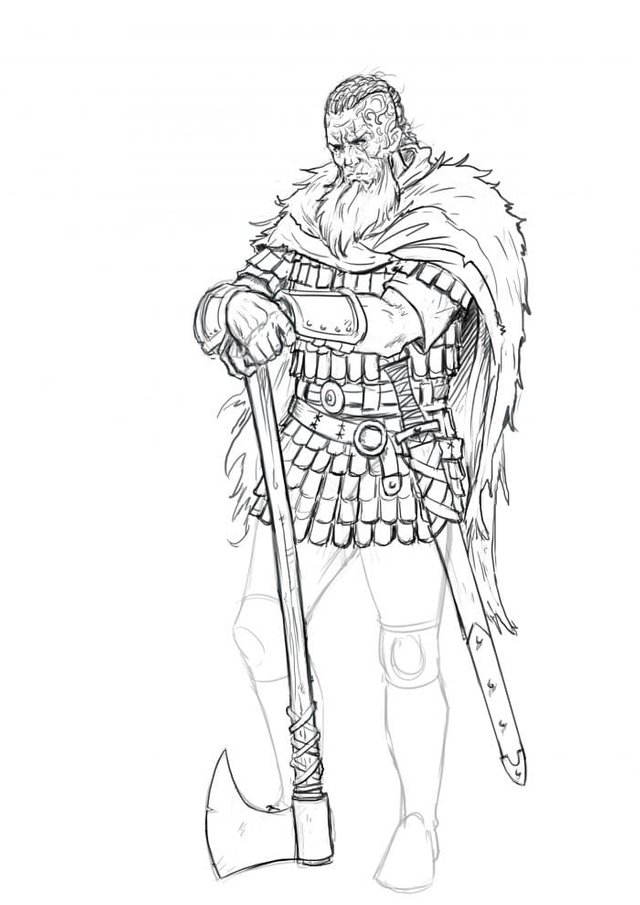
The character’s face must look like the one of a though Viking seafarer. This means our character will wear a long beard, long hair with several braids tight in one big tail. The sides of the head will be shaved and will show Nordic symbol type tattoos. The face should look angular, with strong features, like pronounced bone chicks, small eyes and wrinkles, and scars.
STEP 9: THE LEGS
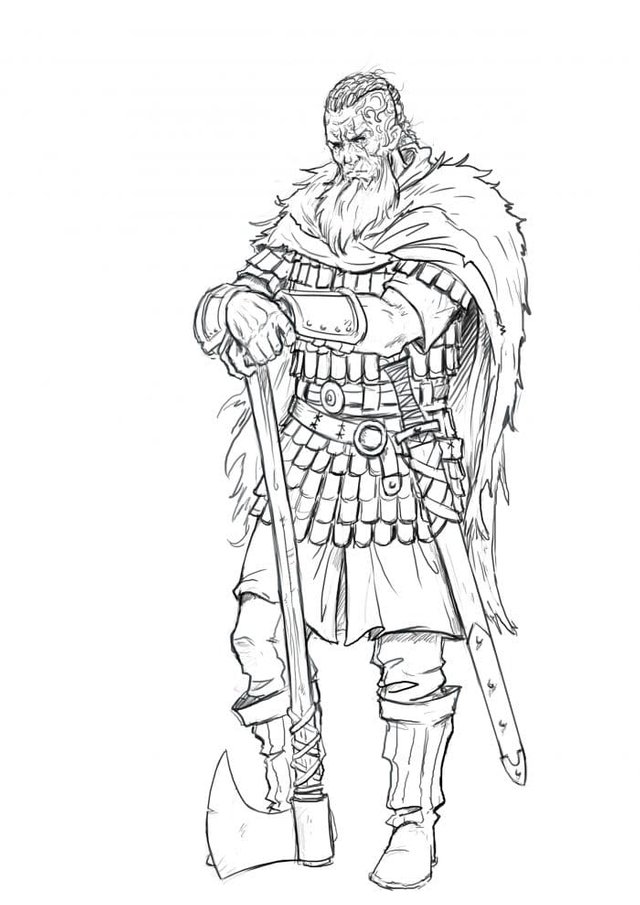
For the legs, we will draw some pants. From the Knee to the feet the trousers will be inside some high leather boots. The key element here is the wrinkles on the trousers, just on top of the boots, giving the effect that the trouser’s fabric is too thick to stick inside the boots and is folding from its own weight. Another similar effect is the leather from the boot folding on top of the foot due to its own weight. This wrinkle effect brings realism to the drawing.
On top of the trouser is some piece of fabric, like it was the bottom part of a long shirt that almost reached the knees. This shirt is the same one we see coming under the armor sleeves on the arms. This layering is also another of those elements which bring realism to the drawing. Usually, beginner artist tends to draw a character wearing just an armor, like they were wearing nothing under. Vikings used to wear several layers of clothing, like we drawn here( cape, armor, shirt, pants, and boots).
STEP 10: DETAILING AND SHADING
.jpg)