HOW TO DRAW A STORMTROOPER FROM STAR WARS
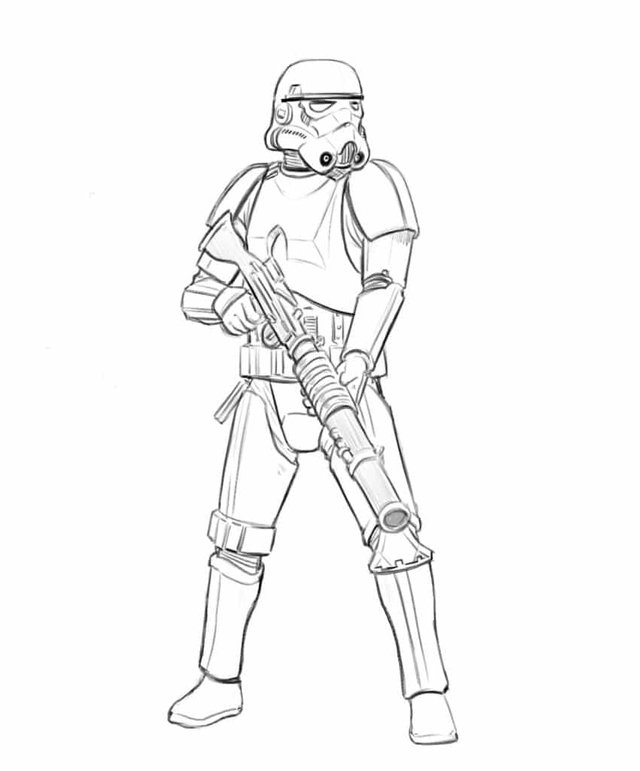
In this article, we will be showing you how to draw a perfect image of the most famous soldier of the science fiction genre. We are talking about the Stormtrooper, the Empire’s foot soldier, and we will teach you how to draw him in 7 easy steps. The drawing would capture all his might and glory.
You should also note that the more familiar you are with each step, the more likely your final draft would be flawless and the more likely it would appeal to an audience. That said, we would start up by drawing a dummy. The manikin would serve as a foundation for our final sketch. Ready?
STEP 1-DRAWING THE TORSO
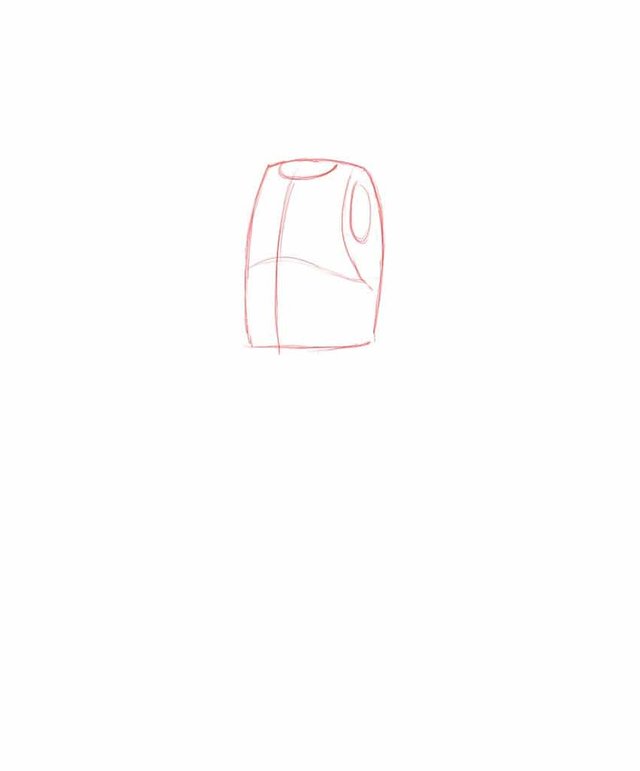
Using the above picture as a guide, Stormtrooper ´s rib cage should be drawn using a slight 3/4 perspective. This just means that the right side which faces the viewers would be drawn bigger in size than the left side.
Going on, the rib cage should be started off by drawing two horizontal lines. The upper line should have a deeper arc and the bottom line should be straight. Then you should draw two curved out vertical lines that connect the earlier drawn horizontal lines at their extremes. Having done that, divide the rib with a vertical line using the 3/4 perspective. When that is done, as seen in the picture, draw another curved vertical line at the right side of the rib cage. This would serve to highlight the underarm area. Below the chest area, you should draw deep curved line representing the rib cage. Having drawn it, go on to highlight where the head will be by drawing a small circle at the top of the rib cage. Flowing from that, draw another circle at the top left side of the rib cage. This would be where the right arm would emerge from.
STEP 2- DRAWING THE HIPS
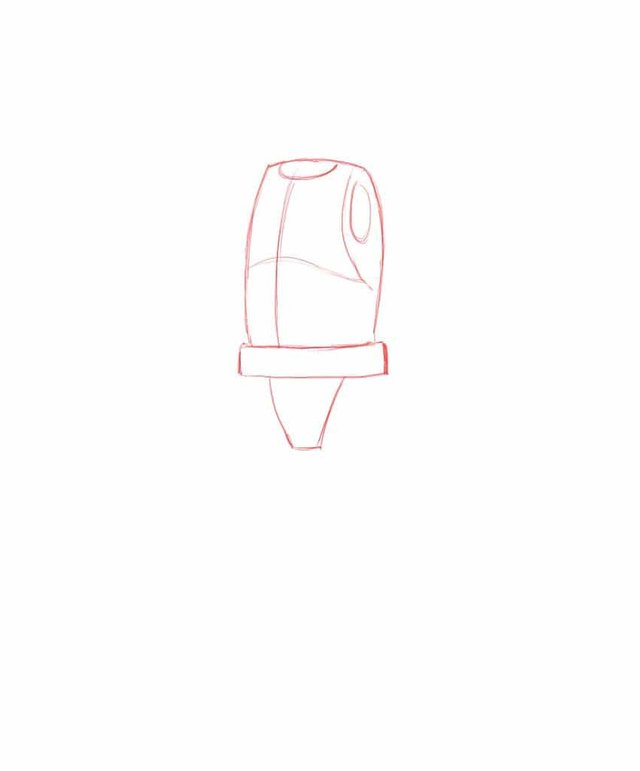
For the hips, you should draw them to take the form of a man’s underpants as depicted in the image. This is where the legs of our character would emerge from.
STEP 3- DRAWING THE LEGS
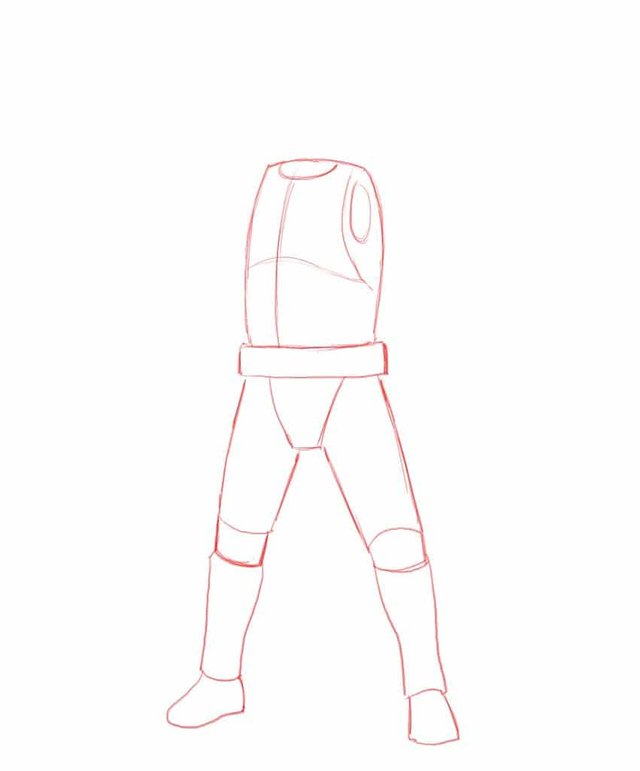
Our character would be drawn standing with his legs separated. Each leg should be started off as a big tube and then you should gradually reduce them as you get to the knees. To highlight the knees, draw two horizontal lines on each knee and then draw a circle in between them as seen in the above picture. When you’ve done that, the continuation of the leg should then extend out a little and will Become narrower again towards the ankle.
The feet will be drawn as simple geometric shapes. The right foot will be drawn frontally, meanwhile the left feet will be drawn in a 3/4 perspective, so the foot´s interior side is visible.
STEP 4-DRAWING THE ARMS
.jpeg)
The arms of our character should be sketched slightly extended from the body and they should be drawn using a 3/4 perspective. This entails the right arm being bigger in size than the left arm because the left side faces the viewers.
Both arms will connect with the torso by the shoulders. The shoulders will be drawn as armor shoulder pads rounded on top and flat on the bottom.
Having laid that out, the upper arms should be started off in the form of big tubes and should reduce in size as they get to the elbows. Then they should extend out at the point of drawing the lower arms and should further reduce as you get to the wrist. The main difference between the left and the right arm is the perspective. Meanwhile, the right forearm will be drawn almost fully extended, the left forearm should be drawn almost frontally and elevated compared to the opposite arm. Having drawn that, draw the left hand as seen in the picture. When drawing the left hand, draw the fingers of the left hand slightly clenched like if the stormtrooper was grabbing something. The opposite hand will be drawn in the next step holding the muzzel of the blaster weapon our character will be carrying.
I will like to stop here for a moment before I keep moving forward with this tutorial. I want to introduce you to the course that I made on “How To Draw Characters”. In this step by step course, I dive deep into the drawing principles I’ve been speaking about previously in this tutorial, plus many other techniques that will help you develop the skills necessary to draw professional level like characters. If you wanna know more about this course please click the image below.
STEP 5- DRAWING THE BLASTER

The Stormtrooper’s Blaster is a tube like shape with a rifle butt in one end and the muzzle on the other .
Meanwhile the left hand we drew in the previous step will be grabbing the handle, in this step we will draw the right hand holding the other side of the weapon.
Because the right hand will be holding the Blaster from under, only the tip of the fingers will be visible, and not all of them. On the other side, the thumb will be on top of the weapon so we can draw it fully visible. Basically the position of the hand will be with the palm facing upwards( even if we can only see very little of it).
STEP 6- DRAWING THE HEAD
Now it´s time to focus our attention on the head covered by the iconic Stormtooper’s helmet. We will draw the main volumes of the head, so we can detail it properly in the next steps. You should draw an oval shape on top and on the bottom of the helmet two short, curved and thick tubes. Obviously, due to the perspective the left tube will be drawn almost side ways and the right tube will be barely visible. We could only see the end of the right side tube.
Along the oval shape of the helmet, we should draw a curved vertical line, coming from the top and ending on the bottom center of the helmet, where you should draw an opening for the breather. This line will leave you with the helmet divided in two uneven parts, the left side being way bigger than the right side. Again this will help you to align the features of the helmet correctly with the 3/4 perspective.
A little bit above the center of the helmet we will draw an horizontal curved line. This will leave us with the helmet divided into 4 parts. This horizontal lines will help us to locate properly where the visors for the eyes should be drawn in the next step.
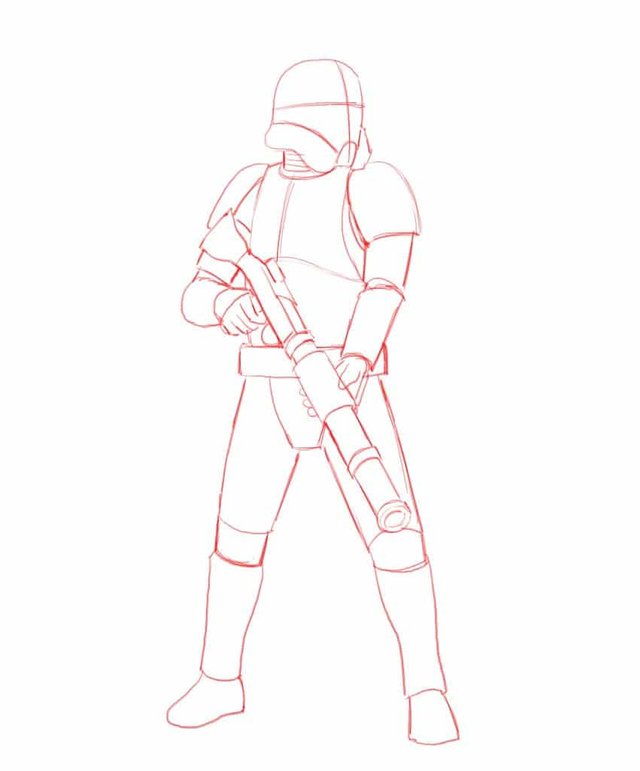
STEP 7- DRAWING THE FINAL LINE ART
Ey! you already reached the last step. Now it´s time to have some fun and ad some cool details to our character. When detailing a Stormtrooper you should think.
Use the two images you can find in this step as, reference for drawing the different elements of the armor. Is very important you use the lines of dummy we created during the previous steps, to draw your final art on top of it.
Try to fade the lines of the dummy with an eraser, so you can draw on top of it without loosing track of your final line art and without the dummy lines interfering in your final art.
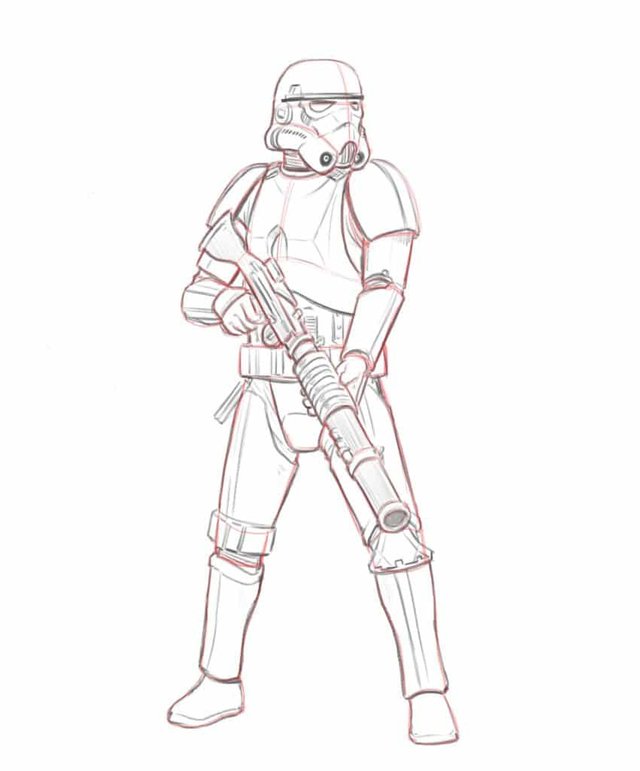
STEP 8- SHADING THE CHARACTER
You should play with the line thickness, darkening the lines located in shadowed areas.
Because the Stormtrooper armor is mostly white with some black parts here and there, this will help you to create high contrast in your drawing, by darkening the joint areas, which are more flexible and soft, leaving the armor plates in white, with little shading.
Your post was upvoted by the @art-venture account after manual review. Support of Visual Artworks and Photogrpahy on Steem by @stef1 and @art-venture
thank you
Your post is manually rewarded by the
World of Xpilar Community Curation Trail
join the World of Xpilar Curation Trail, info can be found here
thank you