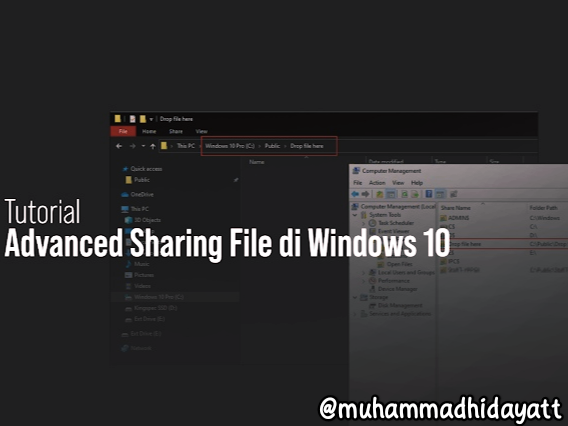
SIZ Approved Course | Lecture 01 | "How to Advanced Sharing Files & Folders in Windows 10" by @muhammadhidayatt
Hello dear SIZ members, how are you all? I hope you are all well and always in God's protection. On this occasion meet me again @muhammadhidayatt and I will post a tutorial for all of you. The theme that I will discuss here is: "How to Advanced Sharing Files & Folders in Windows 10"
Sharing files and folders in Windows 10 is actually quite easy, but sometimes there are some conditions where we have to give a password to what we share, and each access must be different depending on who we want to share the file with. Well, regarding this, on this occasion I will try to share a little tutorial that might attract the attention of friends, especially for someone admin, it support, or other work.
Introduction
Let me explain a little first what scheme I will use, the first folder that I will share is a special folder with username and password access that we will create and specify. Here I will also use Windows 10 as a host, and will try to test with access via VirtualBox using Windows 10 OS as well.
Steps.
Account creation.
First of all here I will create a special account to access the files and folders that I share and here I will also name it with "silverknight" as the username. Please friends see how below.
Step 1. First we go to Computer Management > Local Users and Groups > Users.
Step 2. Next, please create a new User by right-clicking New User and please fill in what is needed, which includes username, full name, descriptions, and password, please fill in.
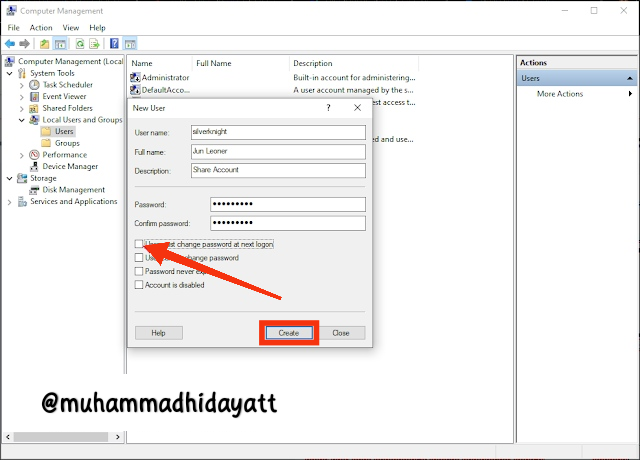
Exactly like what I showed in the picture above, make sure you also uncheck the User must change password at next logon, I turned off this option because I will not use this account as an account to access Windows 10 like our main account here.
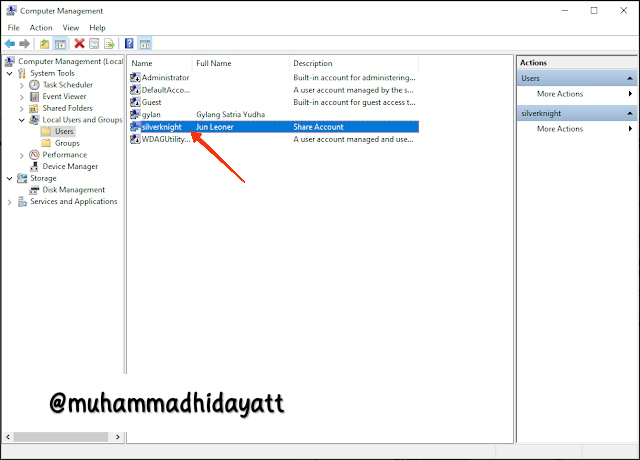
At this point, the account creation step has been completed. Then please continue to the next point, where we will hide the account we have created from our Windows 10 Login Screen.
Sharing Files and Folders.
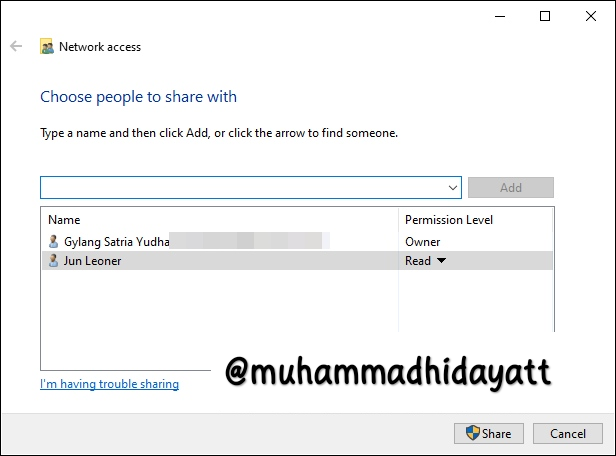
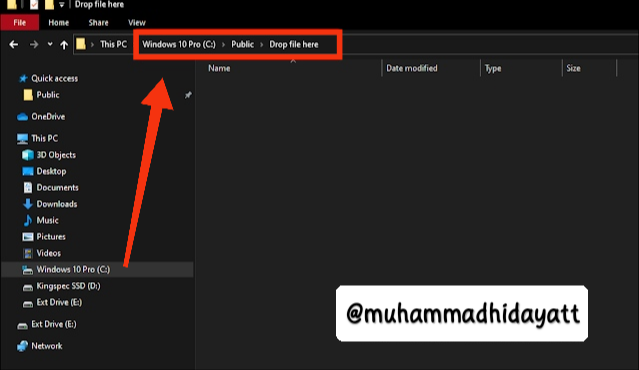
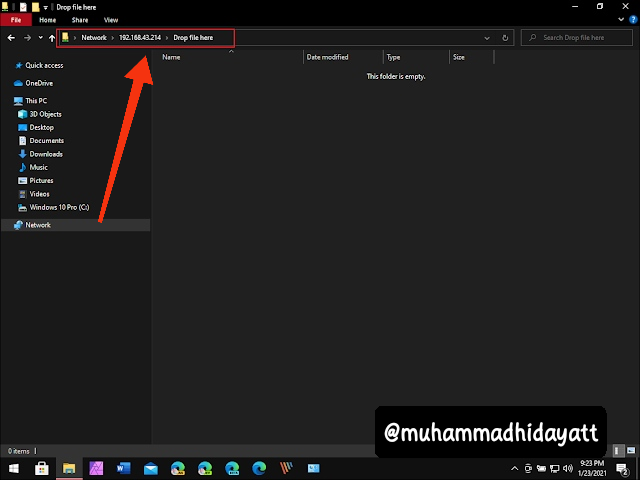
Well, if you have done the above points, then we will share the folder created in C: Public (I will name the folder "Drop file here"), then the steps are to right click on the folder > Give access to > Specific people > Jun Leoner (the account I created earlier).
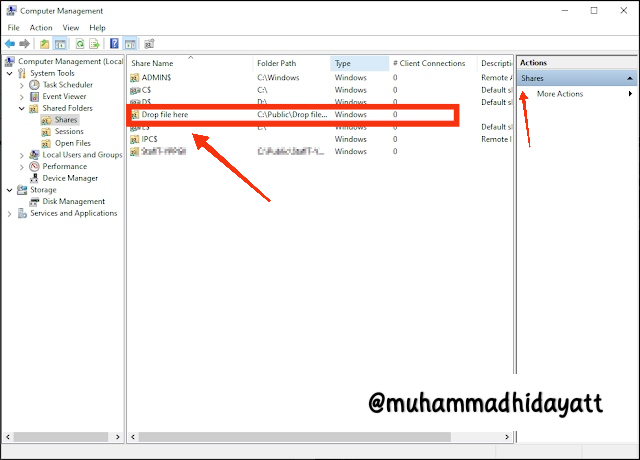
Next, please check in Computer Management > Shared folder > Shares, whether the folder has appeared there.
Hide Account on Login Screen.
Because the account that I created can basically be accessed like a local account on Windows 10, it's just like what I said earlier, this account is specifically for file sharing access from the client pc, so we don't need to display this account on the login screen.
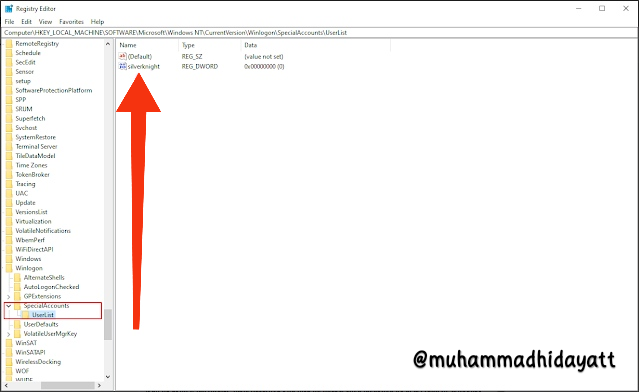
In short, you just need to create a Sub Key from Path:
HKEY_LOCAL_MACHINE\SOFTWARE\Microsoft\WindowsNT\CurrentVersion\WinLogon
Then fill it with the name Special Accounts, then re-create the Sub Key from Special Accounts with the name UserList, then fill in the DWORD (32-bit) with the account username that I created in the previous point and fill in the value with a value of 0. you do, then the account created in point one will no longer appear on the Login Screen because it has been designated as a Special Account.
Done, then please proceed to testing.
Testing (on PC Client)
For testing, here I use Windows 10 in VirtualBox with Bridged network settings so that both can be connected to each other by Wi-Fi networks and in the same network position.
The details of this PC Client are (Username and Password) are the same Username as what I use on my Asus laptop. And we will access the previously shared files and folders using the account we have created. Here are the steps:
Step 1. First, please make sure first the IP of the Host PC, we can use the ipconfig command in CMD or manually view it via Control Panel, here my Host PC IP is 192.168.43.214
Step 2. Next, if the IP of the Host PC is known, then please open Run Command (press Win + R) and enter \192.168.43.214
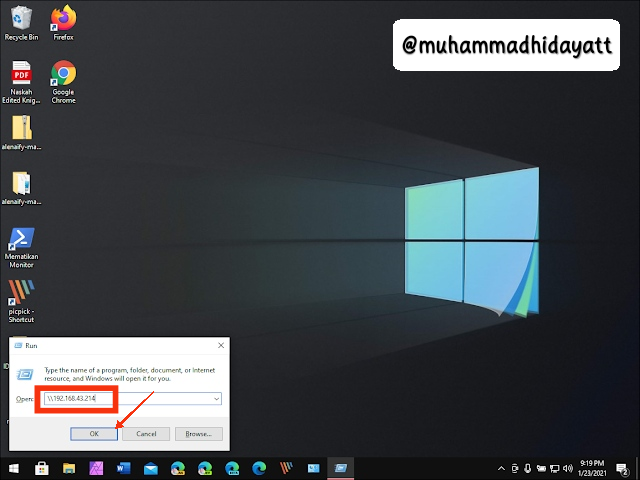
Please friends, adjust the IP of your Host PC.
- Step 3. Next, please click Enter and please enter your username and password as I have made in point one above, and in this example the username is silverknight and the password is admini12.
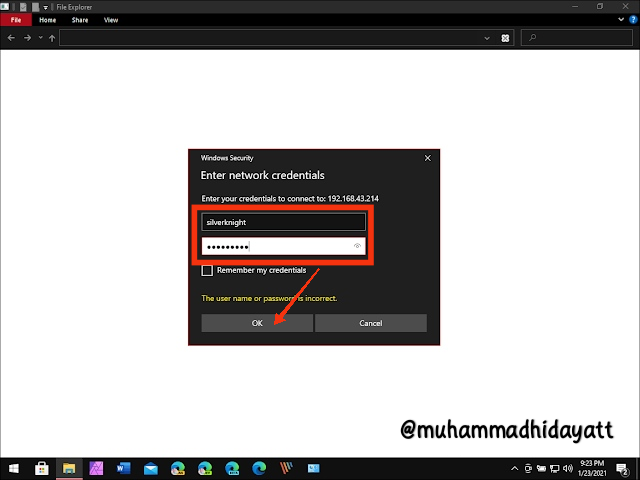
Also make sure that the username and password you entered are correct, and if you have, please click "OK" and you will be directed to the folder that you shared earlier.
Those are the Advanced steps for sharing files and folders in Windows 10. I hope that with the steps I have made above we can share files according to their respective users and access. Of course this is very suitable to be implemented on Windows Server, or on a Windows 10 Server PC that you set for File Sharing. That is all and thank you...
Author:
@muhammadhidayatt
About me

This is a great tutorial. Will be a little complex for people with little knowledge about computers but I guess that’s normal because the course is titled “ How to Advanced Sharing Files & Folders in Windows 10” after all