SIZ Tutorials | Graphic Art Program | Creative Designing | Tutorial-1 | Adobe Illustrator Tutorial for Beginners
Hello Beautiful Peoples!
I am Abida. Coming with tutorial series of Graphic Designing!
Welcome to another post. It’s not just a thing to read-only it’s a superb learning platform as well. Where you can learn and enjoy different creative ideas in Adobe Illustrator, Photoshop,canva.com.freepik.com, and video editing as well as with extra episodes of these Graphic Series which are starting now.
So let’s start our first Tutorial of Adobe Illustrator….
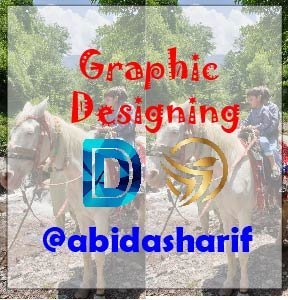
Featured images are going to be one of the first interactions your audience engages with on social media or in their email inbox.
So let’s design Featured Image like this:


How to create a new Document?
Adding Layers!
The next thing you’ll need to do is make three layers, this is going to make editing, shifting, and moving any text or shapes that you add later so much easier!
In Layer 3 [simply click on the layer to place objects within it], you’ll need to place the photo that you want to use for your background and completely cover the artboard [press downshift before enlarging to keep the dimensions locked to avoid warping].
Next, you need to add a rectangle into level 2 that you’ll use for your slightly transparent cover so that it’s easier to read the fonts over some photos that have a lot of colors or details. I leave the opacity around 40-50%. You can change the color of the rectangle, but I leave mine on white...
Text
Text will go in level 1. The best way to start is by locking up the other two layers so that they won’t move around when you’re trying to work with text.
OR you can add any image, logo, etc as well.
Now, this is the easiest part! You’ll want to save any graphics or images as either JPEG or PNG. For all the photos within our blog post, I tend to put them in PNG form because WordPress automatically reduces the quality of images to improve site speed. We want to have as much detail in images as possible, so we keep them in PNG. For social media, JPEG file formats work best, but also make sure you are still exporting and downloading medium to high quality from all Adobe software!
I hope this tutorial is very helpful for you to design a featured image or to learn some basics of adobe illustrator.
Soon, I will come with my next tutorial in which we will learn more about this software. Until then, take care of yourself and keep trying to explore this software by yourself.
My entry Post:
https://steemit.com/hive-181430/@abidasharif/introduction-to-siz-by-abidasharif


Great information about adobe illustrator Thanks for sharing this great information