| Hello My dear friends, I hope everyone is well? Alhamdulillah! I am also well with your prayers and love. I am @sheikhtuhin From #Bangladesh |
|---|
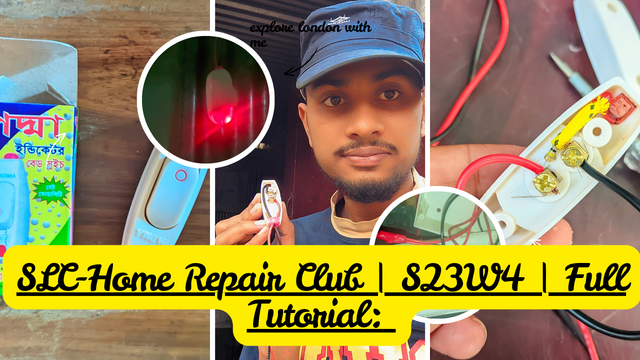
cover photo edit by Canva
A very interesting topic has been added to the 23rd season of the Steemit Learning Challenge.It's called the Learning Club. I've known about it since the beginning, but I haven't tried to join it until now.There are three learning clubs, one of which is textiles, which I am good at, but due to lack of time, I am not joining it, but there are two others besides it.One of them is the Home Repair Club which is run by our dear brother from Bangladesh @imranhassan and another dear person @rmm31. Right now I have appeared at that club with a tutorial.
I will share my tutorial with you today with great caution and care. I hope that after watching today's tutorial, you will be able to learn it very well.Today's tutorial will show you how to install a bed switch in your home.I have explained it very simply from start to finish, now I will complete those tasks step by step.
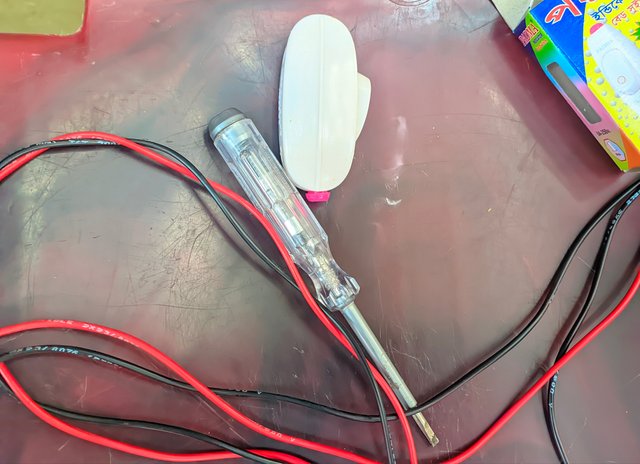
First step: Collection and introduction of materials:
To do this, some very important things are needed, and at the same time, precautions need to be taken.Before doing this, you must turn off the power switch to avoid any accidents. The materials needed for this work are:
| |
|---|
| Bed switch | 1 piece |
| Electrical wire | As required |
| Scotchstep | 1 piece |
- Screwdriver
- Designated place.
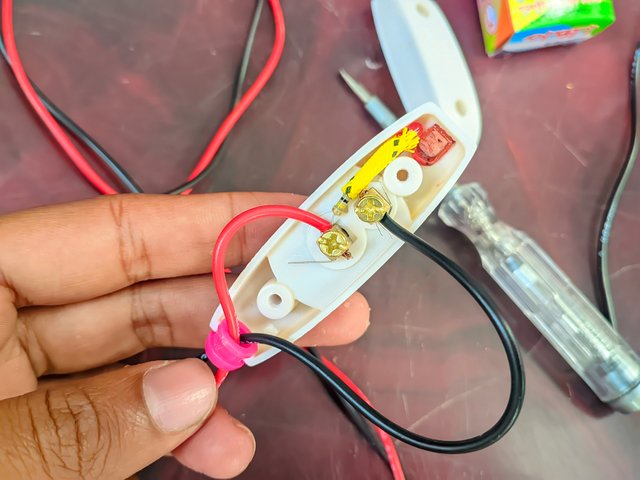
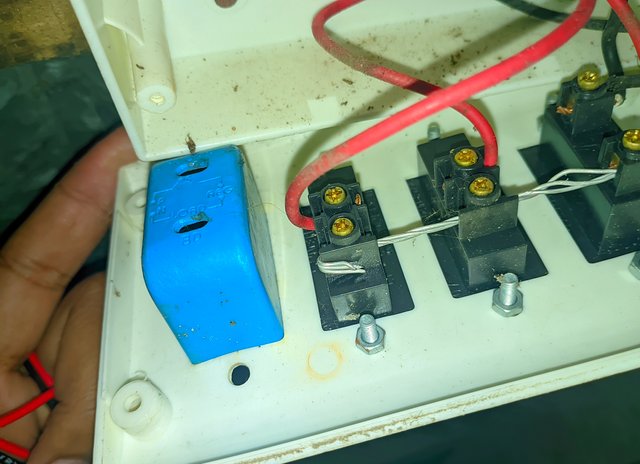
Step 2: Preparing the bed switch.
Using the necessary tools, remove the nut from the top of the bed switch.After unscrewing the nut, there are two nuts inside it for attaching the wire, which after unscrewing, must be inserted into the two parts of the two wires.Of course, while doing this, you must be careful not to turn off the red light inside the switch and not to do anything that would disconnect the electrical connection.
Do it exactly as I showed in the picture above.After I prepared it, I took a picture with it, which is a selfie.Of course, I did it almost in a few steps. I hope it will be very easy for you to install it and I was able to explain it very simply.
Third step: Complete the switch work.
You need to replace the part of the back of the switch that was removed.Then, the wires inside it should be neatly placed and tightened with the knots covered at the back, and it should be tightened very carefully so that there are no gaps in any part.Or it may not open at any time, so you have to work carefully and if it opens, accidents can happen at any time, so be careful.
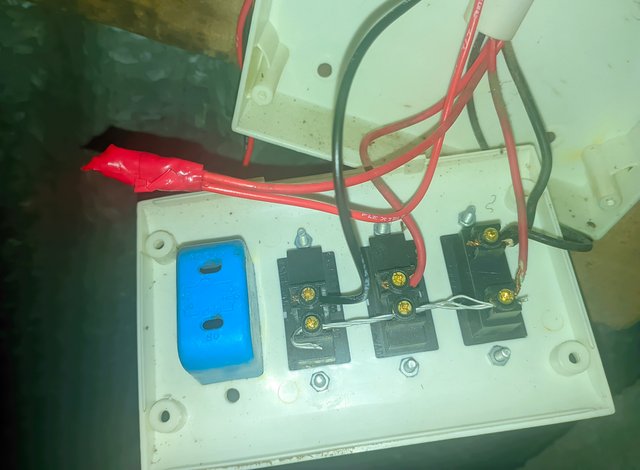
Fourth step:Complete the work near the mainline switchboard of the house.
At this stage, you will first need to go to the board where you will be installing the bed switch and remove the switch board.After opening it, you will notice that it is already nicely wired, so you have to go there very carefully. However, before opening it, you should turn off your power switch or turn off the main switch.
There, remove the wire that is attached to the switch itself, either for the space or for the switch for which you want to get a bed switch.Since it was connected to the main line, do not work in a way that is directly connected to your main line.Then connect that wire to one of the wires of the bed switch and secure it with duct tape.Then, we need to connect the other wire of the bed switch to the same wiring harness that we previously connected, that is, where we removed the wire from.
Then the board needs to be fixed so that there is no possibility of it being damaged in any way after connecting the electrical lines.And after fixing that time, an electrical connection must be made to establish an electrical connection from the electrical line for testing purposes.
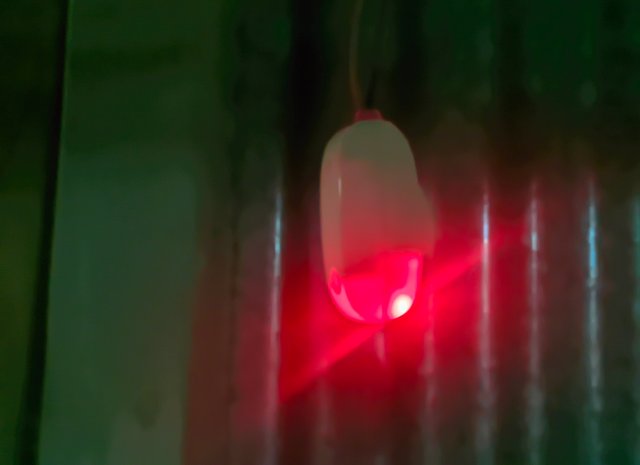
Step 5: Check if it is working properly.
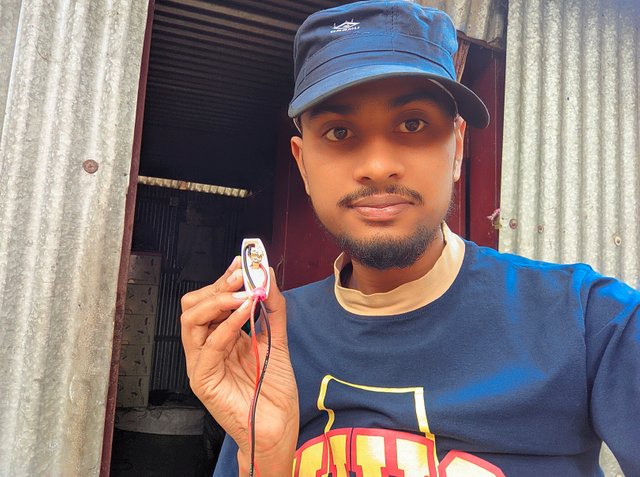
To check if the bed switch is working properly, after turning on the electrical connection or power switch, we must first turn on the main switch on the switchboard where we took out the bed switch.My bed switch was on, so the light came on right away.I was originally using Bed Swiss here for a lamp.
I turned off the bed switch and here the red light inside the bed switch is on.That means the bed switch I installed is working properly. Basically, this is how you can install any type of bed switch in your home.Since I did this for testing purposes and teaching purposes, I took a selfie with it right after I finished the task.I hope you all understand this very well and will be able to do it at home.
| I created a tutorial video while doing this, which I am sharing with you below.I hope you will be able to do the job well enough after watching this video and learn in a very nice way. |
|---|


X promotion
https://x.com/sheikhtuhin24/status/1899131089219965321?t=l7ItINuaA7TZ7jfuuWWYmw&s=19