Sharing my general knowledge
Good day everyone, hope you have a great day, am here again to participate in this contest titleSharing my general knowledge and was organized by @sahar78, thank you for organizing this wonderful contest, it is an opportunity for others to learn something meaningful from those that know it.
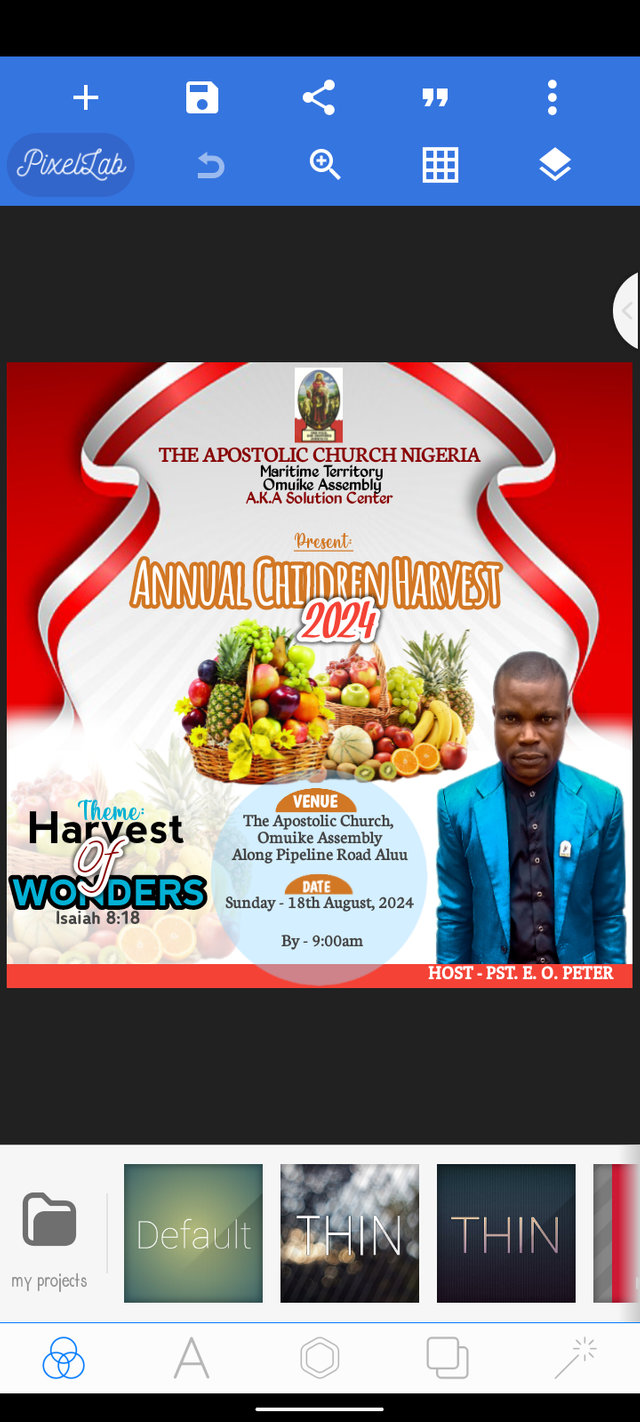
How to create Graphic Design Using You Smartphone
In this contest am going to share how I created graphic design using my smartphone within some few minutes.
Like the image above was created using my smartphone last Sunday, I have been using my phone to create so many of them, I just decided to use this one because it is the recent design I made for my church.
Step 1
How I started was, I went ahead to internet and look for a good background that can match the design I want to make, I downloaded a lot of background but decided to use this particular one.

Here is how the background looks like, before I positioned it to my own satisfaction. To see something like this on the internet, you can search for premium background and you will see them in different ways, if you are in need of a particular color you can add the color to it like red premium background and you will see the color which you added.
Step 2
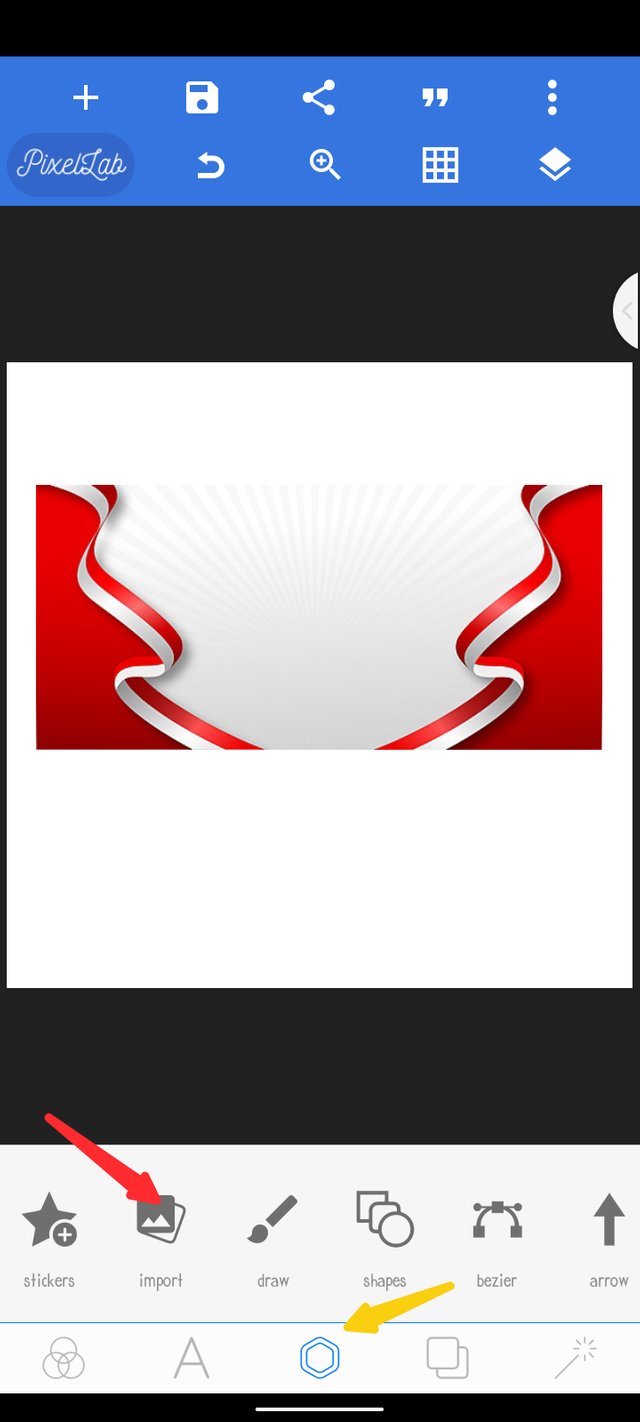
Import the image to pixellab because I was using pixellab for my design. You import the image as a background to your pixellab background like this 👇. Firstly click on the yellow arrow direction before the red one to select the image from your galary.
The image seen below was the background I used but I rotate it upsidedown.
Step 3
Start inputting the written text directed by the client, or your self. Any text that was supposed to be added should now be added after you have arrange the background to your taste.
This how you can add your text below 👇
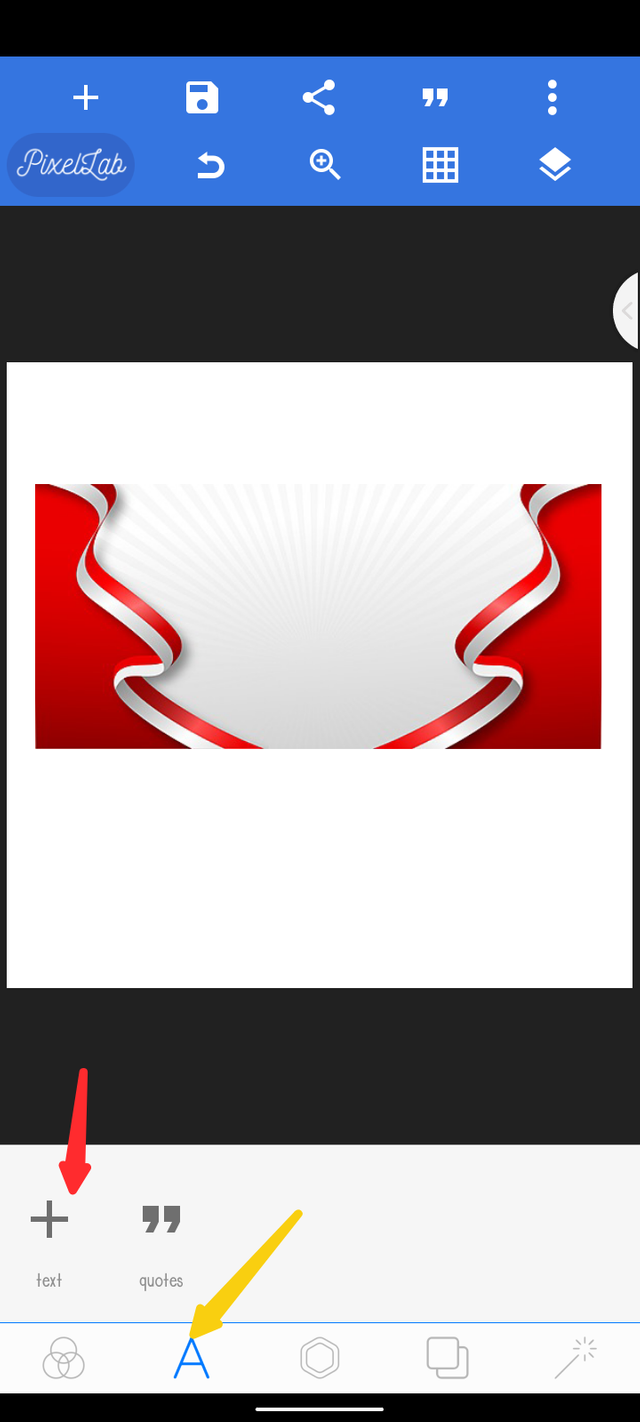
Click the yellow arrow direction firstly before clicking the red arrow direction to insert a text box.
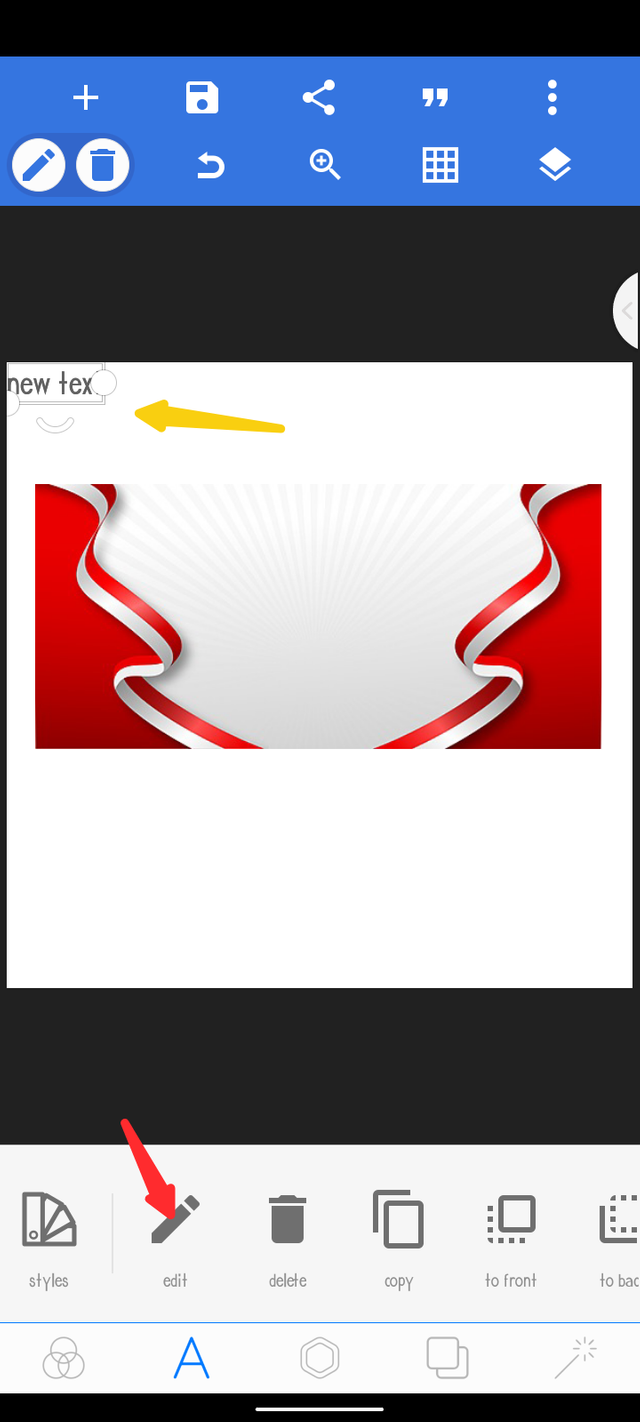
The yellow arrow show the inserted text box while the red shows where you can make any editing to your own write-up of your choice.
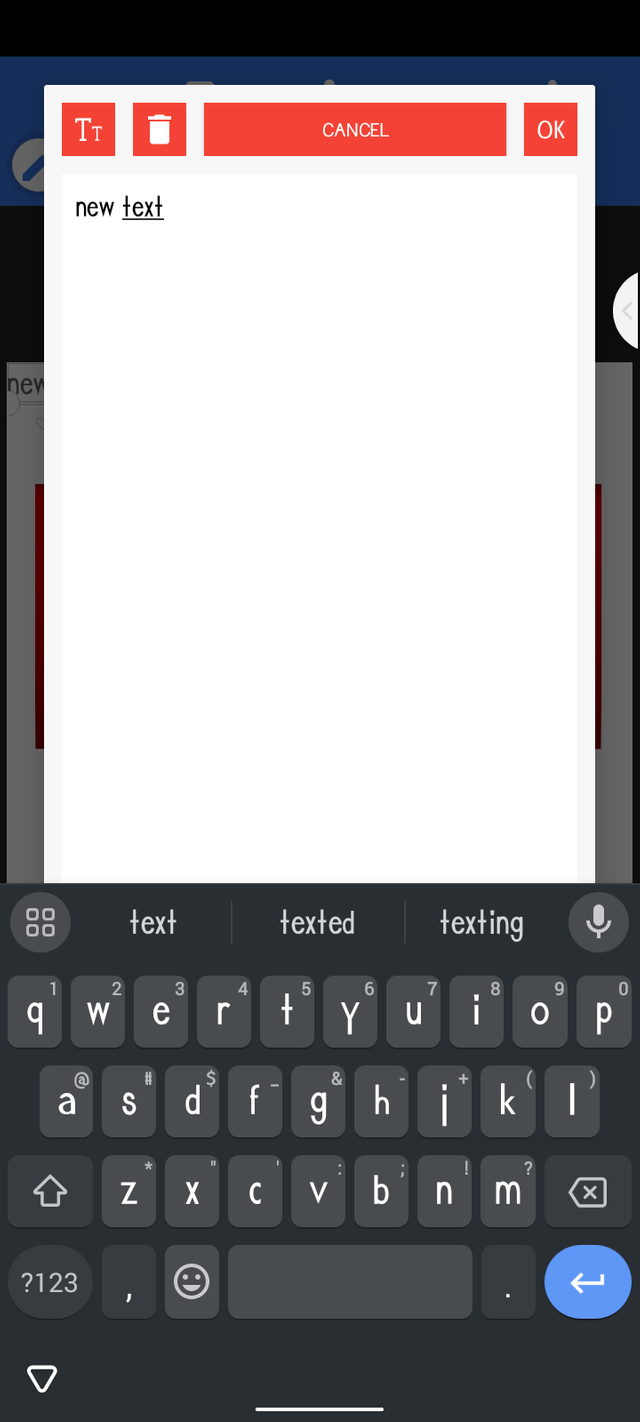
This is how it will pop up when you click the red arrow directed by the former image
Step 4
After arranging the text to well places, you insert an image if needed like how mine was, I inserted the image the same way I took the background image and arrange it to the position you are seeing it so.
Like the fruits you are still seeing there are images I downloaded from the internet and was also imported like the way the background was imported.
Before importing such images, you have to check if there is any original background if any you need another application to remove the background which am going to be showing you here.
Step 5
Now how can you remove original background from images lick this 👇
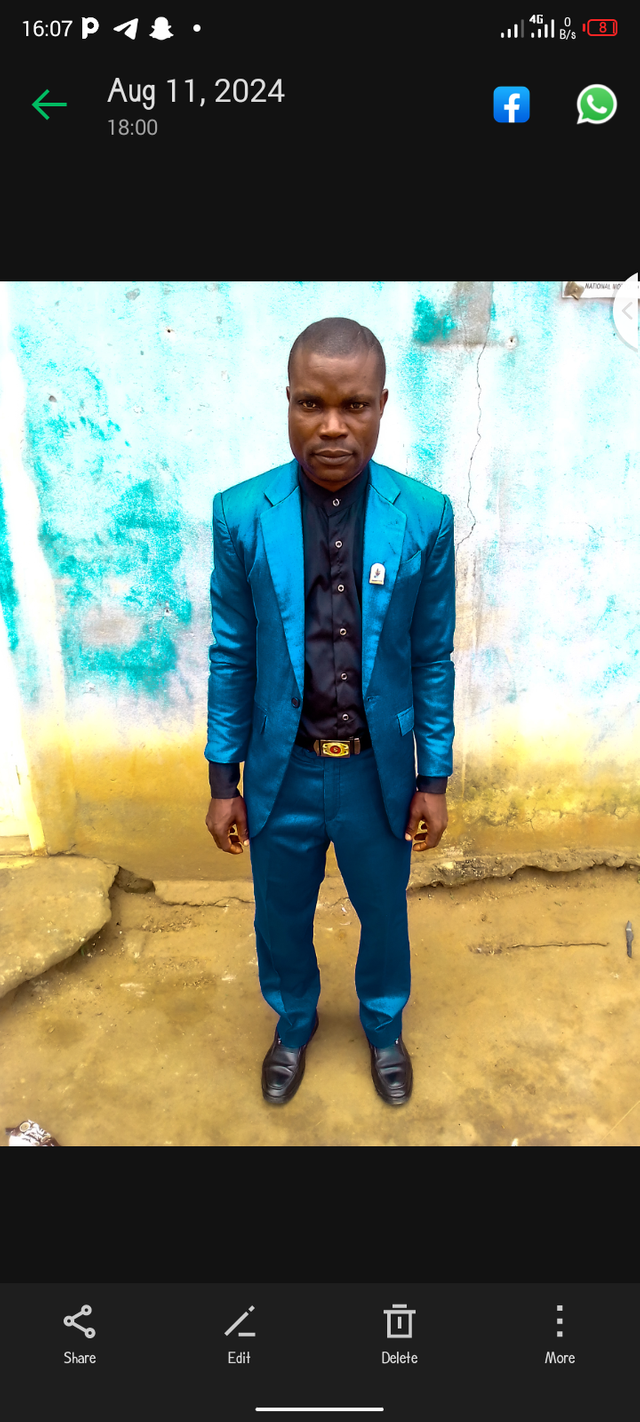
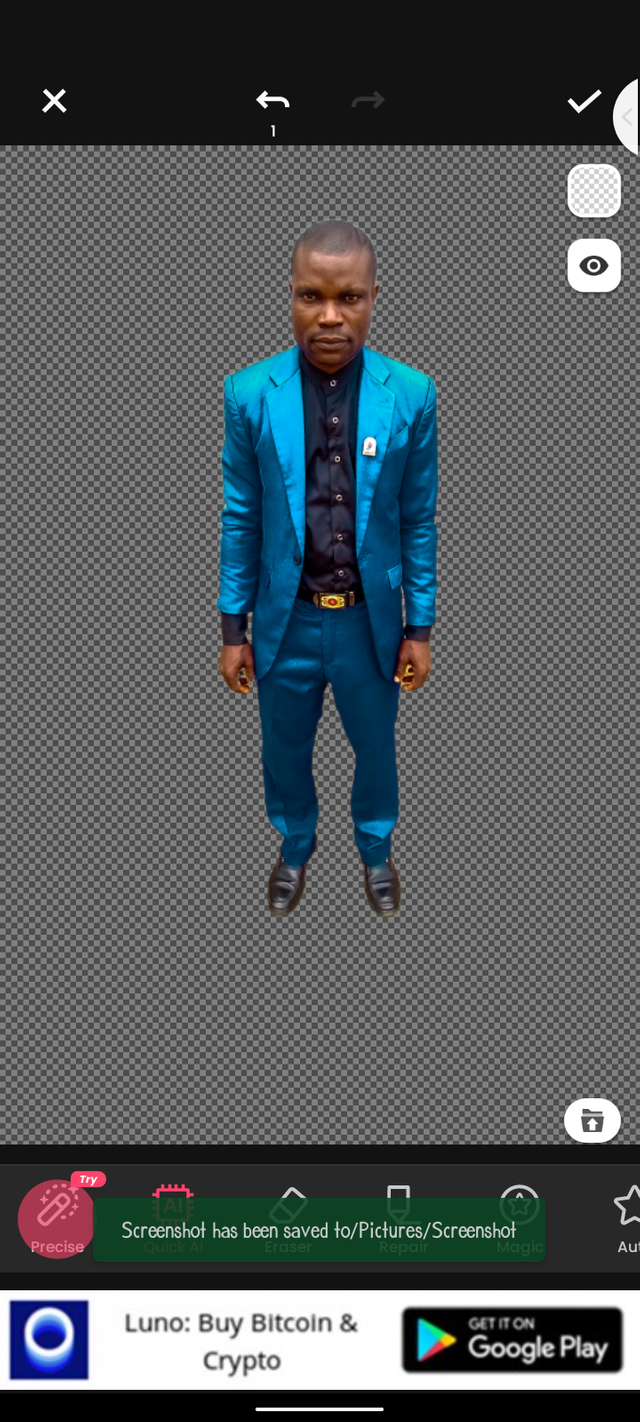
I used an app called background eraser from play store
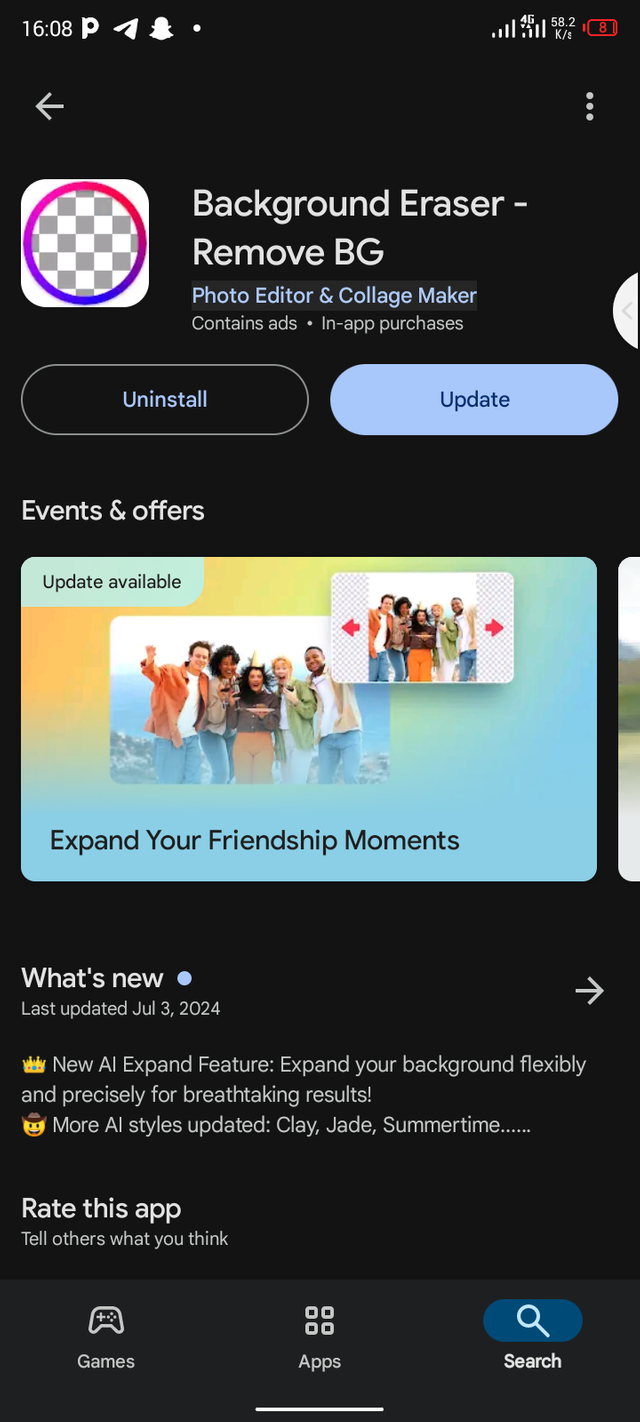
This is the application on play store
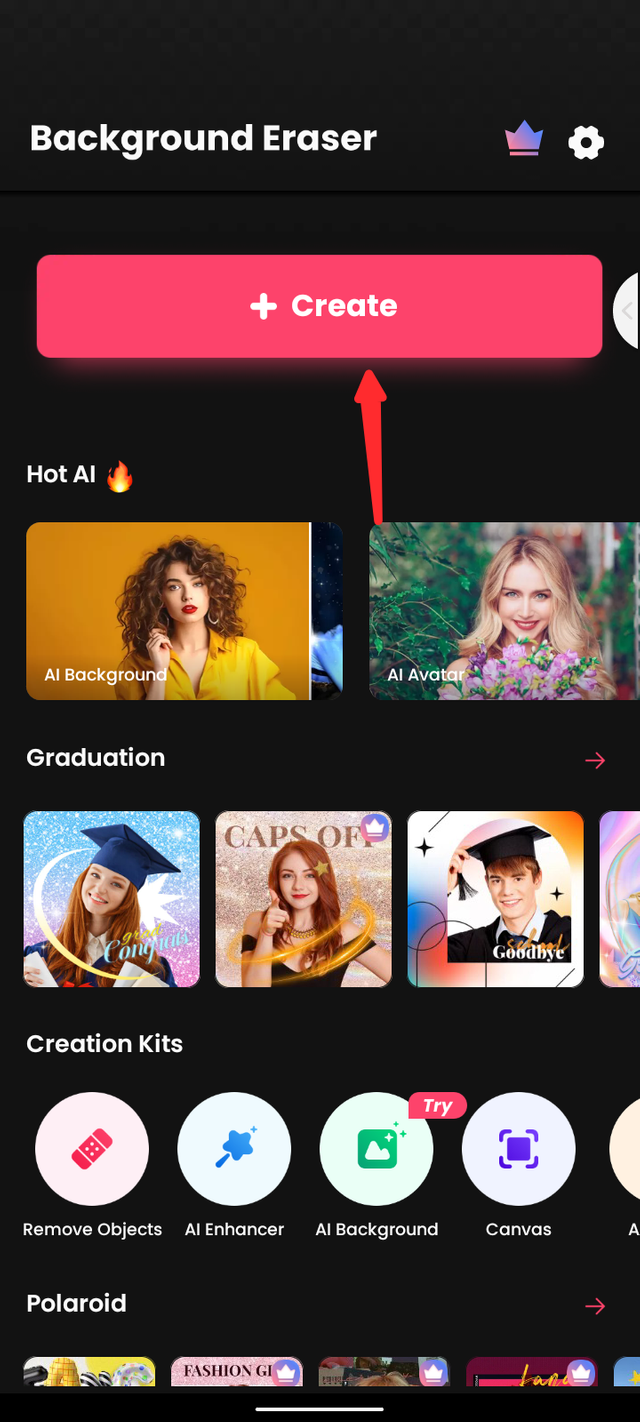
After downloading the image, open it, it will be showing create like what you've seen above, click the create and choose the picture you want to remove background.
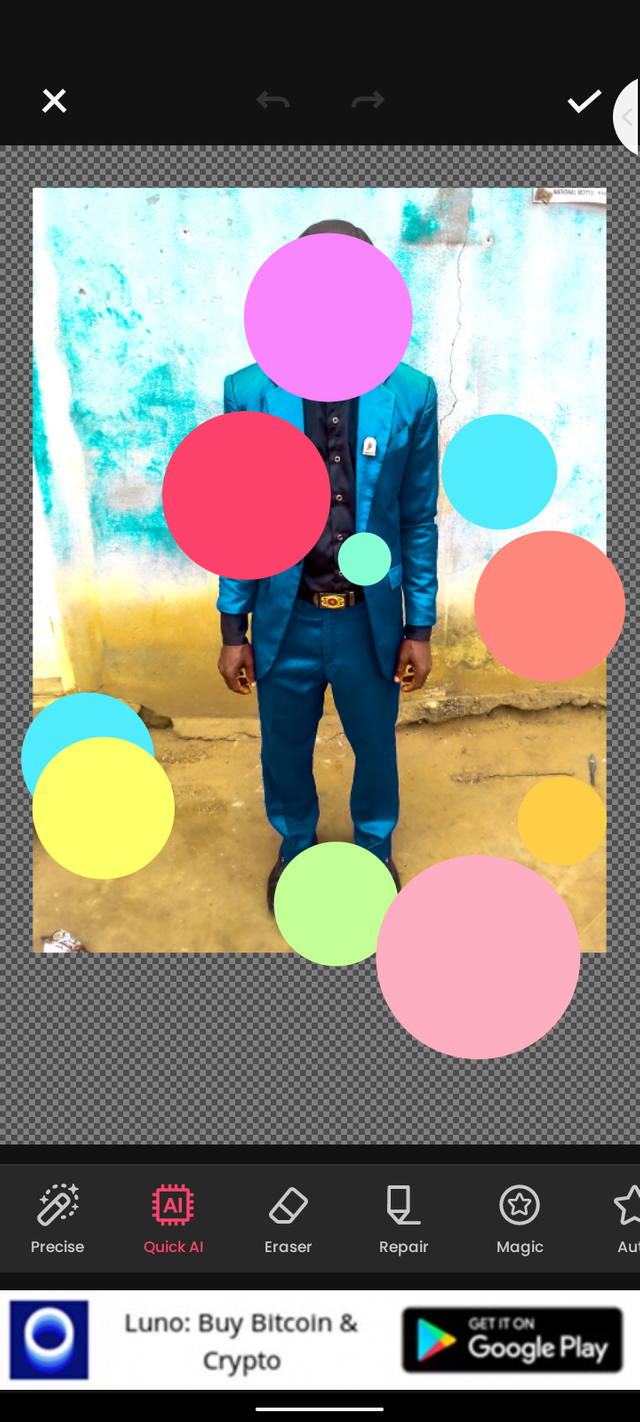
I choosed this image you are seeing above, and this is how it start working, it's removing the background, you will have to wait for some second before it will perfect everything for you.
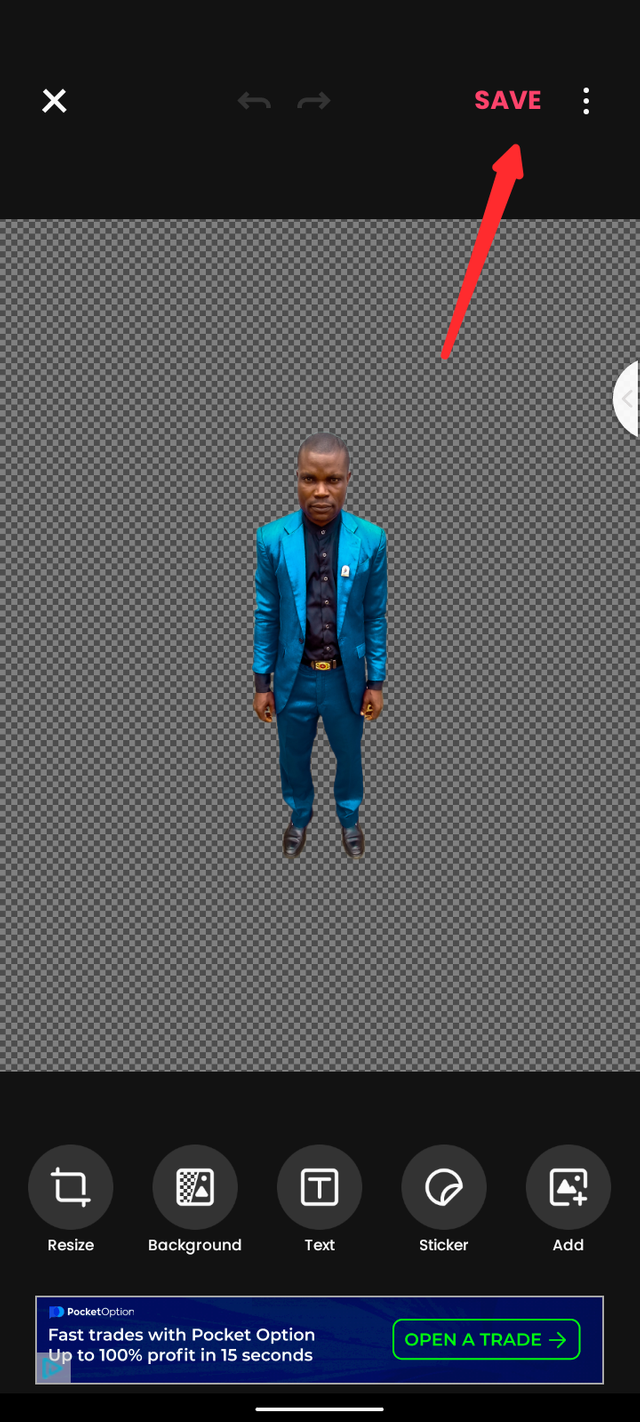
After some few seconds, this is the results. You have to click the save there and save the one without background to your phone and use for your design.
Following the above image you will be able to remove background from image and use for your design.
Thanks for reading, if you find it helpful let me see your opinion in the comment section
I invite @samuelnkenta @ruthjoe @simonnwigwe
Thanks to @arjinarahman for inviting me to participate 😊
Twitter link
https://x.com/godswillcephas/status/1823744415858614369?t=jSLOosfUYb32H6cGhjPzFg&s=19