How to Recover Deleted Files from Storage Drives
Hello to all the members of this illustrious community, today I will share with you my article about the recovery of deleted documents from our storage units.
Nowadays the web offers us an endless number of technological tools that allow us to solve the difficulties that may arise in the computer area, there are so many problems that can be generated in this area, that the simple fact of trying to make a list of them is a problem.
Among the main features of this software are the following:
Compatible with Windows, Linux and Mac OS X, DOS/Win9x operating systems.
It is portable, that is, it is not necessary to install it on your computer.
It has an excellent file system, it can recover information from almost all systems (FAT, NTFS, exFAT, ext2/ext3/ext4 filesystem, HFS+).
It recognizes numerous file formats among which we can mention: ZIP, Office files, PDF, HTML, JPEG and various graphic formats.
The following is a step-by-step guide on how to use this software to recover deleted information.
Step One.
Source: In-house design
Step Two.
Source: In-house design
Step Three.
Source: In-house design
Step Four.

Source: In-house design
Step Five.
Source: In-house design
Step Six.
Source: In-house design
Step Seven.
Source: In-house design
Step Eight.
Source: In-house design
Step Nine.
Source: In-house design
Step Ten.
Source: In-house design
Step Eleven.
Source: In-house design
Step Twelve.

Source: In-house design
Source: In-house design
Reference Consulted
https://www.wondershare.net/ad/es/data-recovery.html
https://es.easeus.com/deleted-recovery/recover-deleted-files-from-hard-disk.html

Document prepared by

Source: In-house design
Now, what is certain is that a very common problem that appears is when by some error caused by the computer or by the users' own accident we eliminate important files from our storage units, one of the software that we have to recover our eliminated information is PhotoRec.
PhtoRec, is a free portable software that allows us to recover files that were intentionally or accidentally deleted from our storage units (USB memories, MicroSD cards, hard drives, etc...). From a very easy to use interface, this program allows us to recover all types of files such as Images, Videos, Documents, among others.
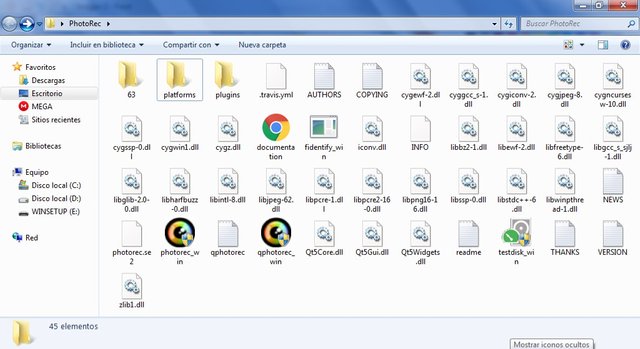
To start recovering your files you need to open the folder containing the software.
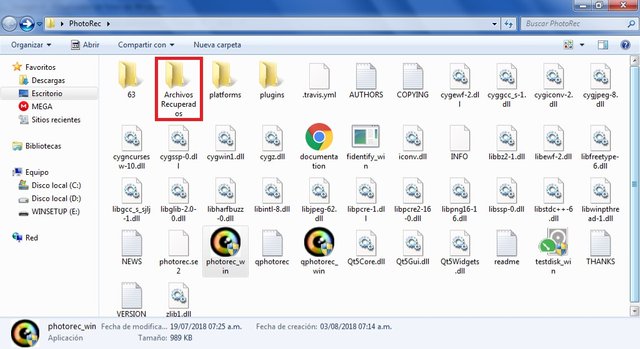
Once the folder is opened we create a new folder, and we will name it Recovered Files. (You can give it the name of your preference).
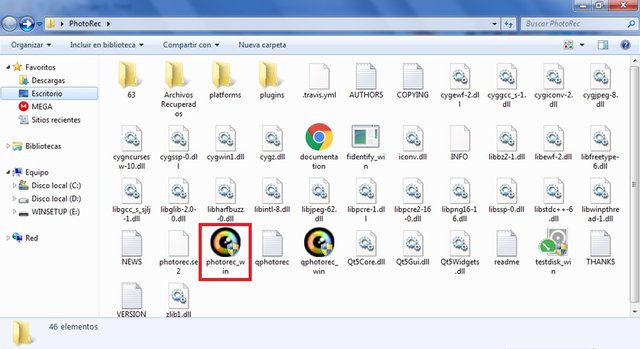
Then run the software by double-clicking on the photorec_win.exe application.
Once inside the program interface you can view the internal or external storage drives that are connected to the computer, which can be used for file recovery.
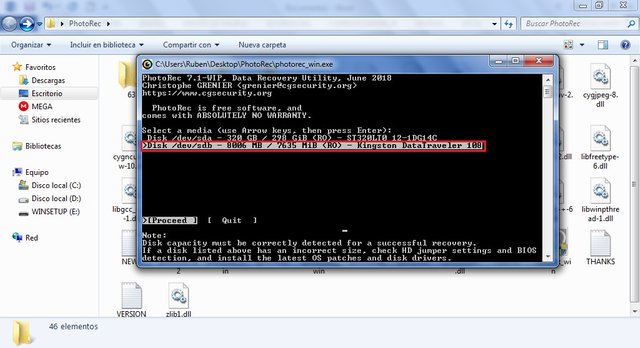
Then we select the unit to which the file recovery will be performed, once selected we press the Enter key. (For this example I will take a USB Memory).
When we select the unit, the software will show us the data concerning the selected unit.
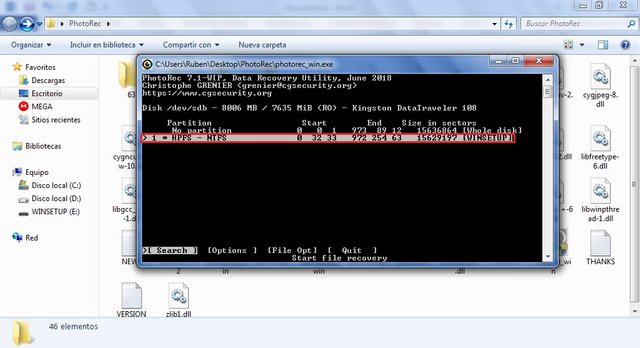
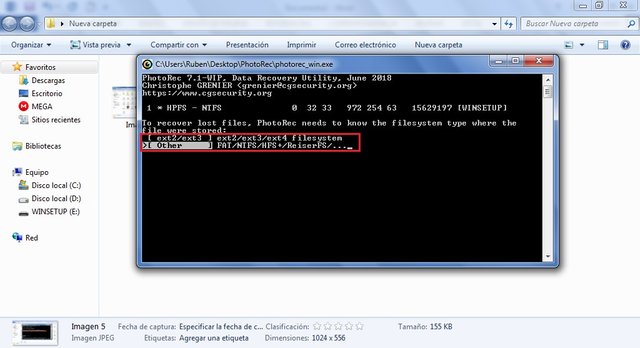
Then we press Enter again, and it will show us the screen where it will ask us what type of files we want to recover. The first option is for Linux files and the second for Windows files and other operating systems. (For this example we will select option number 2). We give Enter.
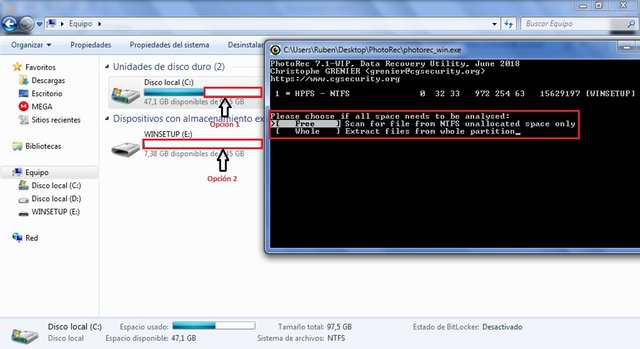
Next it will show us the screen that indicates us in that space of the disk I want to look for the information that will be recovered. It shows us again two options, the first option indicates us that it will look for only in the available space of our storage unit and the second option indicates us that it will look for in all the storage unit. (For this example we will select the option number 2).
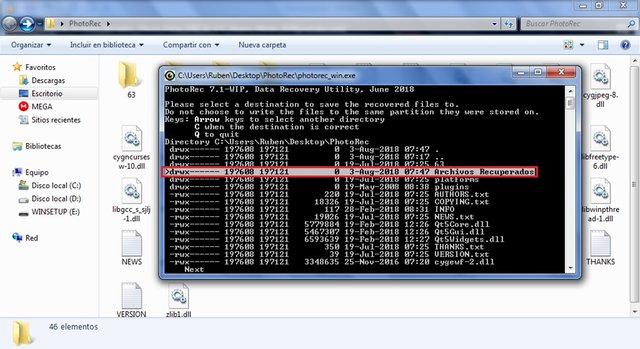
Once the option is selected, press Enter, in the next screen we will be asked in which folder we want to save the recovered files, there we locate and select with Enter the folder Recover Files that we created in step two.
Once we select the folder, the following screen will appear, where we will only type the letter "C" in capital letters and the program will automatically start to recover the files, saving them in the folder created for this purpose.
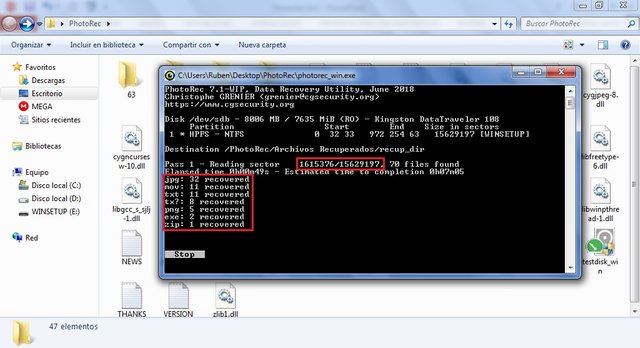
In this step you can check the progress of file recovery. (See image of Step Ten and Eleven).
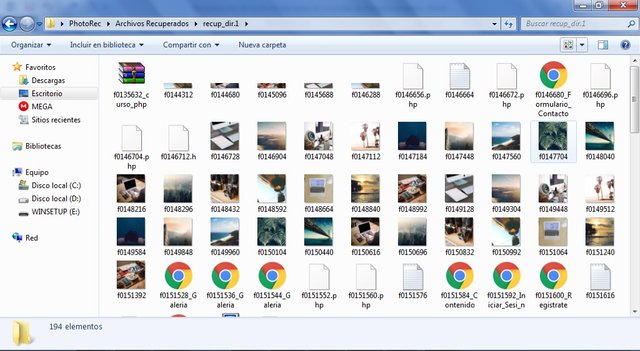
Once the file recovery process is finished, we go to the folder created in Step two and we can see that a folder is created with the name "recup_dir.1", in this folder we will find all the recovered files that were in the storage unit and that were deleted intentionally or accidentally.
Hello @carlir, thank you for sharing this tool with us.
In my empirical journey through the area of computing, I have tried many alternatives with half results, I hope to solve with these clear and simple instructions that you have described in your post.
Greetings friend. It is certainly very common to delete a file and then need it or even delete something important by accident. It is always good to find this kind of tools to help us in those cases. Thanks for explaining how to use it.
ZERION Airdroping 300 STEEM
Steem Staking Will Be Live Soon
Join zerion for early access and 300 STEEM Airdrop
Steem also enters to Defi one step into the future
For More Details and Airdrop click here
It is really good to find a post like this here, people tend to lose files and they just think that is the end of it, it is a great to find a platform like this one where we can get very helpful informations.
Hello @carlir:
Welcome to the Project Hope community.
Thanks for the information, this software really represents a solution to one of the biggest headaches, a deleted file.
An excellent explanation, thanks for sharing.
Have a great day.
Best regards.
Hello @carlir.
Wow brother, this information is very important. Once I deleted some documents and I was able to recover them, I do not remember if it was with the tool that you explain in this post, anyway in case it happens to me again I will reblog this post to have it as important information. Greetings and thanks for sharing.
Greetings @carlir, great contribution that you share with us, since I have seen important information lost due to the lack of knowledge of this type of applications, I will keep it in mind in future accidents or loss of information. We are reading
Great guide for Windows users. What about macOS? I've had situations where I've accidentally saved a new file overwriting an old one that had the same name. I always thought that the old file was irrevocably replaced and deleted, but it can actually be restored https://setapp.com/how-to/recover-an-overwritten-file as well. So, if you know you may need this data in the future, it's better to be careful and save both files right away. But know that there are ways to get the data back.