Tutorial - How to assemble Bullet Faratta Fan in easy steps.
Hello Teachers & Students |
|---|

Today I am going to show that how to assemble Faratta Fan in few easy steps for summer season. This Fan is very good in quality and very cheap in price so let's see it's installation process in east steps:

Step 1 |
|---|


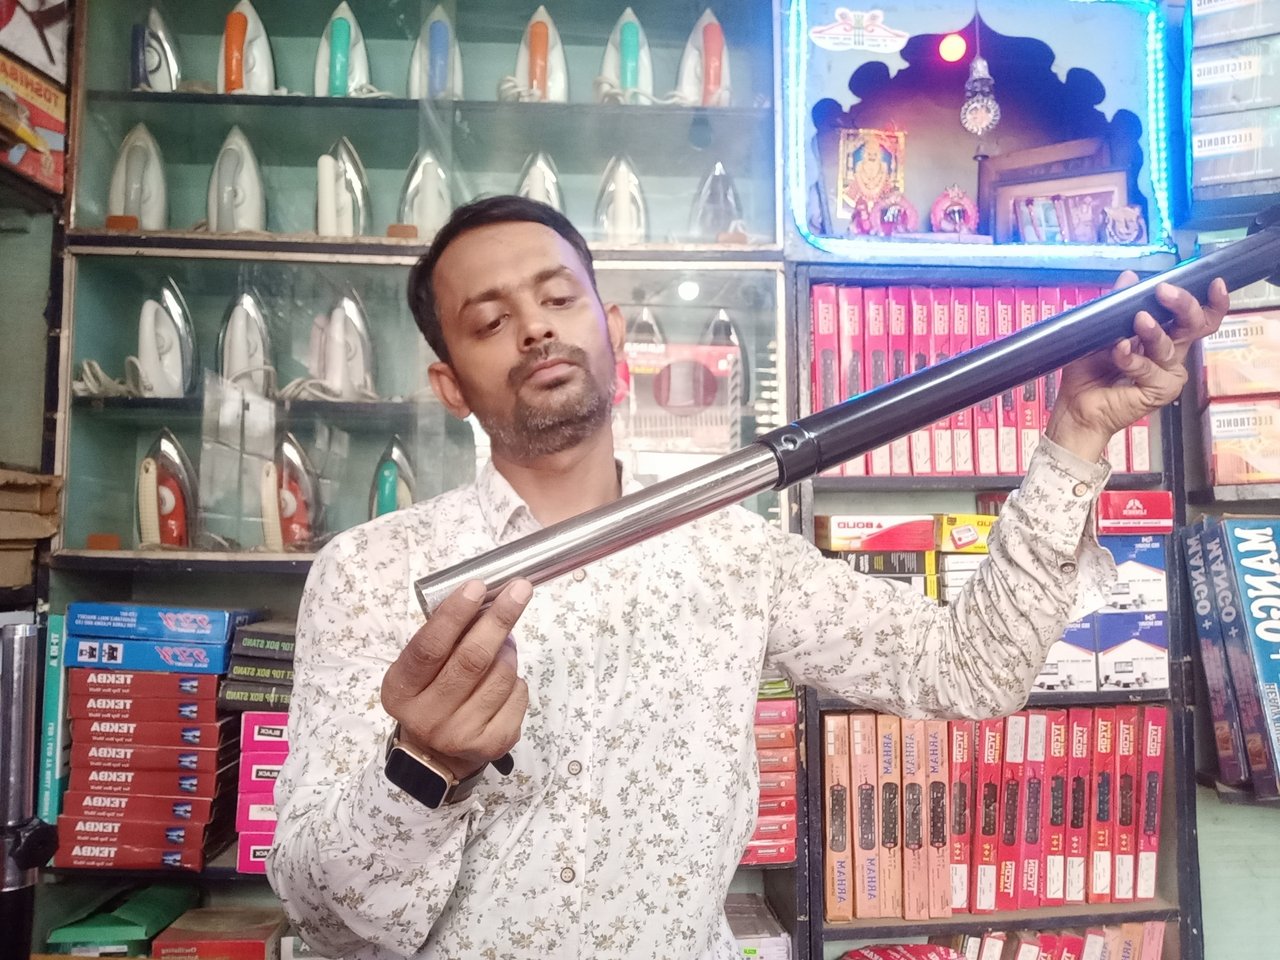

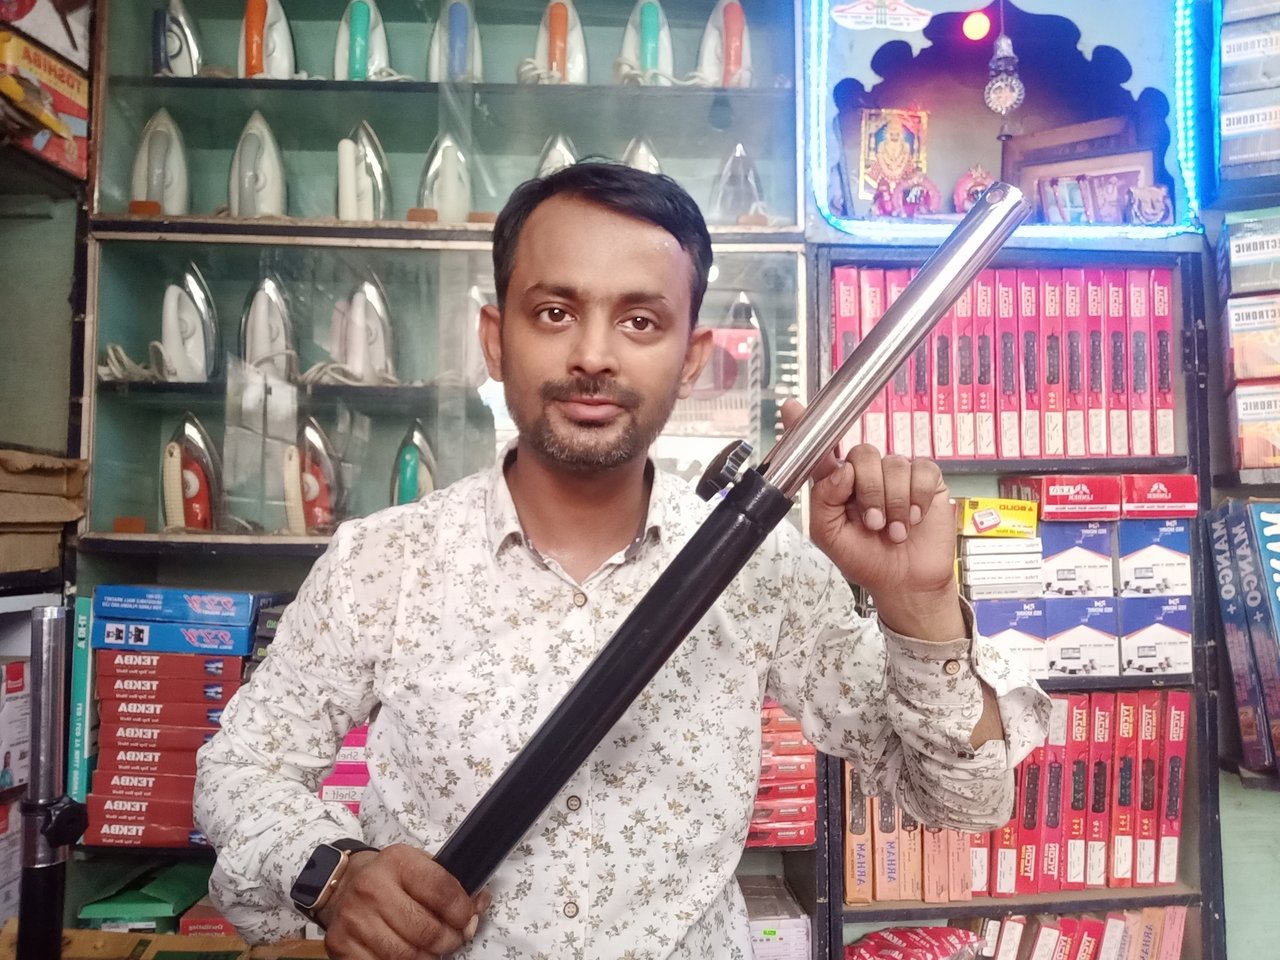
To assemble Faratta Fan, first we need to connect one long pipe and one short pipe with each other. So in this step, you can see black pipe is round and long and other one is short so we will insert short pipe into long pipe and we use round screw to tight it so it will not come out from black pipe. Last above image is final result of step 1.
Step 2 |
|---|


Now first step is completed, now we have to connect this pipe with base so it can stand properly without support. So we have black round base as you see in image and base has 4 holes, other side black pipe has also 4 holes in its bottom so we use 4 screws and we will connect pipe to base. Last image is final result of Step 2
Step 3 |
|---|


Now 2 steps has been completed, now main part is we need to connect motor. Motor is main part of fan which will run fan and give air. So we we'll connect motor using screw. Last image is final result of step 3
Step 4 |
|---|


Now we need to connect safety Jal using motor. Motor has 4 screw whole and back side jal has also 4 screw holes. We will place jal's whole on motor screw hole and we will put screw and it will be tight and back jal is connected. Last image is final result of Step 4.
Step 5 |
|---|


Now most major steps has been completed now we need to connect blade in motor. Blade has hole which I need to insert in motor's sharp rod and we have round screw which will use to tight blade with motor so blade will not come out whole running. Last image is final result of step 5
Step 6 |
|---|


Now in six part, we have orange long strip which I need to attach on back side jal which is already attached in previous step. This orange strip will hold front jal so let's see final result in last image.
Final Step 7 |
|---|


Now this Final Step, in this step, we need to attach branding logo on front jal. So we have small screw so we will use it to attach on front jal. Then we attach front jal with help of orange strip which we connected in previous step. So it will cover motor from back and front side. No will hurt from blad while it will run. See the final result of step 7 in last image.
Final Result |
|---|

giphy
| Photo's Author | @yourloveguru |
|---|---|
| Location | Lucknow |
| Device name | oppoF11 |
Thank You |
|---|
You have shared a post about assembling a fan very well, you also explained each step to us. Continue to share quality posts here that can be useful and educate many people. I wanted to give you a little gift because I love your incredible hard work. Hope you like it. 🫰😘
Oh thank you so much for encouraging me for this. I will share more post in this community. I want to delegate few steem to this community as my contribution for its growth about 70-80 steem .. Can I do this ?? Later on I will increase my delegation amount.
Glad to hear that you will be supporting the community through delegation, I don't think it is necessary at the moment, we are working on some plans for the community development program, please wait until we announce our community account. once again thank you very much. nice to meet you.
So let me know when you think it is right. You can dm here also. I will happy to delegate.
Thanks 🙏
We still remember you, now you can delegate it.
Oh ok at night I will delegate few steem but it will be just start, later on I will increase my delegation amount
Here are the results of our assessment of your post:
Feedback:
El paso a paso para ensamblar el ventilador quedó excelente. Saludos.
It is my pleasure that you liked my post.
Upvoted. Thank You for sending some of your rewards to @null. It will make Steem stronger.