Do it yourself with @davidmarkgeorge
Greetings great steemians, I am much delighted to share with you all my creative photography editing skills. Much thanks to @goodybest for letting me among the participants. We all have great skills and potentials embedded in all us either to use as a source of creating wealth or to render services to anyone.
Before i continue with my creative skill, I will say a great come back to @goodybest coming up so strong again to continue with creative contest ideas. As the contest topic says "Do it yourself" I will be sharing how I made out beautiful wallpaper with my smartphone and editing tool. Let's Go
Photography is an art of capturing moments and events with the use of lens, the lens here can be of digital camera or smartphone. Photography helps to explain history and occurences simply without talking much about it.
I use my RedmiNote13 smartphone to create capture beautiful moments, nature, objects and making them more beautiful with my editing tool.
Today I will be sharing how I captured a beautiful flower and how I maintained the lights also enhancing the right colours to make it stand out.
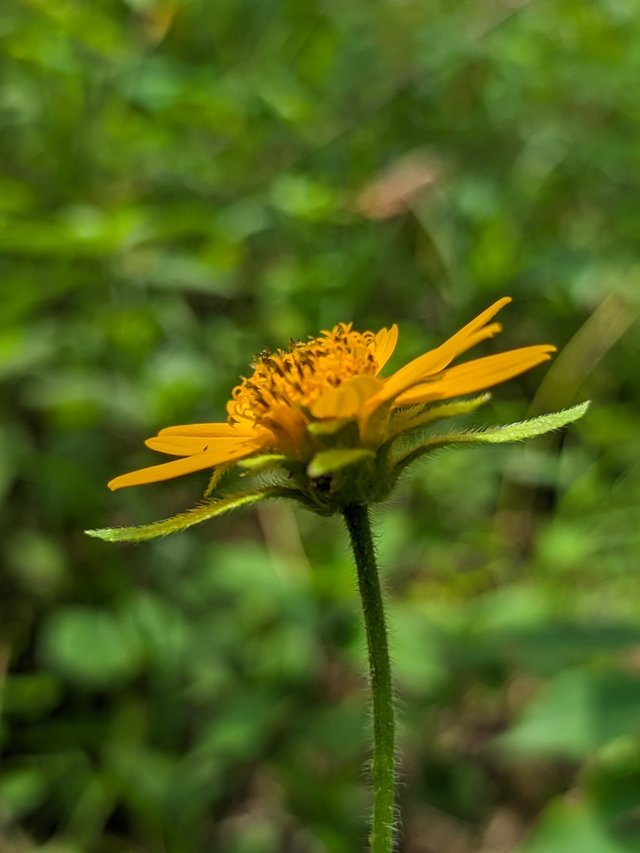
The first step
❤️Using my RedmiNote13 smartphone I opened the camera, tapping on the X2 which is to zoom the image captured also giving a blur to the backgrounds.
It came out so good and it was actually what I wanted, you can also take good abs good pictures of this kind of your smartphone is of 50megapixel up.
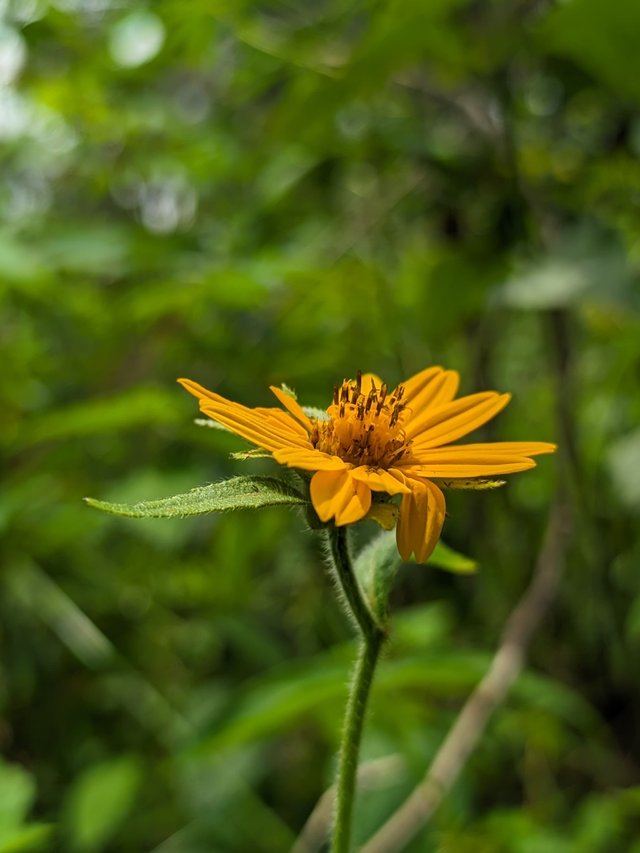
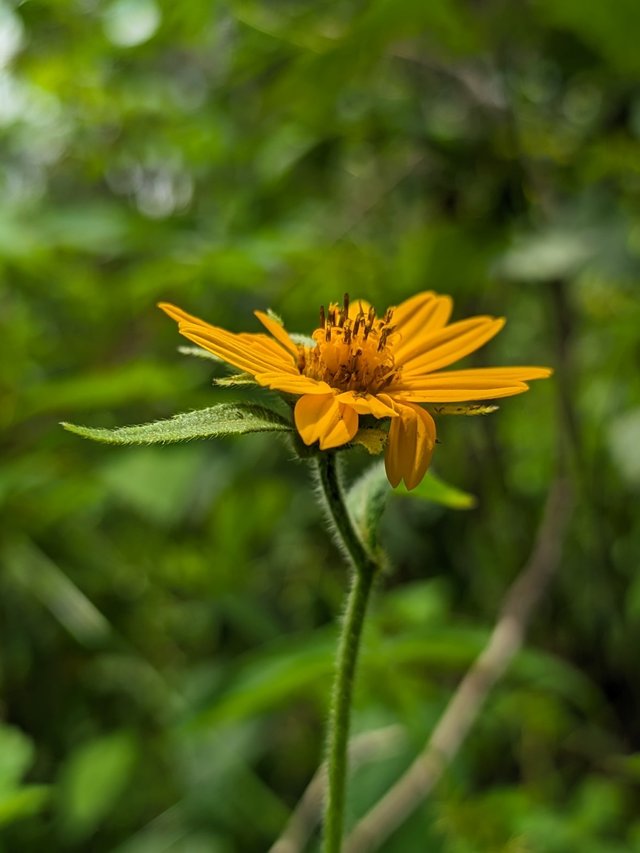
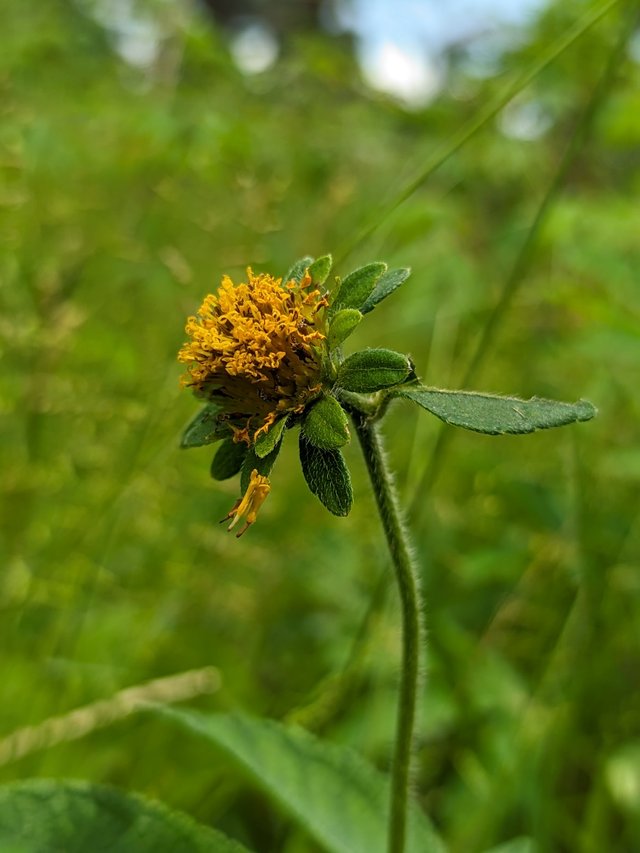
I took captured alot just to select from the best, most angle looks so beautiful. So it's advisable to take several shots of one particular object or subject to give you what you're looking for.
 |  |  |  |
|---|
The above pictures are of different angles and perspectives just to give me a better choice if am to pick only one slide.
Most people just snap without editing maybe because they can't edit or they just love natural pictures. Natural pictures can be enhanced abit to really show the beauty.
Step2❤️
There are several photo editing tools that can be used to add more colours to a picture such as Snapseed, lightroom, photoshop, inshot and many more but I prefer using lightroom because it gives me top notch quality helping to maintain the picture as been seen.

Using lightroom
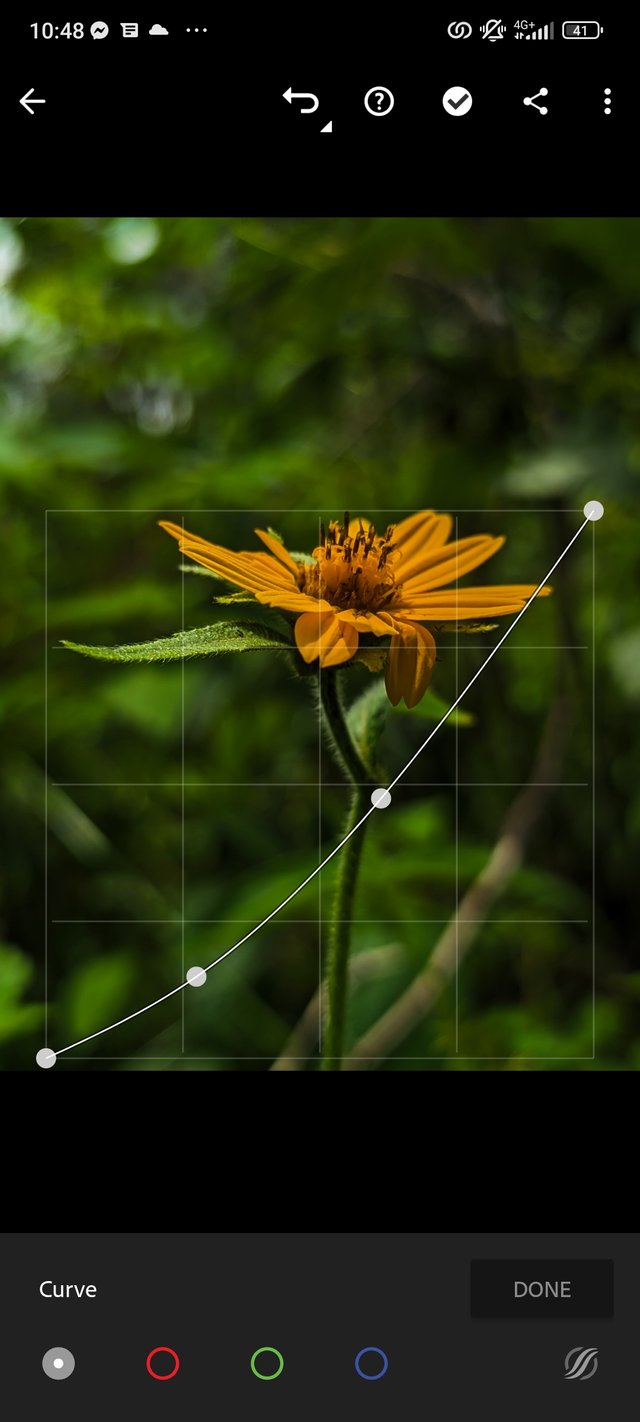
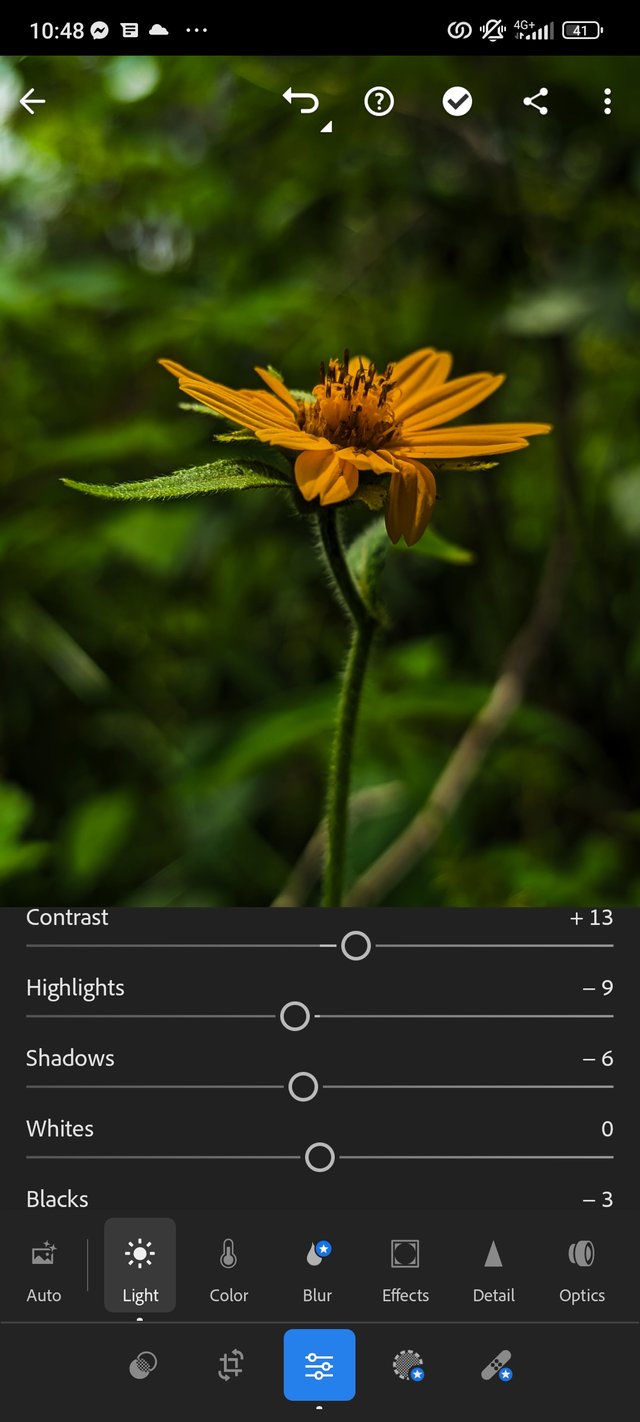
❤️I moved the selected picture to the app to proceed, what really matters in photography is the lighting aspect. I reduced the light abit to enable me edit perfectly well
❤️Using the curves you can either increase the light in a particular picture.
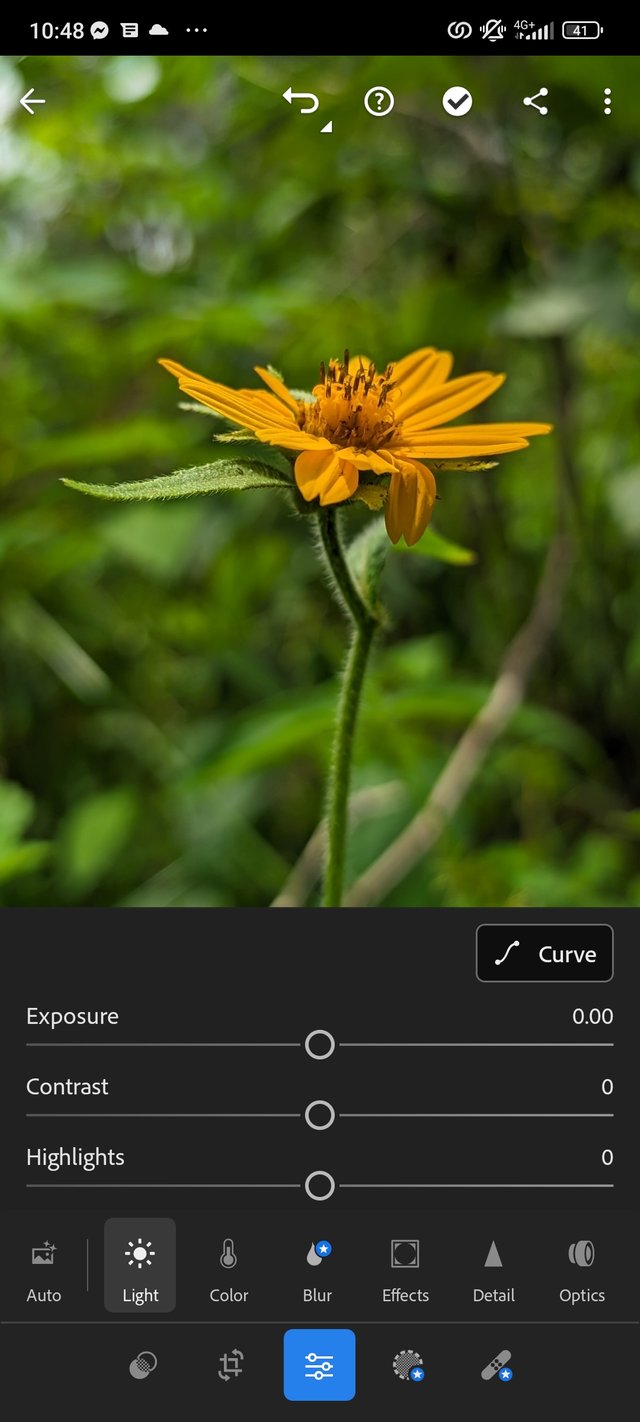
❤️We have other options in the light area showing exposure, highlight, contrast and so on. Those tools help control the light effects and many more pertaining to light
 |  |
|---|
Screenshot showing what to do in the step2
Step3❤️
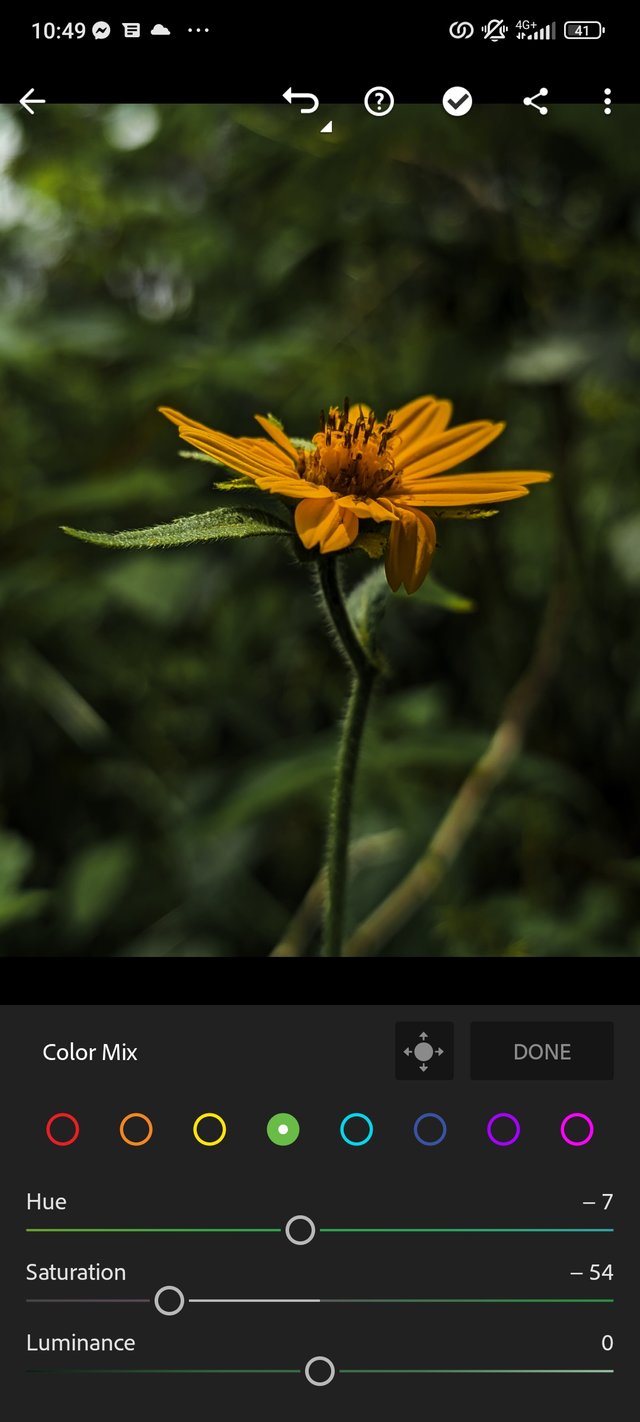
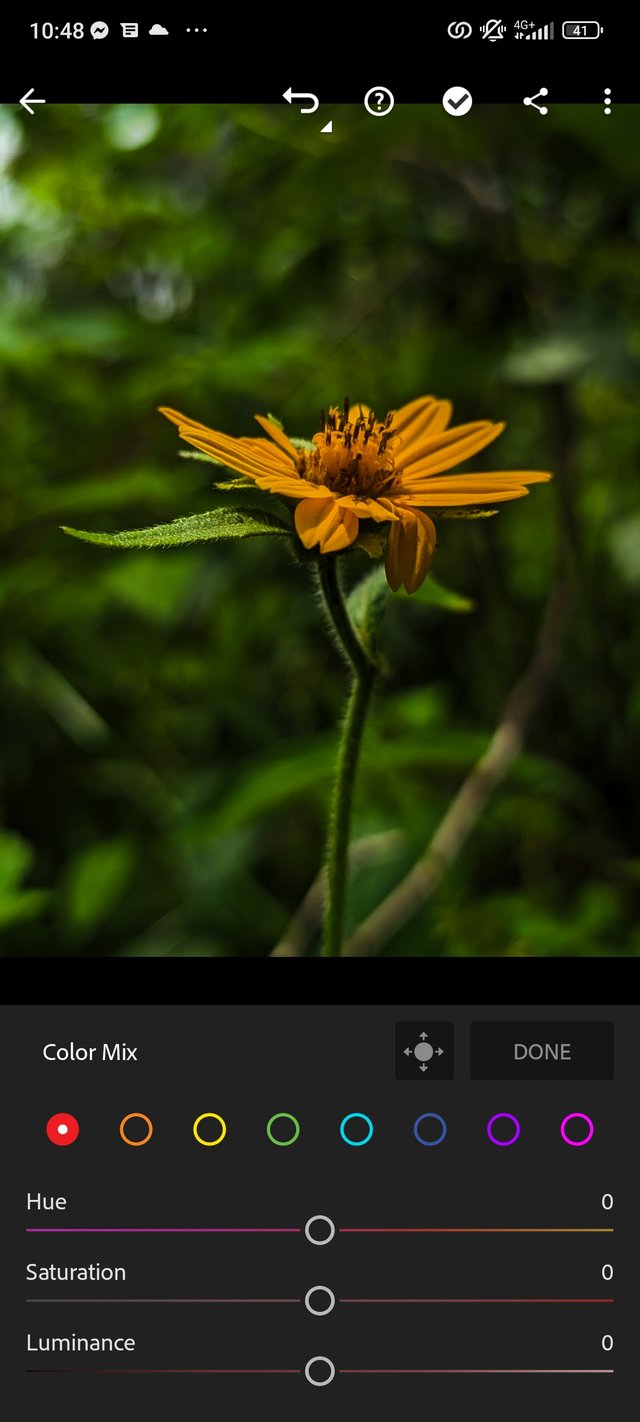
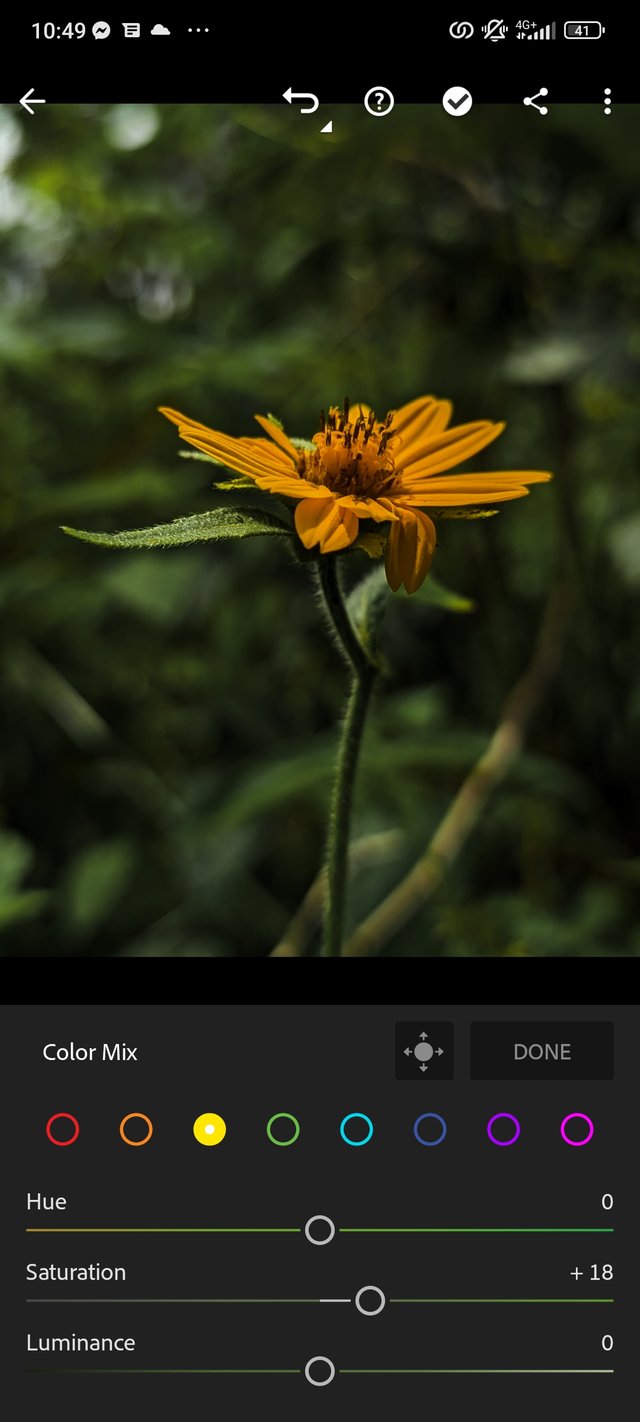
❤️After finishing with the light tool, we move to the colour tools. Here we have colour mix showing colours ranging from red, orange, yellow, green, blue, purple.
❤️The grading aspect is like a palatte showing different colours which can be used to grade a picture.
❤️I increased the red colour abit, decreasing the saturation and hue in colour green
❤️ You leave the purple colour mix because in the picture there's no purple colour to enhance.
❤️After accessing those necessary colour mix the colour will be abit dark greenish to help maintain the saturation.
 |  |  |
|---|
Screenshot showing step3
Step4❤️
This step is the most tactical aspect in editing, the colour grading needs to be taken care of with creativity and high colour combination skills. To say am trying to really understand this aspect but it's hard and needs much time.
❤️For the first colour grading, you darken the picture abit and maintain the environment. To achieve that you have to place it on the blue region. You can balance up the effect by tapping on it
❤️The middle grading is mainly for the object or subject, so the picture we are editing is a sunflower. We place it on the yellow area.
❤️The Third is mainly for the environment being the background, to balance up the edit you bring it back to the blue area abit.
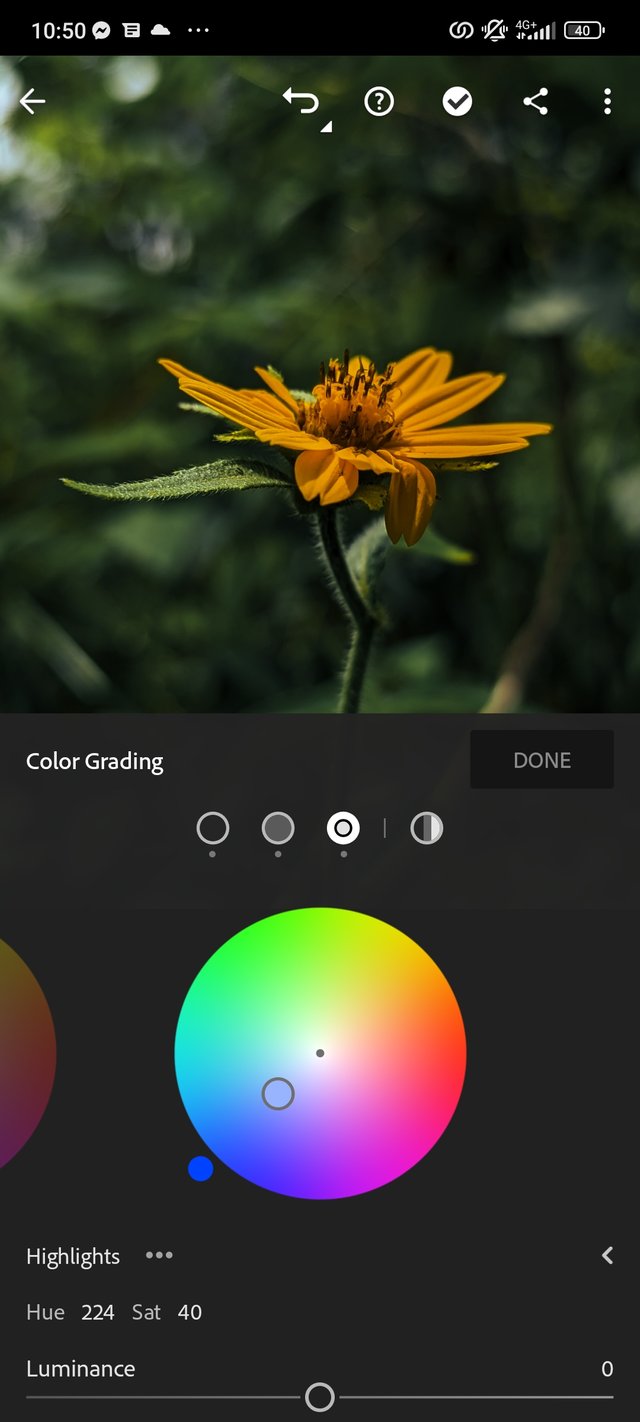 | 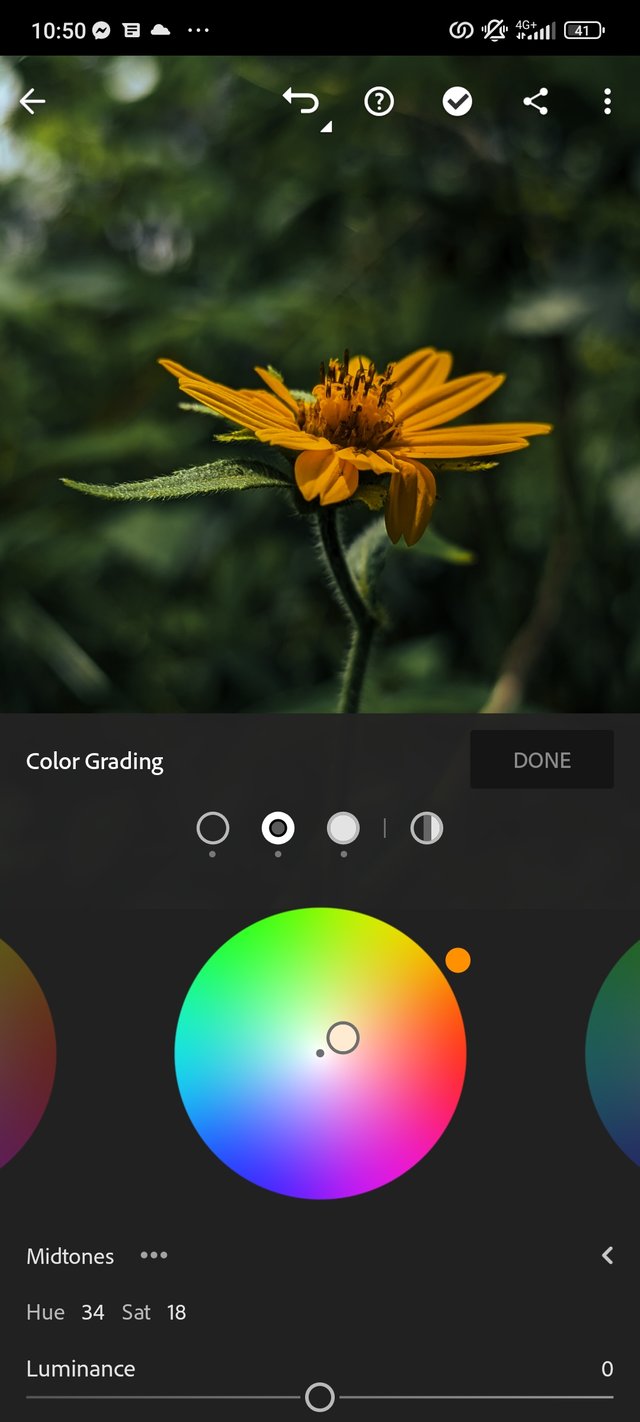 | 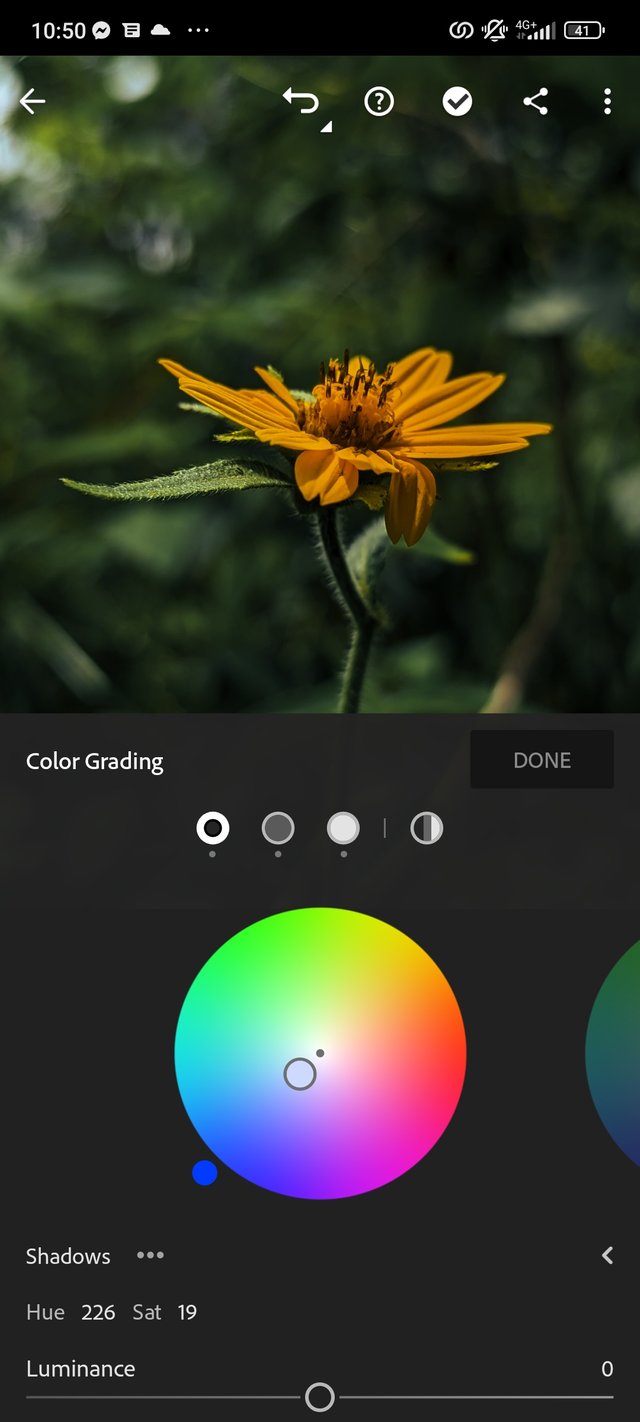 |  |
|---|
Screenshot showing the step4
Step5
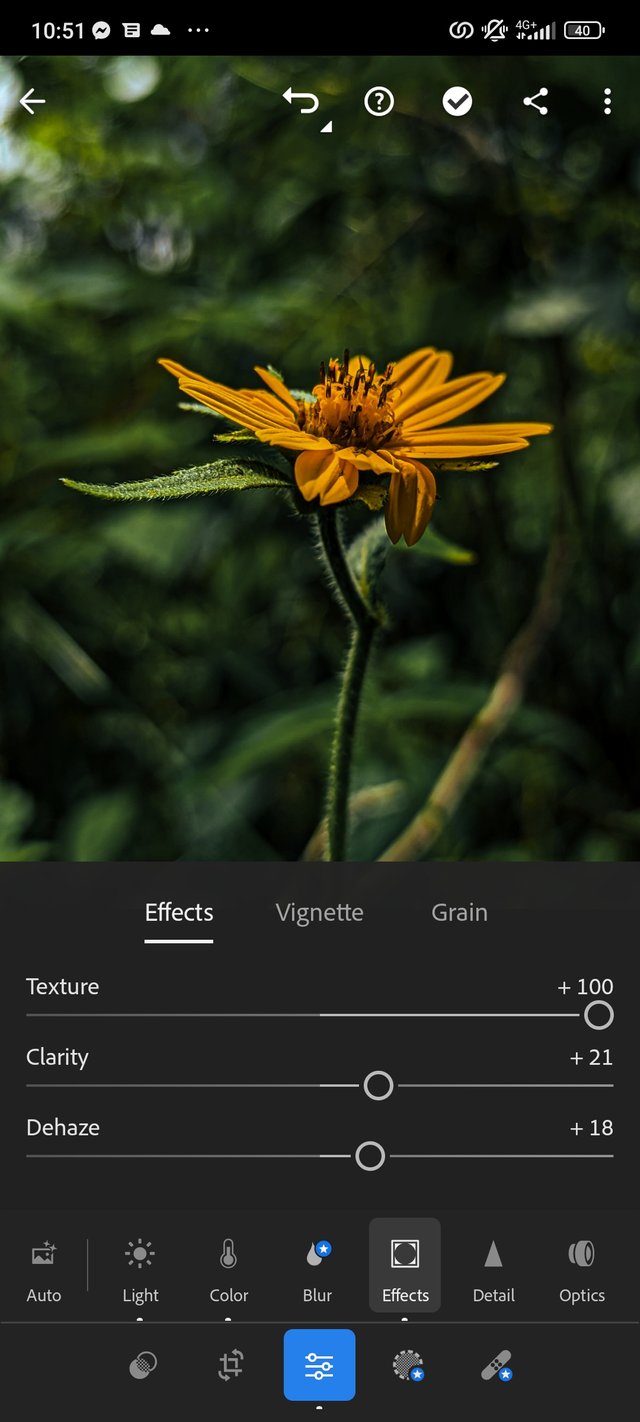
❤️To bring up the quality of the picture you have to increase the texture to the right.
❤️the clarity is to clear the picture, our aim was to darken the picture so we increase the clarity abit to maintain the darkness.
❤️The same thing is applicable to the dehaze.
 |  |
|---|
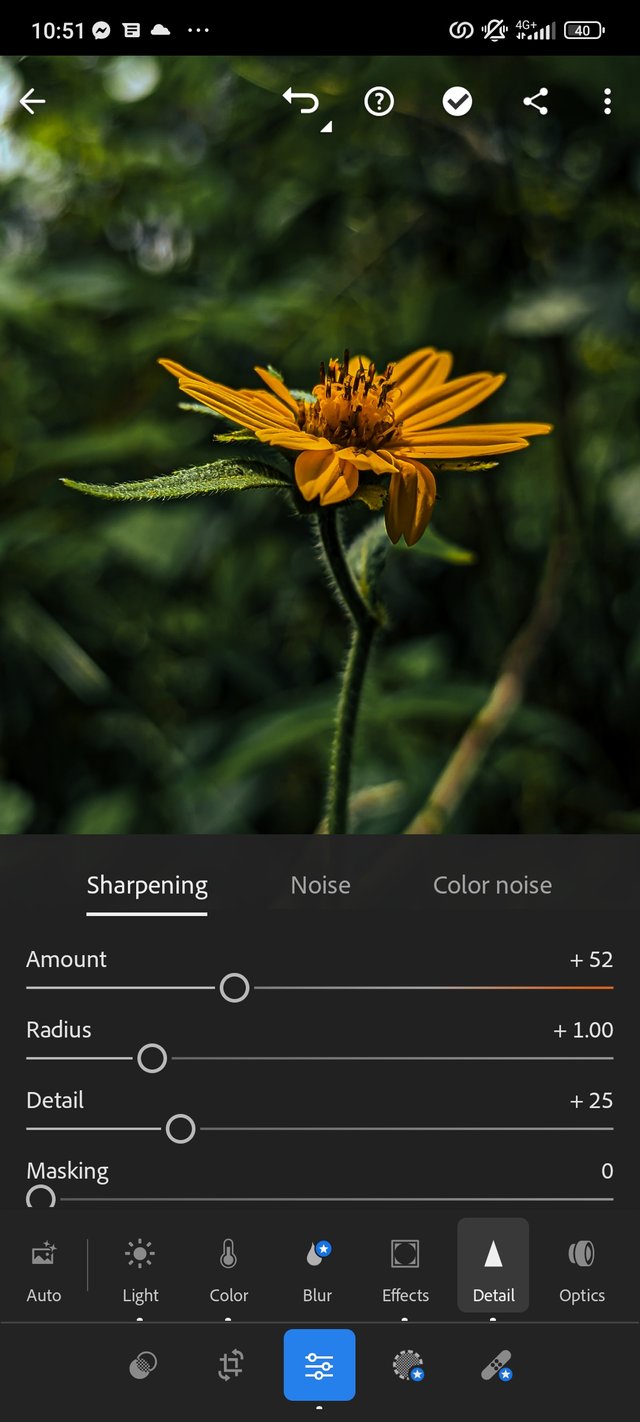
❤️ The effect region, you sharpen the picture abit to bring up the quality. That will bring up the quality.
.jpg)
This is the outcome of the edit..
Available for questions, the comment section is open for any. Thanks for going through my post ❤️❤️
Inviting...
@imohmitch
@onlyonefave
@dorismos
25% @null
Upvoted. Thank You for sending some of your rewards to @null. It will make Steem stronger.
Wow, you're so talented with photography, as Steemians we all need this talent, and thanks for sharing with us. Success!