Where to get copyright-free images from and how to compress them to load the article quickly [Club100]
Namaste Steem Family,
People often upload pictures that have been taken from sources that can claim the copyright to the images used, and this leads to a bad reputation for the platform where they were published, since the original copyright owner sees the platform as the one who can't explain how to properly use the copyrighted images, even though the user who uses these images is more guilty than they realize.
So, in today’s post we will be discussing the sources from where you can find best quality copyright-free images and use them in your posts on Steemit. And then we will be discussing the methods to compress the images in order to save size and minimize the loading speed of these images.
So let's get started.
Copyright-Free Image Sources
1. Google Images
Certainly Google is on our list and we have put it at the top of our list since it's well-known and provides an excellent search engine to find images, but don't just click on Google images and download any image at random. Just because you like a certain image you see after a google search might not have the proper usage rights (creative commons or commercial) license for you to use it on your post, and the owner might demand to takedown the image or even the article itself sometimes. So how should you find the right copyright free image?
First go to the Google image search bar or simply Google search page.
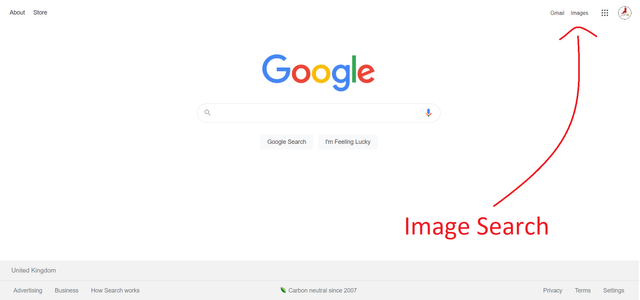
Source: @cryptogecko On the main page of Google, you will find the "Image" button shown on the right side of the top bar. Click on it. You will be taken directly to the Google Image search page. This now gives you the opportunity to search for anything that you may be interested in seeing pictures of.
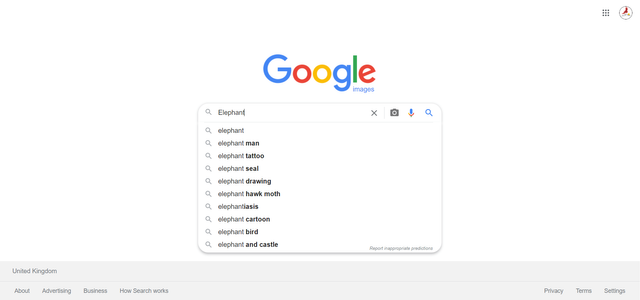
Source: @cryptogecko I am searching for "Elephant" here to get the images of single elephants.
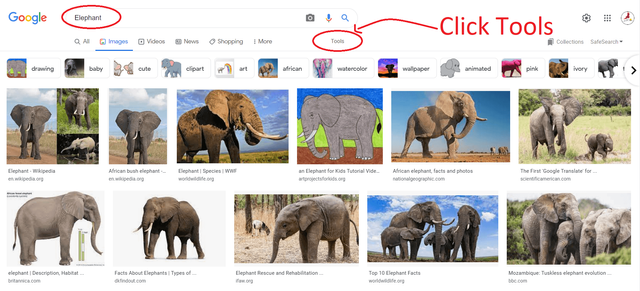
Source: @cryptogecko Now, we got some results, these are some of the pictures of Elephants, but we do not need these images as they may not be copyright-free images. So we will be clicking on the "Tools" button provided in the options bar above the results.
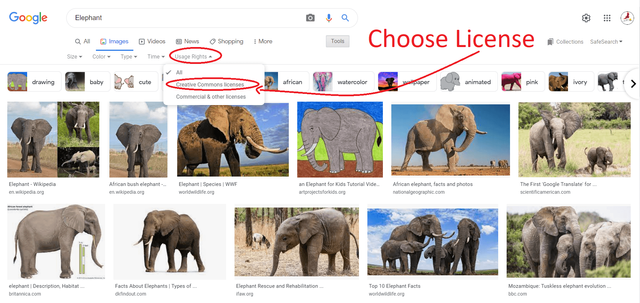
Source: @cryptogecko Now we get to choose the license from the options available to us.
The first license is a creative commons license and this license can be used by anybody who is either going to use the image after making some changes to the image or is going to use this image creatively in their content without making any change to the image itself.
The other license is commercial license which allows a person to use the images in their projects and sell these projects to their clients at a profit margin.
So, we want to choose creative commons licensed images for our posts only.
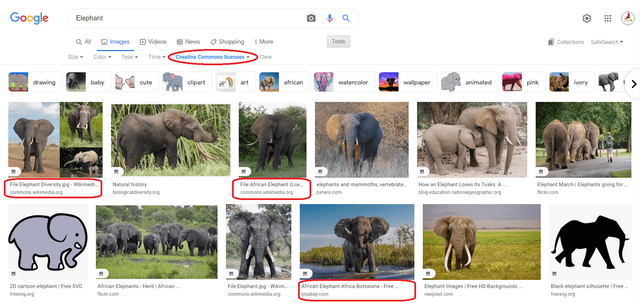
Source: @cryptogecko You can see in the picture above that we have gotten a couple of pictures from the Wikimedia commons website which is known for sharing copyright-free resources with internet users.
2. Pixabay Search
Pixabay is also a copyright-free image search engine and provider. They have many good copyright images for every use. I use this when I need wider options to choose from and to get better quality images on a specific topic.
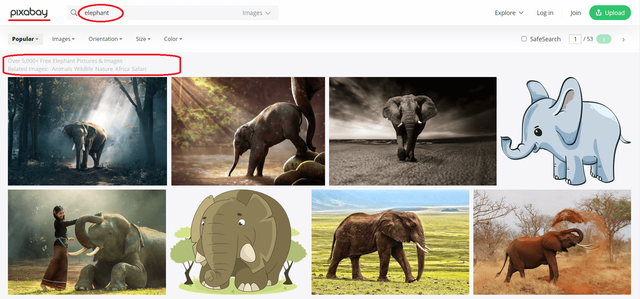
We have searched for Elephants again on the Pixabay platform to get similar results to the Google Image search results.
If you can read the text in the left hand corner of the image, you will see that there are more than 5000 image results for the phrase "Elephant". And the text further says that the images are "FREE". All you need to do to use them in your posts is to reference these images properly.
3. Pexels Search
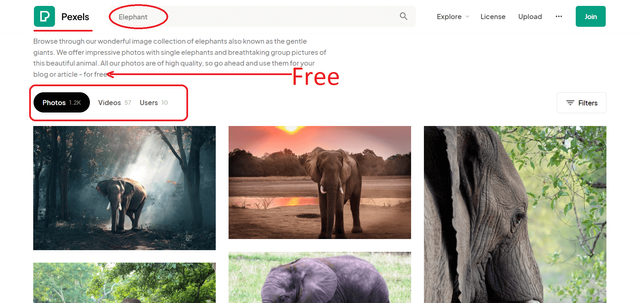
Pexels is one of my favorite copyright-free image finders on the web. I mostly make my thumbnails and social media covers on Canva, but mainly my backgrounds and base images come from Pexels only.
Compress Images
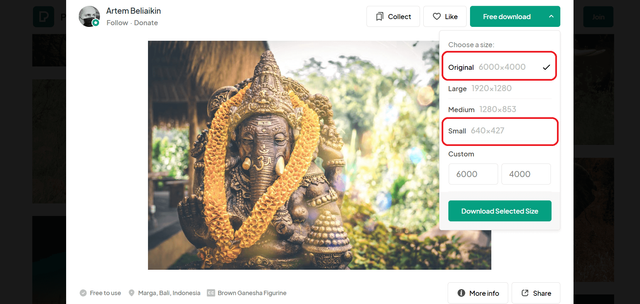
I wanted to show you all how to compress images, but to make you understand I had to download a wider and bigger image from Pexels. To save size and space, one can easily download the picture with smaller size and lowest space. I have downloaded a 6000x4000 px image to show the process of compressing the image to my readers.
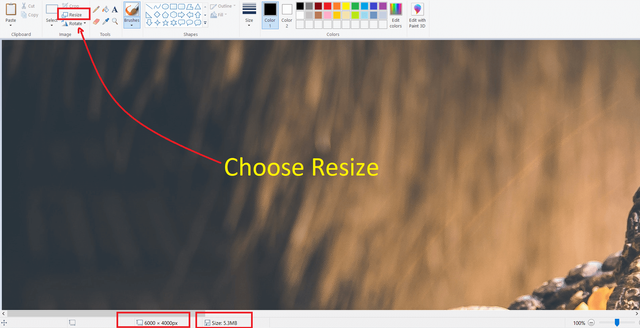
After downloading the image to my computer, I have brought this image into Microsoft paint. You can do this by right-clicking on the image and choosing the "Open with Paint" option.
When the image opens in the paint, you will see the dimensions and size at the bottom of the paint. Now, you will have to choose the "resize" option.
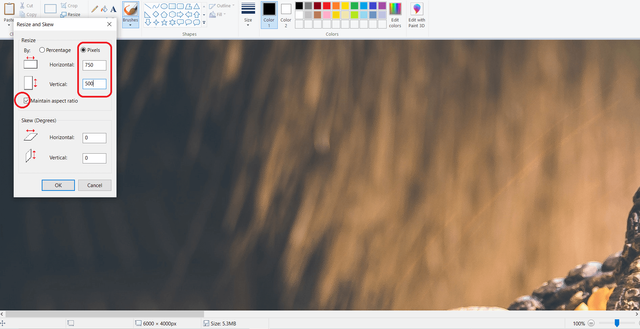
Resizing can be done via using the percentage resizing option and resizing by dimension option. If you know the perfect dimension that you want to get, then you can use the dimension-resizing option. But if you don't know the dimension you want but have a rough and general idea of the new dimension you want, you can use the resize by percentage option.
The image was 6000x4000 px in dimension earlier, and was taking 5.3 MB space on the disk. We did the resize of the image using the dimension, and we let the aspect ratio work and we have to choose one of the dimensions and the other takes the measurements itself and the image resizes automatically.
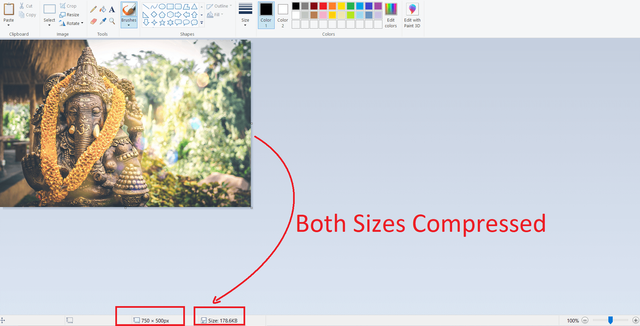
Now, you can see that the image's dimensions are 750x500 px, and the space this image was taking on the disk has also reduced by a huge percentage. Now the space this image takes has reduced to a mere 178 KB.
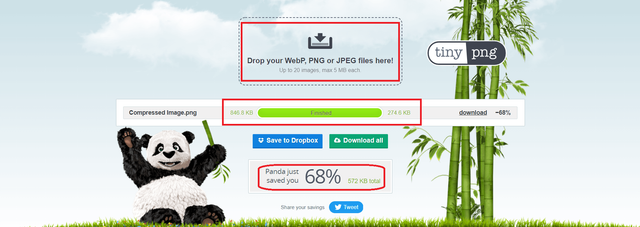
Another website(s) I really like to compress my images is the TinyJPG, and TInyPNG. This website allows you to drop or select images from your storage and then it processes all the images to reduce the space taken by the images on the storage medium.
Using this website, I was able to save upto 68% space, and the image can now be easily used in any of my posts.
Thanks for the information, Mr. @cryptogecko
It really helps us.
😊😊😊
I am happy that you liked it. Thanks for visiting.