Beautiful Paper Flower Wall Decoration | Handcraft Design...💐
Hello everyone,
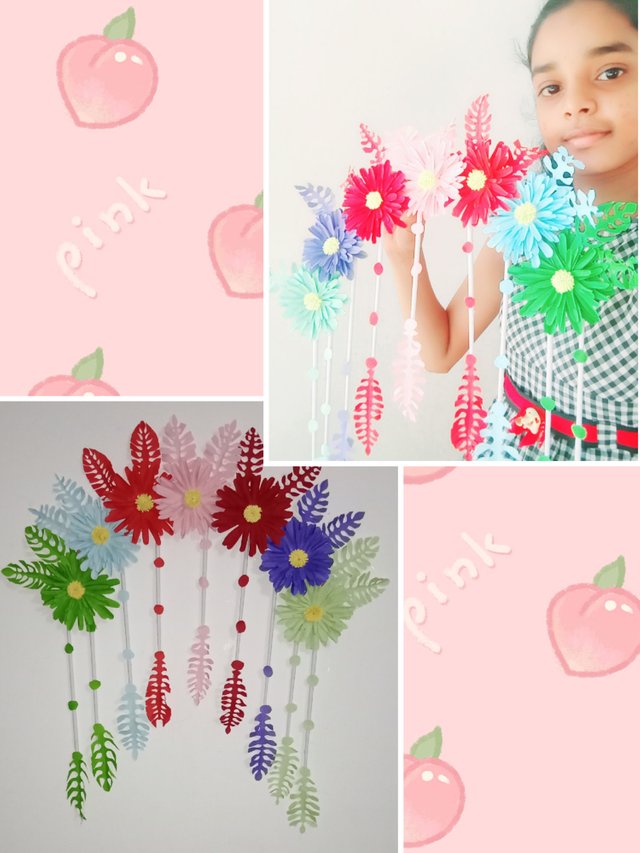
I hope you are all safe and happy. Today I am going to tell you about a very beautiful wall decoration made by myself.
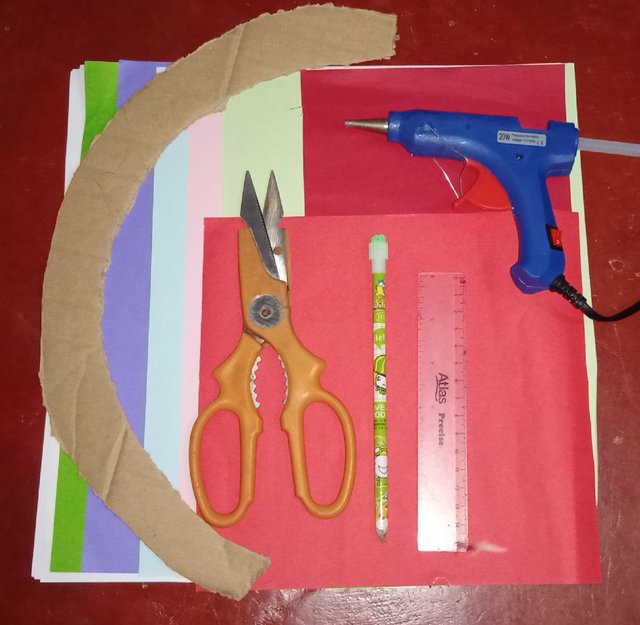
Ingredients for making wall decoration: -
- Color A4 paper (light blue, purple, light green, dark green, red, crimson, light pink, white)
- A footnote
- Pencil
- A half-shaped strip of cardboard
- Scissors
- Glue gun
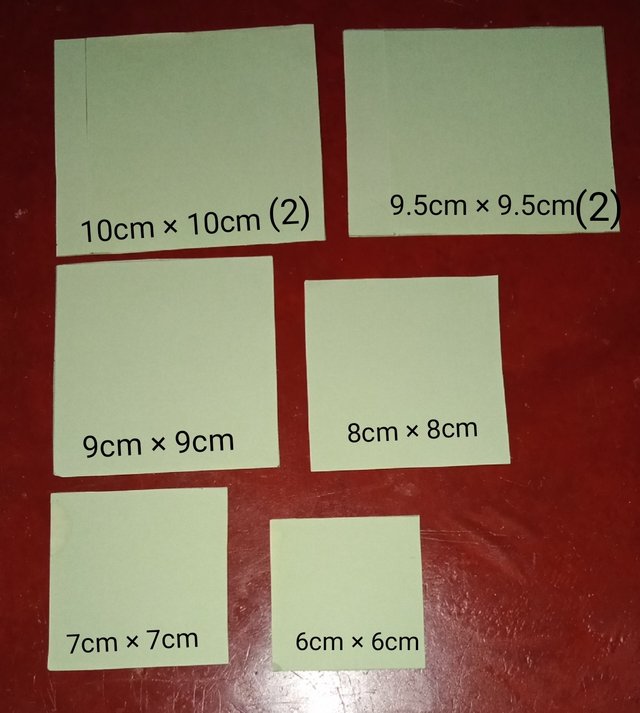
Step 01: -
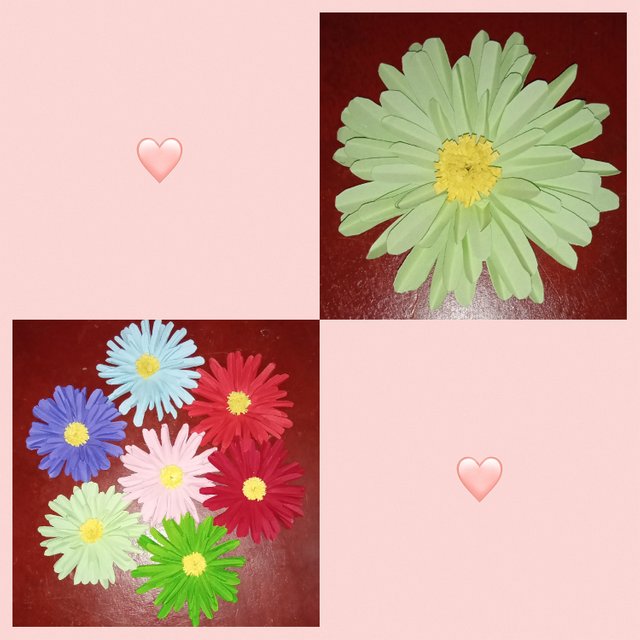
First we arrange the flowers needed for the design. This requires seven flowers. It takes eight pieces of paper to make one flower. Two pieces of paper 10cm long by 10cm wide, two pieces of paper 9.5cm long by 9.5cm wide, one piece of paper 9cm long by 9cm wide, one piece of paper 8cm long by 8cm wide, one piece of paper 7cm long by 7cm wide and 6cm long by 6cm wide According to the above measurements, each flower needs eight pieces of paper. Cut the pieces of paper according to those measurements to make seven flowers using the colored paper you use to make the flowers.
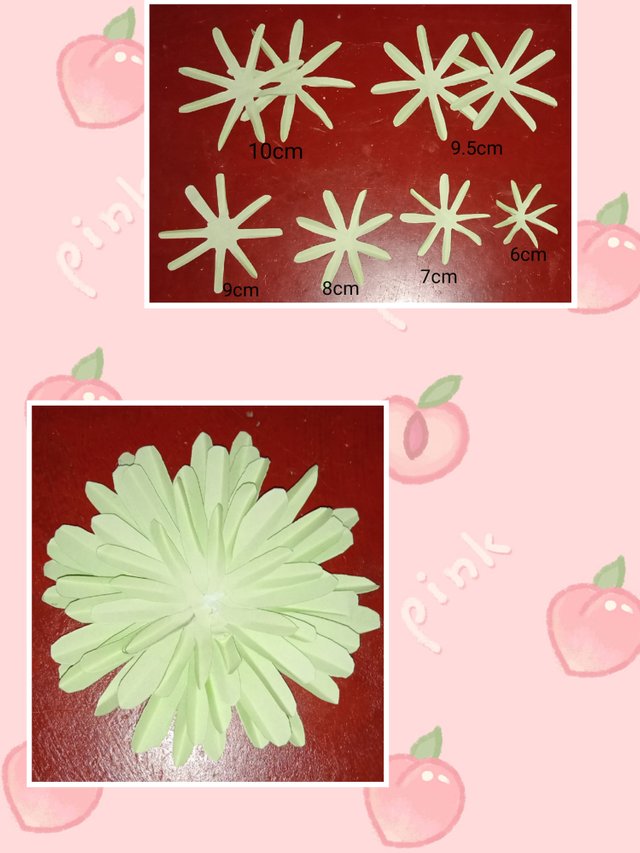
Step 02: -
Then take each piece of paper, fold it three times as shown below and cut it into the shape of a flower petal.

Step 03: -
Cut out each piece of paper in the same way and paste the other flowers neatly on the large flower.
Step 04: -
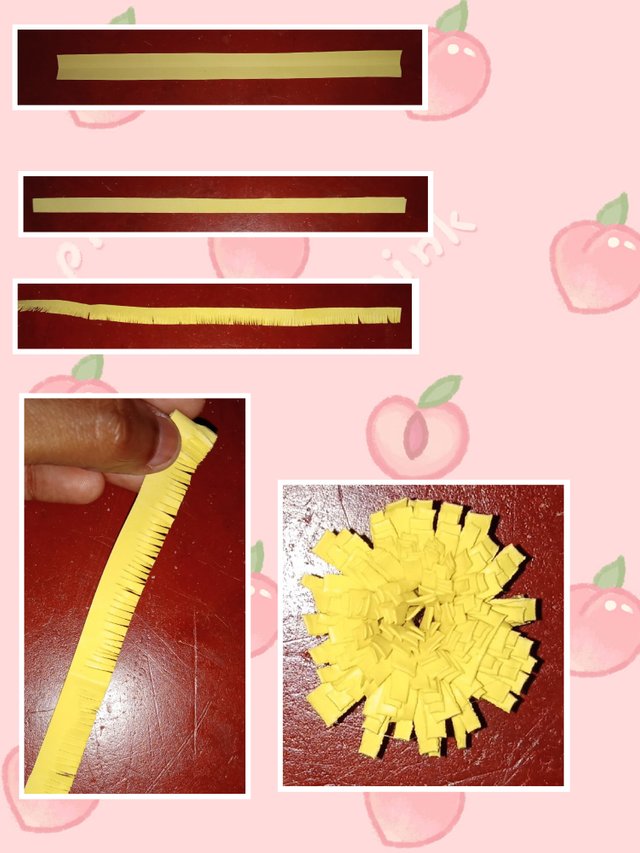
Let us now see how to arrange the middle part of the flower. Take a piece of yellow colored paper (use paper of a color of your choice.) Cut a thin long strip. Fold it in half and cut into small wrinkles using scissors. Then roll it up and glue the end part. Shown in the figure below.
Step 05: -
Then glue the pieces in the middle of the flowers you made.
Step 06: -
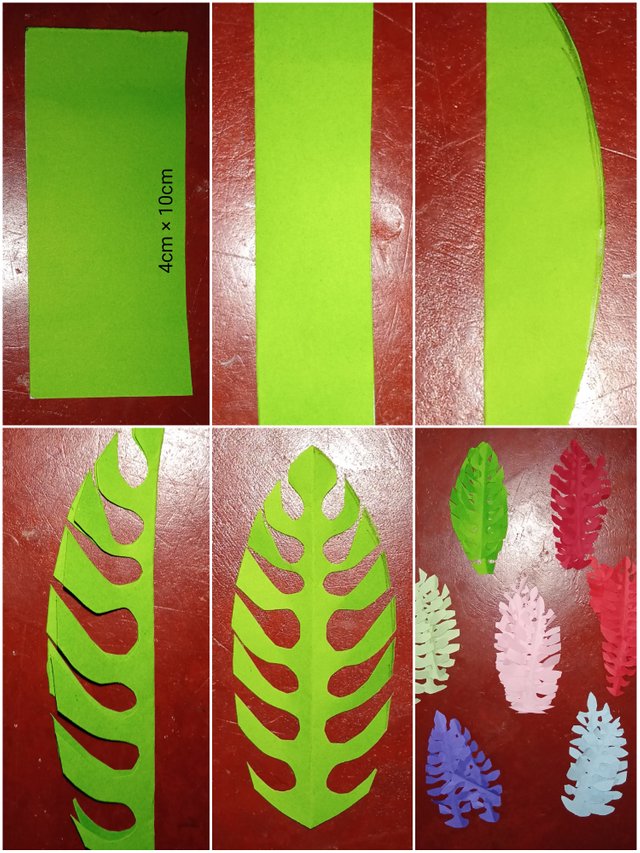
Then we set up the leaf-shaped parts of a tree. To do this, cut three pieces of 10cm long and 4cm wide with each piece of colored paper you have. Fold the two pieces into the shape of a tree leaf and shape it as shown below. Arrange such parts in every color.
Step 07: -
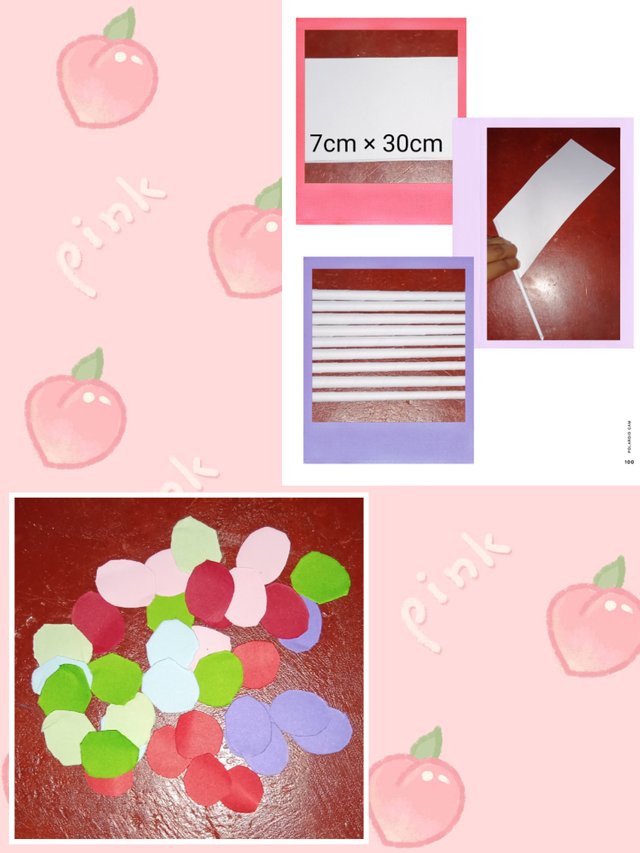
Then all we have to do is prepare the paper rolls. To do this, cut 9 pieces of white paper 30 cm long and 7 cm wide. Roll the paper as shown in the picture below and make 9 rolls of paper. At the same time, cut out a few small round pieces of paper of each color.
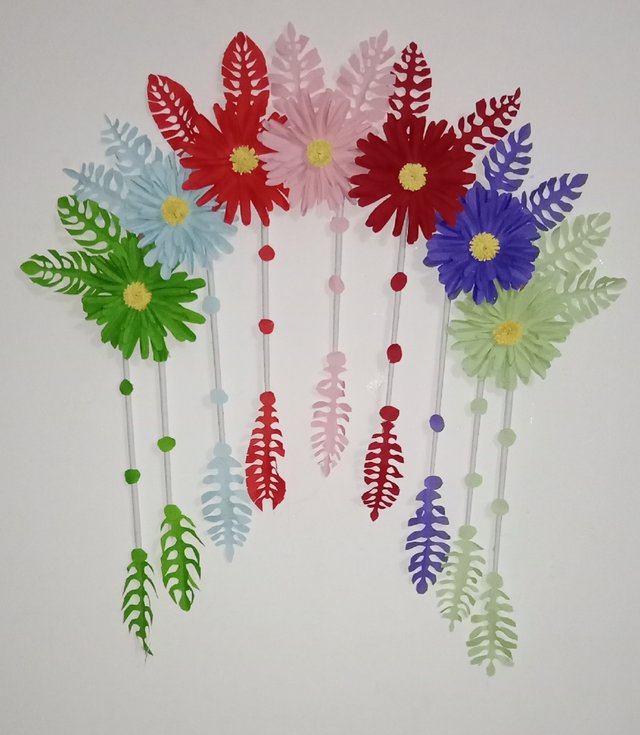
Now we have completed all the parts required for the design.
Let's see how to paste these parts one by one ...
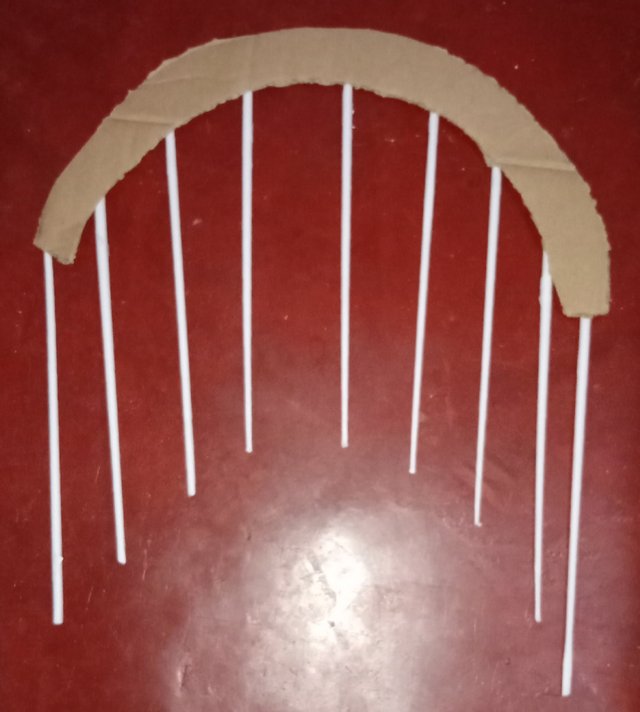
Step 08: -
First, take the half-shaped piece of cardboard we have and glue the 9 rolls of paper we made on the back side.
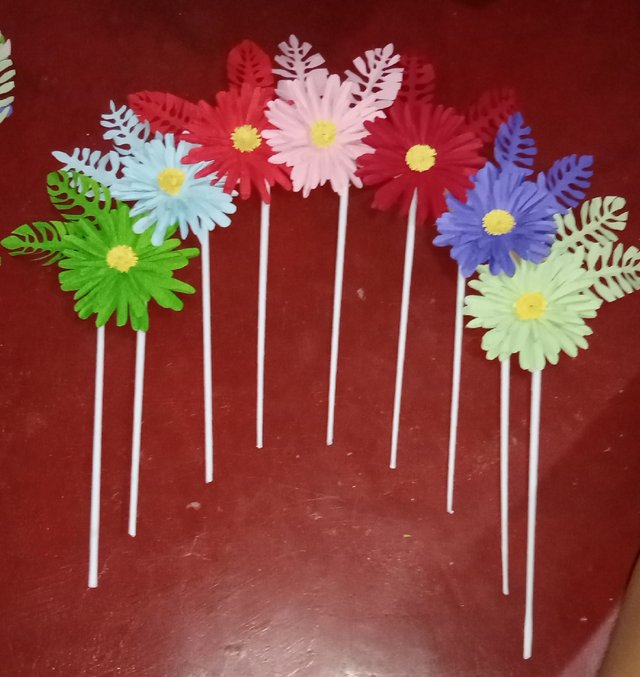
Step 09: -
Then paste the flowers we made and the leaf shaped parts of the tree on it as shown in the image below.
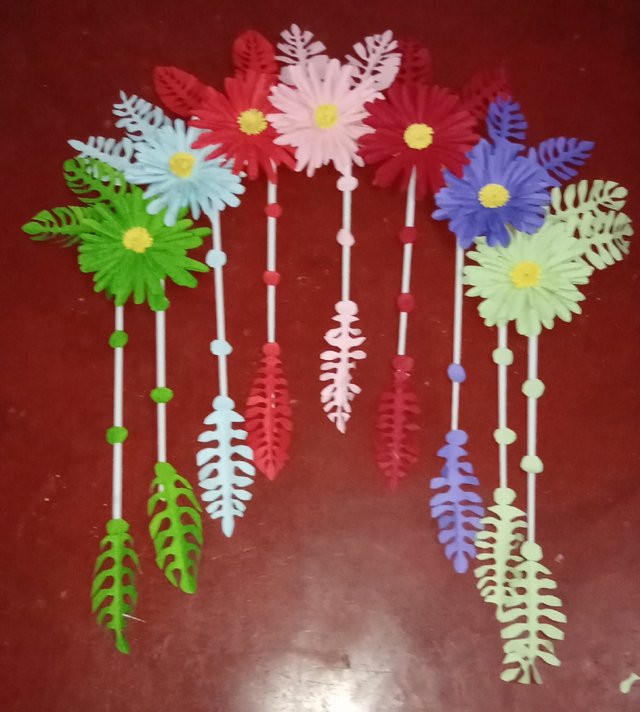
Step 10: -
Then we glue the leaves of the tree to each other at the end of the roll of paper as shown in the picture below. Glue the small round pieces we cut out on the same roll of paper. See the image below.
The final look ...
Woow @sewmini 😍 Your handcraft design is very beautiful.
Thank you akka ❤