BEFORE & AFTER! CONTEST - Week 6 / Day 6: Design Steem Exclusive Things from Raw or Waste Materials - Reward Pool 50 STEEM
Hello dears, How are you all? I am fine by the grace of almighty. Today, I am coming with a new craft idea to join this contest. It is really a very interesting contest which was arranged by my friend @enveng I want to thanks her, for gave us a chance to join there.
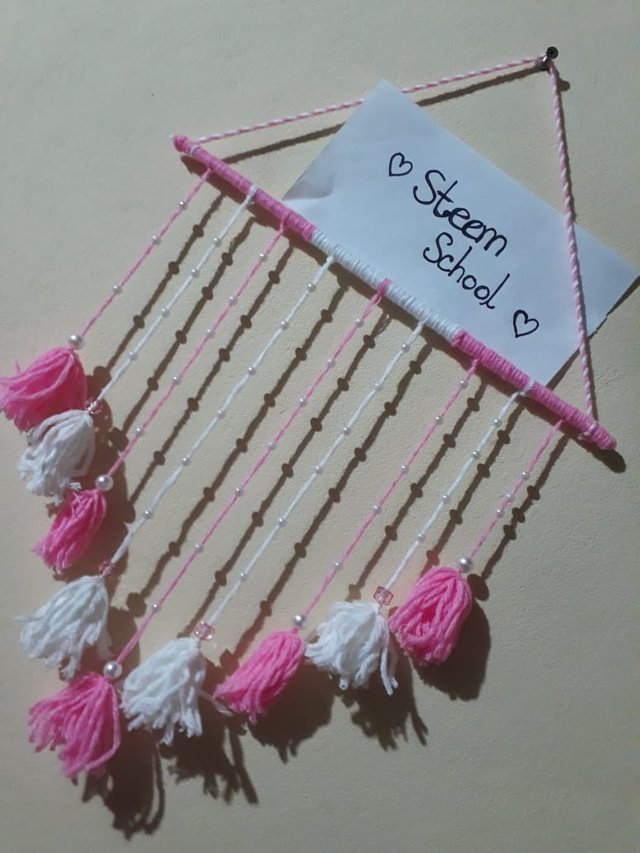
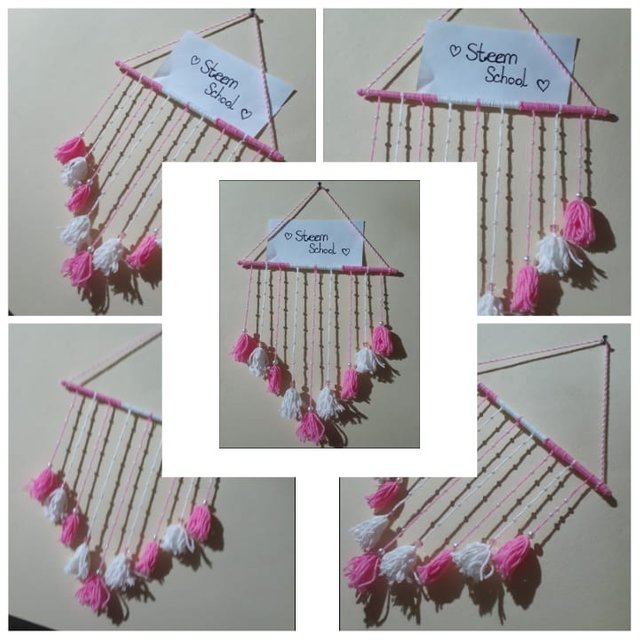
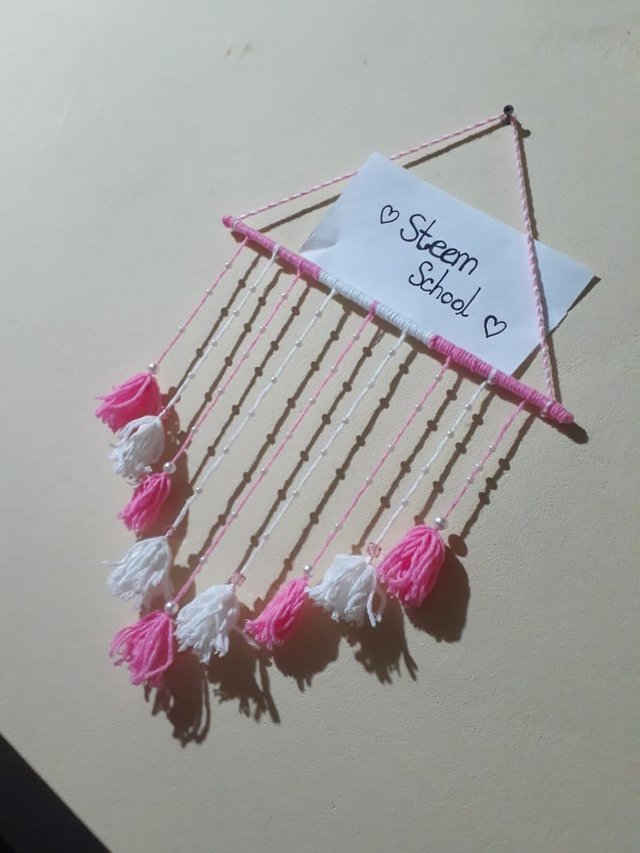
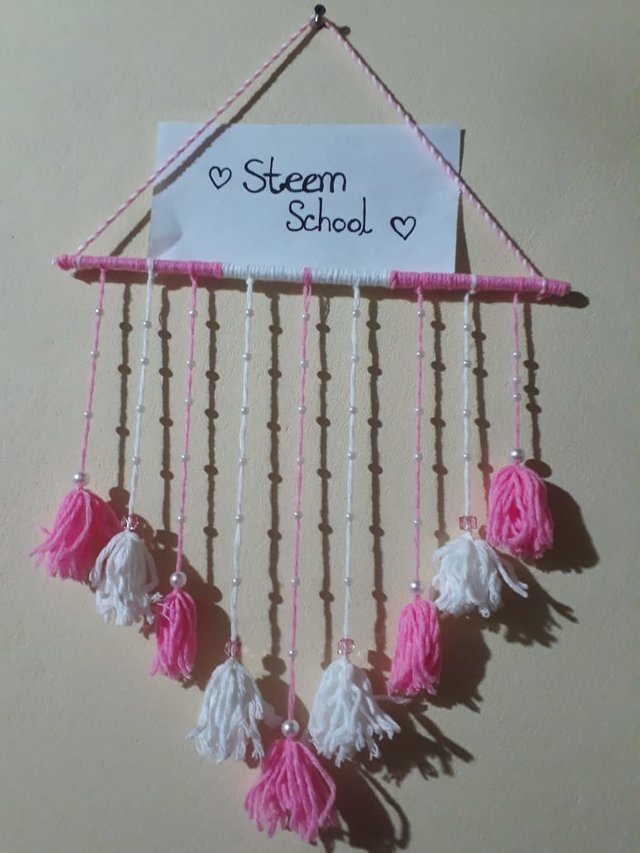
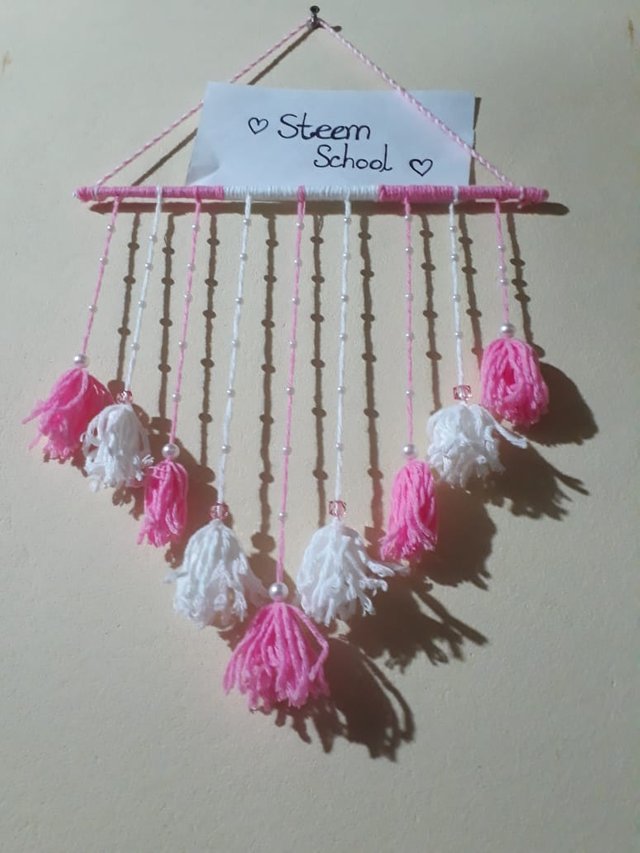
After
Before
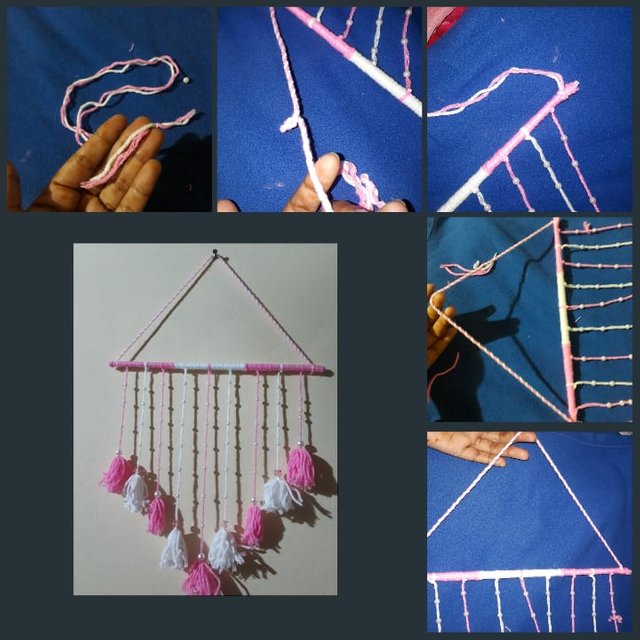
I want to share my today's work, which I made very easily. It is really looking beautiful. So, let's describe my work what was before and the what is after.
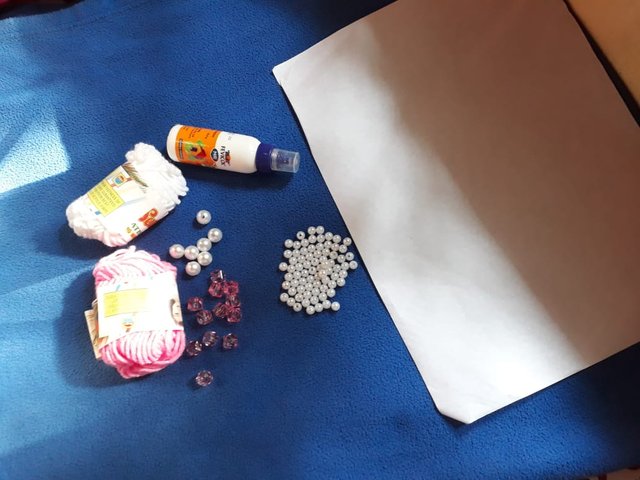
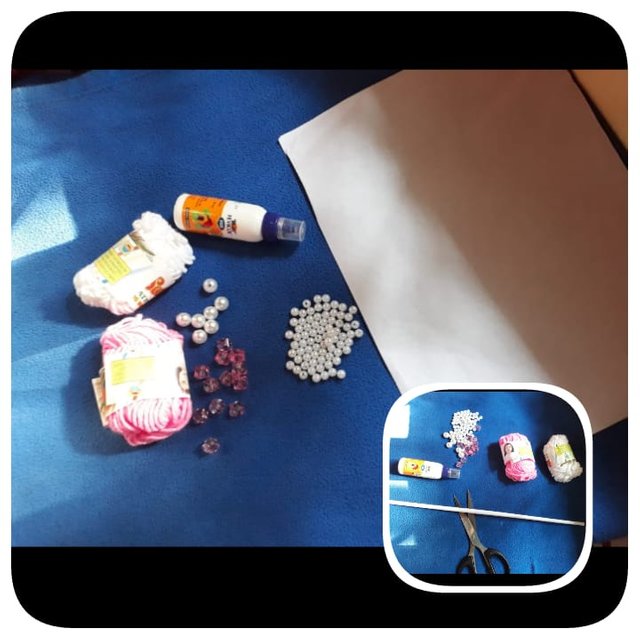
Made a very beautiful wall hanging craft with wool. All the materials you need for this: -
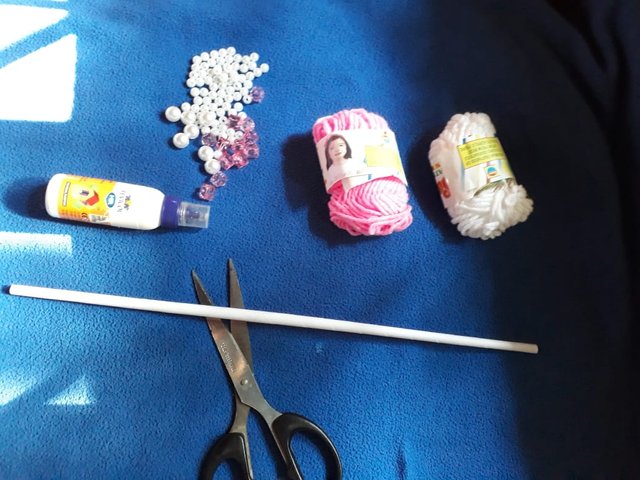
- Wool- pink, white color.
- Pearl bead - white, pink.
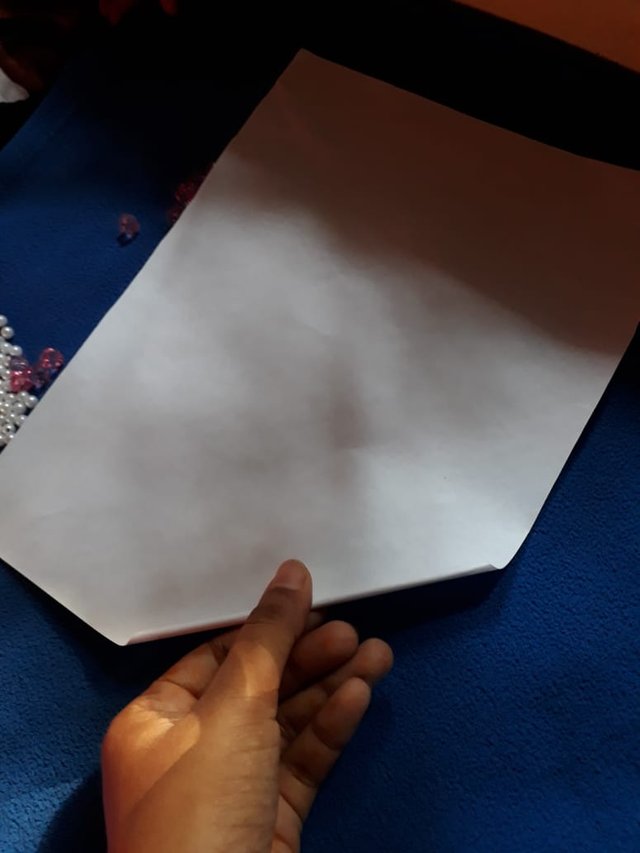
- A paper
- Scissors
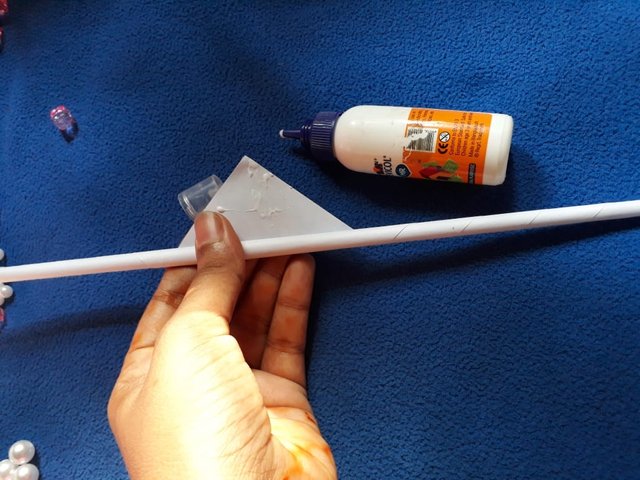
- Glue
#Pic 1
First step:
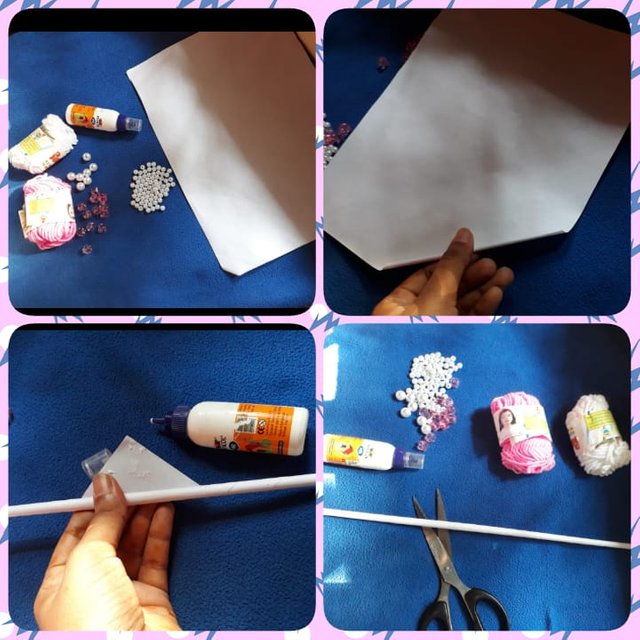
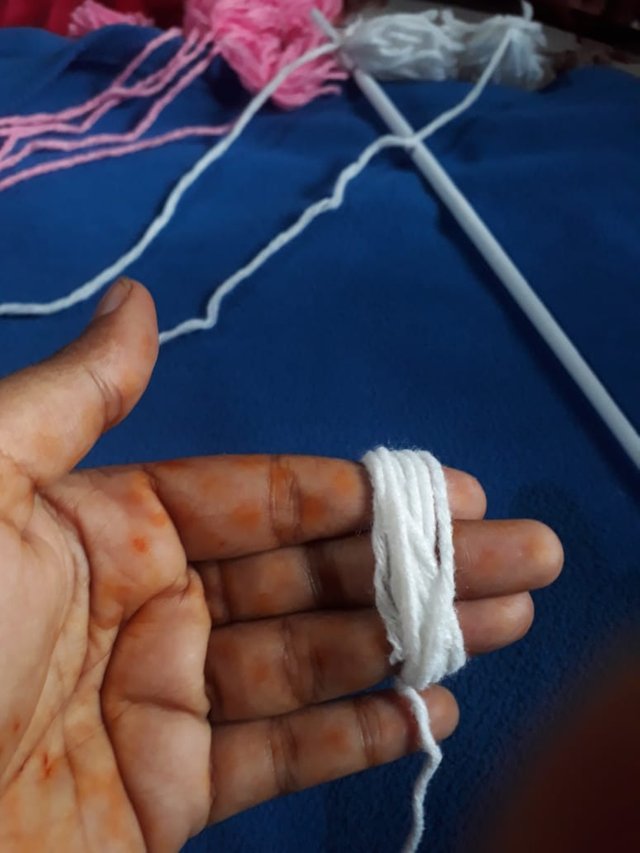
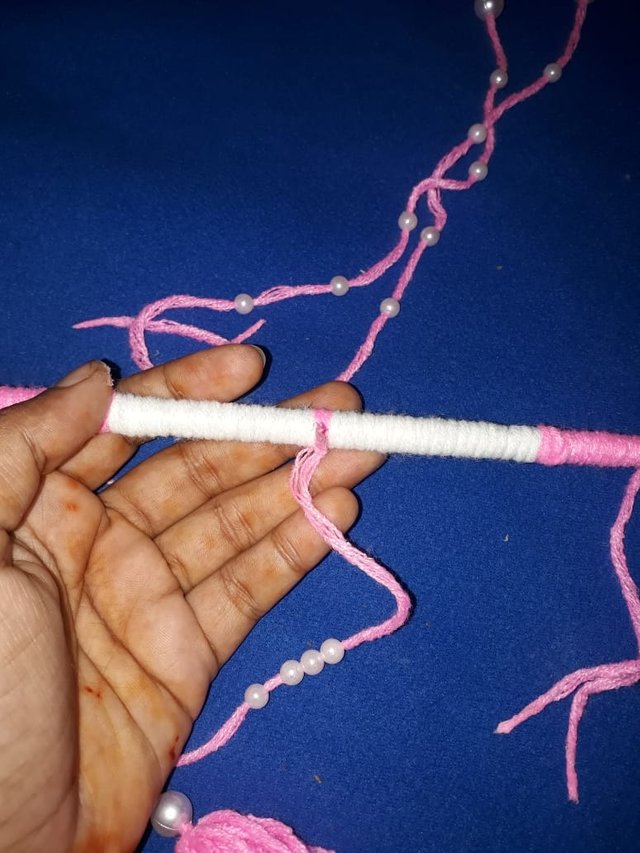
- I took the white paper, rolled it from the corner and made a stick. I glued the last end. The stick was made and taken.
#pic 2
Second step: -
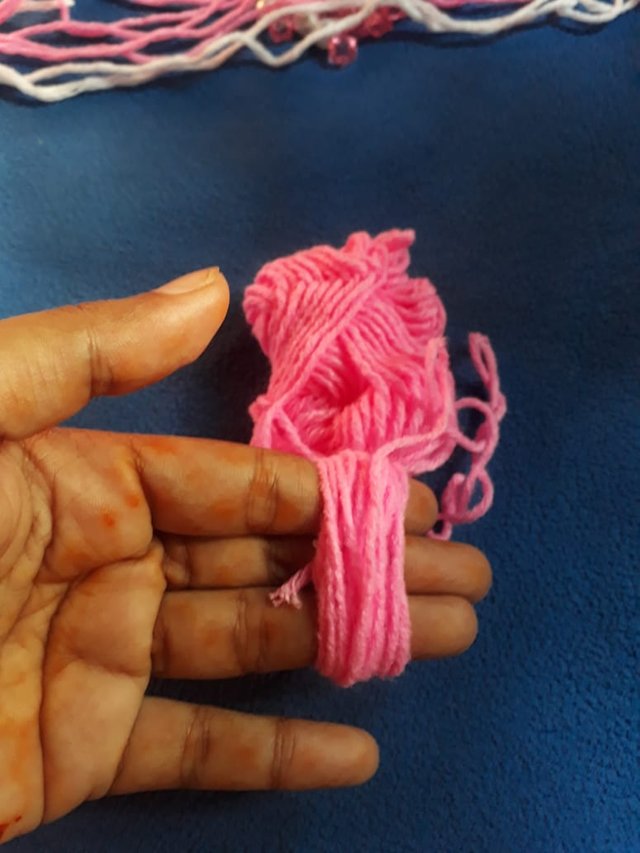
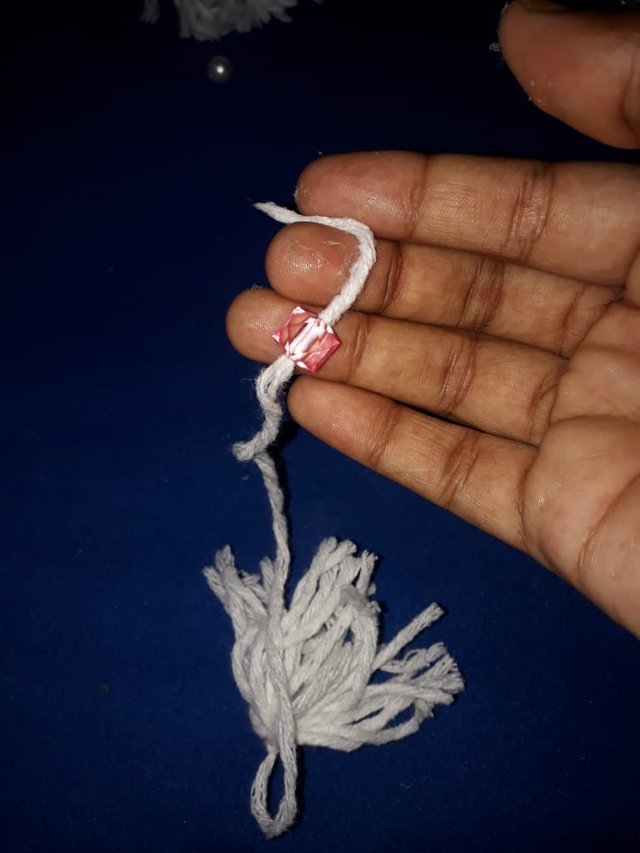
- I cut some wool longer than this with pink wool. I single cut 5 pink wool and 4 white wool.
Step 3: -
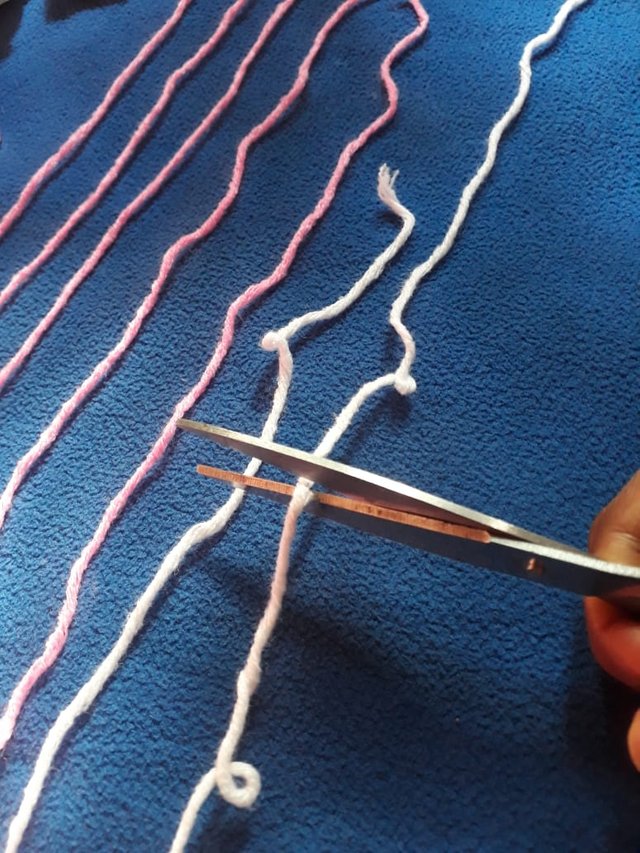
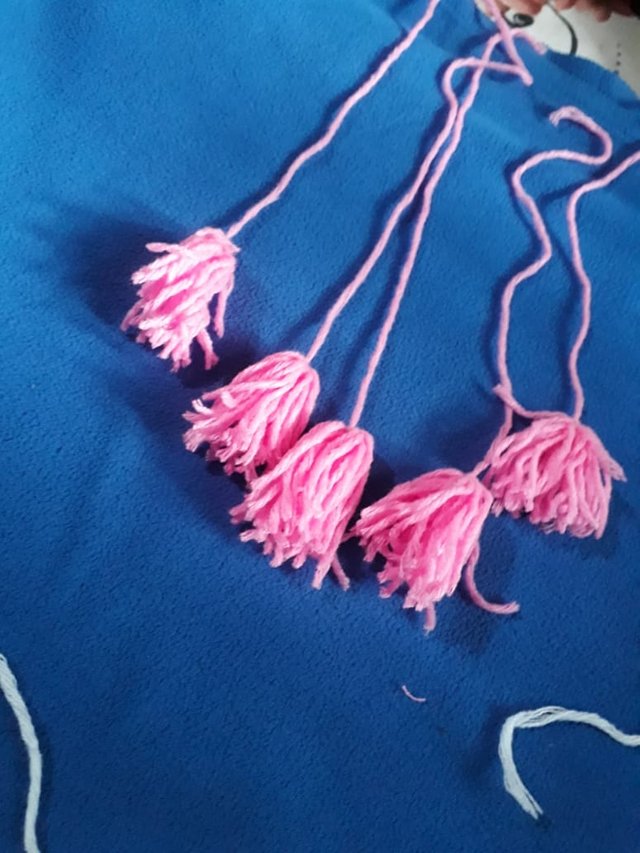
I wrapped one end of the wool yarn in the top of 3 fingers. I twisted the yarn into 20 rounds. Then I took off the twisted wool from my fingers and tied the round part with a thread cut earlier. I cut with scissors from the opposite side of the barrier part. Then I put them together by hand. Now it became a fringe. I made 5 fringes with pink wool.
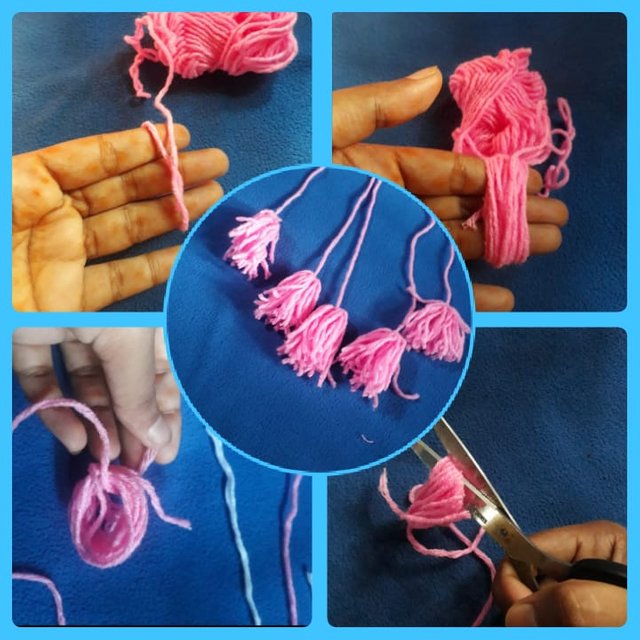
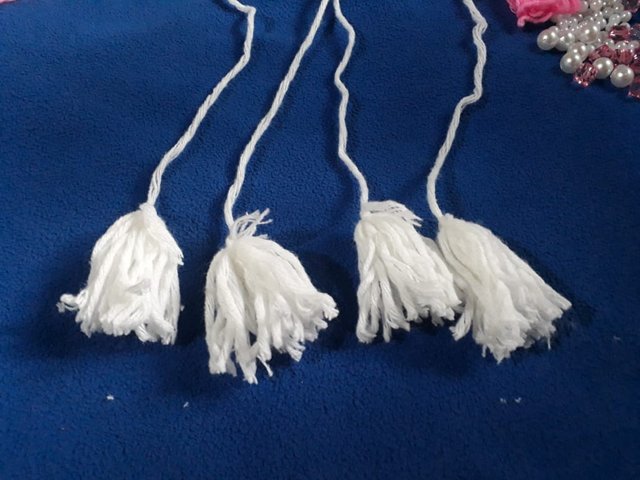
#pic 3In the same way, I made 4 fringes by twisting yarn from white wool. I made a fringe with white thread and tied it.

#pic 4
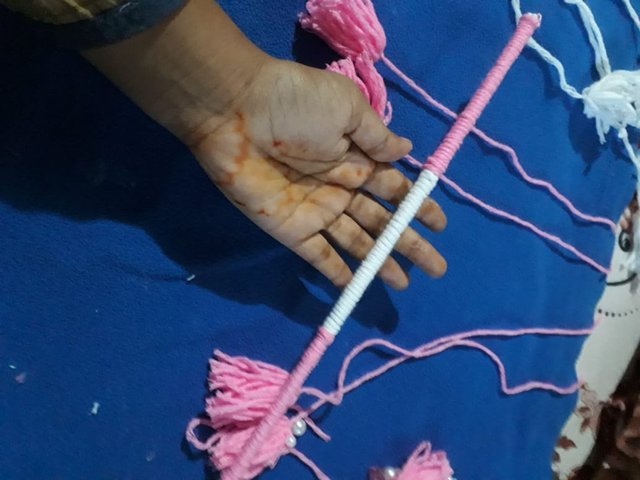
4th step: -
- I wrapped the stick made of paper with wool. For this, I first wrapped it with pink wool on one side, white wool in the middle and pink wool at the other end. Divide the stick into 3 equal parts and wrap it with pink wool on both sides and white wool in the middle.
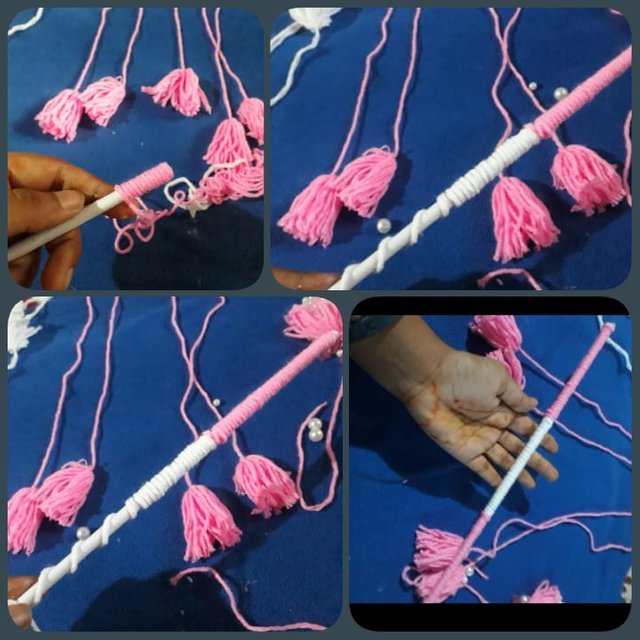
#pic 5
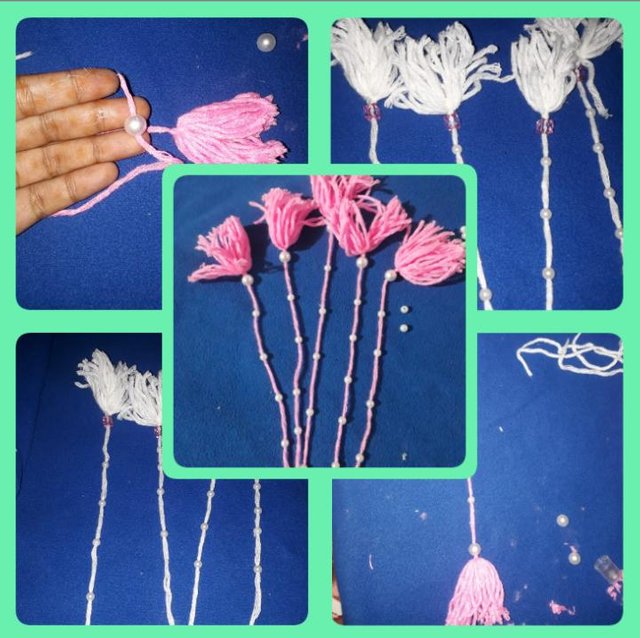
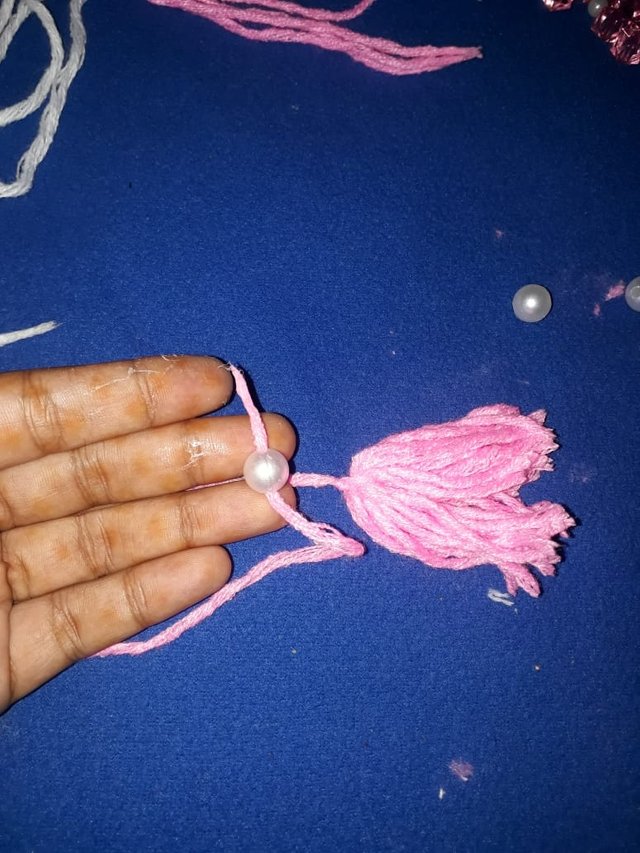
Step 5:
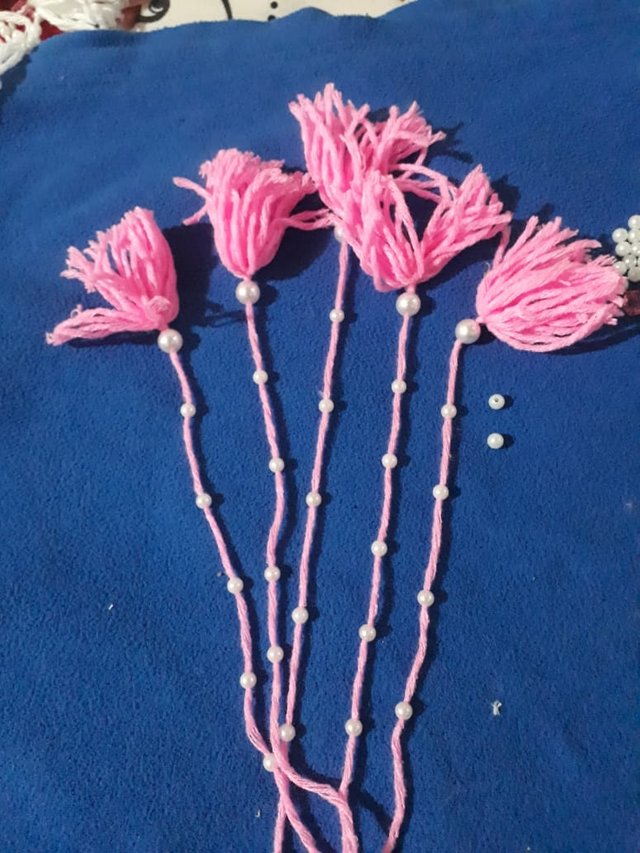
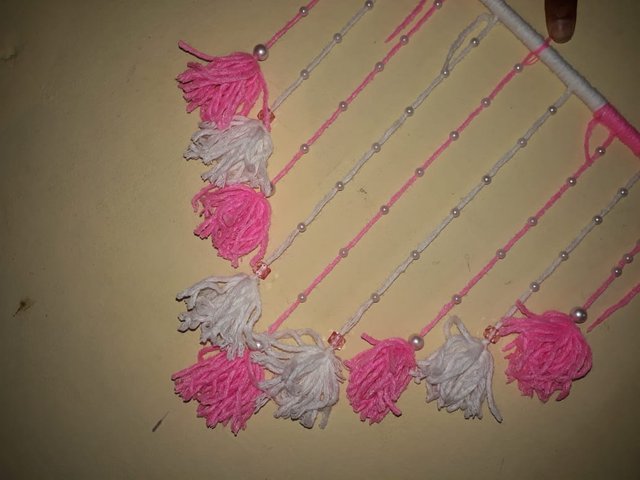
- I took the pearl bead in the thread of the fringe that was made. I gave some small beads with big beads in the pink fringe. And I gave a big pink bead and small white beads in the white fringes. In this way, I took the bead in all the fringes.
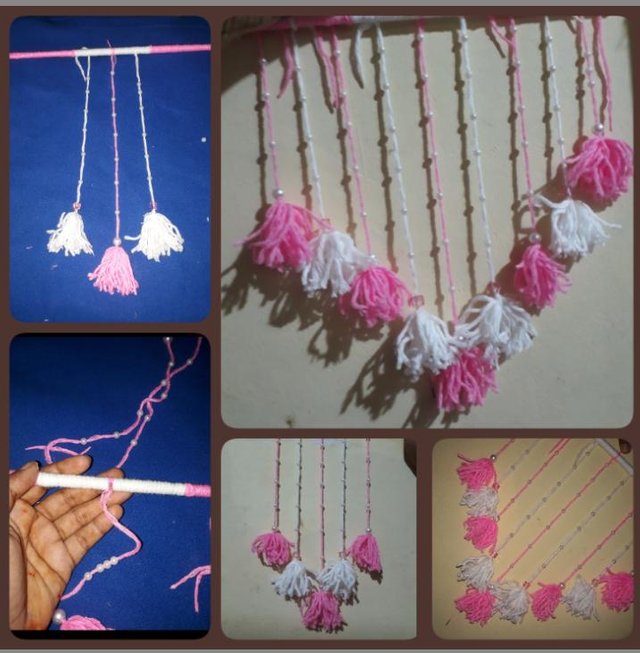
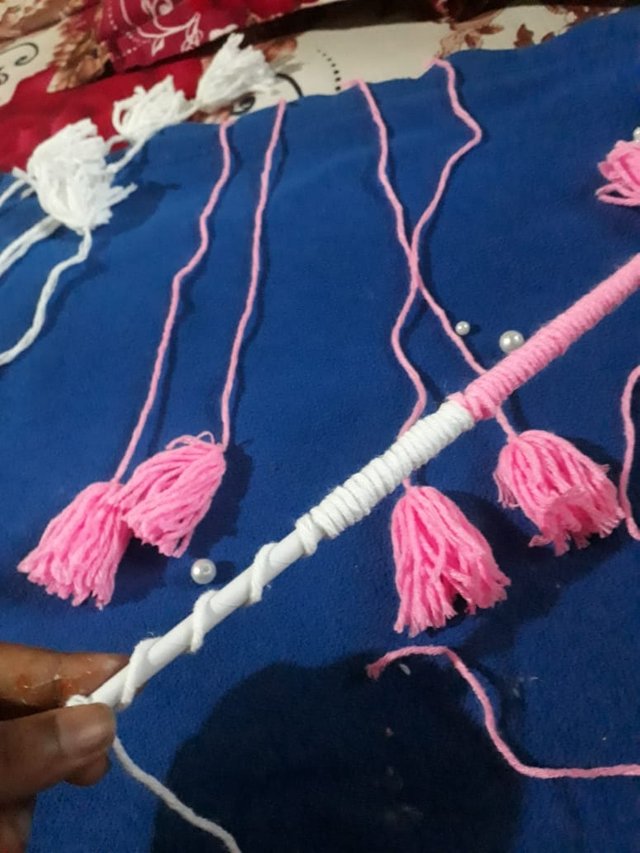
6th step: -
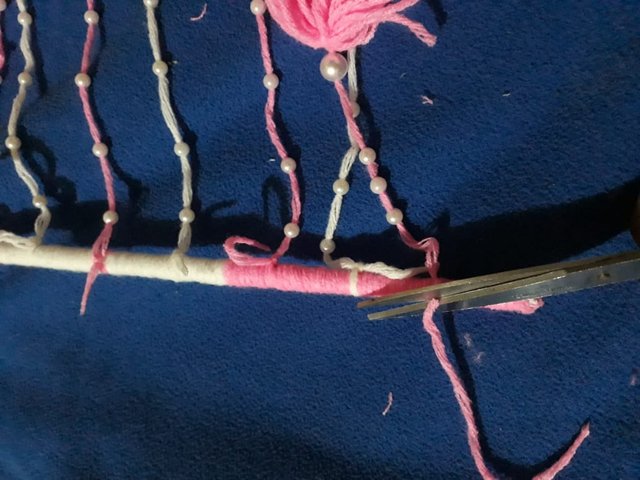
- After taking the pearl bead in all the fringes, I put the fringes in a stick wrapped in wool. I'm one step ahead. I put the fringes on the stick, pink fringe in the middle and white fringe on both sides, so I tied the fringes step by step on the top.
#pic 6
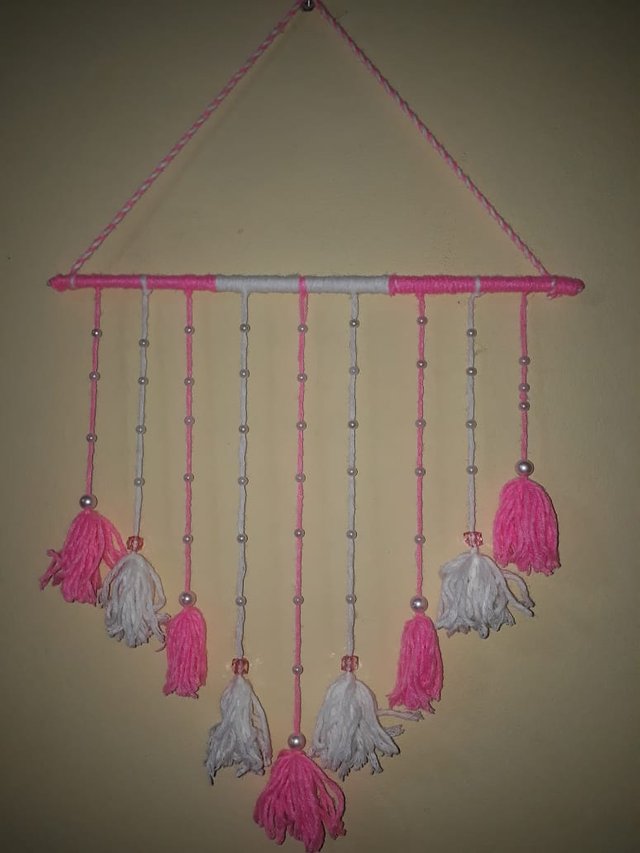
After tying all the fringe sticks, I cut the extra yarn.
Then I cut 2 wool from white and pink wool, to hang as a hanger. For that, I twisted two yarns by hand. Then I stuck this twisted yarn on both sides of the stick. To hang it on a hanger at the top.
#pic 7
This is how I made a wall hanging craft with wool. I put it on the wall of my room.
Full episode of my craft :
Special thanks those people's who read my post.
💦
💦 BRISTY 💦
💦
Hello @bristy1, you made a good craft again 😊