BEFORE & AFTER! CONTEST - Week 3- Day 3: Design Steem Exclusive Things from Raw or Waste Materials - Reward Pool 50 STEEM
Hello dears. How are you all? I am fine by the grace of almighty. Today, I am coming with a new handicraft items. It is made by the waste and unused things. Which looks very beautiful.I want to share it with you.
I will make one more thing with the things that were immediately available to me. I also made a very nice wall hanging diy with some discarded things and unused things before.
I have some more things left, and I have found some other things. So I thought I would make another craft with them today. That's why I sat down with all the materials. I like to create something new. So I started working with the unused things I had.
Waste things are very important because we can create extraordinary things by use them. I want to show all of you that what things was it before and what is now.
FULL DEMO OF THIS CRAFT:

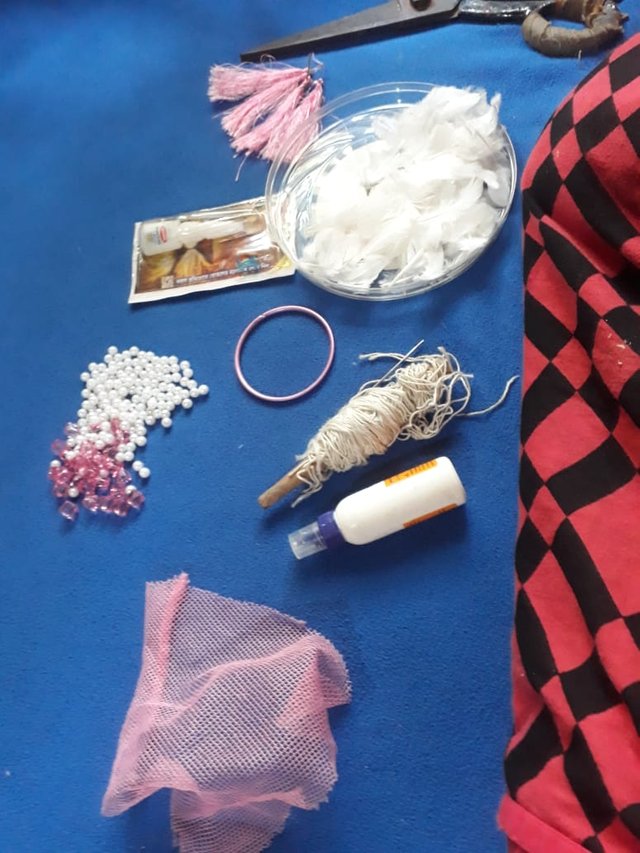
Ingredients for making the Wall Hanging DIY : -
- Beads
- Bangles
- White yarn
- Scissors
- Pigeon feathers
- Glue
- Needle
- Rug yarn
- Color net
- Yarn blower
First some of my work: -
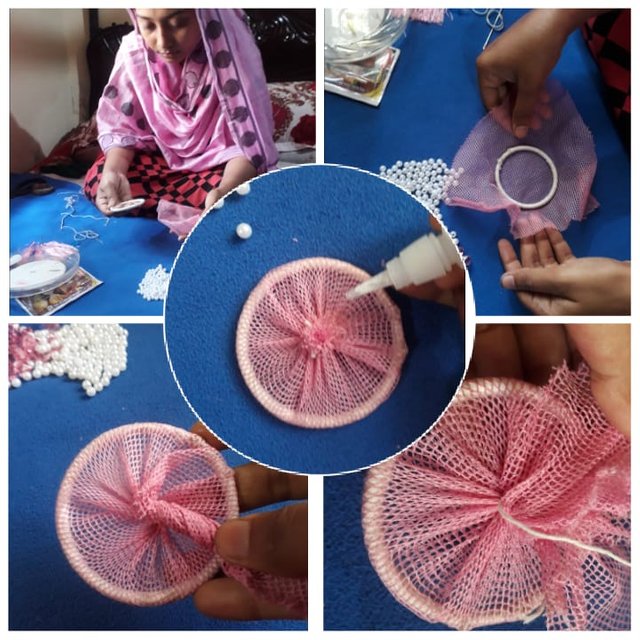
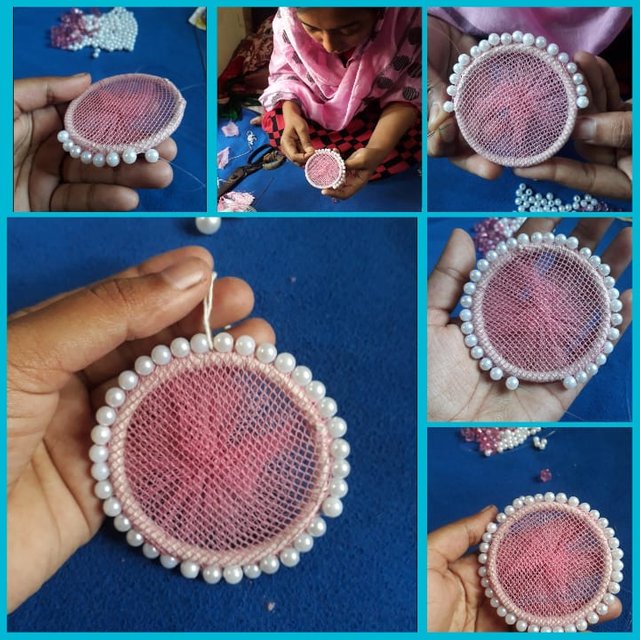
- I took the materials for my work. An old bangle, some white thread from the cement bag, I had collected them earlier. I took some small and medium pigeon feathers, pink net for bangles, I took this net from an old cloth,deferent size beads. Scissors and glue are always kept for my work. I sat down with these things.
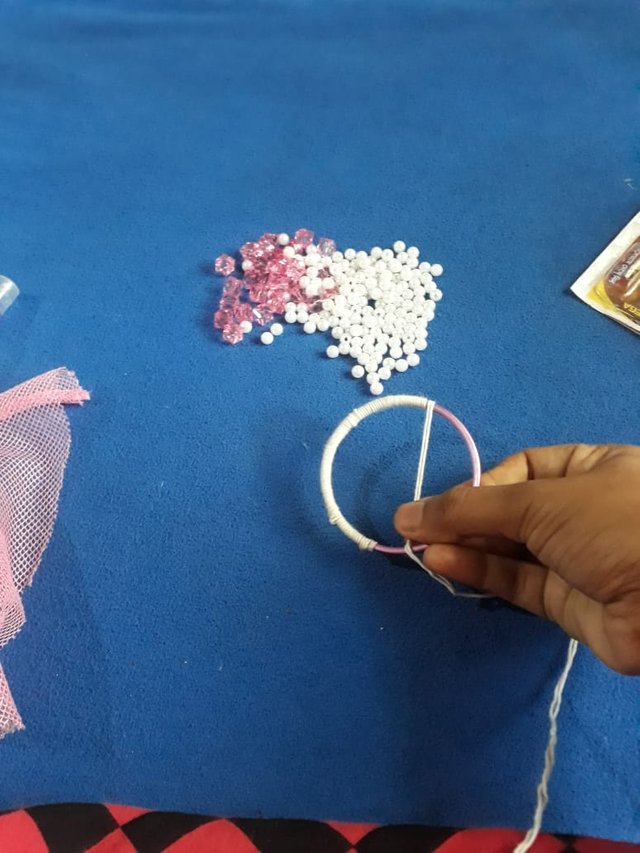
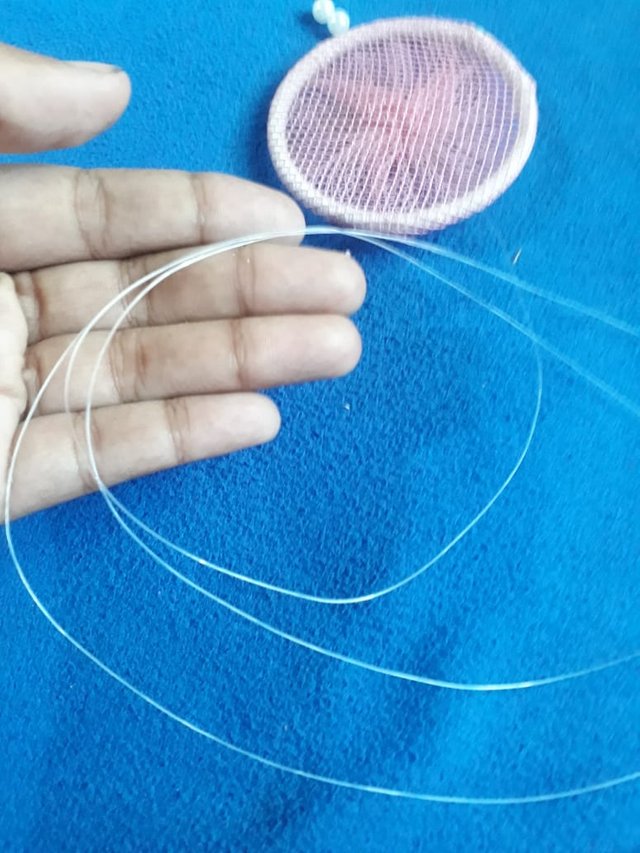
The first step in starting work: -
• First I took the bangle, then I took the white thread. I glued the white thread to one end of the bangle. Then I stayed behind the remaining long thread in the whole bangle. I pulled the yarn back into the bangle well. Then I glued the thread to the end again.
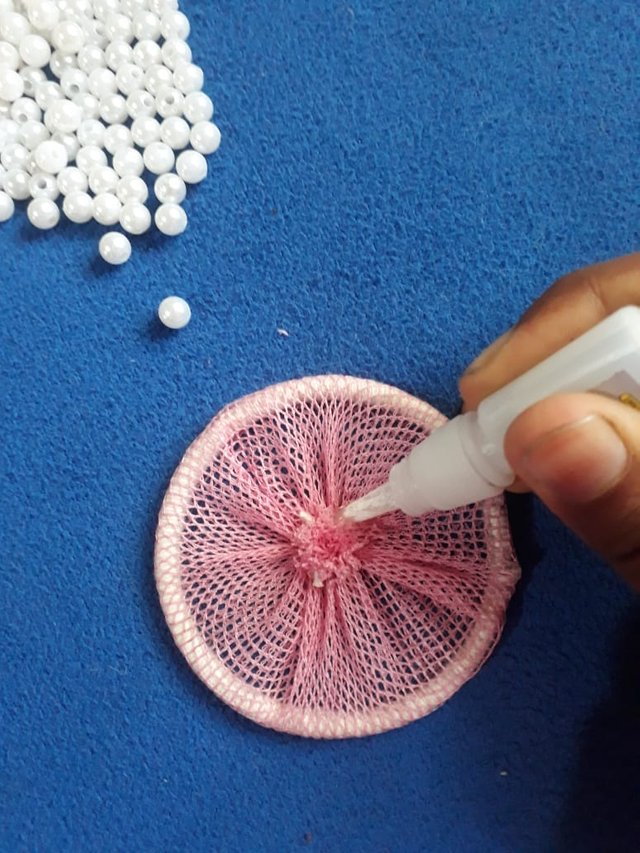
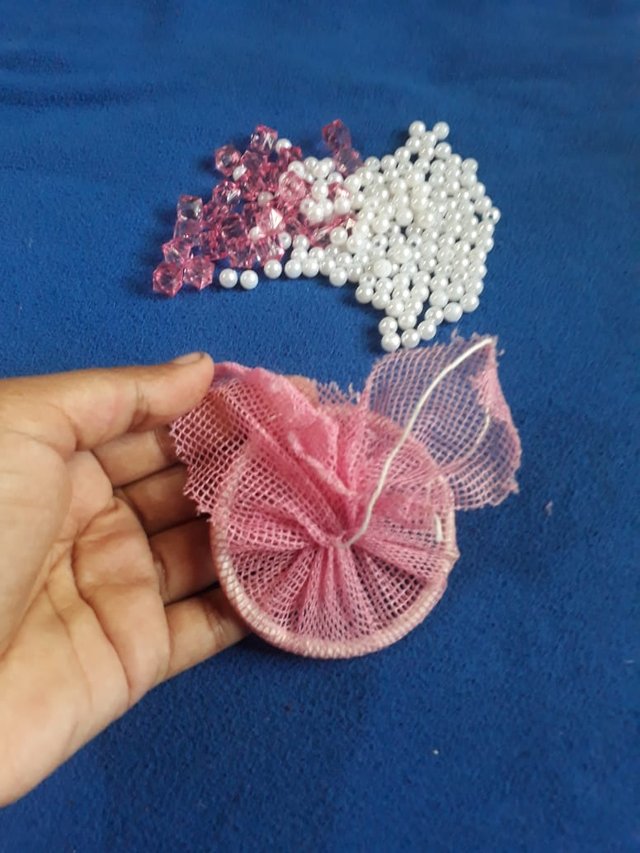
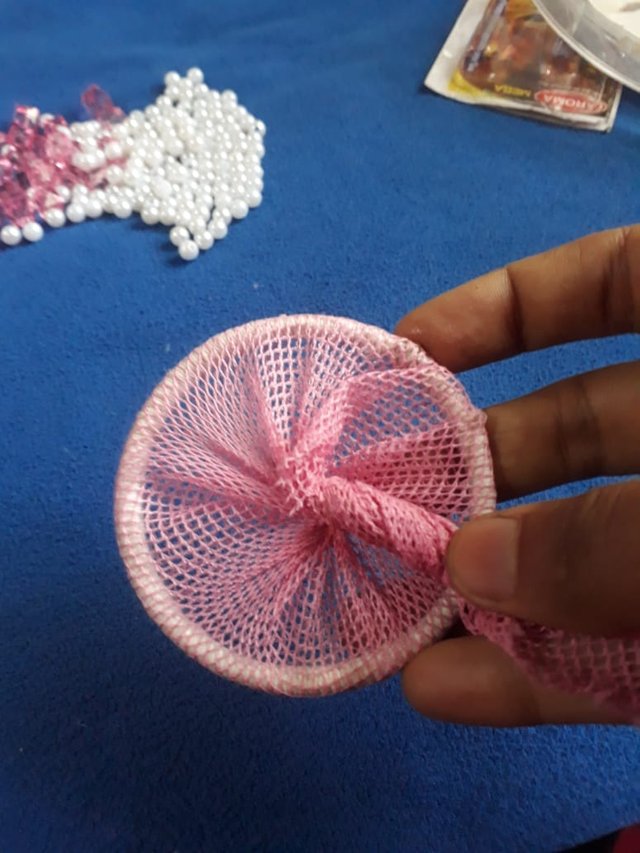
★2nd step: -
• The bangle wrapped in yarn should be wrapped with net this time. So I doubled the size of the bangle and cut the net. And I put the bangle along the middle of the net. Then I pulled the rest of the net and wrapped it tightly along the middle and tied it with yarn. I cut off part of the extra net.
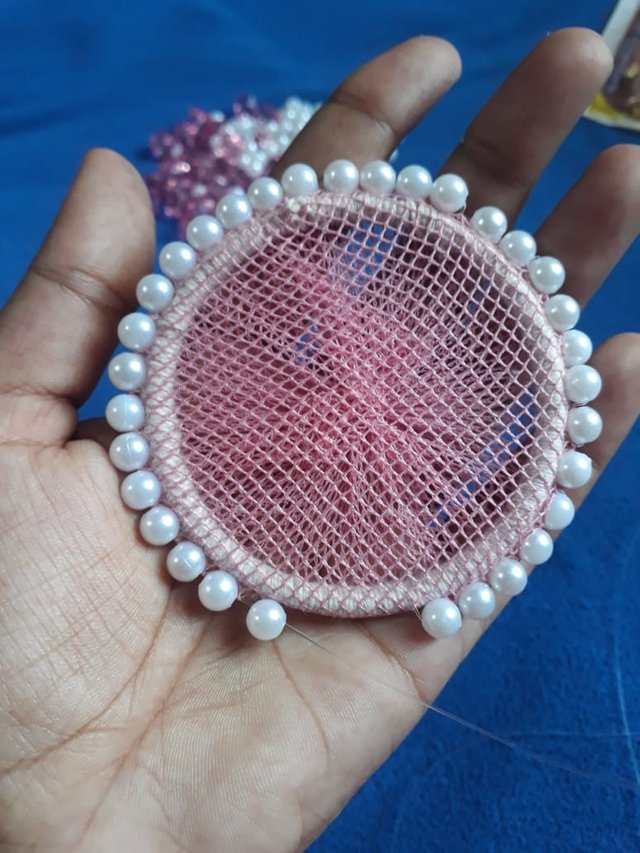
★ 3rd step: -
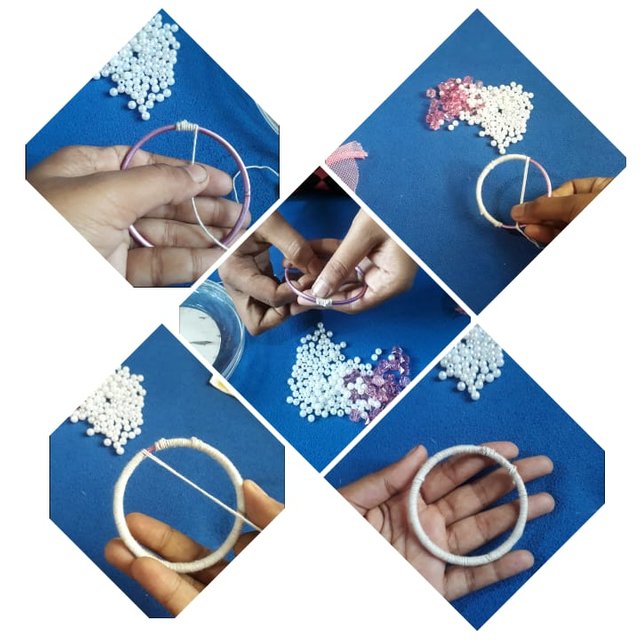
• This time it is the turn of putting small size bead on the outer side of the bangle wrapped in yarn and net. So I took the yarn, tied one side of the yarn to make a small white bead on the outside of the bangle covered with yarn and net. Then I put the extra yarn in a bead rug yarn and again in the bangle yarn. Then again with a bead I took the thread in the bangle thread like before. In this way, I covered the whole bangle with a small white bead. It took a while for these puppies to be put between the yarn and the net.
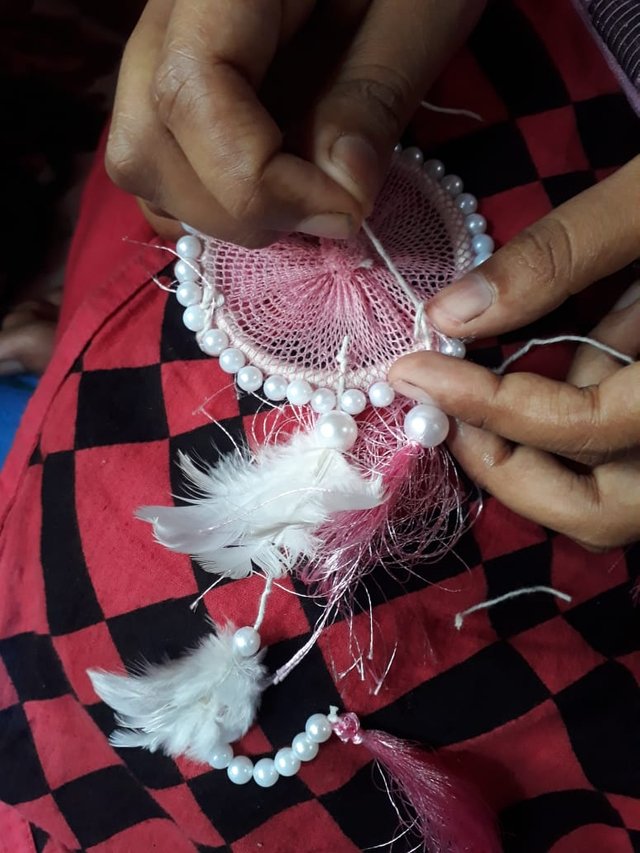
★4th step: -
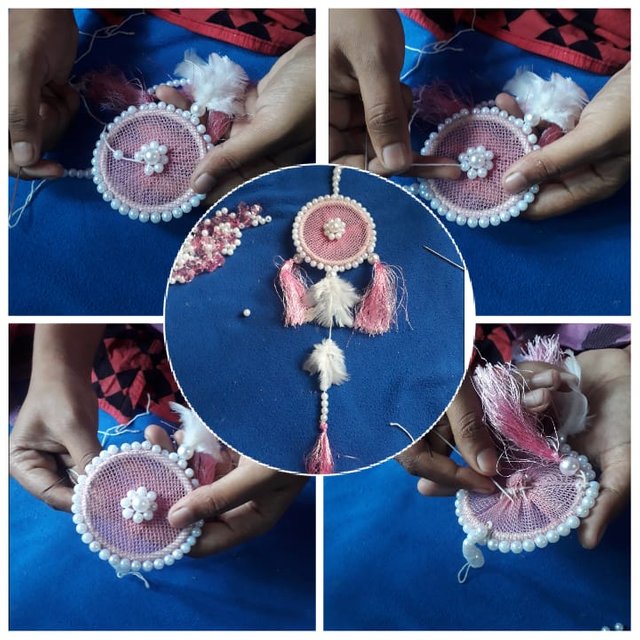
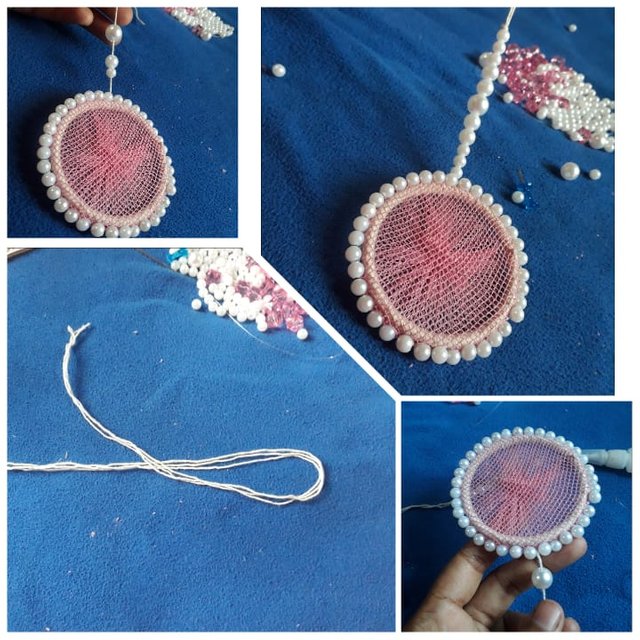
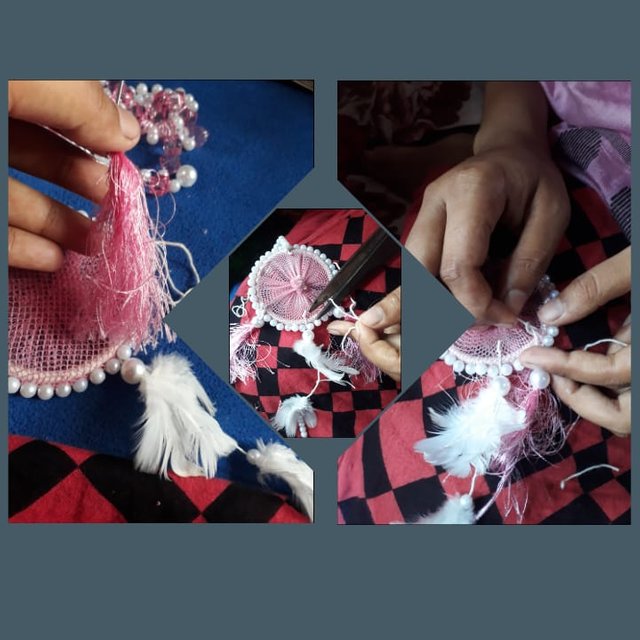
• I tied a thread in that bangle, to hold it up. I put the thread and put the white beads in it. I gave a big bead in the middle and a medium bead and a small bead on both sides. When it is held upwards the whole bangle will be hanging downwards. It will be used as a hanger.
★5th step: -
• After holding the thread like the hanger of that bangle, I tied another thread long along the thread of the hanger at the bottom. I put a big white bead in that thread, I put a white pigeon feather on the bottom of the bead. I glued the feathers to the white bead. Then I put a little white bead a little further down. I put pigeon feathers in it again. Then I put a few small white bead on the bottom. And I put on a thread. I tied it with thread.
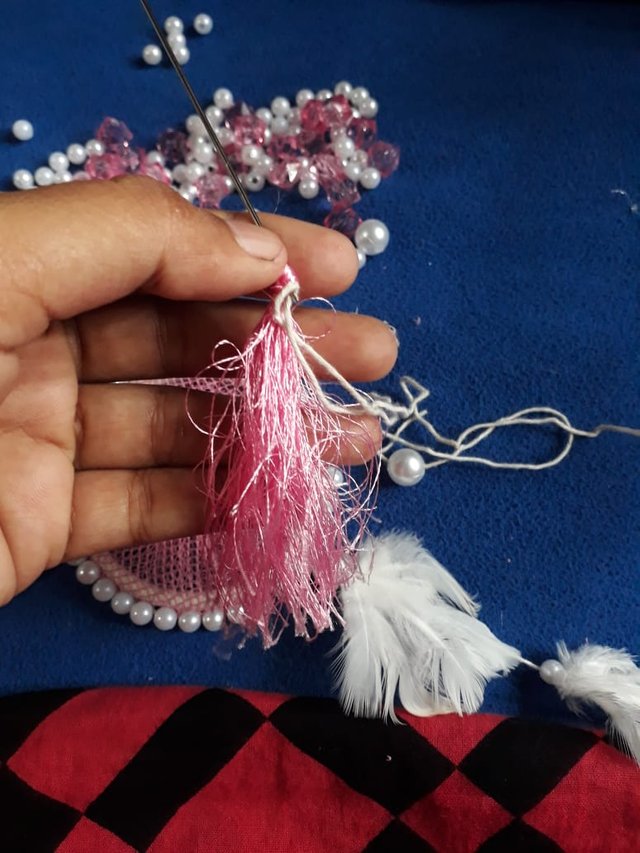
★ 6th step: -
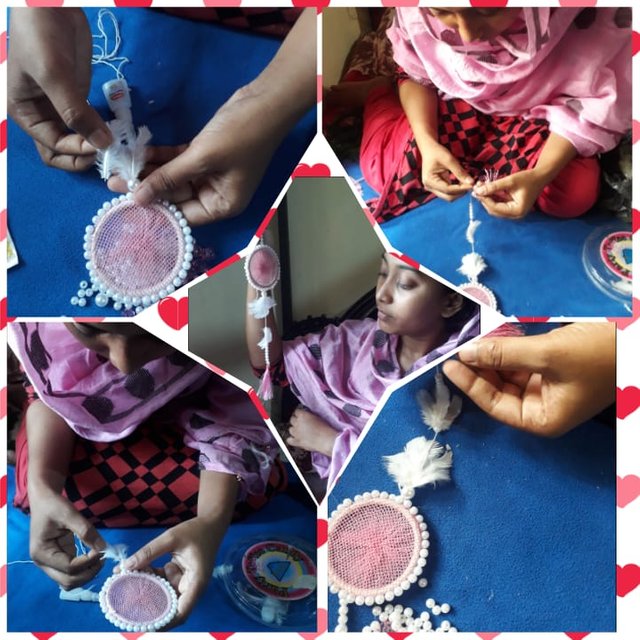
• After completing the work of the middle part, there is work left for the two sides. For this I took small yarn, keeping equal distance from the middle of the bangle on both sides, I took a big bead to give 2 fringes. I stuck the bead in the thread and fringed it downwards. I did the same thing on both sides.
★7th step:-
• Inside the bangle, I took the bead with the needle thread in the middle. I gave the middle bead large size and the side bead small size. I made it in the shape of a flower. After making it, I tied the yarn on the opposite side
Step By step i took pictures as a tutorial hope you also make it if you follow this work let's see:
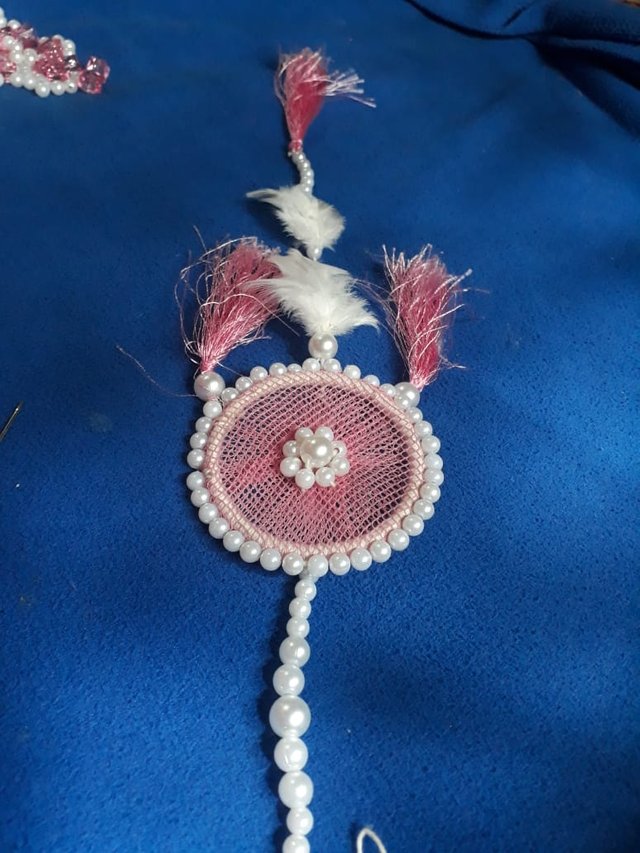

In 7 steps I finished this wall hanging dye. It further enhanced the beauty of my room. I put it on the front wall of my room table. I like my handiwork very much. I put all my craft things in my room and in the drawing room. I put this thing on very easily.
Special thanks those people's who read my post.
💦
💦 BRISTY 💦
💦
Very beautiful work
I liked your beautiful work. You are talented with this 😊