My Quarantine Sourdough Bread Journey
Hey guys! i thought i'd share my recent experience learning how to make sourdough bread from scratch! As time is something we all have a lot more of these days, what better skill to learn at home than making bread? It has been a very educational and fulfilling experience, going from not knowing anything about sourdough bread, except that it tastes great, to spending large parts of the day researching the web and watching Youtube videos about making sourdough, to making my own loaf. Overall this was a deeply satisfying and eye opening process, and i think it's something everybody should try at least once in their life. The end product is not only edible and tasty, but also develops a feeling of self-reliance and independence that I think we can all foster in this time of crisis by connecting to this ancient practice.

First of all, i want to say how much respect i now have for bakers who have managed to keep this ancient practice alive. I learned that in some cultures they hand down their sourdough starter from generation to generation, and that there are thousands of techniques and methods to make sourdough bread, from handling the dough, kneading it without getting your hands sticky, to scoring at the end. Who knows how old this practice actually is, but the start of agriculture to harvest Wheat grains as a staple part of our diet is thought to come from anywhere between 11,000 to 30,000 years ago in ancient Sumer and Mesopotamia of the fertile crescent, modern day Middle-East, later spreading to Europe, Australia and beyond.
(https://en.wikipedia.org/wiki/History_of_bread). I think it's important to choose the right flour to make sourdough bread. I go for the organic ancient grain varieties like Einkorn, Emmer, Spelt or Rye, which are much healthier for you and create a more wholesome, artisanal final product. They contain more protein, minerals and vitamins on average than normal wholewheat or white flour, and their gluten structure is different and more digestible thanks to the wild yeast that neutralise the phytic acid during the fermentation process (https://nourishedkitchen.com/good-questions-einkorn-spelt-heirloom-wheat-ancient-grains/).
Watching experts online stretch and fold the dough with ease was initially quite daunting, but their passion really comes through and just by watching them you get a certain feeling of awe at the flow state these people get into, and desire to try it yourself. What you might find if you try to make sourdough yourself, is that it takes a lot of time. Developing the starter was one of the most time consumer parts of the process, as starting a whole culture of yeast from scratch is something that needs to develop properly before being fit for use. This was totally new to me, but surprisingly easy when it came down to it. It was like having a new pet in the house, having to feed it every day, sometimes twice a day if it was looking hungry (a bit of water at the top).

All you need is 2 ingredients, flour and water. There are actually 3 ingredients if you consider air, but that's just part of the magic of sourdough bread. I learned that the yeast actually forms from the bacteria that are omnipresent in the air, and they feed on the starch in the flour which depletes as they develop, which is why you need to feed it more flour everyday, lest it weakens and gets invaded by bad bacteria like mold or fungus which we don't want. The most important part is to remember to feed it daily, no exceptions. One day i forgot to feed my starter and had to start from scratch because it didn't look normal anymore, sad day! In the beginning i was feeding it too much, which made it grow a lot in volume. This is the video i used to avoid making too many mistakes, and I think it turned out pretty good in the end!
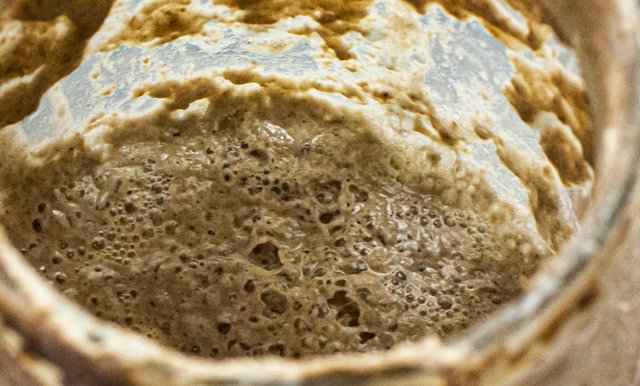
Once you start seeing bubbles on it and it smells a bit sour or funky, you know it's ready (usually 5-8 days later). When it gets a bit full in the jar you need to empty some of it out before feeding it again to make space for the rise in volume as it feeds on the new starch. It turns out, once the starter is mature enough to start using for baking, you don't need to throw away what you empty out; pour it into a waffle maker or fry it in some olive oil for some nice sourdough waffles and pancakes for breakfast! Yum yum. So when do you know it's ready to use? I found it depends on the type of flour you use, as more refined flour (white/all-purpose) gets used up much faster than wholewheat or ancient grain flour, which took more time to develop and grow the yeast. I tried to stick to one type of flour throughout the whole process (rye), but i don't think it matters that much if you mix. You can use the float test to check if it's ready; just fill a jar full of water and scoop in a bit of the starter, if it floats, it'll make bread! Also, this should be 4-5 hours after it's been fed, you want to be around it's peak rise when using it to make bread.
When the starter or levain (french for sourdough starter)is ready, the next step is to "autolyse" the bread. This means mixing the flour you want to use for the actual bread loaf with some water. You have to use specific percentage of hydration here to get a good result, and sourdough is a very wet dough at between 70-80% hydration, which makes it quite hard to handle, but you get used to it over time. I used 1000g of flour (Emmer flour) and 700g of water, so 70% hydration, and 1% salt. After autolysing the bread and letting it rest for 45 minutes to an hour, you can now add in the sourdough starter, around 150 grams (don't forget to leave some in the jar so you can use some for next time!), and start to fold it in to the mix. Once the starter is added, fermentation has begun, and there is still quite some time to go before you can bake the bread. There is still the stretch and fold process (every 30 minutes for around 2-4 hours), and the bulk rise/fermentation process (5-10 hours) which i did by putting it in the fridge over night, that needs to occur before you can shape the dough and put it in the oven. The next morning, you can make the initial shape of the dough by rounding the edges underneath itself and making it into a smooth round shape. This was really hard as the dough can still be a bit sticky, at least it was for me! So i found dipping my hand in water before handling the dough helped a lot to avoid some of that stickiness (some people use flour instead of water to coat their hands with, i found water to be better).
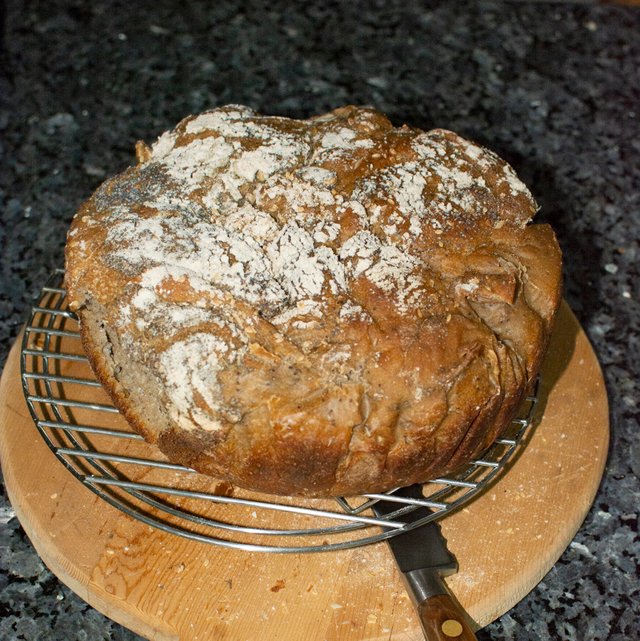
Once the dough has rested a bit, time for the final shaping, fold the corners over themselves and knead the dough with your hands into the desired shape, before rolling it in your choice of toppings (i really like poppy seeds, sesame seeds and sunflower seeds for their nutty flavor,)and putting it in the proofing basket for the final rise for 5-10. So much waiting, i know! But that's the last rest period of the entire process, and when it's done, time to cook. Coat a dutch over (sealable oven-friendly pot) with parchment paper or flour and gently flip the dough from the proofing basket into the pot. Flick some flour onto the dough, and score it with a sharp knife or razor. Pre-heat the oven to max before putting the bread in, 30 minutes will do, take the lid off three quarters through to develop the crust more. Once your happy with the color, take it out, letting it cool for an hour or so before digging in!

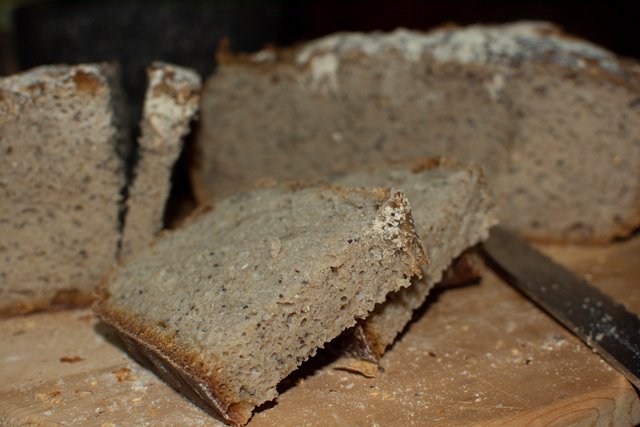
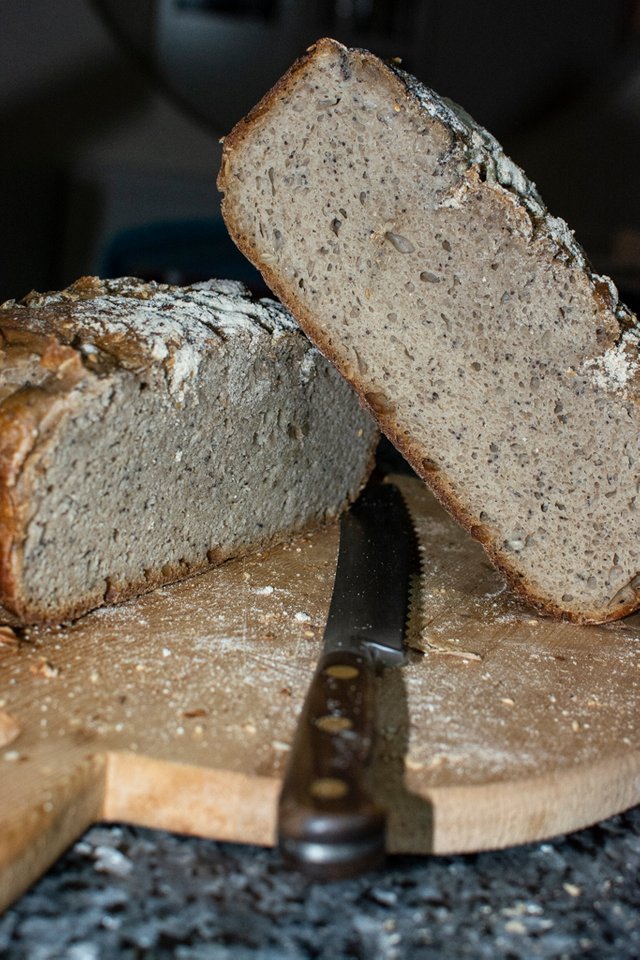
And there you have it! Home made sourdough bread, what a great feeling when the crumb comes out even and all that stretching and folding, not to mention waiting, comes to be all worth it in the end! What a journey it has been, definitely a satisfying and worthwhile, and a useful skill gained! With plenty more to learn and many more loaves of bread to make, i am excited to keep practicing my bread making skills. The feeling of independence you get from making your own bread is really great, not having to go out to the shop and relying on your own skills gives you a sense of control over the entire process, which develops a keen awareness and flow state which can be quite relaxing and rewarding. The finished product is only limited by your imagination and you can always try mixing in new ingredients like walnuts or olives or seeds to make it tastier and more personal! I'm glad i discovered this awesome practice, and i am grateful for bread and it's inventors from way back when that gave us this awesome tasty food that is so versatile, wholesome and satisfying to make.

I hope you guys will be inspired by my experience to try making sourdough bread and that you find it as awesome as i did! It's definitely worth it if you ask me, and is a very rewarding skill to have. Mine definitely didn't come out perfect, and I know i still have a lot to improve on. This was only my second try, and I still need to work on the crust and scoring processes, as well as working with sticky dough, but i'm really happy with the outcome and i find it crazy how not that long ago i had no idea this was possible. Now i can proudly say I made a sourdough bread from scratch. With many more loaves to come, i wish you all good luck in your sourdough journey. It's one thing we can all do to stay healthy and spend some quality time at home. Enjoy!
Stay healthy everyone, stay safe, stay sustainable,
Dizzybee