Commission #19 Illustrated a Bionic Dragon | Digital Art

Dragons, mythological creatures totally extinct, or not so much, since for this new commission with @smanuels I have elaborated a bionic dragon that shows the union of technology with magic. The one designed by the Dianes is a recreation of the legendary dragons of the genesis, with some new differences in their abilities, therefore in their mouths does not flow fire, but electric intensity and at the end of their tail instead of spikes or a mace, they have a plasma cannon.
The real reasons for creating this beautiful creature are unknown to me, but I would be very careful not to upset any of these inventors, I would not like to destroy this legendary dragon or in its absence be its part-time toy.

Tools:
- Wacom Intuos 4
- Photoshop
- Medibang Paint
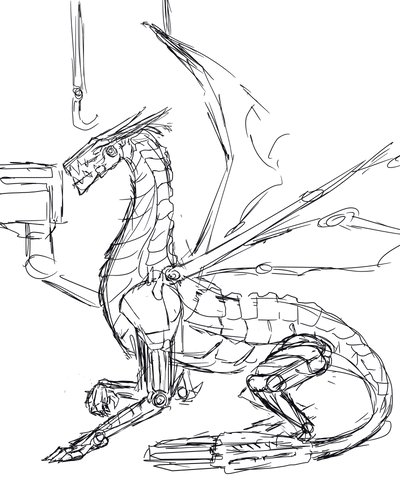
-Step 1:
As usual, I started sketching the idea, the structure of the dragon was not so difficult, since I only had to rely on the dragon I illustrated a few days ago, although I did have to think a little about the mechanical part and the mobility of these pieces.

-Step 2:
With a solid color, I filled all the silhouette of the dragon, this I did with the intention of using the layer or pixel block, this way I could color only inside the silhouette without risk to get out and paint in unwanted areas.

-Step 3:
I started to give shadows to the dragon's armor, it is made of chromed metal, so the key to achieve this look is to use a balanced contrast between shadows and lights.

-Step 4:
This dragon is supposed to be in a robotics workshop, I was a little lazy to make robot parts thrown around, so I created a neat and clean workshop, where everything is in its proper place and you can appreciate the machines that the Dians use to work and create their wonderful and destructive machines.
 |  |
|---|
-Step 5:
Then it was all about mechanics and patience. I focused on defining details, for this I reduced a little the opacity of the brushes, and with a little bit of calm I improved the strokes that I had made previously.
It is important to highlight something, the electricity in your mouth, this effect is easy to do in Photoshop. In a new layer, you make the strokes of your rays/electricity, enhance them and give them the direction and shape you want, then right click on the layer and look for the layer blend or enhance modes, once in them, go to outer glow, check the preview box, and play with the options until you get the desired glow. If you want to learn exactly how to do it, write it down in the comments and I will soon do a tutorial about it.
I'll leave you a little gif with the whole process in it, so you can better appreciate the step by step.

See you in a future post!
Thank You for Supporting My Artwork