SLC21/WK6: Summary on Lessons so far [Hands-on Practical]
 |
|---|
Greetings and welcome friends, I'm really glad to have you here. In this publication, I want to share a summary of everything I've learned throughout the Graphic Designs practical class lessons from the week I started to this point. But then, I would like a very big thank you to an amazing professor, sir @lhorgic, who has taught everyone of us so much about graphic design. With that said, let’s get started on summarizing what I've learned so far.
Unfortunately I didn't start this class from the very first week due to some circumstances, however I never missed a class from week 2 till date, so my summary will start from week 2. Thank you also as you follow me through this journey.
WEEK 2: INTRODUCTION TO LOGO DESIGN |
|---|
Under this lesson, I learned that a logo is a symbol or design that represents a brand or business and that simplicity, memorability, versatility, relevance, and timelessness are the principles of a logo. That is, keeping a logo simple will help people remember it easily, while versatility ensures it looks good in different sizes and formats.
I was also introduced to the do's and don'ts of logo design with some important do's being using appropriate colors and fonts that match the brand's identity and to make sure the logo is scalable. While on the other hand, the don'ts include avoiding overly complicated designs and using too many colors, which can confuse people.
Then we went on to a practical demonstration, where I created a logo for my business by first having a simple idea that reflected my brand. Then, I chose colors and fonts that aligned with my brand's message and refined the design until it was clean and effective as shown below.
 |
|---|
Click here to read about the full lesson and the making of the Logo. And with this hands-on practical experience, I understand better how to apply the principles of logo design effectively.
WEEK 3: LOGO DESIGN - PART 2 |
|---|
Under this week's lesson, we talked about the various types of logos, how to determine a logo design and we carried out hands on practicals on logo designs.
So I learned that there are various types of logos, such Wordmark logos, which use the brand's name as the main design; Lettermark logos, which are initials or abbreviations; Pictorial logos, which are symbols or icons; and combination logos, which mix text with symbols.
On how to determine what logo to design, I learnt that we should consider the brand's identity and target audience. Think about what message the business wanted to convey and which type of logo would best represent that.
Then, we moved on to hands on practical designs where we were asked to make a logo for our personal brand and I opted for designing simple logos, like a watermark or combination logo, where I started by putting my ideas together.
For the watermark, I created a subtle design that included my business name and a small icon. While, for the combination logo, I combined the name with a relevant symbol that reflected my brand's values. This helped me create logos that were both simple and effective for my business.
 |  |
|---|---|
Click here to have a first hand note of the full lesson and the making process of the two logos above and more.
WEEK 4: MOCKUPS IN DESIGN AND APPLICATION |
|---|
Under this week's lesson, we discussed what mock-ups are, their various types, their importance to a business and also carried out hands on practicals.
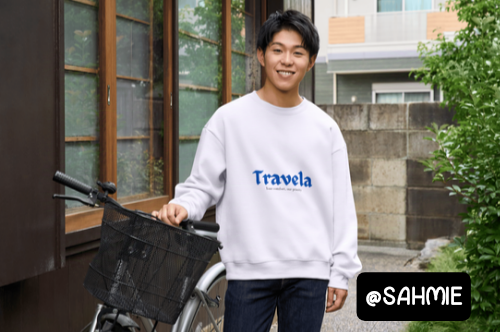
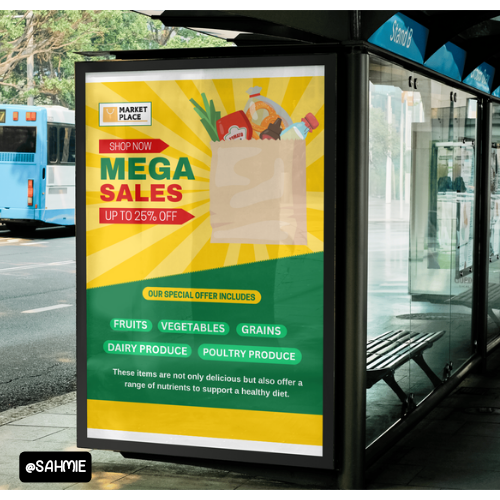
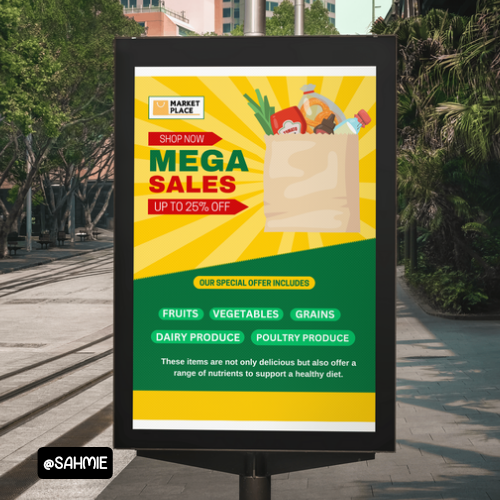
I learnt that mockups are visual representations of how a design will look in the real world and that they help to showcase ideas before the final product is made. I also learnt that there are various types of mockups that include product mockups (they show how a product will look), packaging mockups (this type displays the design on a package) and digital mockups (this represents websites or apps).
I was also taught that, the importance of mockups lies in their ability to help visualize concepts, gather feedback, and make necessary adjustments before production. Helping the business to save time and resources by allowing designers to see how their ideas will work in practice.
After classroom discussion, came hands on practical where we were asked to carry out a mock up design, so to make my own mockup design using Canva, I started by choosing a template that matched my project. Then, I uploaded my design and placed it onto the template, and it gave me a clear view of how my design would look in the real world.
 |
|---|
 |  |
|---|
You can also learn about the lesson and the making process of the mock-up and more by Clicking here!
WEEK 5: HANDS-ON PRACTICAL USING ANY DESIGN APP/SOFTWARE OF YOUR CHOICE. |
|---|
Under this week's lesson, I learned how to practically make a flier design for my brands and businesses by following a few clear steps while also applying the principles of graphic designs.
First, I decided on the purpose of the flier and the message I wanted to communicate. Next, I gathered all the necessary information, like text, images, and my branding elements, such as logos and colors.
Then, I used Canva to create the flier. I started with an empty canvas then adjusted frames to it that suited my style, added my text and images, and adjusted the layout until it looked appealing. I made sure to keep it simple and easy to read, focusing on key information.
 |
|---|
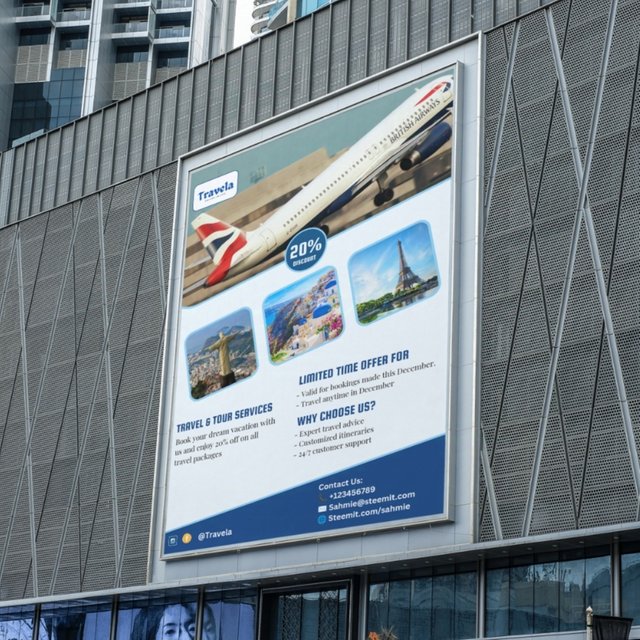
After designing the flier, I created mock-ups to showcase how it would look in real life. This involved placing the flier design into realistic settings, such as a billboard and wall using mock-up templates.
 |
|---|
This helped me visualize the final product and present it effectively to others, making it easier to promote my brand. But then, to learn about all the making process of the flier, the principles used, the procedures for the mock-up application and more, Click here!
CONCLUSION
Each of these lessons has really helped me get a grip of the concepts better. From the hands-on practicals, I've gained a clearer understanding of graphic design techniques and how to apply them. The step-by-step approach made it easier to follow along, and the guidance from the tutor sir @lhorgic provided valuable insights. Overall, these lessons have not only improved my skills but also boosted my confidence in creating designs.
I want to take this opportunity to invite @ninapenda, @bossj23, @ruthjoe and @bonaventure24.
Thank You for your Time
NOTE: Always have a smile on your face, as you are never fully dressed without one.

Hello @sahmie thank you for participating in this week's lesson. We have assessed your entry and we present the result of our assessment below.
Feedback:
Welcome back to class dear student.
Let me start by commending you for a job weldone, the effort put in this work is quite commendable.You have done a nice summary of the lesson and this is commendable.I want to also salute your courage for staying through the lesson and for taking every form of correction in love and patience. You know, I was just thinking that You could still have gone through the lesson one to glean out something from it and then add to your summary.Actually, I didn't limit this week's task to the number of lessons attended. In all you have delivered beautifully I must say and you really got me amazed with your dedication and creativity in this season.
I hope you would maximize all of these lessons and use them to your profiting. Thanks for staying through.
Regards
@lhorgic❤️
Excelente amigo sahmie, tus participaciones han dejado mucho talento, creatividad y conocimiento, cada participación muy buena. Me gustó mucho la última de "Travela" se ve muy profesional.
¡Felicidades y muchos éxitos bien merecidos!
Thank you so much. I really appreciate your kind words. I'm glad you liked my contributions. It means a lot to me to hear that my work is being recognized. Your support motivates me to keep pushing my creativity and talent. Thanks again.