WEEK 01 🔥:- TEACHINGS AND VIDEO TUTORIAL ON HOW I MADE MY MONOGRAMING/EMBROIDERY DESIGN 😃
🔥 WELCOME TO MY BLOG 🔥 |
|---|
Guess What 😃.... This is something huge that will benefit each and everyone that will actually be going through this weekly content which I have drafted to be writing on a weekly basis.. Guess what, as I said earlier it is something huge and educating, it will definitely be all about a weekly teachings including a video tutorial on how to perfect on this particular Field which am into Known as Monograming Artwork, I surely believe that it will definitely IMPACT knowledge and Sincerely speaking it's quiet a Global skill which you can do I'm different countries of the world and indeed it pays awesomely..
Also feel free to ask questions and with time will be definitely be giving out prize's to the best leaner of the week all this will be on the comment section 😃. Below will definitely be in details and with full description on how I made a particular Design using my monograming machine.
RICHARD PREMIUM MONOGRAMING CONCEPT |
|---|

Join me on this Teaching 😃😃. And a special Video tutorial will always be attached on how to craft any Kind of Design using the monograming machine, Everything you need to know about this particular Field will definitely be giving out in details and also in an understanding way. It going to be a weekly content, and today's own will definitely be special. Am also happy to inform each and everyone that I definitely have a running company known as RICHARD PREMIUM MONOGRAMING CONCEPT Where we craft all kind of design and logos using the monograming machine, We also train people on this field and also give out the best to our constumers 😃😃😃😃
A SPECIAL TEACHINGS IN HOW TO CREATE ANY DESIGN USING THE MONOGRAMING MACHINE |
|---|

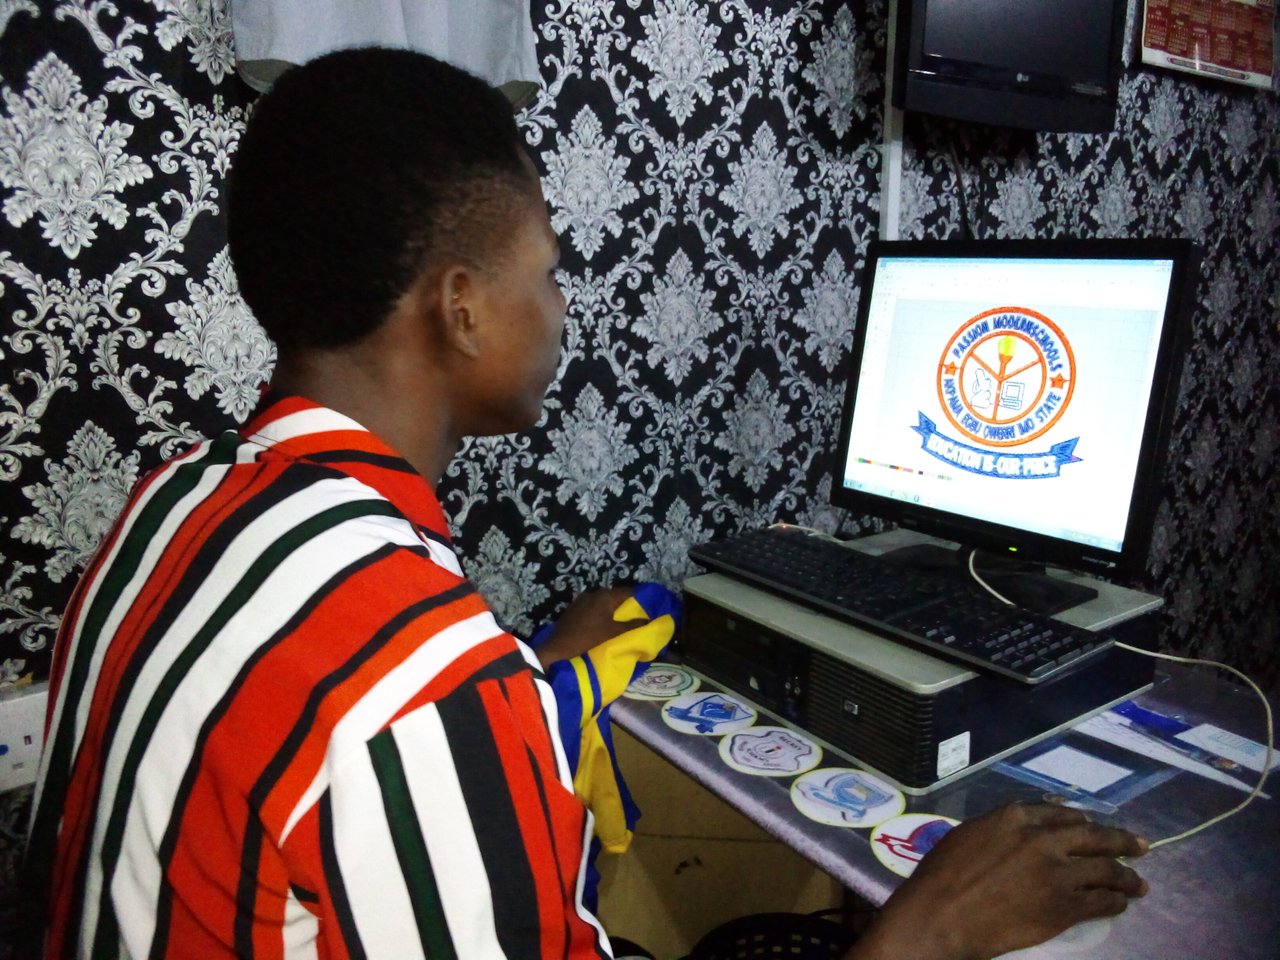
Today I made a unique Design which is a company logo, Well known in Nigeria and so famous. Indeed the logo was really amazing and fantabulous As you all can definitely see it on the above picture. Before joining this particular Field you must definitely be willing to.learn and understand things easily in other to make the work more less for your mentor.

There are certain Steps that one much follow properly when creating designs using a monograming machine and those steps are what I also considered that led me to a perfect and amazing Design. Those steps Include the following.
- STEP ONE
The First Step To consider is what we call the DIGITIZING Aspect which means using your computer system or laptop to first create the Design using an application known as WILCOM Before the machine will the. Place then design.
 |  |
|---|

At this point you Either download the Design of your choice using your phone or you snap and or also take a picture of it also using your phone. After you are done getting the Design you then summon your computer system or laptop.. after you get your computer system ready you then transfer the already snapped picture or design to your computer system through the BLUETOOTH
- STEP TWO
At this Stage, and After you are done transferring the Design to the computers system, Through BLUETOOTH. You then Finally Open Your Application which is normally used in creating the Design, called the WILCOM is an app and as I said earlier there is no other Application that is actually used in creating design before the placement by the machine expect this application.
 | |
|---|

As you open, this Application you then START digitizing it using some special features in the app, also in our week 02 lesson I will be giving a good detailed explanation on how you can digitized a design using WILCOM Application. So after you are done digitizing it you then transfer to the FLASH DESK and through the FLASH DESK You Finally transfer to the.maim monograming machine. At this point the machine is now good to go and READY to place the Design. 🔥🔥
- STEP THREE

 |  |
|---|---|
 | ASSEMBLE YOUR WORKING MATERIAL 🔥🔥 |
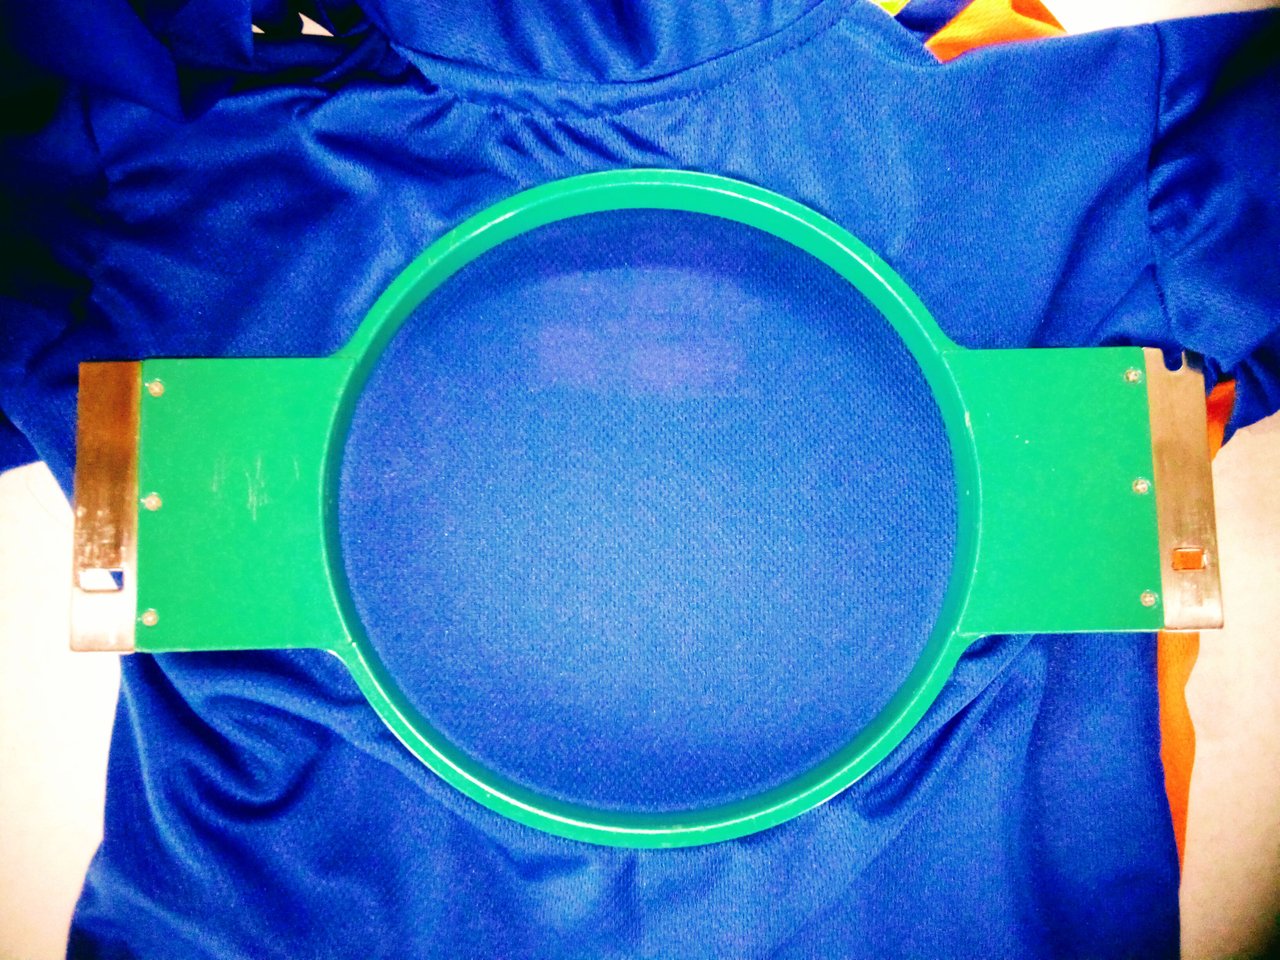
So after adding your threads to the Needles you then choose the frame that can contain the size of your design, this frame is really an important factor and equipment and without it you can't place any clothing material to the machine for it to place the Design. As you brought out your frame you also bring out the clothing material that is actually needed for the placement of the design.
- STEP FOUR
 |  |
|---|
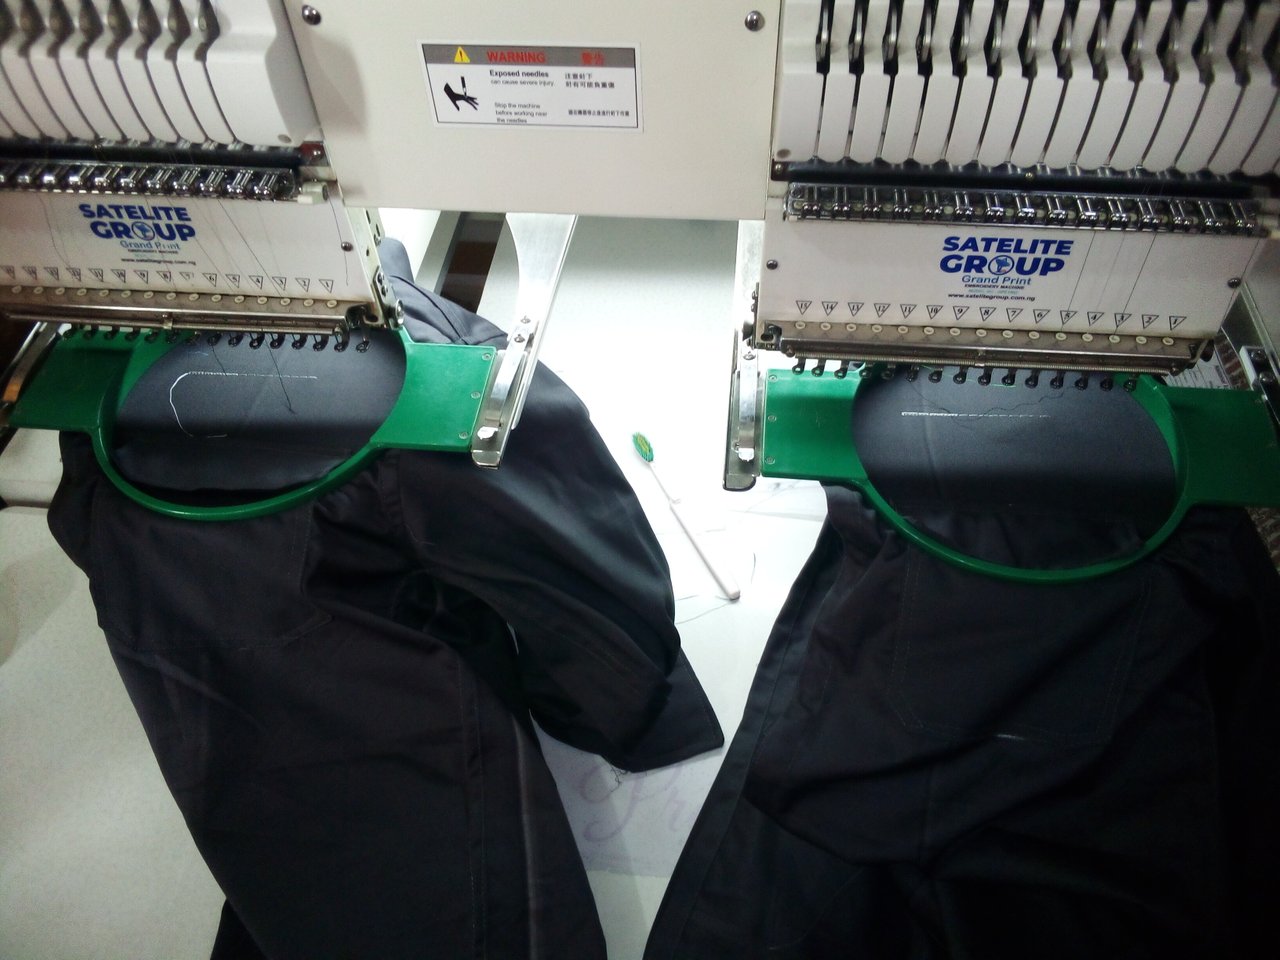
At this point, One actually needs to be careful. At this point you then add the clothing material to the plastic frame which is called horking or framing. This section is where you add you plastic frame to the exact position which you really want the design to be placed. This point is so important that one need to know it perfectly any makes in the section will cause a massive mistake.
- STEP FIVE
After the placement of the frame to the exact position the Design would actually. You then add it to the monograming machine, and Trace it to the exact middle point using the monograming machine. The tracing of the design with the frame on it is so important because it will give a good direction leading how the Design will be place perfectly. How After tracing you work you the consider adding what we call COLOUR FUNCTION
 |  |
|---|

The colour function means adding the exact color of the design which is the thread and the exact needle number it is. For Example if you add the red thread on needle 1 and green at Needle, that's also how you add them using the monograming machine, and this will actually make the robotic.machine understand which needle and thread to use for the Design.
- STEP SIX
After adding the colour function. You then finally start the machine which will actually do all the work by itself, it will draw exactly the Design by itself and also select the colour by itself. It really a wonder, the machine don't need any help, all you need to do it to keep investigating to avoid any error or occurance of any mistake.
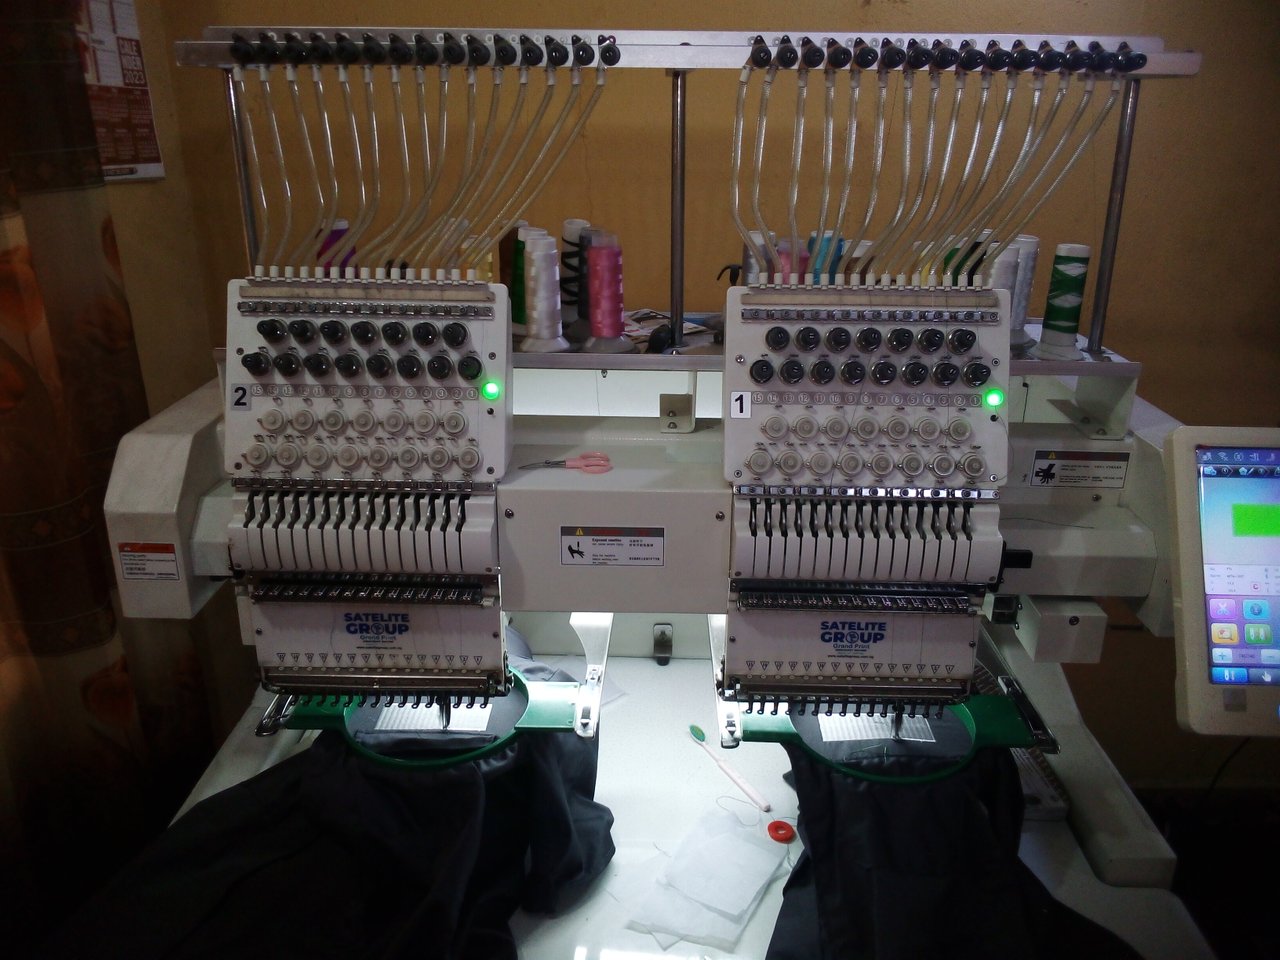
for the above Design it took about 7 minutes, and it run smoothly without no mistake. It was indeed a perfect Design created by the monograming machine itself.

🔥 A VIDEO TUTORIAL 🔥 |
|---|
😃 The above video Is a good tutorial and i belive it will definitely go a long way to help you all understand the lesson fully. 😃. I believe you all enjoyed it.
Hope that today's lesson was so educating and I believe you all learn a lot from it. See you at the comment section were I will also be giving prize's to the best leaner I will also be available to I good answer to questions.
Upvoted. Thank You for sending some of your rewards to @null. It will make Steem stronger.
Thank you for publishing an article in the Steem4nigeria community today. We have assessed your entry and we present the result of our assessment below.
MODs Comment/Recommendation:
Remember to always share your post on Twitter using these 3 main tags #steem #steemit $steem
Hi, Endeavor to join the #Nigeria-trail for more robust support in the community. Click the link Nigeria-trail
Guide to join
😊 Congratulations on completing the tutorial! 🎉
Wow, you've taken us through a detailed step-by-step guide on how to create a design using a monograming machine. From preparing the plastic frame to adding color functions and finally starting the machine, it's amazing to see the process come together in just 7 minutes without any mistakes! 🤩
I'm impressed by your enthusiasm and dedication to sharing this knowledge with us. Your tutorial has made me appreciate the complexity and intricacies involved in creating custom designs using a monograming machine.
👏 Great Job!
If you're ready for more, please don't hesitate to share additional tutorials or insights on related topics. I'm here to learn from your expertise! 🤓
Before I go, I'd like to remind everyone that our witness @xpilar.witness is working tirelessly to improve and expand the Steem ecosystem. If you value their contributions, please consider voting for them by visiting https://steemitwallet.com/~witnesses. Every vote counts! 💪
Happy Learning and Creating! 🎨💻
Wow, 🤭🤭. Thanks for your encouragement and Support. Hope you learnt a lot see you on week02 TUTORIAL that will.also.be massive.
Thanks you so much I really appreciate 😀😀😀