HOW TO BUILD A 5VOLT CHARGER
Today I will be sharing with you guys based on my field, Electrical and Electronic Engineering, so relax and enjoy your reading.
Let's see how chargers have been built, so instead of you going to buy charger you can decide to build your own charger.
So let's take it step by step
Step 1: Before you start your 5v charger, you should consider some material you need to buy in the market which are:
- A single 12V transformer
- 4 pairs of 1N4007 diode
- A 25V, 100uf capacitor
- A 1k resistor
- A LED (lightting emitter diode)
- A Voltage regulator
- A Vero broad
- A Soldering iron
- A Soldering led
- A USB female pin
- Multimeter
Step 2: We will be looking on the functions of the above.
The function of the 12v transformer is to convert AC (alternating current) to DC (direct current ) and it has input and output sides. The Input current is the current that will come directly to the AC current from your socket. While output is the current that will go to the DC ad then to the circuit. It also stepdown the AC current.
Diode allow the flow of current in one direction, and it has negative and positive sides.
Capacitor store Electrical energy, and it has negative and positive legs. Now the longer leg of the capacitor is the positive while the Shorter side is the negative.
This device opposes the flow of electric current and It doesn't have polarity.
The function of these is to show the light, whether the circuit is functioning or not after building your circuit.
The function of these is to regulate the current, and it also has three legs. When placing your voltage regulator in the vero board you place it in a way that you can see the written number of the device.
This is the board for the circuit, and there are two types of broad in terms of building circuit:
- Brid broad
- Vero broad
Brid broad is used for practice, while Vero broad is a broad that you can solder for permanent use. (Although we are using vero broad on this toturial).
The function of these is to solder two metallic using soldering led.
Soldering led is a metallic iron that is use for soldering.
This is the terminal you insert your charger cable, and it has four pin (two pin for positive and the other two pin for negative) in side of the terminal)
These device play a vital role in your working process, as it's function is to check wether
the circuit is working or not when building or after building your circuit. It has two wire red(positive) and black(negative). Now if you're using these you set the Multimeter on continuing or (x10) once you take a read it will display in the screen wether your connection is okay or not.
How can I take my reading?
In taking your reading, you place the negative of the Multimeter in the line your intend to check and positive in same line your are checking. You must have two lines which are positive and negative, provided you have set your multimeter on continuing or x10.

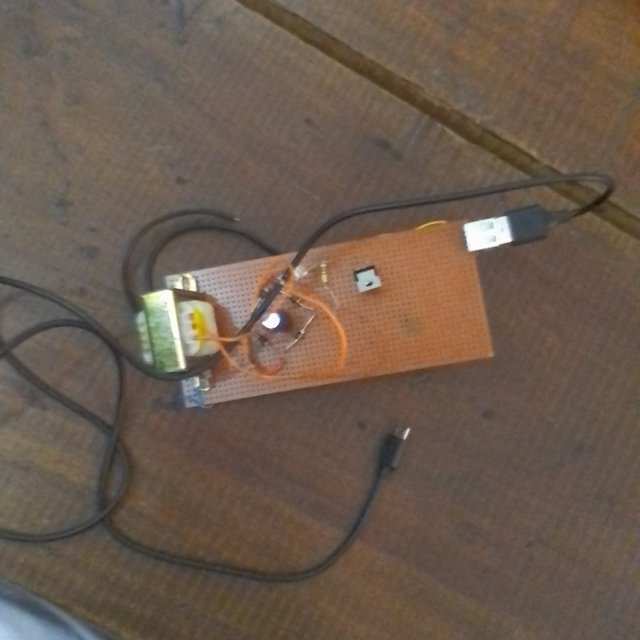
In the diagram above, the output of the transformer is connected to the diode and the diode is connected in rectangle form whose connection is neutral, and positive is connected to the capacitor, resistor and equally to the LED on Same Line to the input voltage regulator and the output of the regulator to the USB Female Pin (IN POSITIVE LINE).
Note: That the resistor doesn't have polarity simply means it doesn't have negative and positive.
The second output of the transformer is connected to the capacitor and to the LED and the ground of the voltage regulator will be connected in same line and to the USB Female Pin (IN NEGATIVE LINE)...
It is 5v charger because if you are true in building your circuit and you take your read, you would see 5volt in the screen of your multimeter.
In conclusion, I have built this circuit and it is been working, and I would love my steemit friends to equally try this at home at their own convenient time...
Thank you for contributing to #LearnWithSteem theme. This post has been upvoted by @cryptogecko using @steemcurator09 account. We encourage you to keep publishing quality and original content in the Steemit ecosystem to earn support for your content.
Regards,
Team #Sevengers
Thanks sharing this valuable lesson with us here, I believe many will benefit from your lesson and try it out themselves. Continue to be active we appreciate your effort 💕