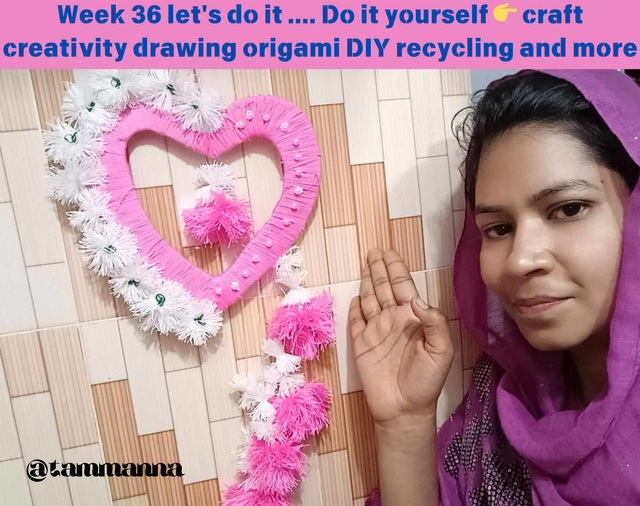
Week 36 let's do it .... Do it yourself 👉 craft creativity drawing origami DIY recycling and more
"Bismillahir Rahmanir Raheem"
This is @tammanna from #Bangladesh.
created by canva
How are you all my dear friends hope everyone is well and I am also having a good day alhamdulillah by the grace of Allah enjoying today I am here to participate in a great contest so first of all I am would like to thank @mesola who presented for us in such a beautiful contest and today I am here to express my creativity as per the theme of the contest here I am making a wonderful wallmate with yarn. will help a lot to enhance the beauty of the house and let's start the new design without delay.
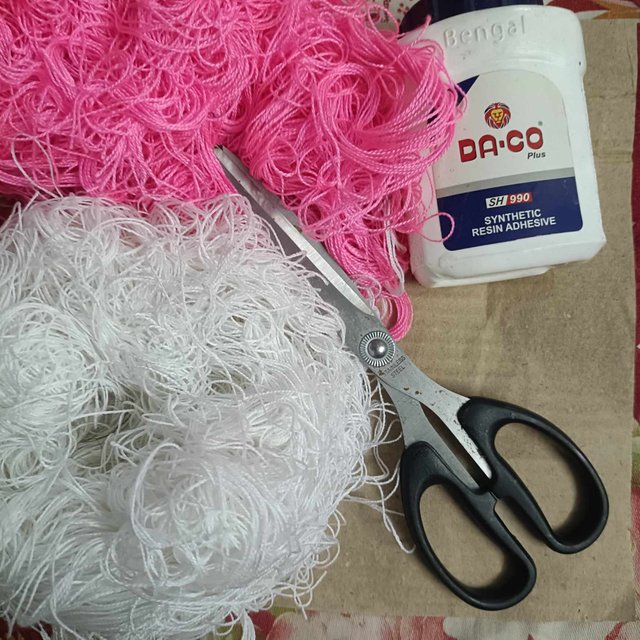
Here are the materials I will need to prepare my origami |
|---|
🎀Cardboard paper
🎀glue
🎀puthi
🎀 scisser and
🎀 lailon yarn different colors
I will show you how to make beautiful origami with the few materials mentioned above, but now let's see the step-by-step process of its preparation. |
|---|
🌸 STEP 1🌸 |
|---|
First I collected all the materials that I would need to make the wallmate
🌸 STEP 2🌸 |
|---|
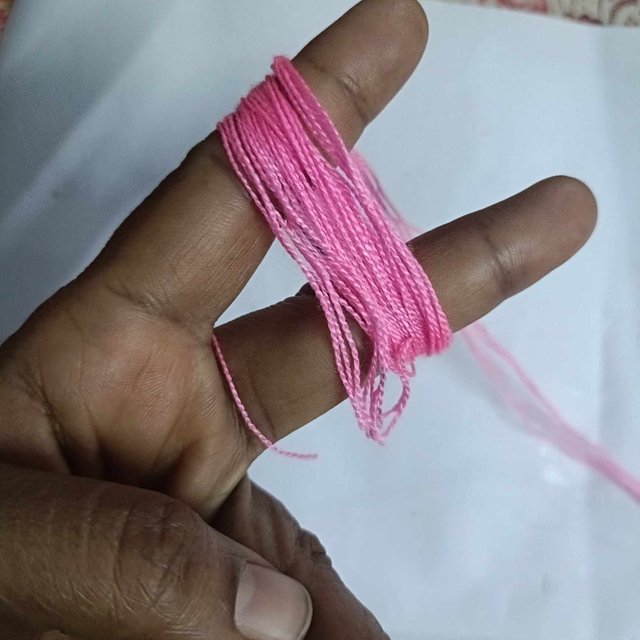
then I took the pink colour lailon yarn and twisted it around the two fingers
🌸 STEP 3🌸 |
|---|
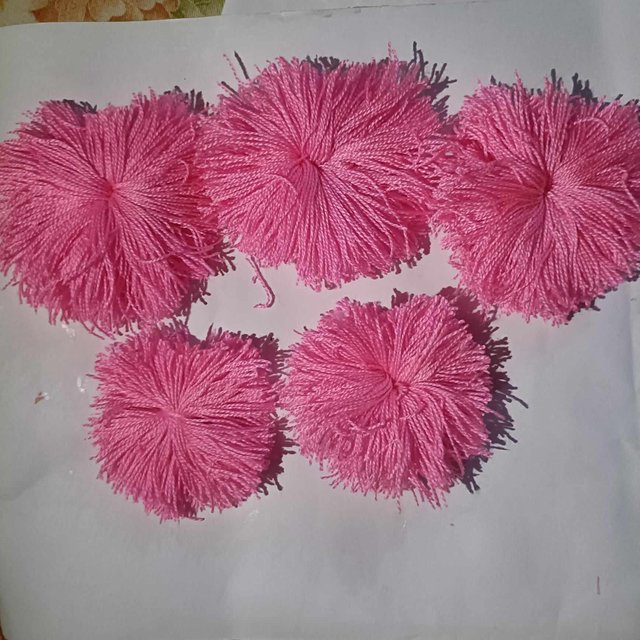
then I cut the twisted yarns to size and made them like flowers I took some small flowers and some big flowers here
🌸 STEP 4🌸 |
|---|
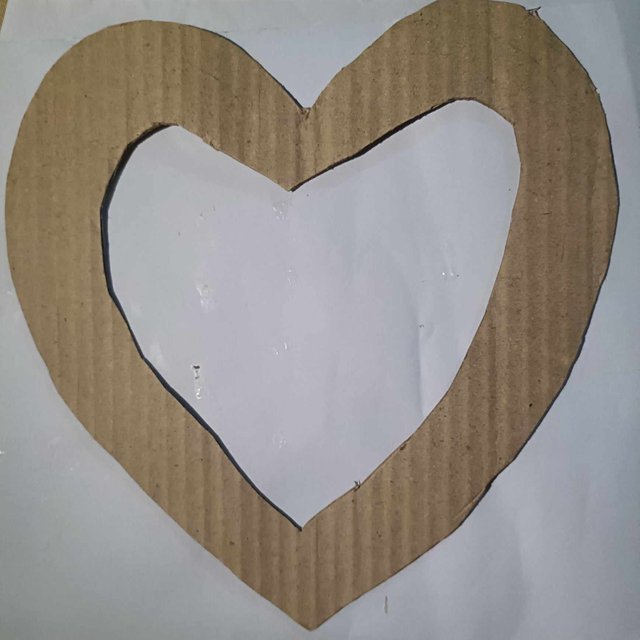
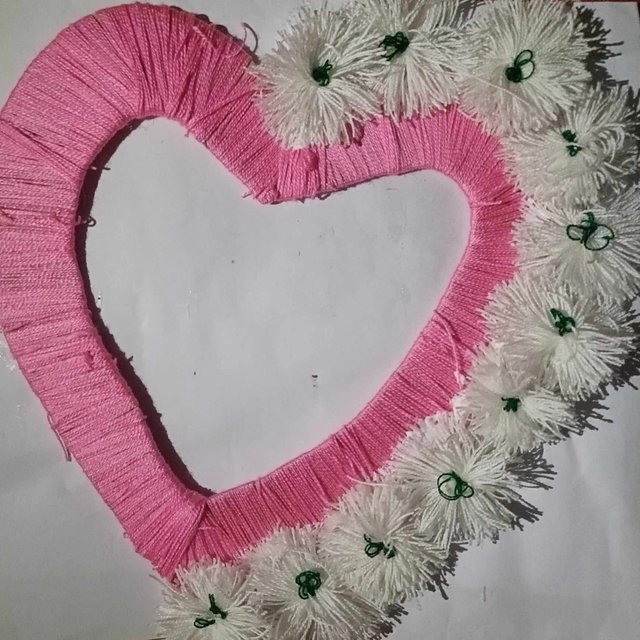
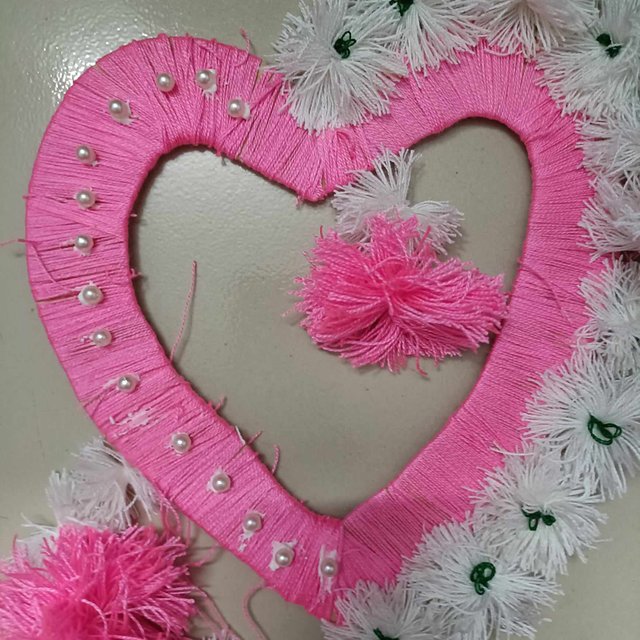
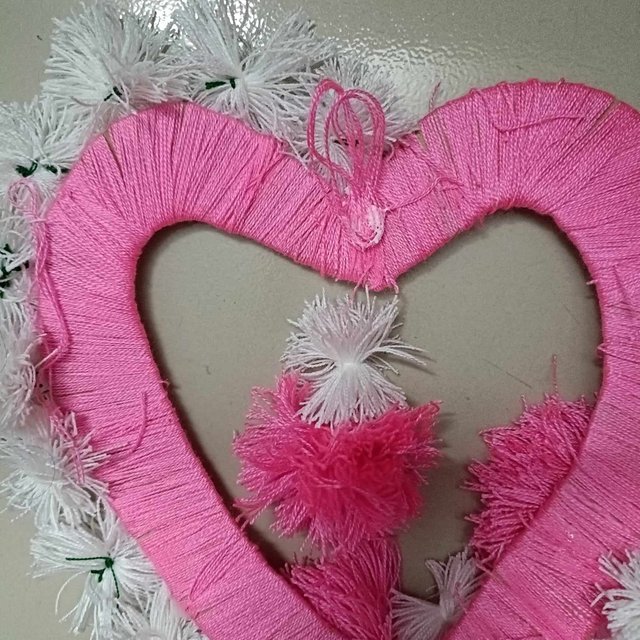
Then I took a cardboard paper and cut out the love size well as you can see in the picture
🌸 STEP 5🌸 |
|---|
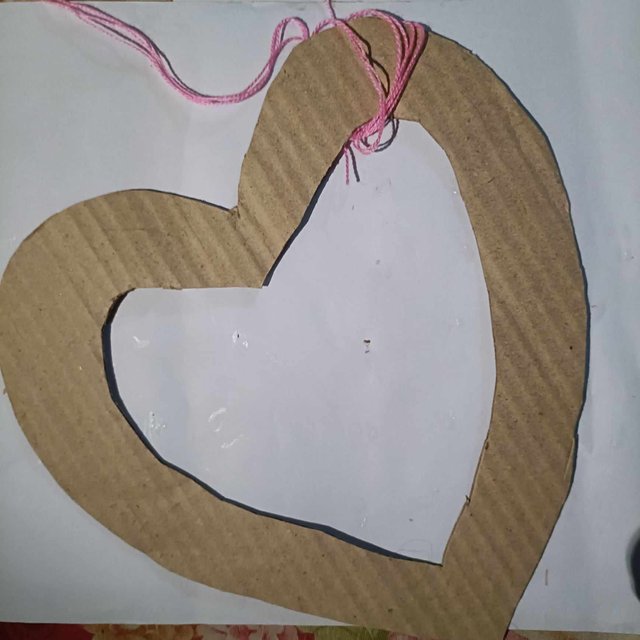
then again I prepared to twist the love size cardboard with pink yarn
🌸 STEP 6🌸 |
|---|
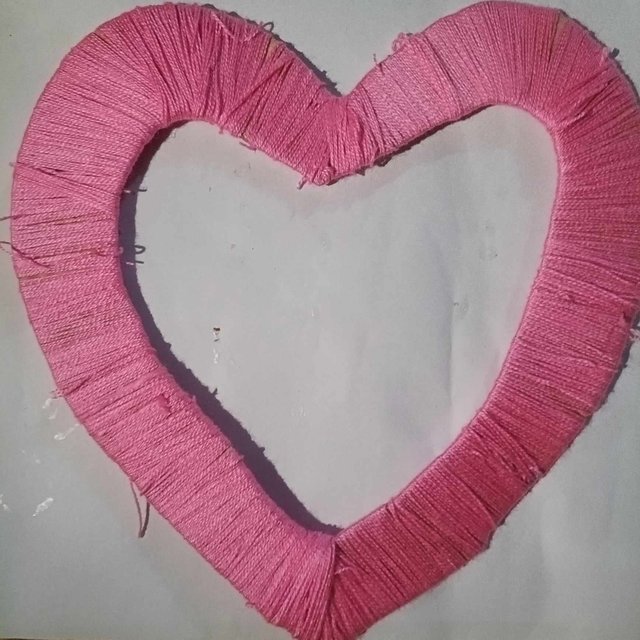
then I wrapped the yarn well around the whole cardboard love part.
🌸 STEP 7🌸 |
|---|
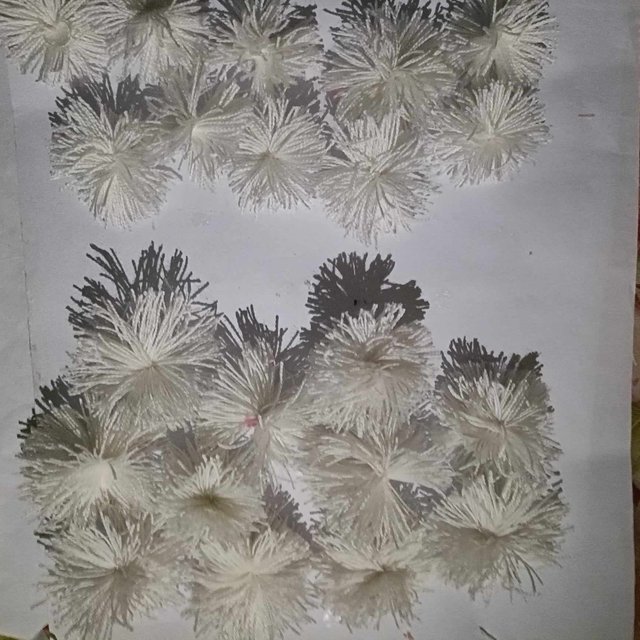
After that, I made several white flowers in the same way. Here I made small and big ones which I separated
🌸 STEP 8🌸 |
|---|
and then I stitched the white flowers in a little circle with green yarn in between the white flowers.

🌸 STEP 9🌸 |
|---|
then, white flower On the right side, one by one, I attached them nicely with glue
🌸 STEP 10🌸 |
|---|
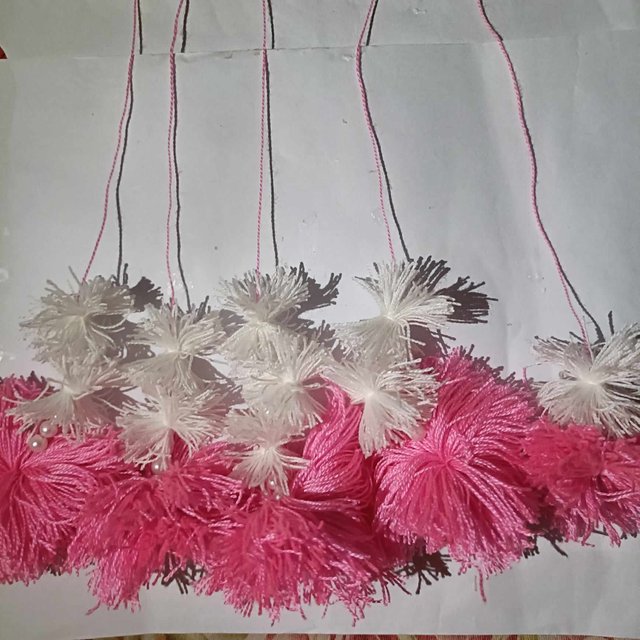
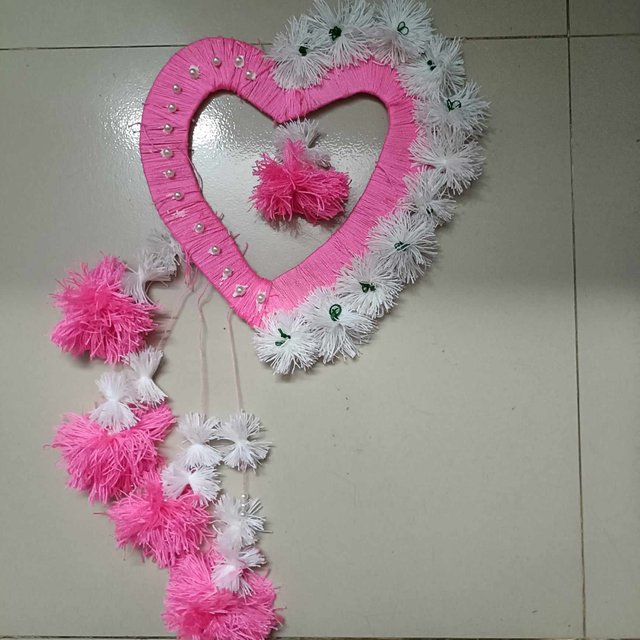
Then I took five pink yarns and there I made with first pink flower and then two white flowers made tersel
🌸 STEP 11🌸 |
|---|
then I set the tersel from small to big by glueing them one by one on the other side of the small to big shape and in the middle an I attached it with small tersel glue
🌸 STEP 12🌸 |
|---|
and then I put it on some white puithi coloured
🌸 STEP 13🌸 |
|---|
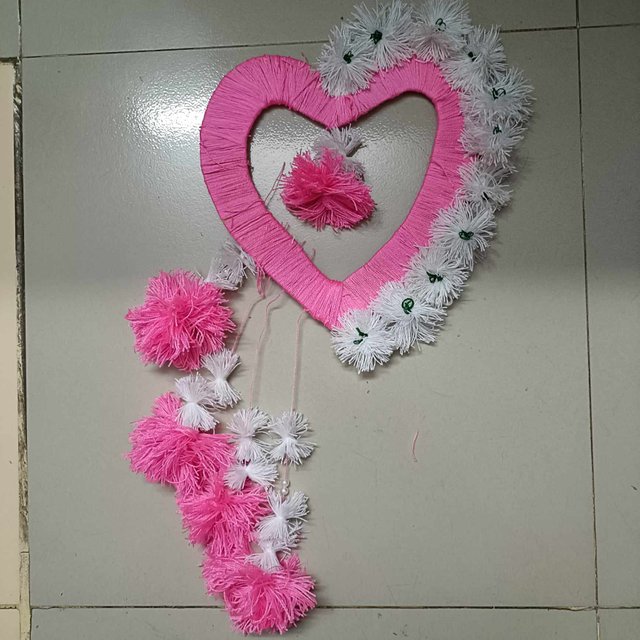
then I took the pink colour yarn from the back side and glued it to the size of the huk
🌸 STEP 14🌸 |
|---|
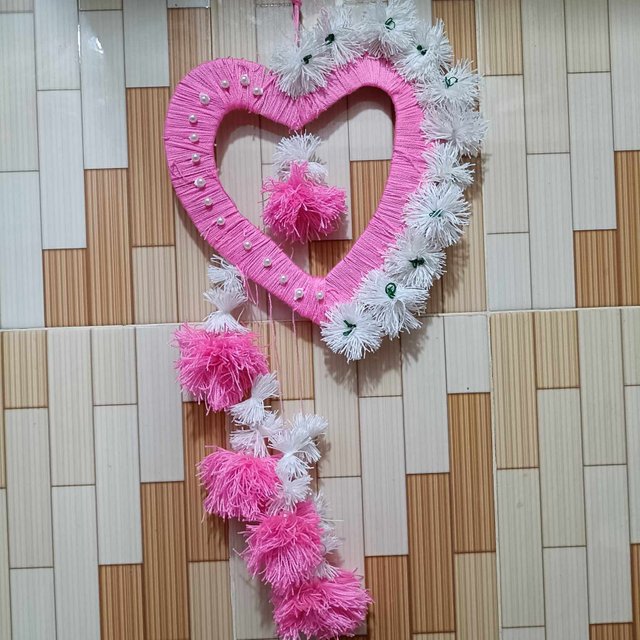
then I took half an hour to dry my origami
🌸 STEP 15🌸 |
|---|
then I made my wallmate and I hung my wallmat on the wall of my room
🌸 STEP 16🌸 |
|---|
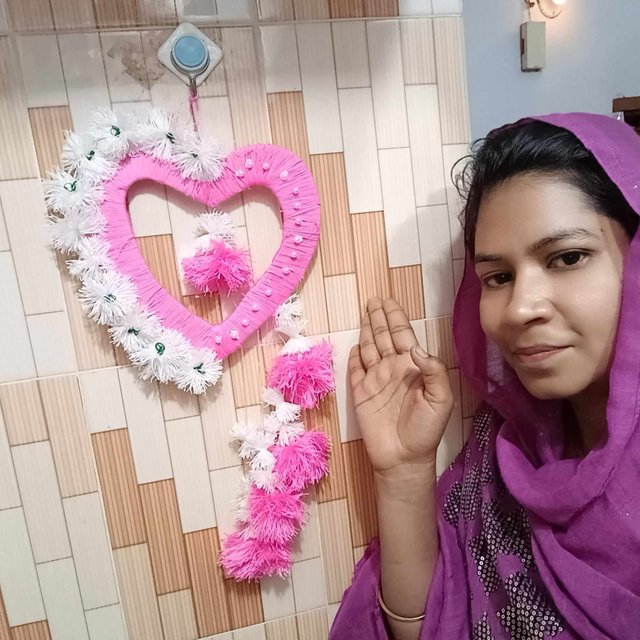
and then I took a selfie with it.
It's a bit time-consuming to make this origami but I like it after making it in origami hope my friends will also enjoy and like to decorate their houses with new origami like this I make everyday hope to see you in some new posts till then everyone May God bless you.
i invite some of my friends
@us-andrew
@kidi40 and
@impersonal
| Device | oppo 11 pro |
|---|---|
| Photographer | @tammanna |
Regards

twetter
https://x.com/Alamin007196964/status/1834655821843837039
You made a beautiful home decoration here. Please keep it up.
OMG, this is so beautiful and the final look is outstanding. Your craft design really catches my eye and it is lovely. Success to you and keep it up 👍