#2 Saturday Daily Dynamics/Photography – We can all take that perfect photo! (COMPOSITION)

As promised… I am back! This time with my post on that key factor for taking that perfect photo, COMPOSITION. Before we start let’s go back to last week’s lesson. Photo B was the photo chosen as the most perfect photo.
|
|
|
And now kiddies is it time for our lesson.
There is actually a very easy way to describe composition. It is the way in which “things” are put together. I say “things” as we get composition in writing, art, chemistry, films and the list goes on.
In photography we get two different divisions of composition;
We are not experts so we will only look at some of the basic major rules. If you can get some of these rules of composition right you will for sure get that well deserve “A”.
These are the major rules and tips which must be in a photo.
- 3D If you want your photo to look real you must always try to give it that 3D look.
- There must always be a subject, foreground and background in your photo. Subject: This is the main item you want to focus on
- Your photo must be taken against a neutral background. This means that it is a background which are not very busy and don’t have a lot of colour. This will give your photo the best 3D image.
- Rule of 3rds It might sound complicated but this is actually a rule that you can learn and adopt very quickly.
- Your focal point, the subject on which you want to focus, is in your “golden area”
- Where these lines intersect is where it will be best to place you subject
- The subject cannot be straight in the middle block
- Always place your subject in at least 2 of these blocks
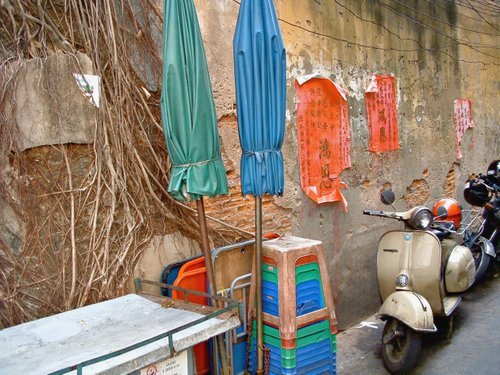
- Use frames When you use a frame in your photo the eye of the person who looks at the photo will be drawn straight to your subject. Frames also gives your photo depth.
- Look for items that forms a frame for your photo. This can be bridges, buildings, trees and even human bodies
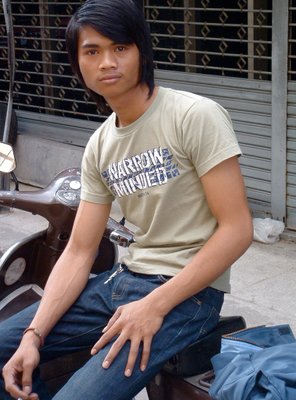
- Eyes well eliminated When you are photographing people, birds or animals the eyes must be well eliminated.
- When you take photos of people the best is to use a flash
- When you take photos of birds and animals the sun must be direct. In other words, it must shine in their eyes.
- Rule of amputation So many people "chop off" body parts of humans and animals when they take photos. By doing this they spoil their photo completely.
- Head – The eyes and two other organs (e.g. mouth and nose) must be visible. If the eyes are not visible there have to be one other organ visible (e.g. the ear)
- Neck – Hang man amputation You cannot cut a photo by the neck accept if you cut the head or pieces thereof also off
- Torso (body) – Never cut a photo through the breast. You always cut above or below. Never through the genital parts, above or below
- Arms – You can only cut a photo through the top arms and never through the lower arm (below elbow) or wrists.
- Legs – When you cut the legs you cut below the knees and above the ankles
- Hands/Feet – You can cut some of the fingers but you can never cut all of them. You must always leave something. This is the same for toes and feet
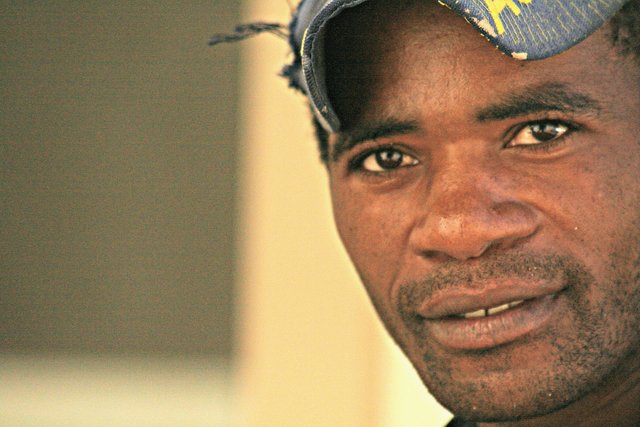
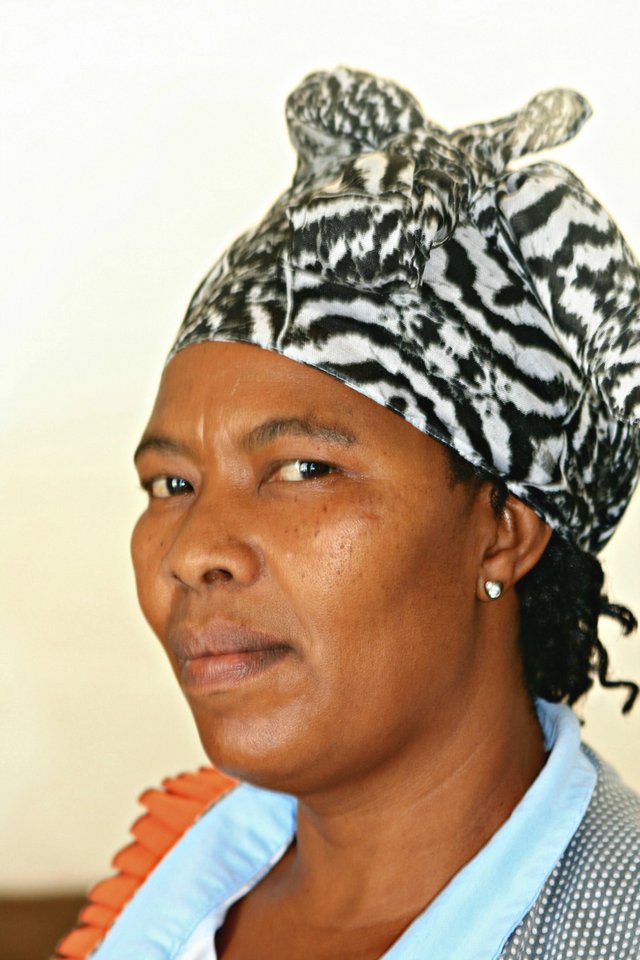
- Body language and body composition Of importance is that you must always remember that there are different rules for male and female. When you take a photo of your dad you must always keep the “muscular or strong” image of a man and when you take a photo of your mom you must bring out her “soft” side.
- Head - Female: You never take a photo straight on for a female. The head must always be slightly tilted to the side or taken from one side
- Torso (body) - Female: You take the angle along the waist line and never at the bottom (stay away from that bum )
- Arms & legs - Never take photos where the arms are folded
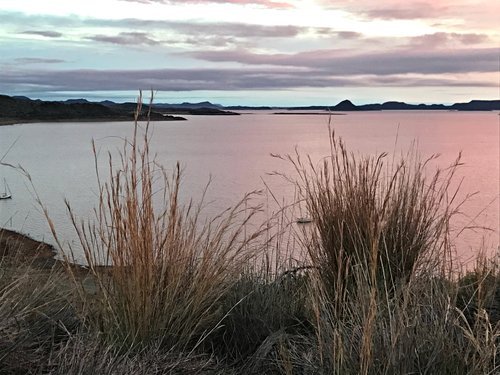
- Line and patterns It is so important to use lines and patterns in your photos. These are the things that tells us the story when we look at a photo.
- A line of trees can lead the eye to the subject
- Patterns on the other hand can create a fantastic photo. For example the pattern on a zebra
Foreground: This is the first thing that the eye will see
Background: This is normally at the back of your subject

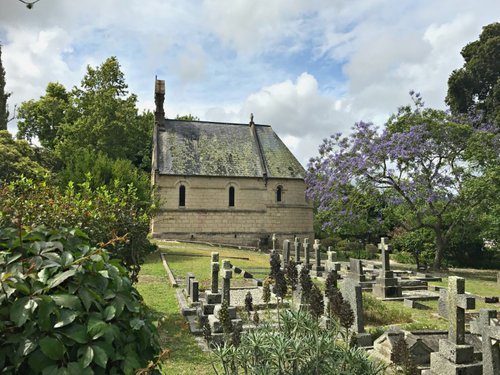
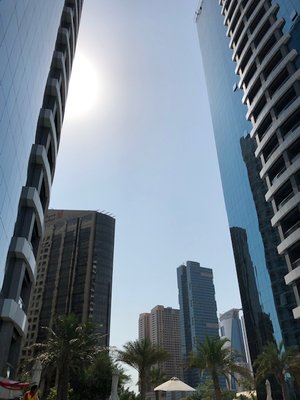
Subject:Is the temple
Foreground: Is the jeep
Background: Is the blue sky
To get this rule right you must divide your photo in 9 equal blocks.
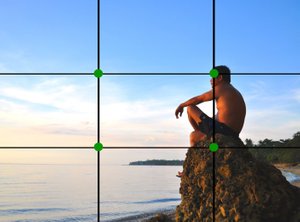
Image Source

|

|

Here are some basic rules:
- Male: You take the photo straight on
- No open fingers for females and the thumb can be slightly open
- Open hand for men
- No fists for females but it will be fine for men
- Females never cross legs
|
|
Boys and girls, there are more rules but these, as I said, are some basic ones. If you don't understand some of them ask daddy or mommy to help you. And... if you master them you will have the perfect photos on Steemit!
Most importantly thing, keep practicing!
#Club 100
10% to Steemkidss
Que buen post tomare las recomendaciones para tomar buenas fotografías, éxito
Awh!Thank you!
If you can from it and it enables you to take a better photo I’m happy 🌼
Thank you! I have learned from these tips and hope to incorporate them on my next photos. Do you have tips for how to take photos on your mobile phone.
I still like photo B the most
I do :-) Let's see what I can can come up with next Saturday.
Thank you for reading my post!
Well-written post as ever you shared nice tips for kids and parents also to improve better photography.
Thanks you ❤️❤️
Thank you for your kindness 🌼
Nice photograph.. I'd love to take photos of places here I'm my country
Please do and share in a post on the Steem4Nigeria community 😊