Tutorial: Learn How to Work With Icons Using Your Computer
![]()
Hello kids, greetings to you and how are you doing? I trust you are doing very well. It has been a while since I shared with you a tutorial lesson as we used to do before. However, I am deeply sorry for my inability to share some useful tutorial lessons with you for some weeks now. Indeed, today I have shared with you a simple tutorial lesson about how you can work with an icon.
What exactly is an icon?
An icon is a brief graphic representation of a file or program. An icon's associated file or program will open when we double-click it. For instance, clicking twice on my Computer icon would launch Windows Explorer.
How you can work with icons
Icons are a feature you can employ if your project calls for graphics. In Microsoft Word, Microsoft Excel, Outlook, and PowerPoint, icons are available.
Place (inserting) an icon
Step:1 Select Icons from the Insert tab after clicking it to insert an icon.
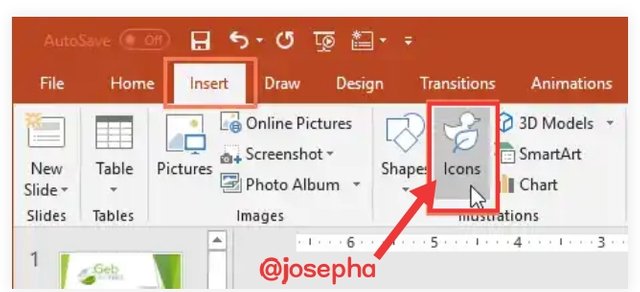 screenshot from PowerPoint
selecting Icons from the Insert tab's button. There will be an option to "Insert Icons. You can browse a variety of topics, such as people, technology, business, the arts, and more. Once you've located an icon you like, click Insert after selecting it as shown below.
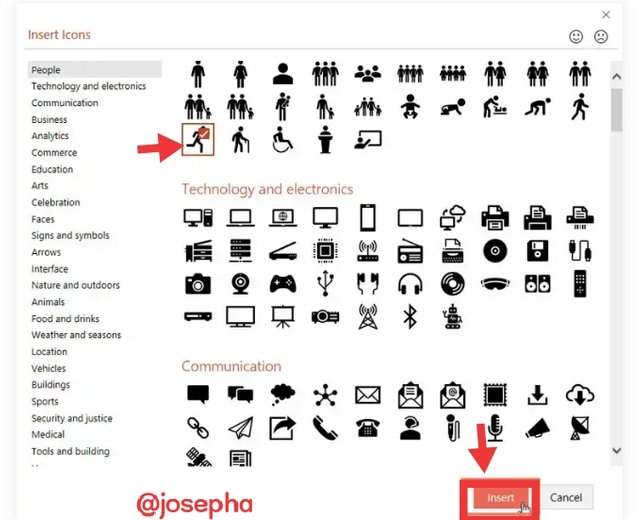 screenshot from PowerPoint
How to Modify (Customize) an Icon
There are numerous ways to tweak an icon after placing it.
Select the icon you want to modify to alter its color. There will be a format tab. Next, select a color from the drop-down selection by clicking Graphics Fill.
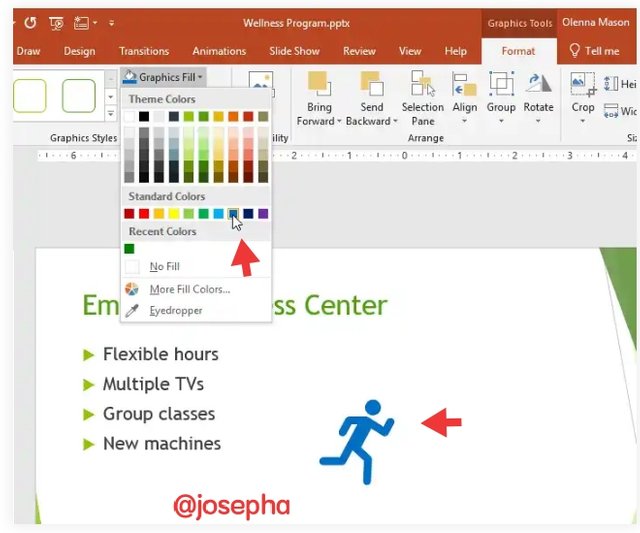 screenshot from PowerPoint
Click Shape Outline and pick a color from the drop-down box to add an outline to your icon.
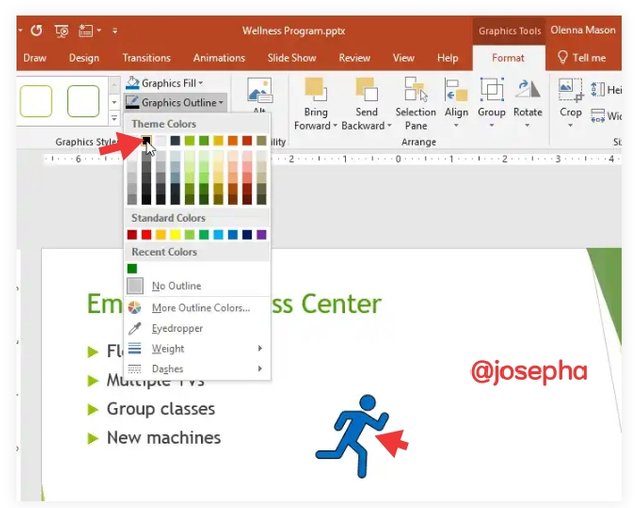 screenshot from PowerPoint
Alternatively, you can alter an icon's size by grabbing and moving one of the sizing handles. Since the icons are vector drawings, you can enlarge them as much as you like without worrying about them being pixelated.
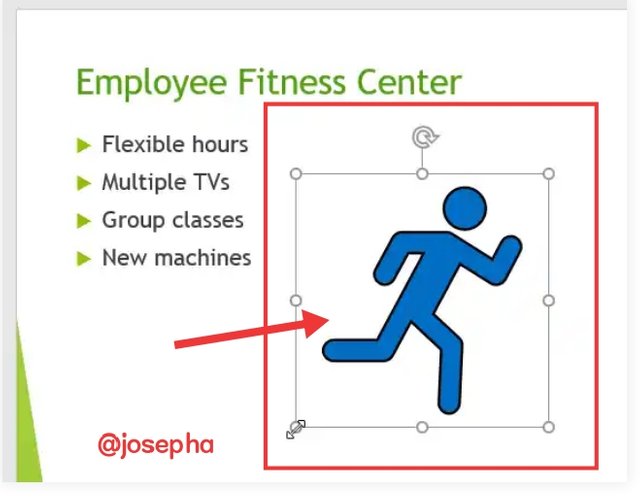 screenshot from PowerPoint
How to divide an icon into many components
Some icons can be divided into independent components, allowing you to edit each one separately for additional customisation.
Step:1 & 2 Convert to Shape can be chosen by right-clicking the icon. A snapshot showing the Convert to Shape option after doing a right-click on an icon In the dialog box, select Yes.
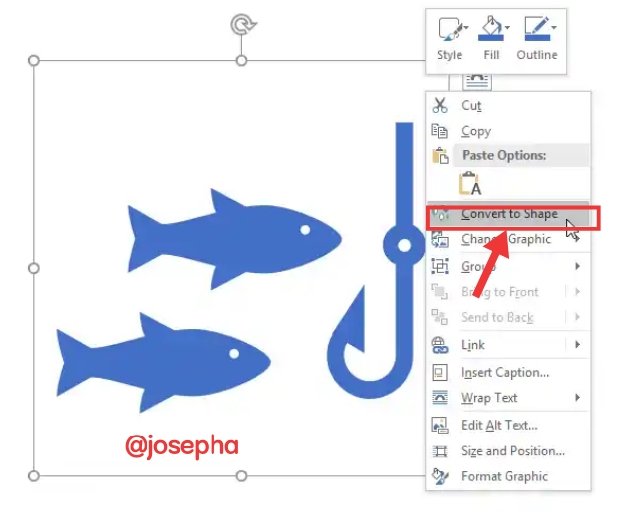
 screenshot from PowerPoint
If your icon is made up of separate elements, you may now adjust each one separately by altering its size, color, and placement.
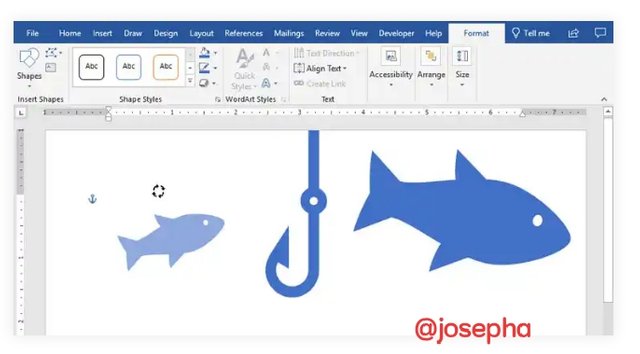 screenshot from PowerPoint
A snapshot of a symbol after being transformed into a shape Numerous options exist for modifying the look of your project using icons. If you're searching for some straightforward, well-done visuals to improve your content, give these a shot.
You can reach me via:
Discord: Josephafen#5962
WhatsApp: 08120419236
Thank you so much, kids, for stopping by here.
Written by:
@josepha
| 10% Goes to @steemkidss |
|---|
Hello friend!


I'm @steem.history, who is steem witness.
Thank you for witnessvoting for me.
please click it!
(Go to https://steemit.com/~witnesses and type fbslo at the bottom of the page)
Curated By - @simonnwigwe
Curation Team - Team 3
This is a very nice tutorial that will truly benefit the kids in the community and entire steemit. I hope they get to learn from your post and also practice using it. Thank you for this lesson
CLUB75: ✅ Elegible. You should power up 0.000 STEEM
(✅club5050) (❌club100)
TEAM 1
Congratulations! This post has been upvoted through steemcurator04. We support quality posts , good comments anywhere and any tags. Curated by : @jyoti-thelightits so good to read your article @josepha