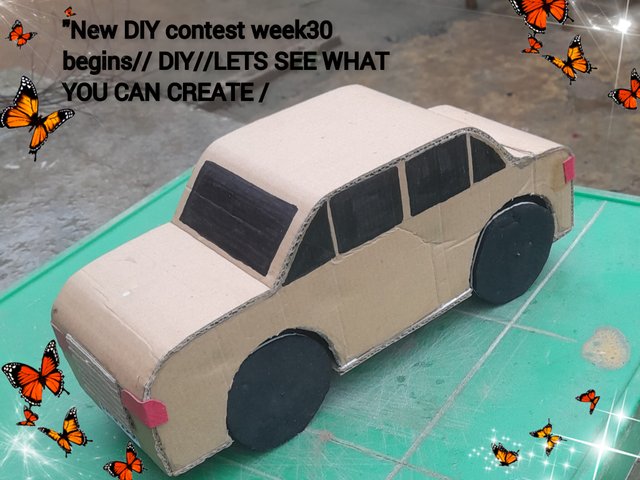
"New DIY contest week30 begins// DIY//LETS SEE WHAT YOU CAN CREATE /Carton Car Craft
Edited in GriGridArt
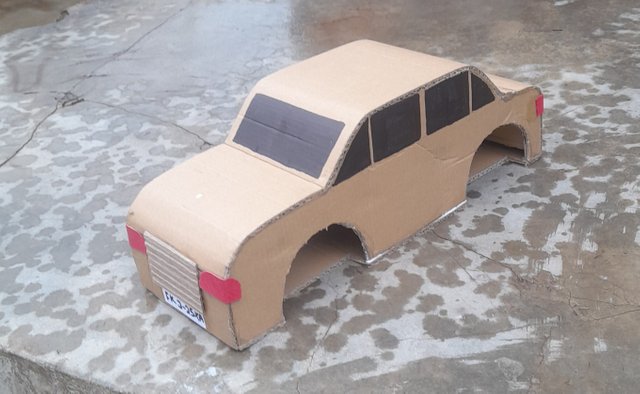
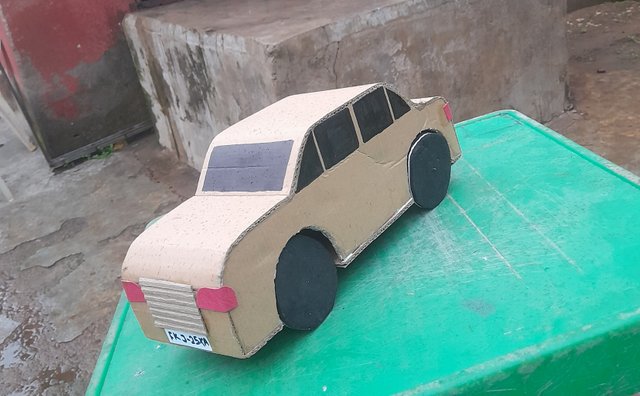
Today I constructed a car with a carton which will suit the kids in the community. Therefore, I shall be presenting the step-by-step process of constructing this car.
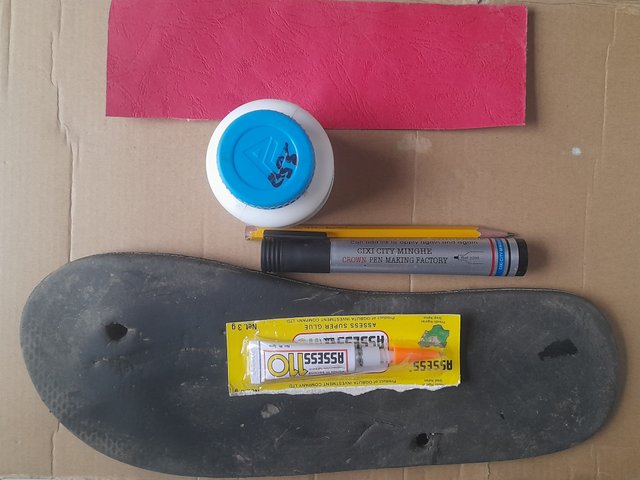
Materials Used For Construction
- Carton
- Emborse card
- Old sleepers
- Cutter
- Marker
- Top bond/Super glue/Evostic gum
- Pencil
- Binding iron
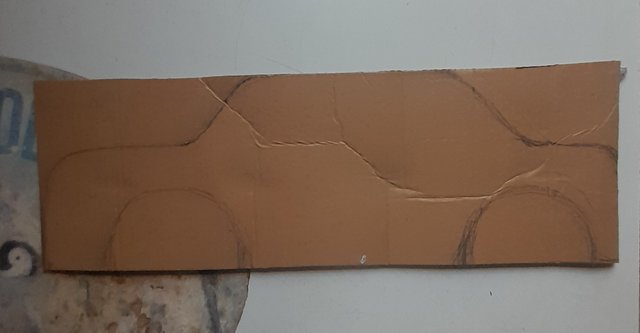
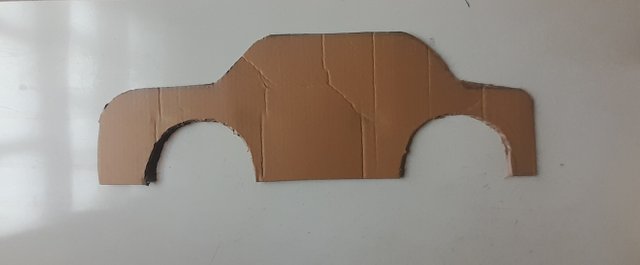
Step 1
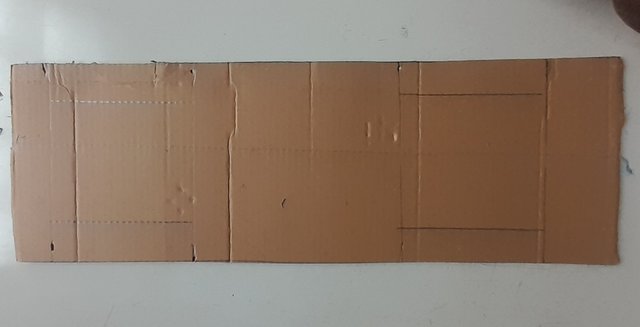
I cut my carton into 4 rectangular shapes of the same measurement About 30cm by 10cm. On one of the shapes I draw the side view of a car and after the drawing, I cut out the shape. I repeated the same in another rectangular shape to have two cut-out side views of the car.
Step 2
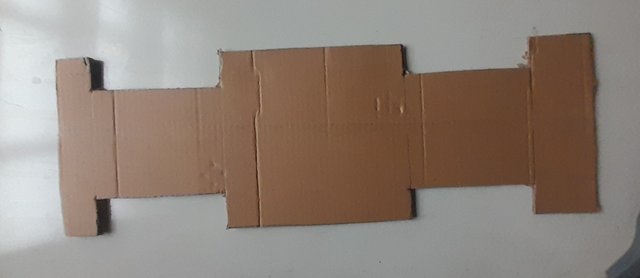
I used one of the rectangular shapes to serve as the under-bottom of the car. On it, I map out the position of the four tyres and cut them out
Step 3
I put my top bond at the edges of the side view of the car and joined it with the under.

Step 4
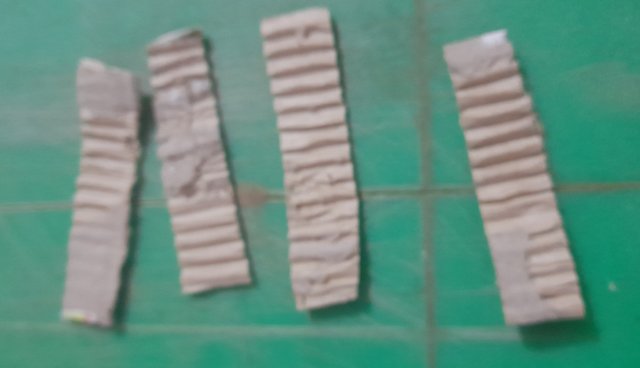
I cut 3 short cartons of 10 cm each. I put gum on it and used it to brace the two sides of the car

Step 5
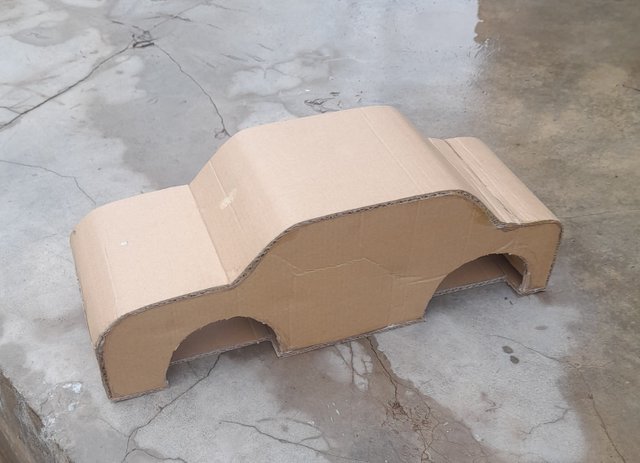
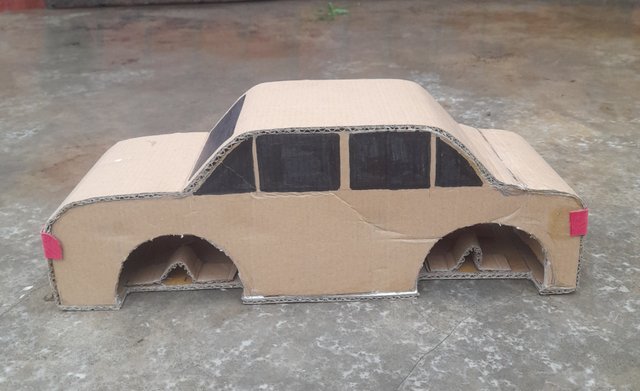
The remaining rectangular shapes are used to seal the top of the car
Step 6
I used my black marker to form the wheel screen and door screen of the car.
Step 7
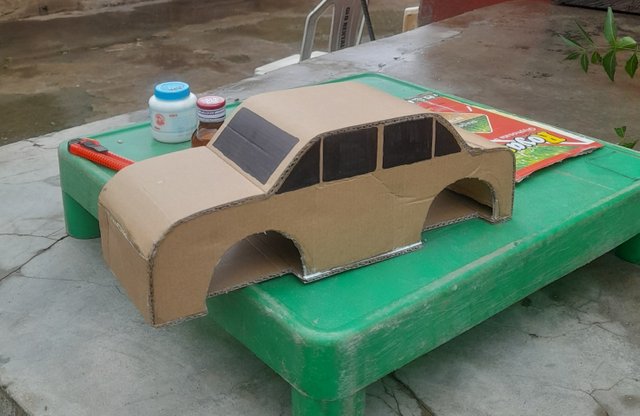
I cut small pieces of red embossed paper to form the light of the car. I also cut a small carton and placed it between the two lights to beautify the car. I cut a small white paper and used it to serve as the plate number of the car.
Step 8
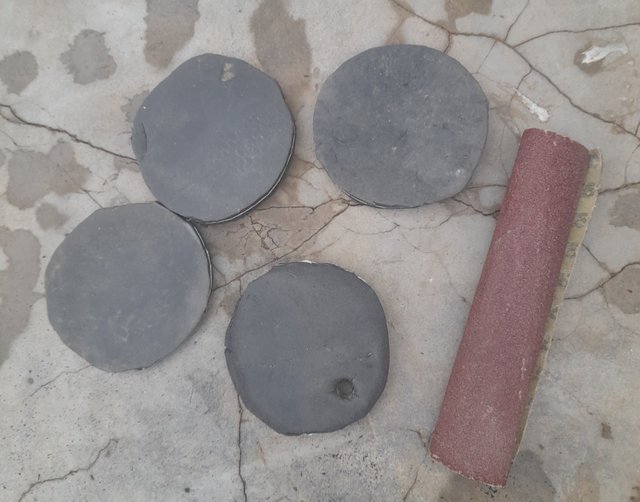
I cut sleepers into four circles to represent the tyres of the car and used sandpaper to smooth them. I also cut two irons to hold the tires side by side.
Step 9
I cut four pieces of small cartons put gum on them and then placed them on the bottom floor of the car to hold and control the tired.
Step 10
I connected the tyres of the car which is the last thing I did in constructing the car.
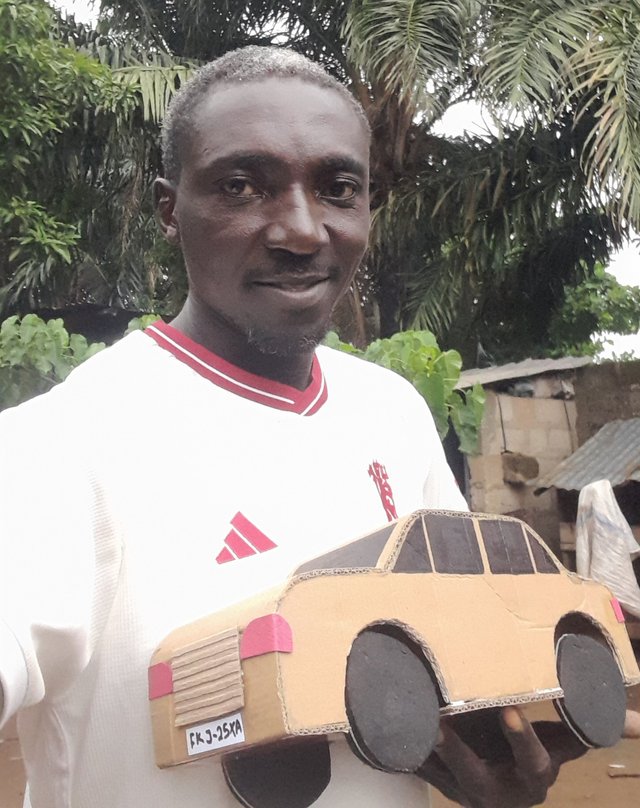
My selfie
Thank you friends for visiting my blog. I appreciate your time spent and contribution. See you in the next contest.
Invitation
I invite these friends of Mine to also participate:
@shawlin
@zisha-hafiz
@benton3
X(Twitter) Share
https://x.com/Manasseh3600/status/1814437568273883213?t=w5Xus9UkAFdeXXkdyz89rA&s=19
Wow! What an amazing DIY you madr Caring. You are so skillful
Thank you my dear
Congratulations! This post has been upvoted through the Steem Spark. We support quality posts, good comments anywhere, and any tags.
Thank you
OMG 😱, this is really creative of you. Indeed you are a talented and gufted person, I love it and it is well constructed.
All the best
Thanks