A better life with Steem:🌱 HOW TO GROW CITRUS, STEP BY STEP 🌱 | CÓMO CULTIVAR CÍTRICOS, PASO A PASO 🌱[ENG - ESP]
Steps to germinate and grow citrus | Pasos para germinar y cultivar cítricos
1- Get the seeds | Obtener las semillas
You only need an orange, a mandarin, a lemon, or a grapefruit, whichever you like the most.
In the case of mandarins, it’s easy, because you simply peel them and when you eat them, you separate the seeds.
With other citrus fruits, you must be careful when cutting them, so as not to damage it.
Solo necesitás una naranja, una mandarina, un limón o un pomelo, el que más te guste.
En el caso de la mandarina es sencillo porque simplemente las pelás y al comerlas, vas separando las semillas.
Con los demás cítricos, hay que tener cuidado al momento de cortarlos, para no dañarla.
2- Prepare for germination | Preparar para la germinación
Place the seeds on napkin paper (with good absorption), at a distance of 3 cm.
Colocá las semillas en papel de servilleta (con buena absorción), a una distancia de 3 cm.
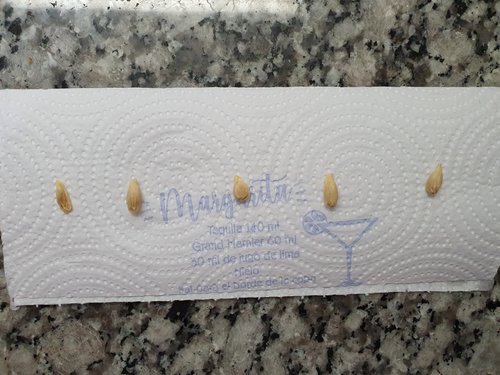
Mandarin seeds | Semillas de mandarino | Camera: Samsung Note 10 Plus
Cover with another napkin paper, moisten and close hermetically with aluminum foil.
Tapá con otro papel de servilleta, humedecé, y cerrá herméticamente con papel aluminio.
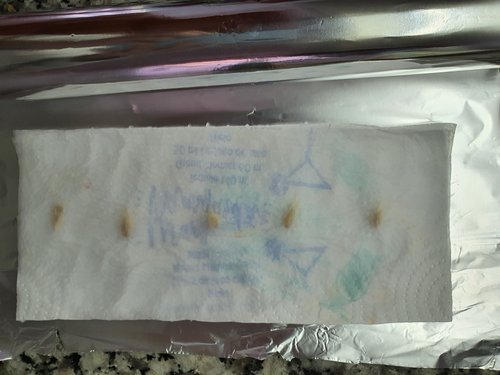
These are the seeds already covered with the second absorbent napkin paper, on the aluminum foil. | Estas son las semillas ya tapadas con el segundo papel de servilleta absorbente, sobre el papel aluminio. | Camera: Samsung Note 10 Plus
3 - Time and conditions for germination |Tiempo y condiciones para la germinación
Leave this foil envelope in a dark place at room temperature.
Every 3 or 4 days, check that the paper has not dried. If so, re-moisten.
In this process, you can see fungi growing on the seeds. You’ll notice it because a dark color is formed in them.
Gently pat with another napkin to remove it, but this is rarely necessary. This fungus doesn’t damage the seed and in general, when it’s formed, the root is about to appear, therefore shortly, the seeds will pass to the ground.
Dejá este sobre de papel aluminio en un lugar oscuro y a temperatura ambiente.
Cada 3 ó 4 días, controlá que el papel no se haya secado. Si es así, volvé a humedecer.
En este proceso, podés llegar a ver que crecen hongos en las semillas. Te vas a dar cuenta porque se forma un color oscuro en ellas.
Con cuidado, hacé palmaditas con otra servilleta para retirarlo, pero no suele ser necesario. Ese hongo no daña la semilla y en general cuando se forma, está a punto de asomar la raíz, por lo tanto en breve, las semillitas pasarán a la tierra.

Seeds inside the aluminum foil, ready to let rest and germinate. | Semillas dentro del papel de aluminio, listas para dejar reposar y germinar. | Camera: Samsung Note 10 Plus
4 – Plant | Plantar
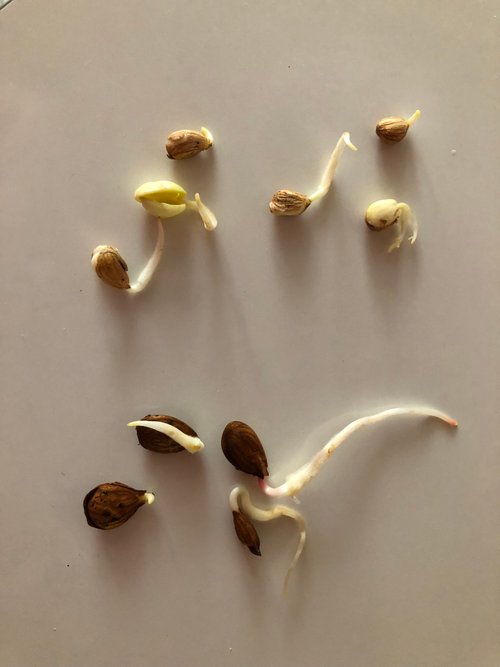
Once the seed has taken root of about 2 cm, it’s time to bring it to the ground. You can find different explanations and methods at this point, but I’ll tell you what has always worked for me.
 )
)
These are cherry and plum seeds, unfortunately, I did not find the photos of the mandarins, which were taken in 2017. These fruit trees were also sprouted by me, and then I will share the step by step. I put this photo as an example since root growth should look like this. | Estas son semillas de cerezos y ciruelos, lamentablemente no encontré las fotos de los mandarinos, que fueron tomadas en 2017. Estos frutales también fueron germinados por mí, y luego compartiré el paso a paso. Pongo esta foto a modo de ejemplo, ya que el crecimiento de la raíz, debería verse así. | Camera: iPhone 8 Plus. April 2019
You should place the root down, pointing to the ground, and cover it with soil. There should be about 2 to 3 cm of soil covering the root.
Then water.
It’s necessary to control that with the irrigation the earth is not spread, leaving the seed in the open.
How should the irrigation be?
The soil must remain moist, but it doesn’t have to be waterlogged. And the substrate should never dry out (less to the point of cracking).
This depends a lot on the climate, so you’ll have to observe carefully: in hot and humid climates, the irrigation is less because the same environment maintains the conditions conducive to the growth of citrus.
In arid climates like where I live, it’s necessary to expose the pot to the sun and water daily, even in summer, sometimes you have to water twice a day (morning and night).
It's about observing the earth. You will realize when it needs water.
What kind of land?
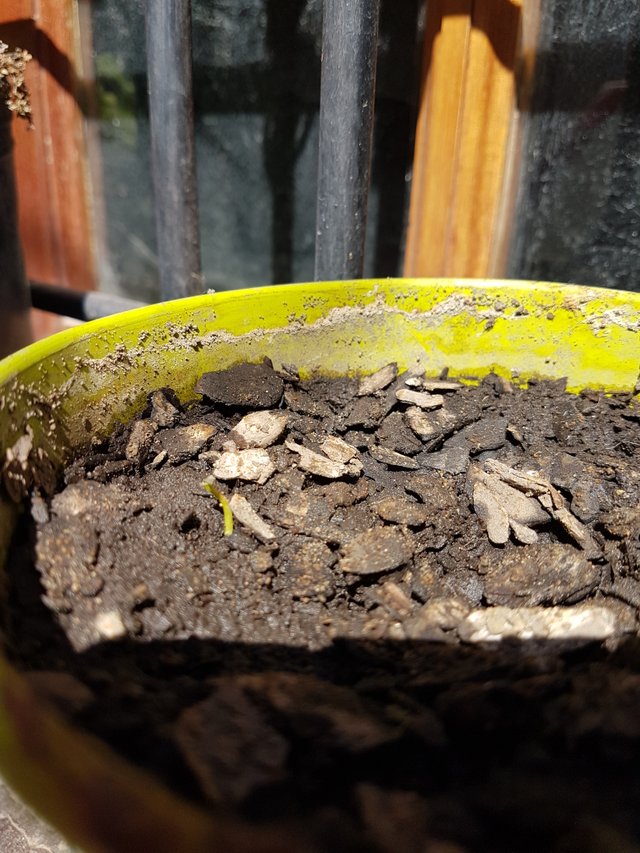
The soil must have a large amount of organic material. All that very dark brown substrate, almost black, is suitable for citrus.
In case you live in an area with clay soil, you can prepare some compost before, or buy it.
A super tip
Put worm humus, this will help any plant enormously, at any time in its life.
What kind of flowerpot?
A small pot can even be a disposable birthday cup. The most important thing is that it has at least 10 cm deep. This will give the root room to grow.
Una vez que la semilla ha largado una raíz de unos 2 cm, es momento de llevar a la tierra. Podés encontrar diferentes explicaciones y métodos en este punto, pero yo te comento lo que siempre me ha resultado a mí.
Colocá la raíz hacia abajo, apuntando al suelo, y tapá con tierra. Tiene que quedar alrededor de 2 a 3 cm de tierra tapando la raíz.
Luego, regá.
Hay que controlar que con el riego no se esparza la tierra, dejando la semilla al descubierto.
¿Cómo debe ser el riego?
La tierra debe permanecer húmeda, pero no tiene que estar encharcada. Y jamás debe secarse el sustrato (menos al punto de que se agriete).
Esto depende mucho del clima, por lo que tendrás que observar con atención: en climas cálidos y húmedos, el riego es menor (y con menos frecuencia) porque el mismo ambiente mantiene las condiciones propicias para el crecimiento del cítrico.
En climas áridos como donde vivo yo, es necesario exponer la maceta al sol y regar a diario, incluso en verano, hay que regar dos veces por día (a la mañana y a la noche).
Se trata de observar la tierra. Te darás cuenta de cuándo necesita agua.
¿Qué tipo de tierra?
La tierra debe tener una gran cantidad de material orgánico. Todo aquel sustrato marrón bien oscuro, casi negro, es propicio para los cítricos.
En caso de que vivas en una zona con tierra arcillosa, podés preparar algo de compost antes, o comprarlo en algún vivero, allí también conseguirás tierra.
Un súper tip:
Colocá humus de lombriz, esto ayudará enormemente a cualquier planta, en cualquier momento de su vida.
¿Qué tipo de maceta?
Una maceta pequeña, incluso puede ser un vasito descartable de cumpleaños. Lo más importante en este punto, es que tenga al menos 10 cm de profundidad. Esto le dará espacio a la raíz para crecer.
You will see that the days go by and there is no sign of your seed. Keep watering and be patience, soon you will see a beautiful green stick peeking out.
Verás que pasan los días y no hay señales de tu semilla. Seguí regando y tené paciencia, pronto tendrás un hermoso palito verde asomándose.
My first mandarin. This photo was taken in September 2017, with a Samsung Galaxy S6. | Mi primer mandarino. Esta foto fue tomada en septiembre del 2017, con un Samsung Galaxy S6
5- Maintenance and transplantation | Mantenimiento y transplante
 )
)
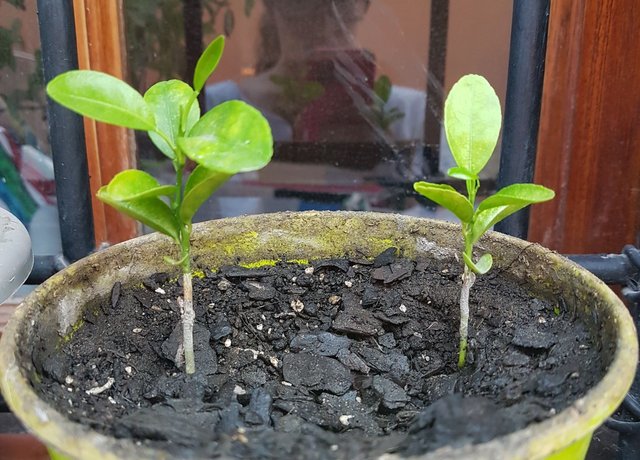
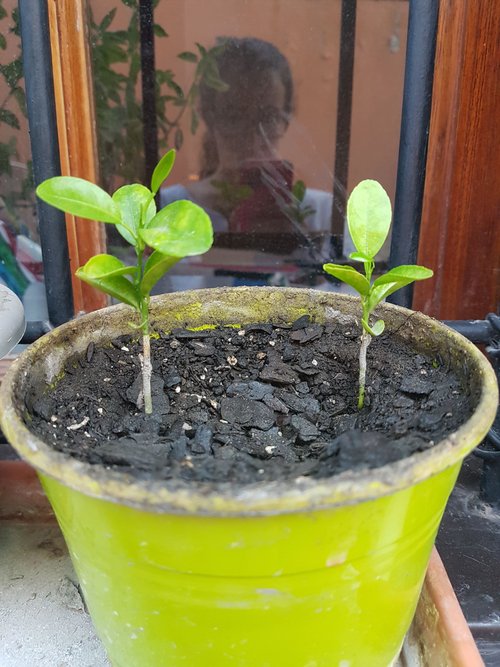
Picture taken in January 2018. In this case, I planted two seeds with their respective roots, in a small pot. Since the stem appeared in the photo you saw previously, 5 months have passed. | Foto tomada en enero de 2018. En este caso, yo planté dos semillas con sus respectivas raíces, en una pequeña maceta. Desde que asomó el tallo en la foto que vieron previamente, habán pasado 5 meses. | Camera: Samsung Galaxy S6
The plant will have to be in its initial pot for at least 1 year. If you have planted in a glass, I recommend you do the transplant earlier, at 6 months.
It’s important that this step is carried out in seasons of medium temperature, but not exactly before winter.
The best time is at the beginning of spring, to give the plant time to acclimate to its new home and receive the warmth of summer rooted in its new pot.
The size of the pot must change progressively, to generate force at the root.
It’s not advisable to transplant a young tree (one or two years old) into the ground directly, because it may die.
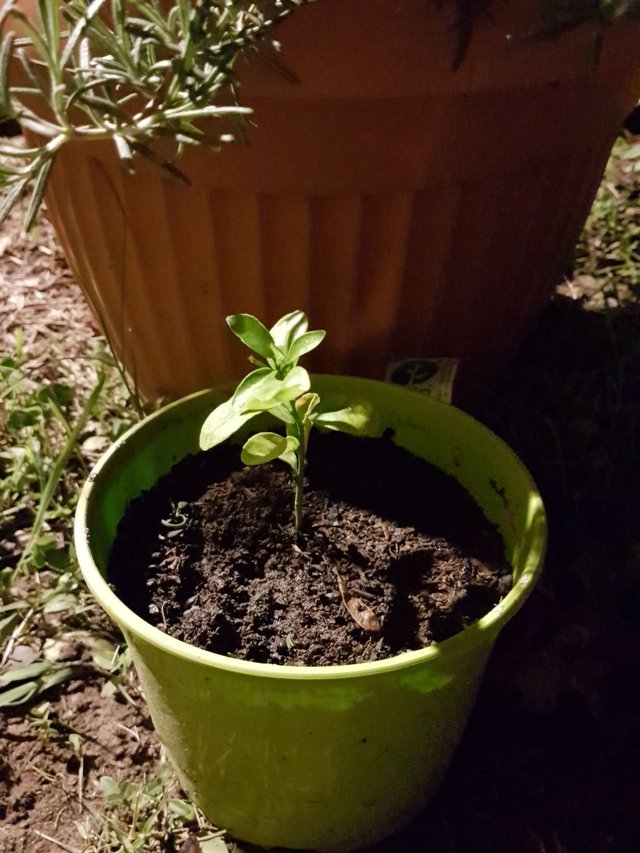
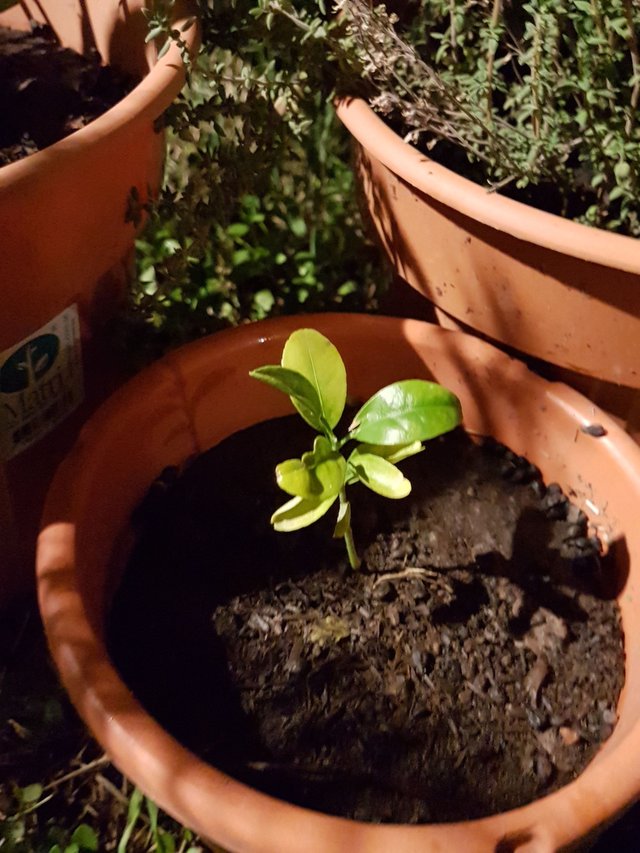
In this case, I had to transplant before the year because there were two plants in the same pot, and they were going to start competing for resources. Faced with the possibility that one of them would die, I decided to separate them and transplant them. || En este caso, tuve que hacer el transplante antes del año porque eran dos plantas en la misma maceta, e iban a empezar a competir por los recursos. Ante la posibilidad de que alguna muriera, decidí separarlas y transplantarlas. | Camera: Samsung Galaxy S6, March 2018
La planta tendrá que estar en su maceta inicial al menos 1 año. Si la has plantado en un vaso, te recomiendo hacer el transplante antes, a los 6 meses.
Es importante que este paso se lleve a cabo en temporadas de temperatura media, pero no exactamente antes del invierno.
La mejor época es al inicio de la primavera, para dar tiempo a la planta de aclimatarse a su nuevo hogar y recibir el calor del verano arraigada a su nueva maceta.
El tamaño de la maceta debe ir cambiando de manera progresiva, para generar fuerza en la raíz.
No es recomendable transplantar un árbol jóven (de uno o dos años) a la tierra directamente, porque puede morir.
Currently, one of those mandarins has grown so big, that it is on its third transplant. I recently moved it to a fairly large pot. With the other mandarin I tried to make a bonsai, but it died when I went on a trip in 2019.
Actualmente, uno de esos mandarinos ha crecido tanto, que va por su tercer transplante. Recientemente lo pasé a una maceta bastante grande. Con el otro mandarino intenté hacer un bonsai, pero murió cuando me fui de viaje en 2019.

Penultimate home of my mandarin | Penúltimo hogar de mi mandarino. | Camera: Samsung Note 10 Plus. September 2020
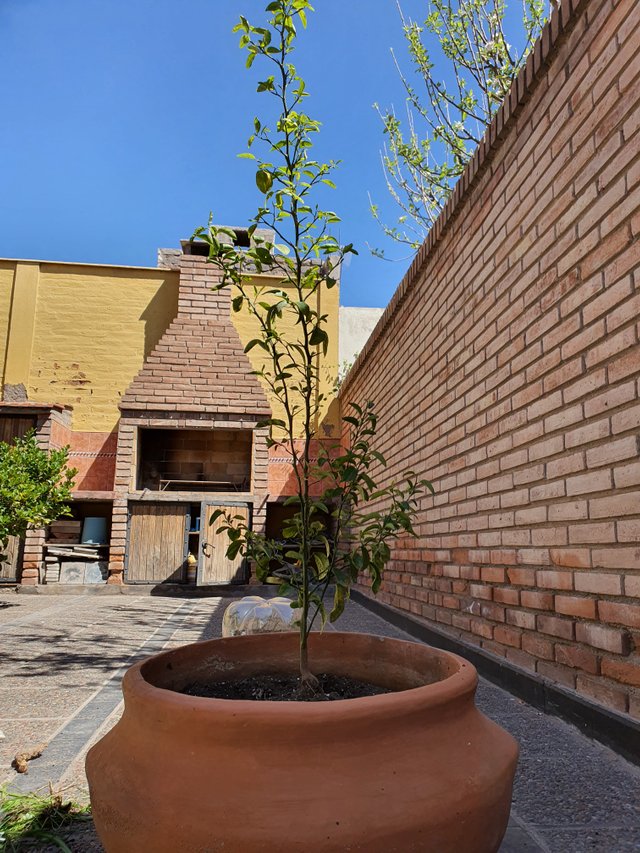
Last transplant | Último transplante. | Camera: Samsung Note 10 Plus. September 2020
Qué maravilla!! Todo muy explicadito y fotografiado. Me habían dicho que el proceso era largo y difícil pero tú lo haces ver fácil. Espero que sea así. Igualmente, me comentaron que las plantas de cítricos tardan muchos años para dar sus frutos. Eso será cierto? En fin, siento que hoy aprendí mucho de tu post si voy a hacer mi huerto. Saludos y gracias, @belenguerra
#twopercent
#venezuela
❤
Me alegra mucho que te haya gustado @nancybriti!! Es un proceso sumamente fácil, solo tenés que tener paciencia. Con respecto al momento en que dan los frutos, sí, tardan bastante!
Mi mandarino tiene 3 años desde el momento en que lo planté, y recién ahora parece que se están asomando sus primeras flores. Según lo que he leído y me han comentado, en este tiempo, también debería dar sus primeras mandarinas. Pero vamos a ver cuáles son sus tiempos.
Me pone muy contenta que hayas aprendido de mi post! Un saludo desde acá!!
#twopercent
#argentina
Hi,
Your post has been voted on by the Ecosynthesizer curation team.
Thank you for your contribution to the Steem ecosystem.
If you would like to support us, please consider voting for our witness, setting us as a proxy,
joining our Discord server, and delegating to the project by using one of the following links:
500SP | 1000SP | 2000SP | 3000SP | 4000SP | 5000SP | 10000SP | 100000SP
Thank you very much!!
I am wondering how much patience you had to collect all these photographs.. 😮 Supper nice structure.. Love it
Hahaha thank you very much!! Yes! I take pictures very often, to see the process after some time, as I did now. However, I'm sad because I couldn't find the pictures of these mandarin seeds, so I had to use those from the plum and cherries trees that I grew too.
¡Súper lindas las plantas! Muy buena explicación, me encantaron.
¡Sigue así!
Me alegro mucho!! Gracias por leerme! :)
Personalmente, me encantan las plantas, pero siempre adquiero mis plantas algo crecidas.
Creo que esta vez, intentaré algo desde cero, como lo que veo aquí.
Me ha encantado.
Muchas gracias.
Saludos desde México.

Me alegra mucho que te haya gustado!! Gracias por leer y sí! Intentalo! Vas a ver qué hermoso es verlas crecer! :) :)
Lo intentaré. Espero elegir bien mi semilla ❤️ Muchas gracias.
Gracias a vos!
Hola, amiga te admiro eso se llama paciencia y dedicación, agradecida por brindar e tus conocimientos; ya les comentare a mis padres, para que tambien sembremos citricos.
Bendiciones!
#onepercent #venezuela
Gracias por tu comentario amiga!! Me alegra mucho que te haya gustado!!
A mi papá siempre le a gustado cultivar cualquier tipo de plantas y las cítricas han sido sus favoritas, mandarina, limón, naranjas, esto nos ha permitido poder disfrutar de estas frutar y además de sus aportes de vitaminas C.
Gracias amiga por compartir tan importante información con todos nosotros y en realidad disfrute mucho en la lectura . Éxitos.