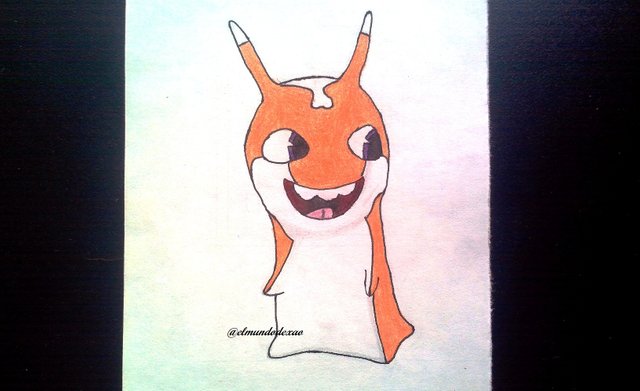
Hello, I hope you are doing well; today I want to share with you a drawing of the character bengala from the animated series Slugterra; this slug belongs to the fire element; the idea of drawing these creatures is to practice with figures that at first glance seem quite complex but once you detail them you realize that they are easy to do so the practice becomes quite enjoyable.
The materials I used: white paper, pencil, 0.5 marker, eraser and colors.
I usually use video material or images to complement my learning, so at the end I leave the link I used on this occasion.
Next I start the step by step drawing:
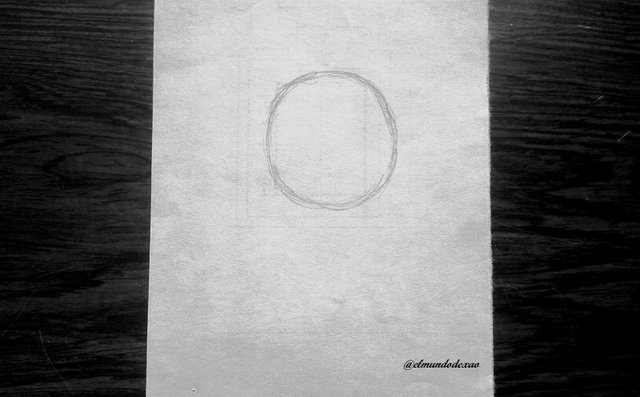
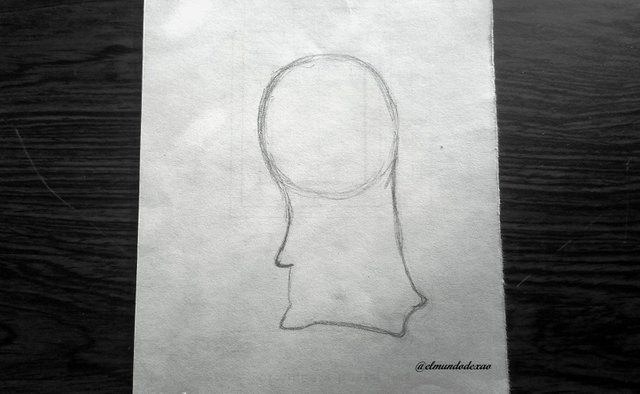
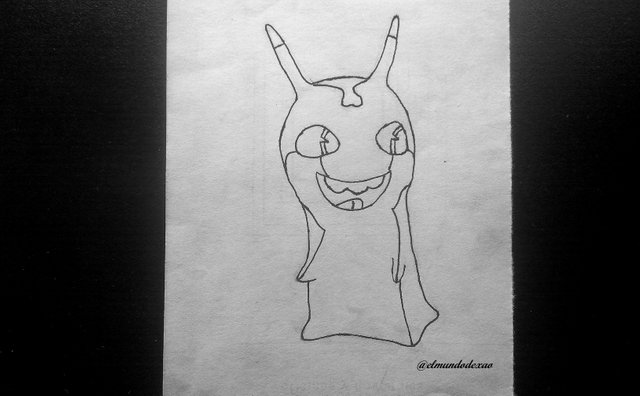
Step # 01: I start by drawing a circle to define the head and then drawing a couple of lines down to elaborate a silhouette in which at least I must make four points to identify hands and feet.
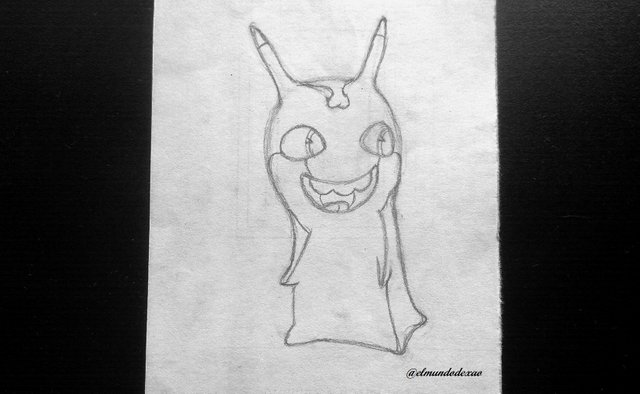
 Step # 02: I draw the horns and the right hand and then dedicate myself to detail the eyes that will be like horizontal ovals with a couple of curved lines inside to define the pupil; as for the mouth it will be like a half moon placed horizontally and with the arched part upwards; I also define the upper teeth and the tongue.

 Step # 03: Now I draw the lines that will separate the belly and other parts from the rest of the body which also defines the colors of its horns and head.
 Step # 04: The inking; I proceed to highlight all the drawing with the marker and then erase the graphite and clean the sheet.
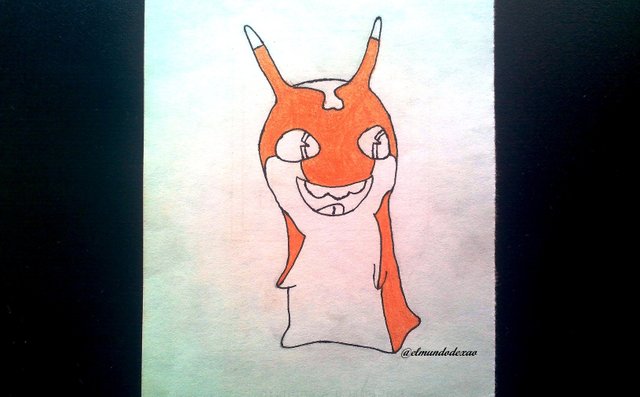
 Step # 05: I start coloring and I do it with an orange color for the body and part of the head, the belly and other parts are white plus a little gray to detail some shadows.
 Step # 06: For the eyes I will use brown and black; and I will finish with a pink color for the tongue and carmine with black for the inside of the mouth.
Well friends I hope you enjoyed this tutorial and I say goodbye wishing you all a great day, afternoon or evening depending on where you are.
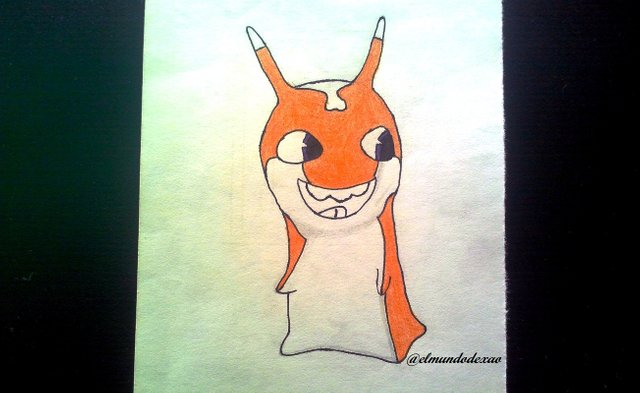
Photo Source: Own photos captured with a Síragon camera.
Modified size: With the Paint Program.
Thanks for visiting my Blog… AH! Don't forget to vote, reblogear, and comment.
Translated with:

www.DeepL.com/Translator (free version)

Dibujando a la Babosa Bengala.
Hola como les va espero que bastante bien; hoy quiero compartir con ustedes un dibujo del personaje bengala de la serie animada Bajoterra; esta babosa pertenece al elemento fuego; la idea de dibujar estas criaturas es practicar con figuras que a simple vista parecen bastante complejas pero una vez que las detallas caes en cuenta que son fáciles de hacer por lo que la practicas se hace bastante amenas.
Los materiales que utilice: Papel blanco, lápiz, rotulador de 0.5, borrador y colores.
Por lo general utilizo material de vídeo o imágenes para complementar mi aprendizaje por lo que al final les dejo el enlace que utilice en esta ocasión.
A continuación inicio el paso a paso del dibujo:
Paso # 01: Comienzo elaborando un círculo para definir la cabeza y luego trazando un par de líneas hacia abajo para elaborar una silueta en la que almeno debo hacer cuatro puntas para identificar manos y pies.
Paso # 02: Dibujo los cuernos y la mano derecha para luego dedicarme a detallar los ojos que serán como unos óvalos horizontales con un par de líneas curvas en el interior para definir la pupila; en cuanto a la boca será como una media luna colocada horizontalmente y con la parte arqueada hacia arriba; también defino los dientes superiores y la lengua.
Paso # 03: Ahora trazo las líneas que separaran la panza y otras partes del resto del cuerpo lo cual define también los colores de sus cuernos y cabeza.
Paso # 04: El entintado; procedo a remarcar todo el dibujo con el rotulador para luego borrar el grafito y limpiar la hoja.
Paso # 05: Comienzo a colorear y lo hago con un color naranja para el cuerpo y parte de la cabeza, la panza y otras partes son blancas además de un poco de gris para detallar algunas sombras.
Step # 06: For the eyes I will use brown and black; and I will finish with a pink color for the tongue and carmine with black for the inside of the mouth.
Well friends I hope you enjoyed this tutorial and I say goodbye wishing you all a great day, afternoon or evening depending on where you are.
Fuente de Fotos: Propias capturadas con una cámara Síragon.
Modificado el tamaño: Con el Programa Paint.
Gracias por visitar mi Blog… ¡AH! No se olvide de votar, rebloguear y comentar.